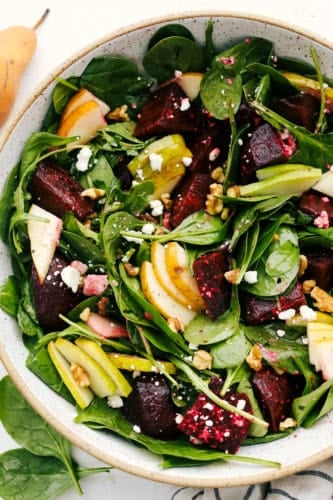
This Amazing Pear and Beet Salad is fresh, zingy, and absolutely delicious. It’s a perfect combination of crisp-tender pears, sweet roasted beets, mixed greens all tossed in a honey vinaigrette.
Salads are just the best! Whether it’s for a side dish or the main star, salads are quick, diverse and heavenly! Try Strawberry Pretzel Salad, Creamy Grape Salad or Literally the BEST Egg Salad the next time you want to try something new and luscious.

The Perfect Pear and Beet Salad
This beet salad is so fresh and tantalizing, it’s one of the most delectable ways to eat roasted beets. The crunchy sweet pears couple perfectly with the earthy sweet beets. Roasted walnuts add crunch and flavor. The salty feta is incredible with the honey vinaigrette. All of this sits perfectly balanced on a bed of spinach and mixed greens I love the arugula mix. It has a nice peppery bite to it that is just awesome. It’s the perfect fall and winter salad. You and your family are going to love this.
The colors of this beet salad are vibrant and enticing. The green, red and yellow are so fun. This is a great way to introduce roasted beets to someone who isn’t quite a believer yet. Roasting the beets caramelizes the sugars creating a sweet vegetable that is tender and combines beautifully with the pears, cheese and dressing. It’s an incredible salad that’s truly good for you. Full of vitamins and antioxidants, it’s a potent dish for fall and winter. It’ll help boost your immune system and taste incredible at the same time.
Ingredients for the Best Beet Salad
Light and refreshing this beet salads’ ingredients are wholesome and satisfying. The walnuts add both crunch and protein. You should be able to find all the ingredients at your local store. Look for the freshest and most delectable ingredients.
- Roasted Beets: See my post on how to roast beets perfectly.
- Spinach and Arugula mix: Might have to purchase separately instead of in a mix.
- Pears: See my tips below for purchasing and using pears.
- Feta: You can usually find feta with the parmesan cheese.
- Walnuts: Save time by buying pre chopped walnuts
Honey Vinaigrette Dressing Ingredients
In a small bowl whisk together the beet salad dressing until thoroughly combined. Add to salad immediately! The beet salad dressing is simple and straightforward but absolutely divine!
- Olive Oil: Use a high quality oil
- Apple Cider Vinegar: Your favorite brand will work.
- Honey: Use a good strong flavored honey for the best flavor.
- Salt and Pepper: Added to taste
Making this Amazing Roasted Beet Salad
This beet salad couldn’t be easier to through to together. Whip this up for a quick lunch or a perfect side dish. It’s fast and so good! My kind of salad!
- Mix: In a large bowl gently combine the roasted beets, spinach, arugula, pears, feta and walnuts
- Toss: Drizzle the dressing to your desire and toss gently

Tips for Awesome Pear and Beet Salad
This salad is impeccable. I love the way the flavors play together to create fantastic flavor. With a few tips and variations you can keep the flavor and texture and always have a winner on your hands. Mix this beet salad up as soon as you can!
- Roast your Walnuts: To intensify the flavor of the walnuts you can roast them. It can also decrease their bitterness. Place the walnuts in a skillet and roast over medium heat till one shade darker and fragrant. Let cool before adding to the salad.
- Substitute for Walnuts: You can use pecans instead of walnuts if desired. Roast them as well for intensified flavor.
- Other Cheese to Use: Pear and beets go ideally with strong cheeses. Instead of feta you can use gorgonzola, blue cheese, goat cheese or even shaved parmesan for a bit milder nutty flavor. Aged sharp cheddar will also work in this salad.
- Chop: Cut up the beets and pears to your desired size. I like to keep things all bite sized. You can also chop the greens if you feel they are too big. Make it to your liking.
- Mixed Green Variation: Any mixed leafy green mix will do in this recipe. But void iceberg lettuce, you want leafy greens for best taste and texture.
- What do I serve this with? This can easily stand alone as a vegetarian meal served with a nice crusty bread. It also pairs beautifully with Chicken, Pork, Fish or Beef. You can serve it with just about anything, and have an incredible dinner.

All You Need to Know About Pears
Pears make this beet salad incredible! They have a unique flavor that brightens the salad. I love pears combined in salads, they add so much texture and flavor. Like in this Grilled Chicken, Bacon and Pear Salad with Poppyseed Dressing or Strawberry, Apple and Pear Spinach Salad. Pears can be tricky things to work with, however. Here are a few tips to help.
- What Kind to Use? Bartlett, Anjou and Bosc are all wonderful varieties that work with this salad. Asian pears are more crisp similar to an apple. It will work as well, just know the texture will be a bit different. Use a variety of pears in the salad to mix it up and increase flavor.
- How do I know they’re Ripe: You definitely want pears that are firm but ripe. So plan this dish according to when your pears are ready. When pears are ripe and ready they should yield slightly to pressure when pressed near the stem. Avoid soft pears, they will be mushy and mealy in the salad.
- How to Ripen Pears Faster? Needing pears sooner than later? Try placing them in a brown paper bag on your counter with a banana inside. Check them daily. To slow down them ripening place in the refrigerator.
- Be Gentle: Pears are very susceptible to bruising so handle carefully and store in a single layer.
- Keep them from turning Brown: Cut and add the pears right before you add the dressing. The honey and vinegar will help keep the pears from turning brown as quickly. You can also toss them with a little bit of lemon juice if you desire.

More Salads to Love
Salads are just wonderful! They’re light, satisfying, and so easy to customize. I love that you can throw different foods in a bowl with a dressing and it comes out amazing! You can even get super creative and create your own salad winners. Need a place to start? Try these winners!
- Autumn Chopped Salad with Creamy Poppyseed Dressing
- Mexican Pasta Salad
- California Spaghetti Salad
- The Best Antipasto Salad
- Incredible Bacon Ranch Pasta Salad
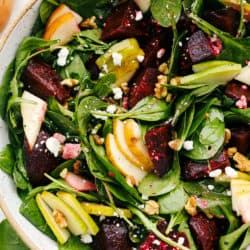
Pear and Beet Salad
Ingredients
- 2 cups roasted beets
- 4 cups spinach and arugula mix
- 2 pears sliced
- 1/4 cup feta cheese
- 1/4 cup chopped walnuts
Honey Vinaigrette Dressing:
- 1/4 cup olive oil
- 2 Tablespoons Apple Cider Vinegar
- 1 Tablespoon Honey
- salt and pepper
Instructions
-
In a large bowl add the roasted beets, spinach, pears, feta cheese and walnuts.
-
To make the Honey Vinaigrette dressing: In a small bowl whisk together the olive oil, apple cider vinegar, honey and salt and pepper.
-
Drizzle desired amount of dressing on salad and toss together until coated.
Nutrition
from The Recipe Critic https://ift.tt/2XhsE3H
https://ift.tt/391aJDK