सोमवार, 8 फ़रवरी 2021

Chocolate Covered Pretzels

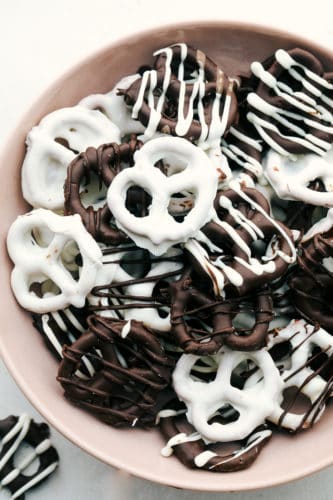
Chocolate Covered Pretzels are fast, easy and delicious! A perfect sweet and salty treat that’s perfect for parties, holidays or any special occasion.

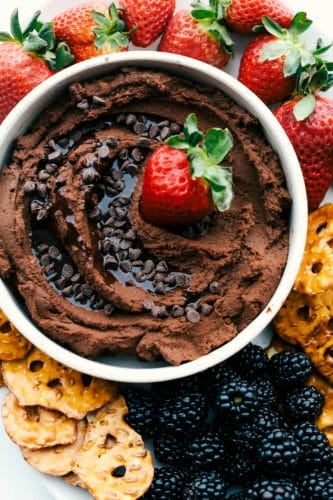
Add pretzels to a dish for a sweet and salty combination! The salty crunch adds to this Chicken dish is divine along with this Strawberry and Raspberry salad version too!

White and Dark chocolate covered pretzels.

Easy Chocolate Covered Pretzels

Every now and then we all need a sweet treat that looks beautiful and tastes amazing, but we need it to be easy and simple. This is the recipe for you! With no more than two essential ingredients, you can have a favorite treat ready in no time, and it’s a sweet treat everyone is going to love.

The sweet richness of the chocolate and the salty crunch of the pretzel is a match made in heaven. These chocolate pretzels are the perfect addition to any party, special occasion or just because you want them. This is a fun recipe to get the kids involved in. They can dip and decorate, and they’ll have so much fun doing it. Chocolate covered pretzels are a classic that are easy to customize and fun to eat!

Ingredients for Covered Pretzels

With only two ingredients, you can’t get much easier than that! Use your favorite brand of pretzels and chocolate and get ready to dip!

  • Chocolate: Choose from semi-sweet, milk, dark, white or all of the above.
  • Pretzels: 2 cups of mini pretzels is what I used, but see variations for other pretzel options.

How to Make Chocolate Covered Pretzels

The hardest part about making these pretzels is the waiting for them to harden so you can eat them.

  1. Melt: In a small microwave safe bowl add the chocolate chips. Microwave 30 seconds at a time stirring in between until chocolate is smooth.
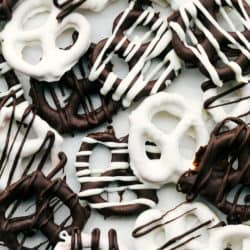
  2. Dip: Using a fork, dip each pretzel into the chocolate and put it on parchment paper. Drizzle the pretzels using the remaining chocolate.
  3. Set: Let set until the chocolate hardens then enjoy!


Melting chocolate chips and dipping pretzels in it.

Tips for the Best Chocolate Covered Pretzels

Crunchy pretzels and velvety smooth chocolate, and sweet and salty, chocolate covered pretzels are the perfect example of opposites attract. These are so insanely delicious, they’re addicting! You should make a double batch, just to be safe.

  • Don’t Overheat your chocolate: When melting your chocolate, you don’t want to burn it or overheat it, this will cause it seize and take away that shiny finish. In between the 30 second intervals, really give the chocolate a good stir. This will help distribute the warmth and melt the chocolate faster and more evenly.
  • Avoid Moisture: Water and melting chocolate don’t mix. Water will cause the chocolate to also seize. Don’t cover the chocolate when melting it to avoid condensation.
  • Use Parchment Paper: If you have it, use parchment paper to allow your pretzels to harden on. They won’t stick to it and it works a bit better than wax paper.
  • Decorate While Wet: You will want to add any sprinkles, or crushed nuts, candies etc while the chocolate is still wet before it hardens so it will stick better.
  • Faster Dipping: I like to take a handful of pretzels and stir them in the chocolate and fish them out with the fork. It’s a faster way of coating the pretzels than one at time.
  • Keep the Chocolate hard: If it’s a warm time of year you might want to consider keeping these chocolate covered pretzels in the fridge so that the chocolate doesn’t soften.

Melting white chocolate chips and dipping pretzels.

Variations for Mini Chocolate Pretzels

Chocolate covered pretzels are fantastic year round, although I see them mostly around Christmas and Valentines. Because they are so customizable you can make them whenever you want and all year long!

  • Add Color: If you are using white chocolate, add food coloring to match the holiday or theme of the party. Green, pink, blue, yellow, they will all taste amazing but look super festive.
  • Toppings: Add sprinkles of all kinds to your pretzels for decorations and pizazz. Be sure to add them when the chocolate is still wet so they’ll stick.
  • Crushed Toppings: It’s also fun to customize these covered pretzels with crushed peppermint, Oreos, Reese’s, or nuts. Crushed cookies and candies add flavor and style.
  • Pretzel Options: Pretzel rods make great chocolate covered pretzels.  Transfer the melted chocolate to a glass and dip the rods in the chocolate coating them about 3/4 of the way up. Decorate and let them harden on parchment.
  • Chocolate: You can also use melting chocolate to cover these pretzels. Chocolate chips and even chopped chocolate bars all work.

How to Store Your Covered Pretzels

Chocolate Covered Pretzels need a dry cool place to keep the chocolate from going hard. Be sure that before you put the pretzels away they are completely hard and not still wet. Store in an airtight container and they will keep for 2 weeks. If you have a hard time keeping the chocolate from going soft, store in the fridge. Note that keeping them in the fridge can cause condensation to form, making spots on the chocolate.

A bowl full of white and dark chocolate covered pretzels.

More Love Inspired Recipes

Chocolate covered pretzels are a delicious treat around Valentines Day. Chocolate, roses, strawberries etc. Are all synonymous with the day of Love. There are so many amazing recipes that go wonderfully on that day, that it’s impossible to make them all. I guess make everyday a Valentine’s Day by whipping up any of these love inspired treats all year long.
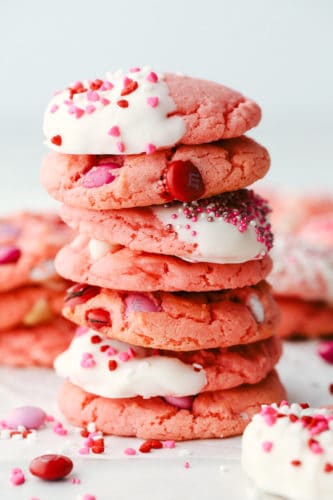
Print

Chocolate Covered Pretzels

Chocolate Covered Pretzels are fast, easy and delicious! A perfect sweet and salty treat that's perfect for parties, holidays or any special occasion.
Course Dessert
Cuisine American
Keyword chocolate covered pretzels, chocolate pretzels
Prep Time 10 minutes
Cook Time 5 minutes
Total Time 15 minutes
Servings 24 Pretzels
Calories 25kcal
Author Alyssa Rivers

Ingredients

  • 12 ounces chocolate of choice white chocolate, milk, or semi-sweet
  • 2 cups mini pretzels

Instructions

  • In a small microwave safe bowl add the chocolate chips. Microwave 30 seconds at a time stirring in between until chocolate is smooth.
  • Using a fork, dip each pretzel into the chocolate and put it on parchment paper. Drizzle the pretzels using the remaining chocolate.
  • Let set until chocolate is hard. Enjoy!

Nutrition

Calories: 25kcal | Carbohydrates: 5g | Protein: 1g | Fat: 1g | Saturated Fat: 1g | Sodium: 84mg | Potassium: 9mg | Fiber: 1g | Sugar: 1g | Calcium: 1mg | Iron: 1mg


from The Recipe Critic https://ift.tt/3jtAr8N
https://ift.tt/3twy2yO

गुरुवार, 4 फ़रवरी 2021

Chocolate Hummus (5 Minutes!)

Chocolate Hummus is a healthier dessert dip your going to love! Made with cocoa, peanut butter and garbanzo beans, this hummus is a smooth dreamy fix for those chocolate cravings!

When you think hummus, you probably think of the traditional hummus that tops savory gyros or maybe a chipotle hummus, that tops barbacoa beef beautifully. But this dessert hummus is a game changer!

Chocolate Hummus with strawberries, pretzels and blackberries.

Chocolate Hummus

When that craving hits for something chocolaty but you don’t want the extra junk, you have to reach for this chocolate hummus recipe. It’s going to hit that sweet spot and you won’t leave you feeling guilty. Full of healthy nutrients chocolate hummus is a great way to sneak some goodness into your kids diets as well. If you don’t tell them, they’ll never know. Everyone will love dipping their favorite dippers again and again! Perfect for a party, snack or dessert. It’s a healthy dessert you will actually love to eat.

Chocolate Hummus is so quick and easy, you will be making this recipe on a daily basis. It’s just that good and simple. Don’t let the word hummus through you off or keep you from trying it. Chocolate Hummus looks and tastes a lot like brownie batter, but one you can eat without the worry and guilt. You have to try this, you won’t regret it. It’s insanely delicious!

Is Chocolate Hummus Healthy?

Chocolate Hummus does have added sweetner so that ups the calorie count a bit. But it’s made with all natural ingredients which makes it healthier than most desserts. Chocolate hummus is made with Garbanzo beans which are high in plant protein and fiber which will help you feel fuller longer, curb cravings, and help you feel satisfied. So yes I would consider this to be healthier than cookies, brownies or most other choices.

Ingredients for Creamy Chocolate Hummus

Simple ingredients make this super easy. You probably have all the ingredients for this chocolate hummus sitting in your pantry right now! Perfect for a late night snack!

  • Garbanzo Beans: Drain and rinse them, reserve some of the liquid to thin your hummus if needed.
  • Peanut Butter: Can be substituted if needed, see below.
  • Cocoa Powder: Not to be confused with hot chocolate mix. This is unsweetened cocoa powder.
  • Maple Syrup: Use real maple syrup for best results.
  • Vanilla: Adds extra flavoring
  • Optional: Chocolate syrup and Mini chocolate chips

How to Make Easy Chocolate Hummus

This chocolate hummus whips up in about 5 minutes flat. Perfect for when you need something sweet and chocolaty fast! Use a food processor for best results. This is going to rock your world!

  1. Combine: In a food processor add the garbanzo beans, peanut butter, cocoa powder, maple syrup, and vanilla.
  2. Mix:  Pulse on high until smooth and creamy.
  3. Serve: Put into a serving bowl and drizzle with chocolate syrup and mini chocolate chips. Serve with pretzels, fruit, or graham crackers.

A food processor with the ingredients for chocolate hummus.

Tips and Variations For Dessert Hummus

This dip is super easy and versatile, making chocolate hummus a win win for everyone.

  • Peanut Butter: You can substitute the peanut butter for Tahini, Almond butter, or even sunflower butter. Most all nut butters will work in place of peanut butter.
  • Garbanzo Beans: If you want a smoother finish to your hummus, try to remove as many of the skins as possible from the beans. While rinsing them gently squeeze the skins from off the beans. You can also cook your own beans and over cook them to create a softer texture.
  • Substitute Beans: If you don’t have garbanzo beans on hand try black beans instead. The flavor will be slightly different, but still amazing and still healthy.
  • Thinning: If you want a tad thinner dip add some of the reserved garbanzo liquid a tablespoon at a time till you reach your desired consistency.
  • Maple Syrup: Use pure maple syrup, not the artificially flavored pancake syrup. You can also substitute honey instead of the syrup.
  • Flavorings: Experiment with flavorings, add a dash of cinnamon, a splash of peppermint flavoring or even a pinch of chili powder. Stir in coconut flakes and a splash of almond flavoring for an almond joy flavor.

Processed chocolate hummus all whipped together.

What Can I Serve Chocolate Hummus With?

Well if you can keep yourself from eating it by the spoonful, there are many ways to serve this decadent chocolate hummus. This is a perfect dish for dipping, and everyone loves to dip! Whether your dipping into hummus or million dollar dip, hot crab dip or chicken alfredo dip, it’s going to be delicious!

  • Sweet n’ Salty: The ultimate combination of sweet and salty is always satisfying, think pretzels, potato chips, or pita chips.
  • Fruit: Chocolate is a golden combination with fruit. Strawberries, blackberries, raspberries, bananas, apples, pineapple, dried fruit and anything else you can imagine.
  • Crackers/ Cookies:  Serve chocolate hummus with graham crackers, shortbread cookies, or wafer cookies for a fun twist.
  • Spread it:  Use chocolate hummus in place of hazelnut spread on bagels, or toast. Use it for fillings in cakes, frosting on cookies and pie.  Spread it on pancakes, waffles or crepes.

Storing and Using Homemade Hummus

This recipe keeps really well, meaning you can use it all week, if it lasts that long. Create individual portions with fruit for quick grab and go snacks.

  • Fridge: Chocolate hummus will keep in an airtight container in the fridge for up to 10 days. It will thicken in the fridge so bring to room temperature to serve. You can also add some non dairy milk, or even water to help thin it.
  • Freeze: This freezes beautifully. Keep in an airtight container for up to 3 months. Let it thaw in the fridge, then bring to room temperature on the counter before serving. If the hummus is too thick, thin it with non dairy milk or water.


Dipping a strawberry in chocolate hummus garnished with chocolate chips and syrup.

More Chocolate Loving Recipes

Chocolate has a rich long history, making it a fascinating food to discover. Most people have very strong opinions about chocolate. Whether it’s dark, milk or white, it’s a divine food. It’s complex, it’s rich, sweet and decadent. Chocolate is just sublime and perfect in all its ways.

Print

Chocolate Hummus

Chocolate Hummus is a healthier dessert dip your going to love! Made with cocoa, peanut butter and garbanzo beans, this hummus is a smooth dreamy fix for those chocolate cravings!
Course Appetizer, Dessert
Cuisine American
Keyword chocolate hummus
Prep Time 10 minutes
Total Time 10 minutes
Servings 8 People
Calories 116kcal
Author Alyssa Rivers

Ingredients

  • 1 15 ounce can Garbanzo Beans, drained
  • 1/4 cup peanut butter*
  • 1/2 cup cocoa powder
  • 1/2 cup maple syrup
  • 1 teaspoon vanilla
  • chocolate syrup and mini chocolate chips (optional)

Instructions

  • In a food processor add the garbanzo beans, peanut butter, cocoa powder, maple syrup, and vanilla. Pulse on high until smooth and creamy.
  • Put into a serving bowl and drizzle with chocoalte syrup and mini chocolate chips. Serve with pretzels, fruit, or graham crackers.

Notes

*can also sub with tahini 

Nutrition

Calories: 116kcal | Carbohydrates: 18g | Protein: 3g | Fat: 5g | Saturated Fat: 1g | Sodium: 40mg | Potassium: 181mg | Fiber: 2g | Sugar: 13g | Vitamin A: 1IU | Vitamin C: 1mg | Calcium: 32mg | Iron: 1mg


from The Recipe Critic https://ift.tt/36JjJx7
https://ift.tt/2MUEyPf

बुधवार, 3 फ़रवरी 2021

Strawberry Cake Mix Cookies (3 ingredients!)

Strawberry Cake Mix Cookies are a sweet treat that are super fast and easy! Make these pink cookies for Valentines Day, baby showers or any special occasion.

Cooking with cake mixes is one of the greatest hacks for all bakers. From Neiman Marcus Bars, to Honeybun Cake to Apple Dump Cake, cake mixes just make it that much easier to get dessert on the table.

Strawberry Mix Cookies with frosting, sprinkles and M&M's stacked.

Cake Mix Cookies

I love making delicious desserts that are so easy, it’s almost like I cheated. Strawberries are almost in season. I can’t wait to use them to make Brownies, Pretzel Salad or this amazing Salad!  I do like using fresh strawberries in cookies, but when I can’t find good strawberries or I need that incredible pink color all over, I love using this strawberry cake mix cookie recipe. The strawberry cake mix gives an incredible strawberry flavor that’s almost hard to get any other way. It’s the perfect pink color too! It’s just the right shade for any festive occasion.  Anyone who is a fan of strawberries is going to love these cookies. They are unique but so easy and they taste amazing!

Chocolate and strawberry are just meant to go together. With these cake mix cookies you can mix and match your add ins. The white chocolate chips add the perfect smooth sweetness to go with the tangy strawberry. M&M’s are a fun colorful addition and give a deeper chocolate flavor. Another idea is to melt white chocolate to dip the strawberry cake mix cookies in and then decorate as you desire for your special occasion. Your family and friends are going to love them. And you are going to love how simple they are!

Ingredients for Strawberry Cookies

With only 3 ingredients, these can’t get much easier or quicker. Use your favorite strawberry cake mix for these divine cookies.

  • Vegetable Oil: Canola or vegetable oil will work.
  • Eggs: 2 Large eggs
  • Strawberry Cake Mix: Use your favorite brand
  • Optional Mix Ins: White Chocolate Chips, M&M’s (For valentines use red, pink and white M&M’s or White Chocolate for melting and dipping.

Let’s Bake Cookies!

Because these are so simple they come together fast and are the perfect go to cookie when you are in a hurry. They’ll always come out chewy, sweet and divine!

  1. Prep: Preheat oven to 375 degrees. Line a cookie sheet with parchment paper and set aside.
  2. Mix:  In a medium sized bowl combine the oil and the eggs. Stir in the cake mix.
  3. Add ins: Fold in optional mix ins if using.
  4. Bake: Using a small cookie scoop drop the cookies on the sheet spacing 2 inches apart. Bake for 7-10 minutes or until set. Remove from the oven and let cool on a rack.
  5. Top: If using the melted white chocolate, dip each half of the cookie and top with sprinkles.

Beating eggs, adding the cake mix and the candies, then putting them on a cookie sheet to bake.

Tips For Easy Cake Mix Cookies

These are so easy and so good, you are going to want to make them all the time. Go for it! I don’t think anyone will complain.

  • Don’t Over Bake: These cookies have a fine line between done and over done. Overbaking the cake mix cookies will leave them dry instead of moist and tender. As soon as there is any browning on the cookies you’ll want to pull them. Check the first batch often to get the timing that will work best with your oven.
  • Refrigerate dough: To help the dough keep its form and bake evenly chill the cake mix cookie dough for about 30 minutes before baking. The strawberry cookies will full up instead of spread out.
  • Cookie Scoop: Use a cookie or small ice cream scoop to get the same shape in your cookies. It will help them cook evenly.
  • Use Parchment or silicone:  To keep the cookies from sticking to your sheept pan, use parchment paper or a silicone cookie mat to line your sheet pan.

Variations and Storage of Strawberry Cookies

Cookies are divine in all their varieties, from white chocolate oreo cookies to homemade Danish butter cookies. They are the perfect portion sized dessert with soft tender insides and crispy outsides. Strawberry cake mix cookies are no exception. You may need to make more than one times the recipe.

  • Add ins: M&M’s and white chocolate chips are just suggestions. You can use semi sweet chocolate chips, mini chocolate chips, or dark chocolate chunks if you desire. Or just leave them plain!
  • Frost them:  I love the decadence of the melted white chocolate, but you can use a cream cheese frosting, chocolate frosting, vanilla or strawberry frosting to top them.  But don’t forget the sprinkles!
  • Roll it: For a crinkle cookie look roll the dough in powdered sugar before baking. Yum!
  • Store them: Strawberry cake mix cookies can be kept at room temperature in an airtight container or sealed plastic bag for up to 2 weeks.
  • Freeze: Make these ahead of time and whip them out when you need them most. Freeze completely cooled cookies in a freezer safe plastic sealed bag. Keep in the freezer for up to 3 months. Thaw on the counter and bring to room temperature.

Strawberry cookies with M&M's, white chocolate chips and sprinkles.

Recipes With 5 or Less Ingredients

We have all been there, we are swamped with life and you need a dinner, dessert or something fast! But you also need something that you have everything for already sitting in your pantry. Life gets busy and we all need those go to recipes that not only are fast and easy but taste amazing. These will definitely do the trick! Put these into your recipe collection for those times when you’ll need it most and be prepared to save the day!

Print

Strawberry Cake Mix Cookies

Strawberry Cake Mix Cookies are a sweet treat that are super fast and easy! Make these pink cookies for Valentines Day, baby showers or any special occasion.
Course Dessert
Cuisine American
Keyword cake cookies, cake mix cookies, strawberry cake mix cookies, strawberry cookies
Prep Time 10 minutes
Cook Time 10 minutes
Total Time 20 minutes
Servings 24 Cookies
Calories 129kcal
Author Alyssa Rivers

Ingredients

  • 1/2 cup vegetable oil
  • 2 large eggs
  • 1 15 ounce box Strawberry Cake Mix

optional mix ins:

  • 1 cup m&ms
  • 1 cup white chocolate chips
  • or 1 cup melted white chocolate and sprinkles

Instructions

  • Preheat oven to 375 degrees. Line a cookie sheet with parchment paper and set aside. In a medium sized bowl combine the oil and the eggs. Stir in the cake mix. Fold in optional mix ins if using.
  • Using a small cookie scoop drop the cookies on the sheet spacing 2 inches apart. Bake for 7-10 minutes or until set. Remove from the oven and let cool on a rack.
  • If using the melted white chocolate, dip each half of the cookie and top with sprinkles.

Nutrition

Calories: 129kcal | Carbohydrates: 10g | Protein: 1g | Fat: 9g | Saturated Fat: 7g | Trans Fat: 1g | Cholesterol: 18mg | Sodium: 19mg | Potassium: 27mg | Fiber: 1g | Sugar: 10g | Vitamin A: 44IU | Vitamin C: 1mg | Calcium: 27mg | Iron: 1mg


from The Recipe Critic https://ift.tt/3oNfQgK
https://ift.tt/3jajfFm

मंगलवार, 2 फ़रवरी 2021

How to Make the Absolute Best New York Steak

Skillet seared New York Steak is one of the best steaks you’ll ever have!  It’s tender, juicy and full of flavor!

When steak is for dinner, most people think of potatoes too. Choose any of these winning potatoes like these Roasted, Mashed or French Fries, will complement this dish perfectly.

Two steaks in a pan with garlic overtop.

New York Steak

My son has truly perfected making the best skillet steak.  He has been practicing and studying for the last year on how to make the best steak.  He always is asking me to get steak from the store so that he can work on perfecting his skills.  Last week he made this steak and I immediately knew he was the one to make it for the blog.  It was the absolute best steak that I have EVER had!   He was the swirling the butter on the steak like a pro and if he can make the best restaurant quality steak, so can you!

Steak can seem intimidating to cook, but it truly couldn’t be more easy. The New York steak cut makes cooking steak a breeze, and a great beginner steak with fabulous results. The New York steak is a favorite for being tender, but still a good chew with incredible flavor. A great steak is just minutes away and you’ll have the beginnings of an amazing meal. Add some green beans and rolls to your potatoes of choice and it’s a meal made in heaven.

New York Strip Steak Ingredients

This New York Steak recipe is restaurant quality but in the comforts of your own home, and at a fraction of the cost. This steak will save you time and money by making it at home. Eat it in your pajamas surrounded by family or make a romantic dinner for two. However you want to eat it, just make it! You won’t regret it!

  • New York Steak: It is best to let your steak sit on the countertop at room temperature for 30 minutes prior to cooking.
  • Salt and Pepper: Season the steaks ahead of time.
  • Olive Oil: Warm the skillet with the oil before cooking.
  • Butter: This helps keep the steak moist and tender as it is cooking.
  • Garlic Cloves: Adding the garlic cloves brings more intense flavor.
  • Fresh Rosemary and Thyme Sprigs: Perfect for adding at the end overtop the steak.

Let’s Get Sizzling!

  1. Prepare the Steak: Let the steaks rest for 30 minutes to come to room temperature. Salt and pepper to taste.
  2. Sauté: In a medium sized skillet over medium high heat at the olive oil. Once it starts to smoke add the steaks to the skillet. Sear on all of the sides until they have a golden brown crust. Add the butter and let melt in the skillet. Add in the garlic and fresh sprigs.
  3. Cook Until Done! Reduce the heat to medium and let them cook until they reach the desired internal temperature. Spoon the butter over the steaks while they are cooking.

Two steaks seasoned with salt and pepper.

What is a New York Steak?

The New York Steak is also known as New York strip steak, ambassador steak, strip loin steak, club steak, or the Omaha Strip. But it’s most commonly known as the New York Steak.  They are the queen of steak in that they are usually not too expensive, they cook up fast, and they are insanely delicious.

  • What Kind of Cut is it? Cut from the area of the cow below the backbone, NY strip steaks are tender, lean, and typically boneless. It has a good amount of marbling, which lends a ton of flavor to this evenly, but it’s not quite as tender as a ribeye or a tenderloin.
  • What’s in a Name: The strip steak is called after the city it originated in. New York is known for its steak houses and this cut of beef was one of the firsts and remains a favorite.
  • What to Look For: Look for New York Steak that is bright in color with tons of marbling. This what gives the strip steak it’s flavor and tenderness. Look for a steak that’s 1/2-1 inch in thickness. Remember the thicker the steak the longer it’ll take to cook.
  • Nutritional Value of a New York Steak: A 6-oz portion packs in 320 calories, 12 grams of fat, 50 grams of protein, 3.2 milligrams iron, and 9 milligrams zinc. I’d say that’s a pretty good steak!

Steak in the pan being flipped.

Tips For the Best New York Skillet Seared Steak

  • Pan: Your best bet is to use a heavy bottomed pan. I love using my cast iron skillet for this purpose. It evenly distributes the heat to the meat so it cooks evenly.
  • Room Temperature:  Allow your steak to come to room temperature, let it sit about 20-30 minutes on the counter. The closer it is to your final temperature before cooking results in the steak cooking evenly, as it won’t have any “cold” spots.
  • Pat it dry:  You want your steak to be dry for the best possible searing. Water will steam your steak, which isn’t ideal.
  • Let it Rest:  I can’t emphasize this enough. Meat should always be allowed to rest before cutting into it. This allows the juices to be redistributed throughout the meat and the fibers to relax. This will result in your New York Steak being tender and juicy every time. Place your New York Steak on a warm plate and loosely cover with foil for 5 minutes. Don’t cover it tightly as it will make your steak sweat. 5 minutes is all you’ll need, you don’t want it to get cold.
  • Make Sure your Pan is Hot:  You want to really sear the outside of your steak and create a golden crust. Make sure your pan and oil are hot.
  • Use a High Smoke Oil: To produce an ideal crust you’ll want a high smoke oil, such as canola, grape-seed, peanut or avocado oil. This will produce the best flavor and texture. Lower smoke oils can ruin the flavor.
  • Use Different Herbs:  New York Steak is the darling of steaks, it doesn’t necessarily need a lot of seasoning to taste great. But you can definitely make the steak to your liking using sage, rosemary, thyme, garlic or any grill seasonings and mixes you desire.

Steak cooking in a black pan with butter and garlic.

Temperatures For Your Ideal New York Steak

When you cook a steak, the best way to check the temperature is to use an instant read probe style thermometer. Stick the thermometer into the thickest part of the steak to read its temperature. Remember that the best thing you can do for a steak, or any piece of meat is to let it rest. When it rests it will continue to rise in temperature, about 3-4 degrees at least. You will want to remove your steak right before it reaches its optimum temperature and let it finish cooking while it rests. This will result in the most succulent steak. I don’t recommend cooking your New York Steak above 150 degrees, as it will become dry and tough.

  • Rare: 130 degrees Fahrenheit
  • Medium Rare: 135 degrees Fahrenheit
  • For Medium: 145 degrees Fahrenheit
  • Medium Well: 150 degrees Fahrenheit
  • Well Done: 160 degrees Fahrenheit

Two steaks in a black pan with garlic over top.

Storing Your New York Steak

Steak is great for leftovers, it’s the warming up that can be tricky.

  • Store: Keep the steak in an airtight container in the fridge for up to 3-5 days.
  • Reheat: The best way to warm up your steak without drying it out is to heat it low and slow. Use the oven and warm it up at 200 to 250 degrees till heated through. Or use the microwave at half power, full power will be too hot.

Cut up steak and potatoes on a white plate.


More Steak Recipes to Fall in Love With

Steak is a meal that can be cooked on a Tuesday night for no other reason then you want it. It can also turn a special occasion or holiday into something special. I love how versatile steak is, it can be used in so many dishes and in so many ways. For some of the best ways to eat steak, try one of these.

Print

New York Steak

Skillet seared New York Steak is one of the best steaks you'll ever have!  It's tender, juicy and full of flavor!
Course Dinner, Main Course
Cuisine American
Keyword new york steak, new york strip steak, steak
Prep Time 5 minutes
Cook Time 15 minutes
Total Time 20 minutes
Servings 2 Steaks
Calories 1055kcal
Author Alyssa Rivers

Ingredients

  • 2 New York Steak Strips
  • Salt and Pepper
  • 2 Tablespoons olive oil
  • 1/2 cup butter
  • 8 garlic cloves smashed
  • Fresh rosemary and thyme sprigs

Instructions

  • Let the steaks rest for 30 minutes to come to room temperature. Salt and pepper to taste.
  • In a medium sized skillet over medium high heat at the olive oil. Once it starts to smoke add the steaks to the skillet. Sear on all of the sides until they have a golden brown crust. Add the butter and let melt in the skillet. Add in the garlic and fresh sprigs.
  • Reduce the heat to medium and let them cook until they reach the desired internal temperature. Spoon the butter over the steaks while they are cooking.

Notes

You can also finish the steaks off in the oven. Once you sear each side put the steaks in the oven at 425 degrees and cook until they reach the desired internal temperature.

Nutrition

Calories: 1055kcal | Carbohydrates: 4g | Protein: 48g | Fat: 94g | Saturated Fat: 45g | Trans Fat: 2g | Cholesterol: 303mg | Sodium: 525mg | Potassium: 769mg | Fiber: 1g | Sugar: 1g | Vitamin A: 1419IU | Vitamin C: 4mg | Calcium: 87mg | Iron: 4mg


from The Recipe Critic https://ift.tt/3ax8EAy
https://ift.tt/3pHrpHI