गुरुवार, 18 मार्च 2021

Wedge Salad

This Classic Wedge Salad is a crisp, cool and refreshing tasty dish. This perfect side dish is super easy and quick!

Wedge salad is superb favorite as a side dish. Or you can serve it with one of these fantastic soups, Cheeseburger or Broccoli Cheese and homemade bread for a light dinner or lunch.
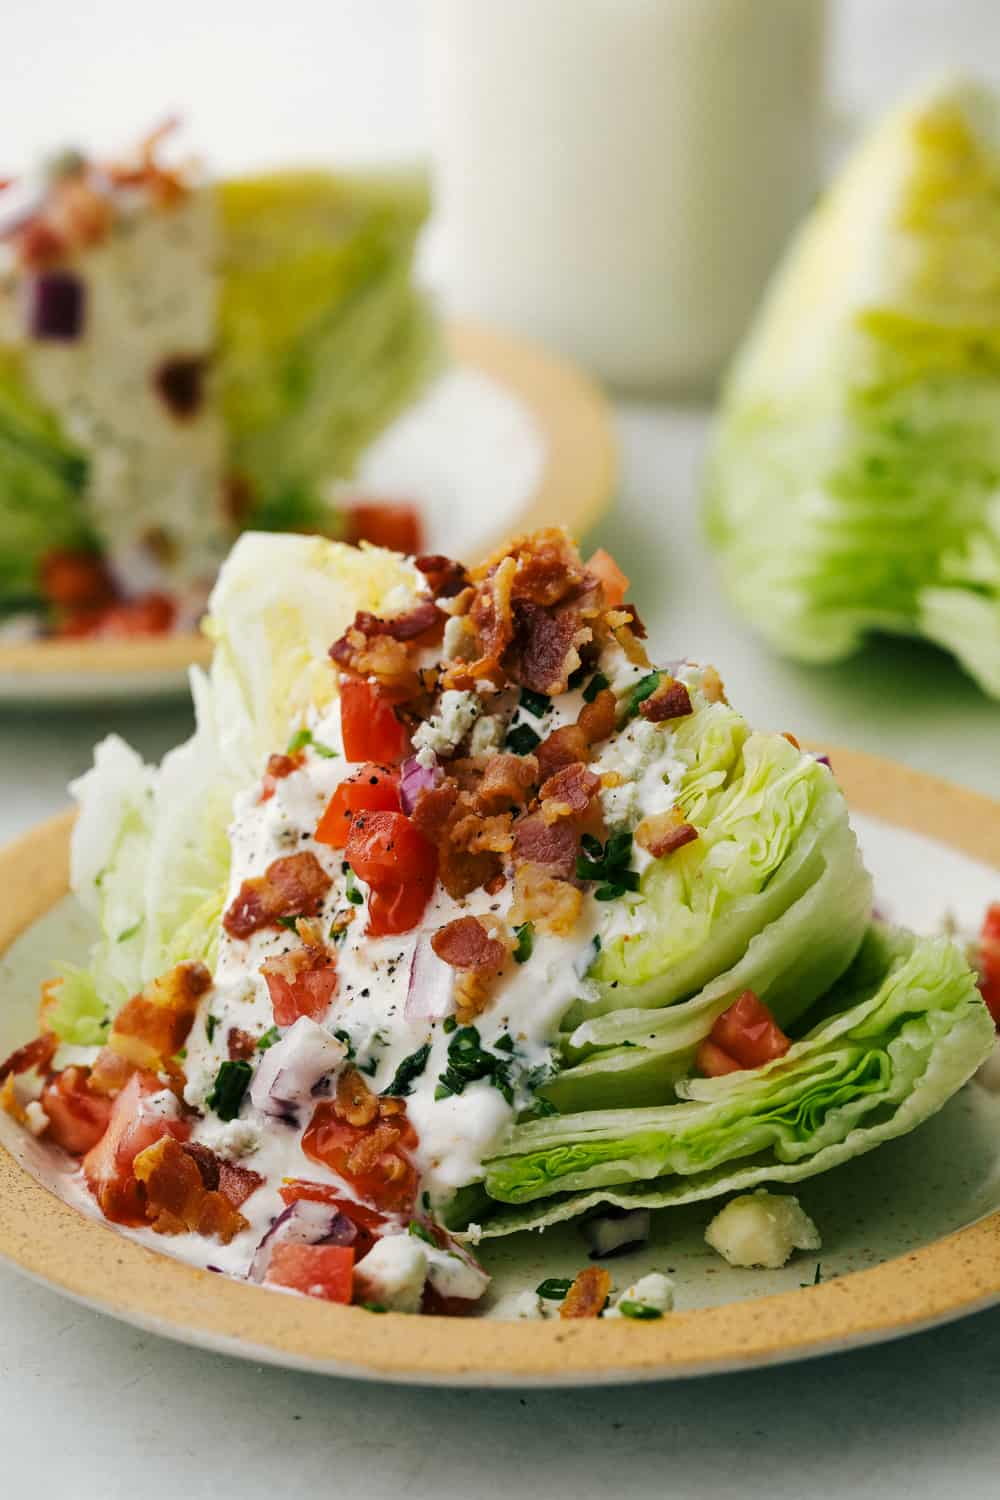
Classic wedge salad topped with tomatoes, bacon and blue cheese dressing on a plate.

Classic Wedge Salad

Wedge Salad is such a fun salad. It is colorful, full of flavor and crisp and fresh. Just like a salad should be. No one knows where these delightful salads came from, but they seem to have come into major popularity ever since steak houses started putting them on the menu. We are not complaining. Such a simple salad, but with such huge flavor. It takes a knife and a fork to eat this impeccable salad!

It can be served on its own or accompaniment to your favorite dishes. Its unique shape and color will draw attention and the taste will pull them in. Serve wedge salad alongside beef, chicken, pork or fish. See below for ideas. This simple wedge of iceberg has made the super fancy salad list. Your whole family is going to love this fun, delicious salad.

What You Need For The Perfect Wedge Salad

Look for fresh lettuce and tomatoes to really help this salad taste its best. Heads of lettuce can vary in size so pick accordingly. Depending on how many you are serving you may need to buy more than one. Some heads are so small that it will work best to cut them in half or just thirds instead of quarters. If you have them, home grown tomatoes cannot be beat! Below I give you a tip to keep your lettuce fresh for up to 2 weeks!

  • Iceberg Lettuce: Do not substitute for something else. Icebergs shape is what gives the classic wedge its name.
  • Tomato: I used a Roma tomato, choose a firm full flavored tomato.
  • Bacon: Cooked and crumbled.
  • Red Onion: Finely chopped.
  • Blue Cheese Dressing: For the best flavor use homemade, get the recipe here!
  • Blue Cheese Crumbles: Use more or less depending on your tastes

Putting a Wedge Salad Together

This amazing wedge salad is so easy! You are going to love how fast it is to throw together and voila! Your salad is done! Ever since wedge salads gained popularity at steak houses they have become known as the fancier salad, then just a bowl full of greens. The fact that it is so easy to make, and yet so fancy to eat make it a choice salad!

  1. Lettuce: Cut the lettuce wedge in half and cut off the stem. Cut into four equal wedges.
  2. Top it: Top with chopped tomato, bacon, onion, homemade blue cheese dressing and crumbles.
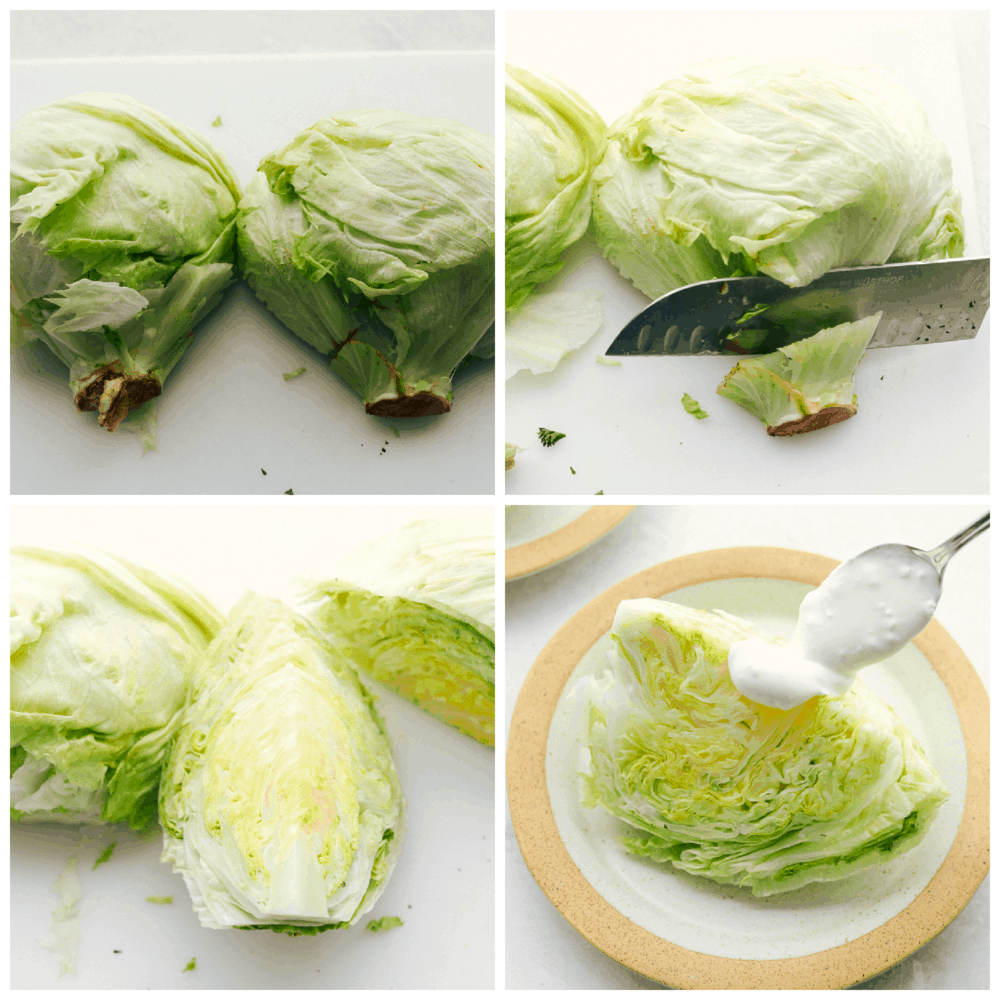
How to cut iceberg lettuce into wedges.

Tips for the BEST Wedge Salad

With this being one of the easiest salads to throw together, there isn’t much that can go wrong. But there are always a few things you can do to make it the easiest and best wedge salad ever.

  • Lettuce: You can prep your salad in advance. Cut the iceberg lettuce into wedges BUT leave the stem on. This will keep the leaves intact better. Wash the quarters carefully, allowing water to run in between the leaves. Drain well. Store in a plastic bag with a paper towel until ready to use. Lettuce will keep like this for up to 2 weeks. If the outside leaves start to turn brown, you ca simply remove them. Cut off the stem right before serving.
  • Tomatoes: Use grape or cherry tomatoes halved or quartered for easy, flavorful tomato flavor.
  • Salt and Pepper:  Add some salt and pepper to taste.

Variations for Topping a Wedge Salad

The classic topping for a wedge salad are bacon, tomato, red onion and more blue cheese along with blue cheese dressing. But that doesn’t mean you cannot take a wedge of iceberg lettuce and make it your own. Wedge salads are easily customizable and still will be absolutely delicious. So mix and match to your liking.

  • Add Different Vegetables: Try avocados, cucumbers, olives and chopped peppers or celery.
  • Add Crunch:  Use croutons to add a bit of crunch. Make your own for the best tasting.
  • Cheese:  Need a different cheese, try cheddar, feta, parmesan or gorgonzola.
  • Not a fan of Blue Cheese Dressing: Although blue cheese is the standard, you can substitute for ranch, caesar or creamy parmesan dressing.
  • Add Some Protein: Add chopped grilled chicken or steak. Or dice up hard boiled eggs.

What to Serve Wedge Salad With

Wedge salads can be a meal on their own or served as the ideal side. Served alongside a hearty meaty dish is exactly what a wedge salad was made for. They are the perfect beginning to your meal as the lettuce is cool and fresh and the toppings creamy and savory. When you need a great main dish to go with your wedge salad try one of these incredible favorites.

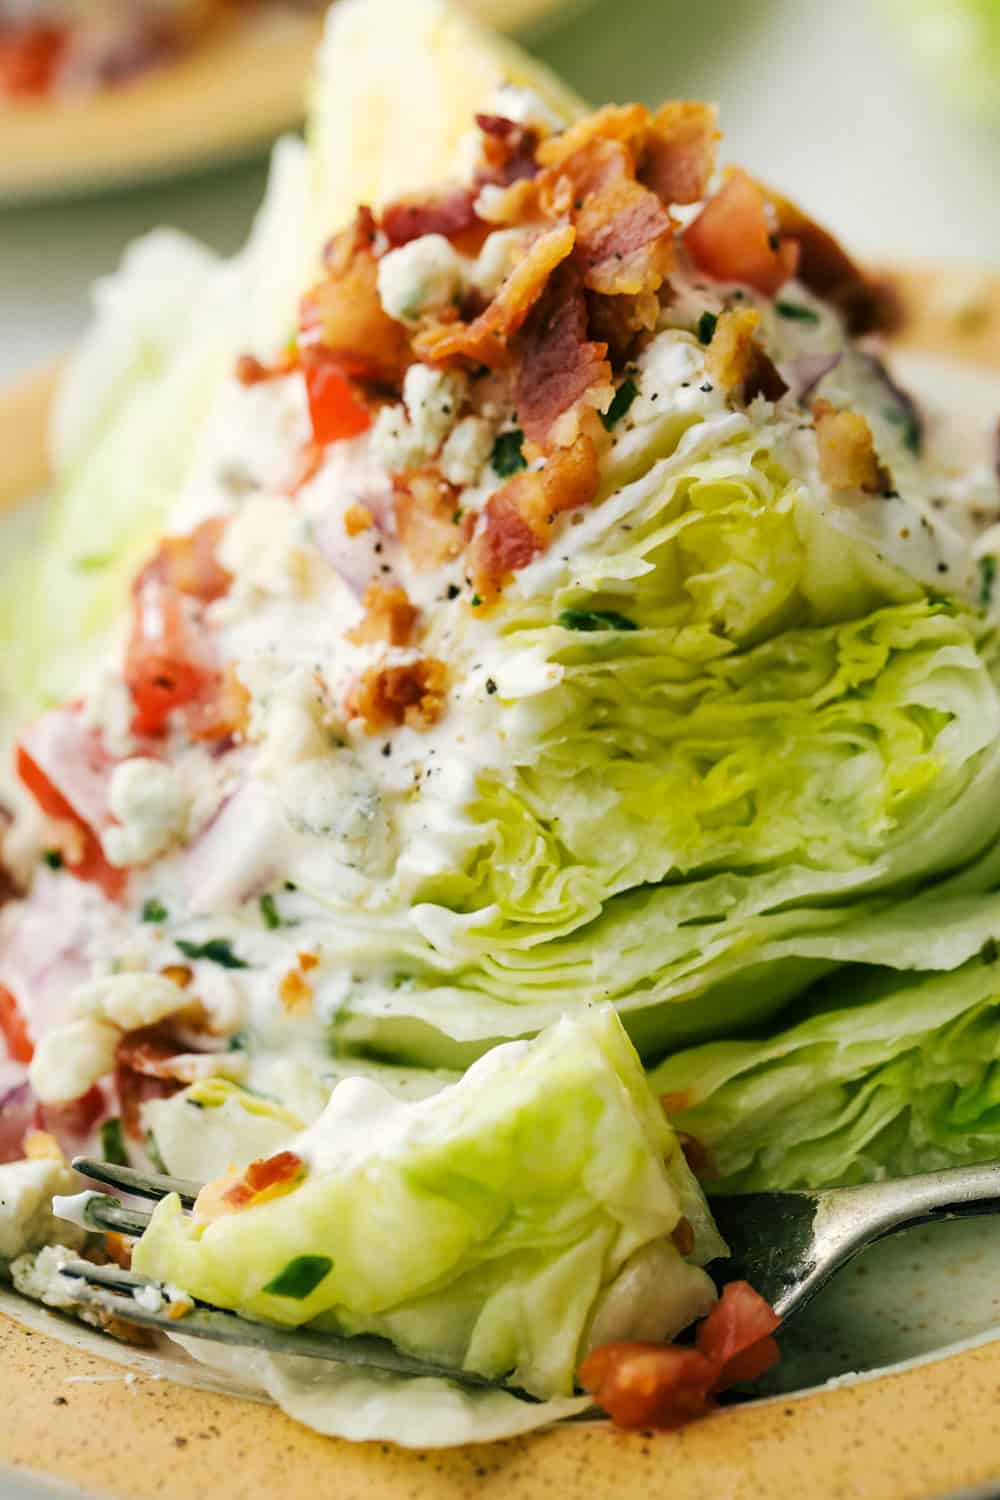
Up close picture of a wedge salad on a plate with a fork.

More Salads We Love

Salads are fresh and inviting. They are perfect way to get more vegetables or fruit into your diet. Salads are great side dishes or light main meals. I love how versatile and creative salads can be. You can combine different flavors that come together in delicious ways. And the dressings! You cannot forget about them! They are the ones that meld all the flavors together in their zingy and zesty ways. Here are some of our tried and true favorite salads to try next time you need one.

Print

Wedge Salad

This Classic Wedge Salad is a crisp, cool and refreshing tasty dish. This perfect side dish is super easy and quick!
Course Main Course, Salad
Cuisine American
Keyword wedge salad, wedge salad recipe
Prep Time 10 minutes
Total Time 10 minutes
Servings 4 Wedges
Calories 383kcal
Author Alyssa Rivers

Ingredients

  • 1 head iceberg lettuce
  • 1 roma tomato diced
  • 1/2 pound bacon cooked and crumbled
  • 1/2 red onion diced
  • Homemade Blue Cheese Dressing
  • 1 cup blue cheese crumbles

Instructions

  • Cut the lettuce wedge in half and cut off the stem. Cut into four equal wedges.
  • Top with tomato, bacon, onion, homemade blue cheese dressing and crumbles.

Nutrition

Calories: 383kcal | Carbohydrates: 7g | Protein: 16g | Fat: 32g | Saturated Fat: 14g | Trans Fat: 1g | Cholesterol: 63mg | Sodium: 861mg | Potassium: 445mg | Fiber: 2g | Sugar: 4g | Vitamin A: 1084IU | Vitamin C: 7mg | Calcium: 210mg | Iron: 1mg


from The Recipe Critic https://ift.tt/3r3rBkA
https://ift.tt/2OGxGpG
बुधवार, 17 मार्च 2021

Homemade Blue Cheese Dressing

Homemade Blue Cheese Dressing is way better than anything you can buy in the store. This dressing is creamy, tangy and absolutely luscious!

Making your own condiments is super simple and better for you! Try these popular homemade recipes like this Taco Seasoning, Alfredo Sauce and Cheese Sauce for starters.

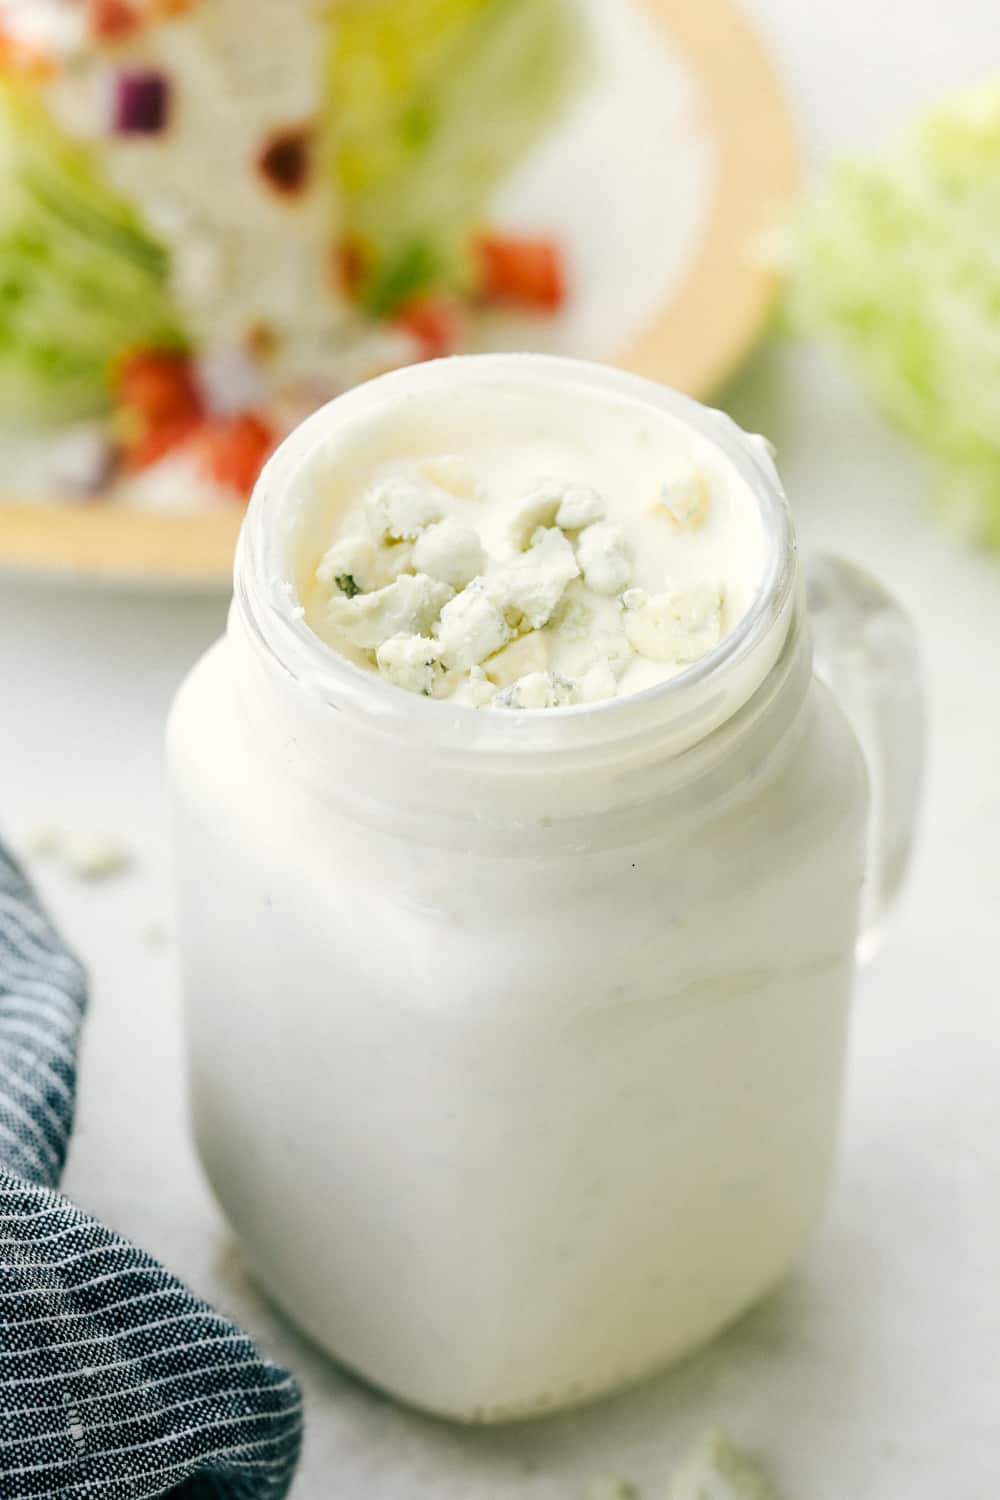
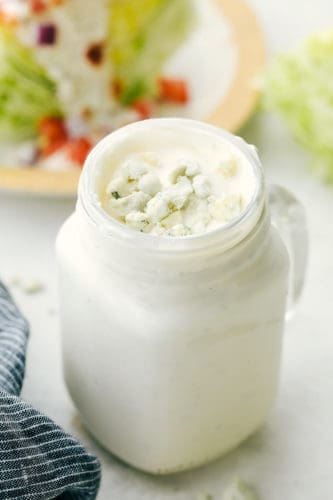
Creamy homemade blue cheese dressing in a jar.

Easy Blue Cheese Dressing

Most people either love blue cheese or they are not that big of fan. This homemade blue cheese dressing, however, may make those unbelievers, believers. It is creamy, tangy and full of flavor. Making your own means you can control the blue cheese amount and what kind too, making it just the way you want it. The sour cream and buttermilk give the perfect amount of tanginess and richness. The mayonnaise balances it all together. You are seriously going to love this dressing!

Just like most things homemade dressing are just better than store bought. Just like this ranch, caesar and greek salad dressings, blue cheese dressing made from scratch is SO much better! Store bought dressings are full of additives and preservatives to make them shelf stable and last longer. These can literally leave a bad taste in your mouth and just taste kind of off.  Making dressing at home is easy, simple, and so delicious.

Ingredients for Blue Cheese Dressing Recipe

There are different kinds of blue cheese to choose from. I describe them down below. Any and all of them will work in this recipe. It is up to you on which you prefer.

  • Blue Cheese Crumbles: Some blue cheeses will come in a block, or already crumbled.
  • Buttermilk: If you do not have buttermilk on hand make some in a few minutes with a few simple ingredients. Find the recipe HERE.
  • Sour Cream: Low fat or full fat work perfectly with this blue cheese dressing.
  • Mayonnaise: You can also use low fat mayo here too.
  • Parsley: Fresh parsley finely chopped.
  • Garlic Powder: Provides just a hint of flavor.
  • Salt and Pepper: Add to taste.

How to Make Homemade Blue Cheese Dressing

This is super quick and easy and will take you about 5 minutes or less. Perfect for when you are in a hurry.

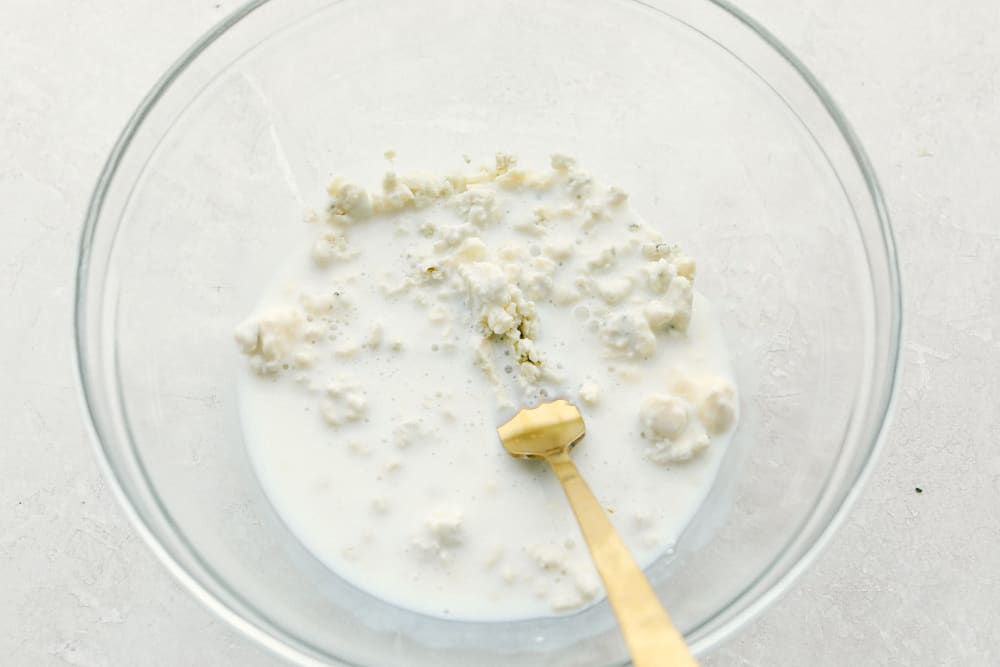
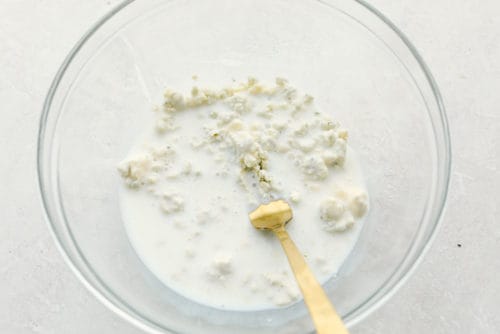
  1. Mash: In a small bowl add the blue cheese crumbles and buttermilk. Mash the crumbles with a fork.
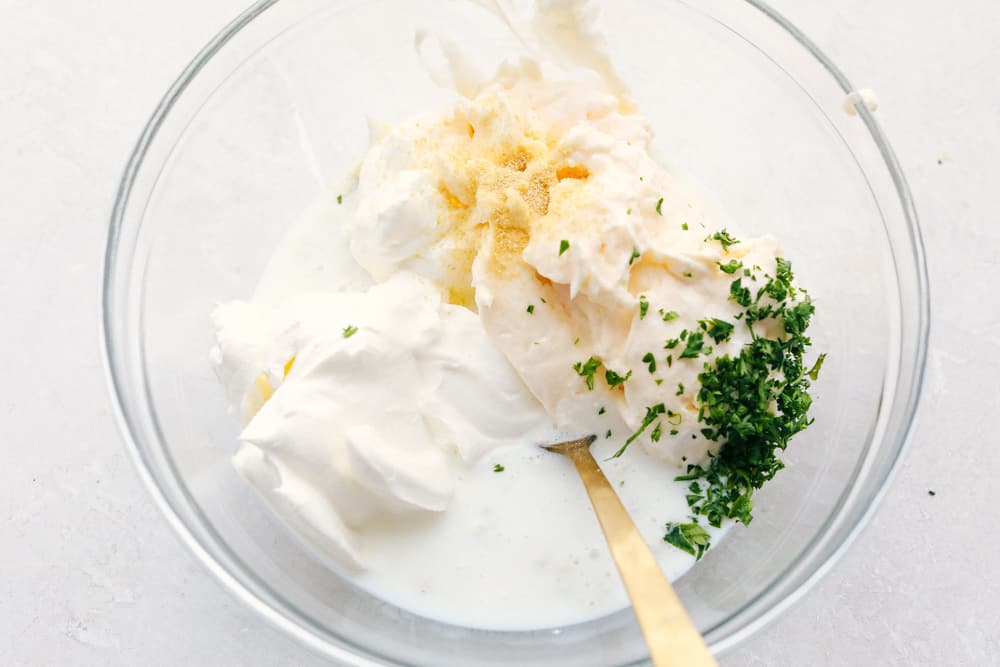
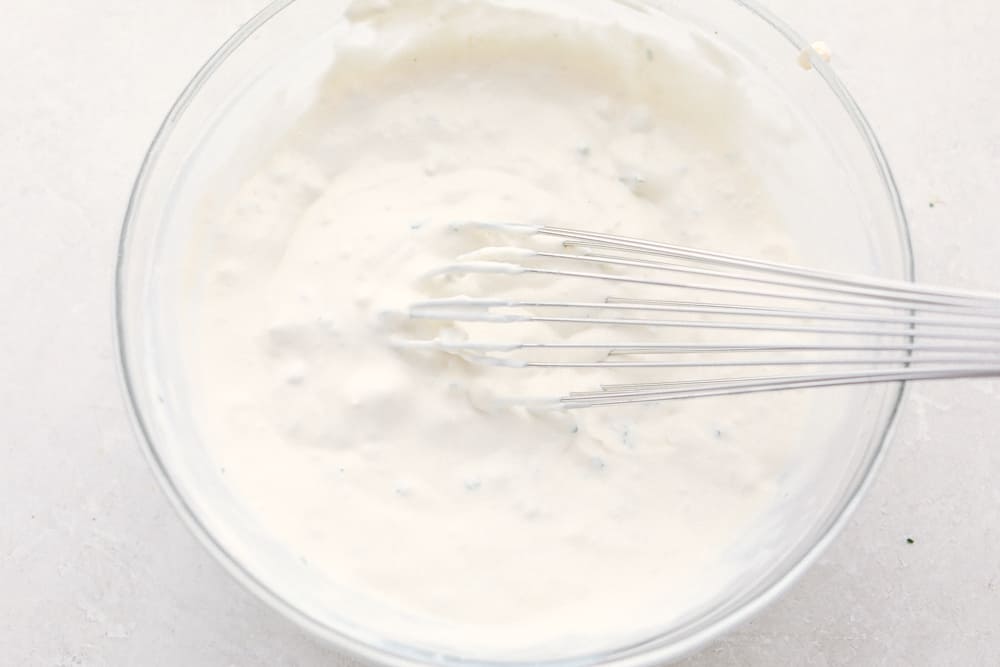
  2. Combine: Add in the sour cream, mayonnaise, parsley, garlic powder, and salt and pepper and whisk. Add in more buttermilk if you want a thinner consistency.

Mashing the blue cheese with the buttermilk in a bowl.

Types of Blue Cheese and Which to Use

There are actually different kinds of blue cheeses in the blue cheese family and some are more mild and other rather punchy. It all depends on what you like. If you are not sure which one to choose, most stores sell a basic blue cheese that will be more mild than a stilton but stronger than a gorgonzola. And they all taste amazing!

  • Roquefort: This blue cheese is the strongest flavored of the varieties and is soft and crumbly.  It originates from France and is made from sheep’s milk. If you like a strong flavor, this is the one for you.
  • Stilton: Made from cow’s milk, this blue cheese comes from England. It is firm and on the strong flavor scale comes in at second.
  • Gorgonzola: Originating from Italy, this is a favorite flavor among Americans. Also made from cow’s milk it has a more mild flavor and is much creamier. It is a favorite for baking as it tends to melt more easily and beautifully.
  • American blue cheese: There are several companies that make blue cheese right here in America. They are also made from cow’s milk and are gaining popularity although they still are working on being placed in the same category as the European blue cheeses. They tend to fall somewhere between a stilton and gorgonzola blue cheese as far as flavor.

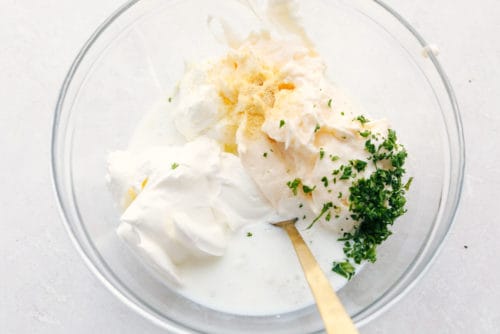
Adding the rest of the ingredients to the clear bowl.

Tips For the Best Blue Cheese Dressing

With incredible flavor and texture, this is going to be a family favorite!

  • Mash: If you love the flavor of blue cheese, but are not a fan of biting into large chunks of it, make sure you mash it well. Mashing it thoroughly will also distribute the flavor better.  If you do like the chunks then mash it less.
  • Buttermilk:  Add more or less buttermilk depending on how thin or thick you like your dressing.
  • Let it sit: Blue cheese dressing gets better with time. Allow the dressing to sit for at least 8 hours, and overnight is better, before using. Trust me this key to a fantastic dressing, you have to allow those flavors to meld. It will make a huge difference in the flavor.
  • Storing: Keep your blue cheese dressing in a tightly sealed jar or container in the fridge for 2-3 weeks.

Whisking the dressing ingredients together.

How to Serve The Best Blue Cheese Dressing Ever!

Beyond eating it with just a spoon, there are a few favorite ways to serve this creamy, cool blue cheese dressing.

  • Vegetables: When you just don’t want to take the time to make something fancy, but want to taste that incredible blue cheese flavor, grab some vegetables and go dipping! Carrots, celery, peppers, tomatoes, broccoli, cauliflower, peas and jicama are some of our favorites.
  • Wings: Buffalo wings and blue cheese dressing were meant to go together. Try Sticky Honey Garlic Buffalo Wings, Buffalo Cauliflower (yes it is amazing), or Air fryer Wings.
  • Salad:  Wedge salad with bacon and tomatoes is a classic
  • Top it: From Steak to Potatoes blue cheese dressing can take a dish from good to impressive. If you think it would taste good, it probably will!

A wedge salad with blue cheese dressing and toppings.

More Homemade Recipes to Try

Homemade is truly better, not only do you know exactly what you are eating, you can truly say it was made with love. It is surprising how easy and quick it can be to make foods at home. It is often cheaper too. Give these homemade favorites a try and see for yourself.

Print

Blue Cheese Dressing

Blue Cheese Dressing is way better than anything you can buy in the store. This dressing is creamy, tangy and absolutely luscious!
Course Dressing
Cuisine American
Keyword blue cheese dressing, homemade blue cheese dresssing
Prep Time 5 minutes
Total Time 5 minutes
Servings 16 ounces
Calories 85kcal
Author Alyssa Rivers

Ingredients

  • 4 ounces blue cheese crumbles
  • 1/3 cup buttermilk
  • 1/3 cup sour cream
  • 1/2 cup mayonnaise
  • 1 Tablespoon parsley chopped
  • 1/4 teaspoon garlic powder
  • salt and pepper to taste

Instructions

  • In a small bowl add the blue cheese crumbles and buttermilk. Mash the crumbles with a fork.
  • Add in the sour cream, mayonnaise, parsley, garlic powder, and salt and pepper and whisk. Add in more buttermilk if you want a thinner consistency.

Nutrition

Calories: 85kcal | Carbohydrates: 1g | Protein: 2g | Fat: 8g | Saturated Fat: 3g | Trans Fat: 1g | Cholesterol: 11mg | Sodium: 153mg | Potassium: 35mg | Fiber: 1g | Sugar: 1g | Vitamin A: 118IU | Vitamin C: 1mg | Calcium: 49mg | Iron: 1mg


from The Recipe Critic https://ift.tt/3bSFjlG
https://ift.tt/3eL8MA5

मंगलवार, 16 मार्च 2021

Instant Pot Corned Beef and Cabbage

Corned Beef and Cabbage will make your St. Patrick’s Day a breeze. The beef is tender and the cabbage and potatoes is full of flavor, you will love this!

Corned Beef and Cabbage is a classic then add Soda Bread to complete the meal. For dessert enjoy a little green with Mint Brownies or a Shamrock Shake.

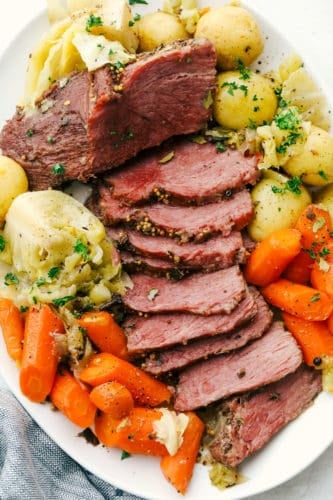
Corned beef, potatoes, cabbages, and carrots on a platter.

Corned Beef and Cabbage

This Irish holiday is a favorite at our house. Along with everything being turned green ( think green milk, pancakes etc), we get to eat this delectable dish! Corned Beef and cabbage is a must for St. Patrick’s Day festivities. Cooking it in the instant pot guarantees tender moist beef and perfectly cooked cabbage and potatoes.Adding the carrots gives it texture, color and flavor. It is the easiest and most delicious way to eat this Irish traditional meal.

Cooking the corned beef and cabbage in the instant pot is a hands off approach that will save you time and stress. If this is your first time cooking it, then the instant pot is the way to go. It will come out perfect and tender! Cook the vegetables separate from the beef so that they don’t get over cooked. This will be a meal that will wow your family! It is so good you may want to make it more than just once a year, which you probably should anyway!

What is Corned Beef?

Traditional Irish made this meal originally with boiled bacon, but when they immigrated to America, they could not afford it pork or bacon. Corned Beef Brisket is what they used instead. They paired it with the cheapest vegetables around, cabbage and potatoes. It has been tradition here in America ever since.

Corned beef is beef brisket that has been soaked in brine and then cured with salt and seasonings. The pink color comes from the sodium nitrate that is used in the  curing process. Corned beef comes in multiple cuts, and is best cooked for a long period of time so that it comes out tender. It can be boiled, slow cooked, or roasted.

What You Need To Make Corned Beef

Now is the time to buy corned beef! I like to buy more than one and stick one in my freezer for later in the year when I get the craving. Corned beef is a favorite.

  • Onion: Roughly chopped
  • Corned Beef Brisket:
  • Water: Needed to create the pressure.
  • Pickling Spice: Many corned beef come with the spices in a packet included.
  • Carrots: Use regular carrots and not baby carrots for best flavor.
  • Baby Potatoes: Red or yellow potatoes work well.
  • Cabbage: Roughly  chopped.

How to Make Corned Beef and Cabbage in the Instant Pot

The instant pot takes the work and fret out of making fork tender corned beef. The vegetables need to be cooked separately so they don’t turn to mush.

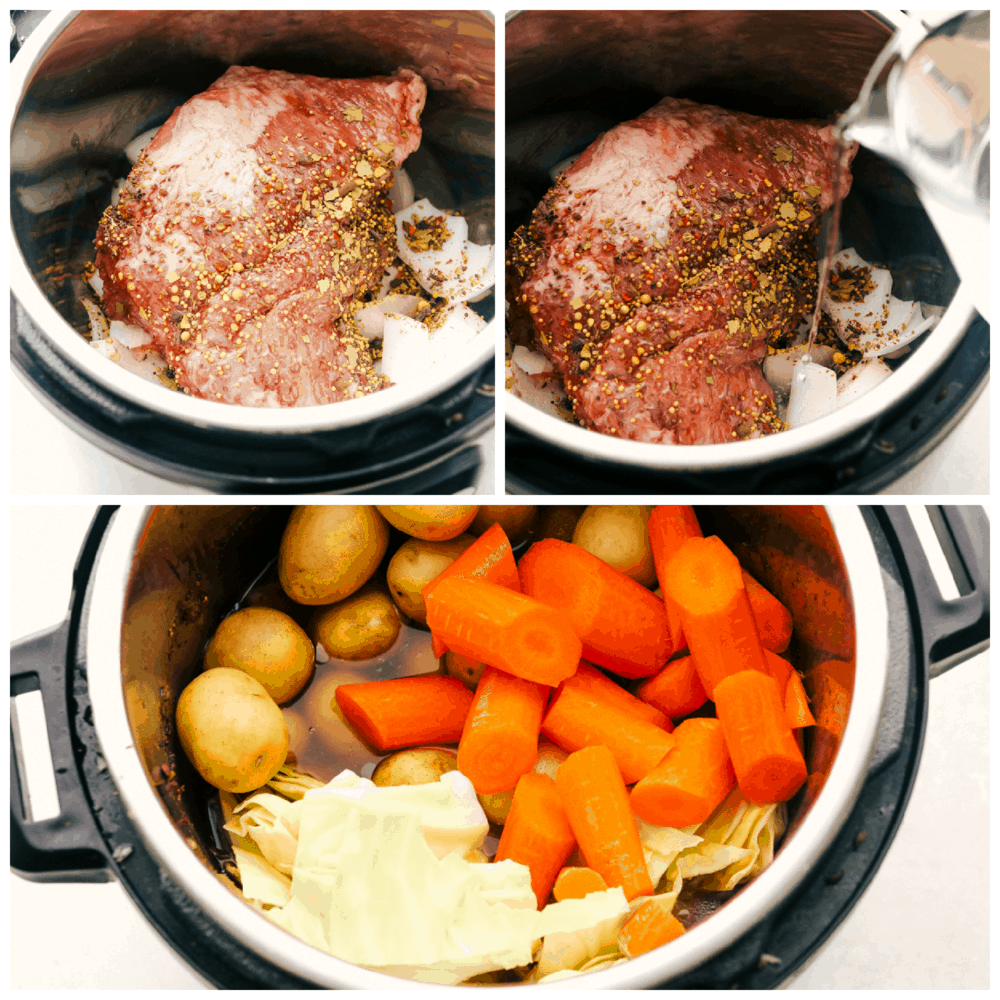
  1. Place: Add the onion to the bottom of your instant pot. Place the corned beef on top and sprinkle with pickling spice.
  2. Cook: Add the water the instant pot and make sure the valve is turned to seal. Set the instant pot to high and cook for 80 minutes.
  3. Rest: Once the time is up, carefully turn the valve to release and let the remaining pressure out. Remove the beef and onions from the instant pot and set it aside to rest.
  4. Cook Vegetables: Take out two cups of the water and add the carrots, potatoes, and cabbage. Make sure the valve is turned to seal. Turn the pressure cooker to high for 5 minutes. Once the time is up then release the pressure. Once the pressure is released slice up the meat going against the grain and serve with vegetables.

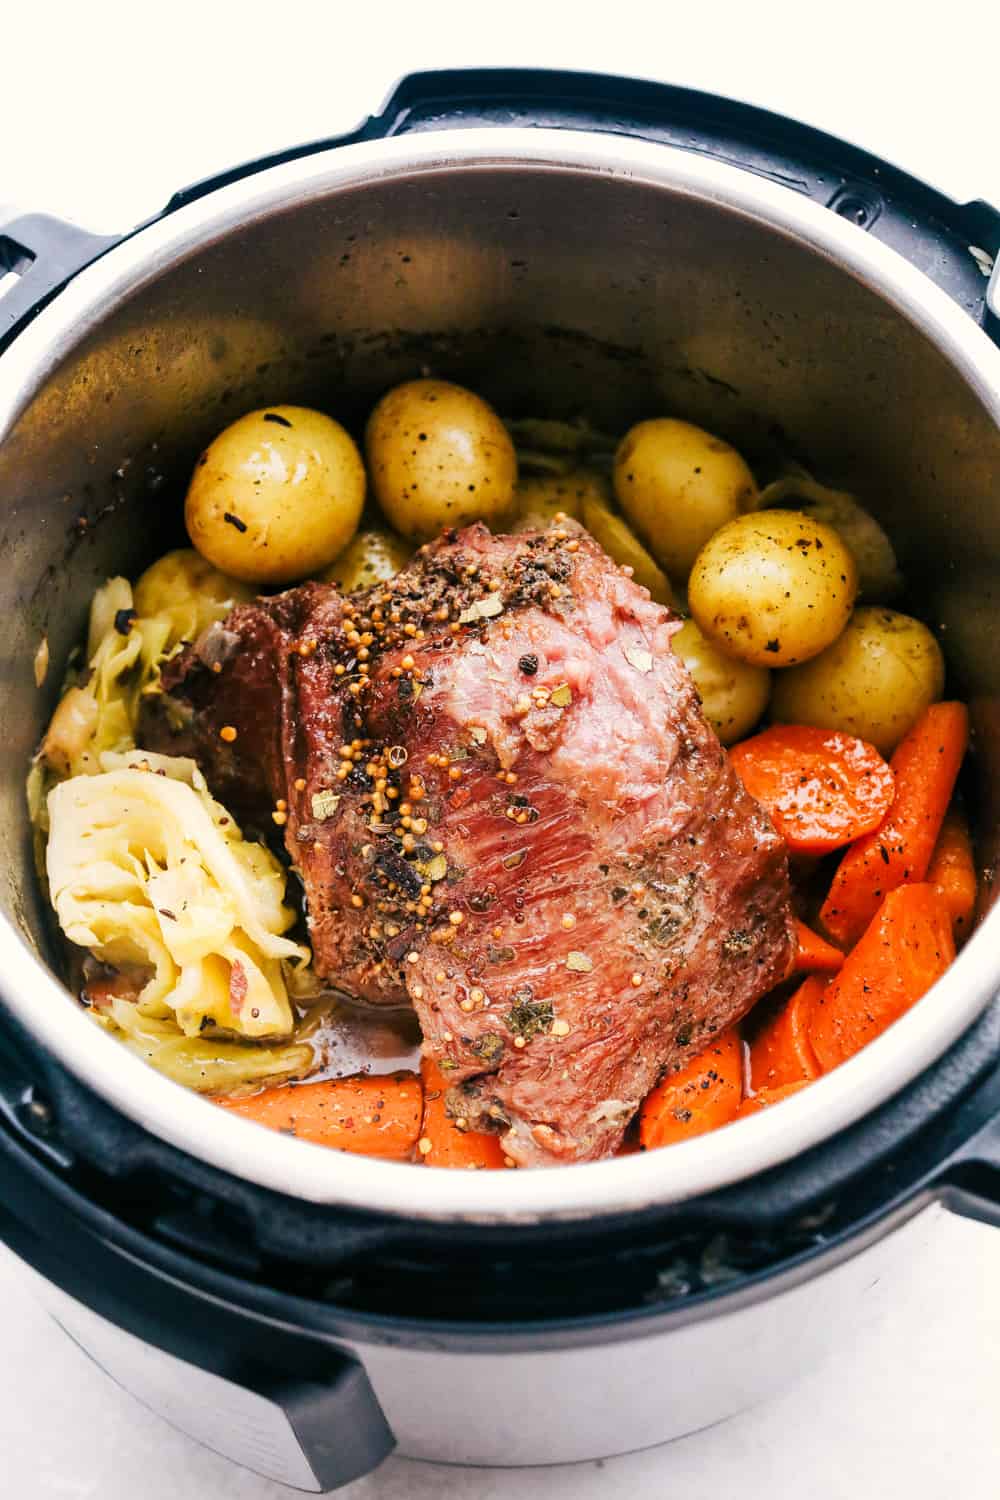
Putting the corned beef in the instant pot and adding the vegetables.

How to Buy Corned Beef

March is the perfect time to buy corned beef, although you can usually find it year round. It is mostly found in two different cuts. The flat cut brisket and the point cut. You can also sometimes find a corned beef roast, but they are not as popular since they have the least amount of fat and dry out easily.

Flat cut brisket and point cut brisket are the cuts you want to look for and buy. Flat is a favorite because it comes in a uniform shape and size. This makes the corned beef easy to cut and you can trim the fat off easy from the top. Point cuts usually have the most fat, but can be the most tender.  Either one will work beautifully for this Instant pot recipe.

Cooked corned beef with cabbage, potatoes, and carrots.

Tips for the Best Instant Pot Corned Beef

Leftover corned beef is divine! Make a Breakfast Corned Beef Hash or these Incredible Corned Beef Sandwiches!

  • Potatoes: To get the best results you want to use waxy potatoes that won’t break down as easily when cooked. Yukon golds or yellow potatoes, red potatoes and fingerlings are all ideal choices. Avoid russets, they can break down into mush when cooked.
  • Carrots:  Yes baby carrots can be used and are convenient, but if you have the time use large carrots peeled and chunked. They will give you better flavor and hold up nicely to the instant pot.
  • Pickling Spices: Almost all corned beef will come with a package of spices with it. This is the same as pickling spices and you can just use them for ease. If you do not have a packet use a combination of allspice berries, coriander seeds, mustard seeds, whole pepper seeds, bay leaves and whole cloves. Salt and pepper to taste.
  • Cut against the Grain: This is one of the most important steps for insuring tender, melt in your mouth meat. As you look at your corned beef you’ll notice how the strands of meat lay in one direction, usually lengthwise. You are going to want to cut against that or at a perpendicular angle. This automatically will help the meat be tender and not fibrous when you eat it.
  • Leftovers: Store leftovers tightly wrapped or in an airtight container for up to 5 days. You can freeze it for up to 3 months. Thaw and reheat as desired.

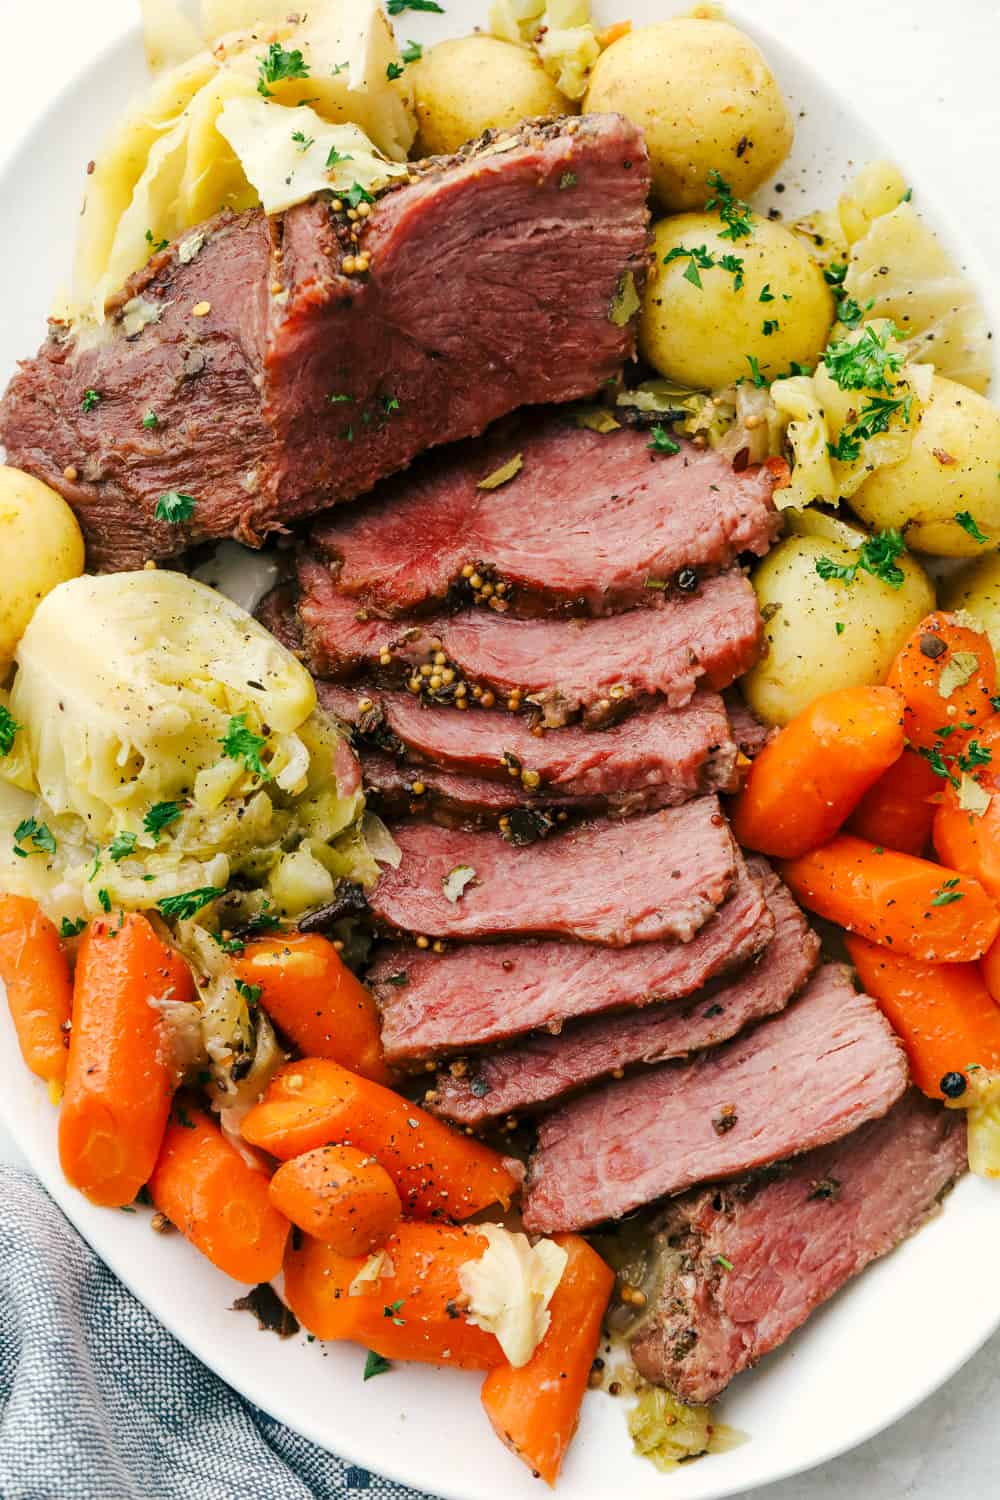
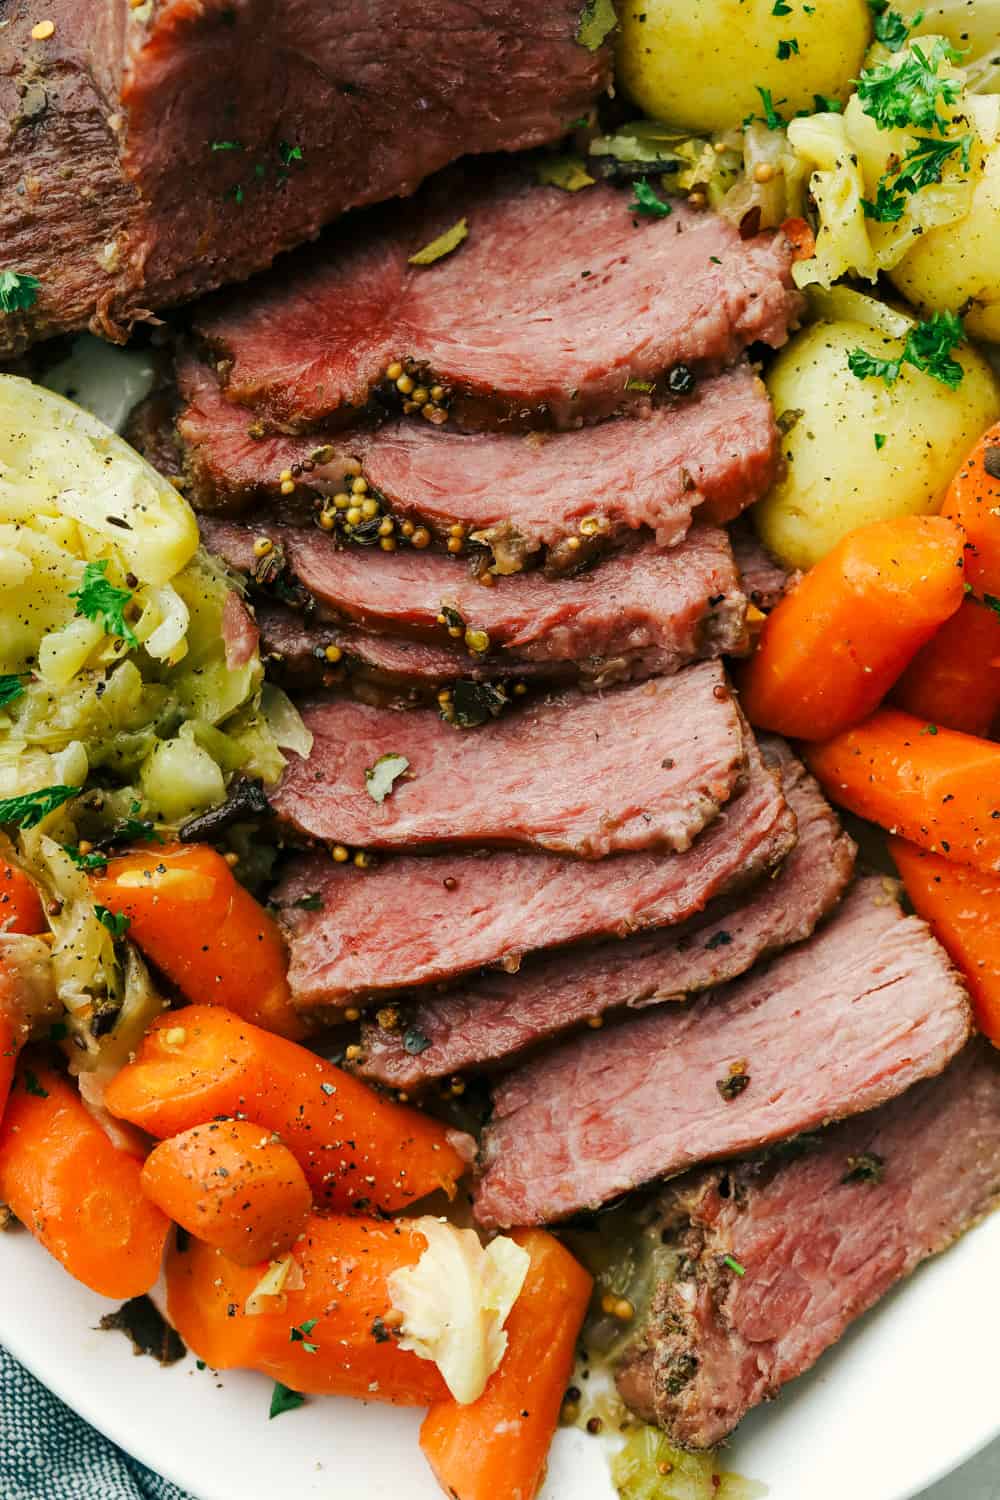
Sliced corned beef, cabbage, carrots, and potatoes on a plate.

More Recipes With Cabbage to Rediscover

Cabbage is wonderful little vegetable that gets overlooked sometimes. It is an exceptionally healthy food. Cabbage  is especially high in vitamins C and K. In addition, eating cabbage may even help lower the risk of certain diseases, improve digestion and combat inflammation. It also adds crunch, volume and taste to dishes. So add these tried and true recipes to add more cabbage to your life. It’s good for you!

Print

Instant Pot Corned Beef and Cabbage

Instant Pot Corned Beef and Cabbage will make your St. Patrick's Day a breeze. The beef is tender and the cabbage and potatoes is full of flavor, you will love this!
Course Dinner, Main Course
Cuisine Irish
Keyword Corned beef, Corned beef and cabbage, instant pot corned beef, instant pot corned beef and cabbage
Prep Time 5 minutes
Cook Time 1 hour 25 minutes
Total Time 1 hour 30 minutes
Servings 6 People
Calories 580kcal
Author Alyssa Rivers

Ingredients

  • 1 large onion quartered
  • 3-4 pound corned beef brisket
  • 4 cups water
  • 2 Tablespoons pickling spice
  • 4 large Carrots
  • 1 pound baby potatoes
  • 1 head cabbage quartered

Instructions

  • Add the onion to the bottom of your instant pot. Place the corned beef on top and sprinkle with pickling spice.
  • Add the water the instant pot and make sure the valve is turned to seal. Set the instant pot to high and cook for 80 minutes.
  • Once the time is up, carefully turn the valve to release and let the remaining pressure out. Remove the beef and onions from the instant pot and set it it aside to rest.
  • Take out two cups of the water and add the carrots, potatoes, and cabbage. Make sure the valve is turned to seal. Turn the pressure cooker to high for 5 minutes. Once the time is up then release the pressure. Once the pressure is released slice up the meat going against the grain and serve with the veggies.

Nutrition

Calories: 580kcal | Carbohydrates: 31g | Protein: 38g | Fat: 34g | Saturated Fat: 11g | Cholesterol: 122mg | Sodium: 2835mg | Potassium: 1460mg | Fiber: 8g | Sugar: 9g | Vitamin A: 8180IU | Vitamin C: 137mg | Calcium: 125mg | Iron: 5mg


from The Recipe Critic https://ift.tt/3vpVijb
https://ift.tt/30Nliqr

सोमवार, 15 मार्च 2021

Glazed Lemon Pound Cake

Birdseye view of a glazed cake on a sheet of baking paper.

This bright and zesty glazed lemon pound cake is buttery, soft and topped with an easy lemon glaze. It is perfect for lemon lovers!

If you’re a true lemon lover like me, try this Glazed Lemon Bread or Glazed Lemon Brownies as well.

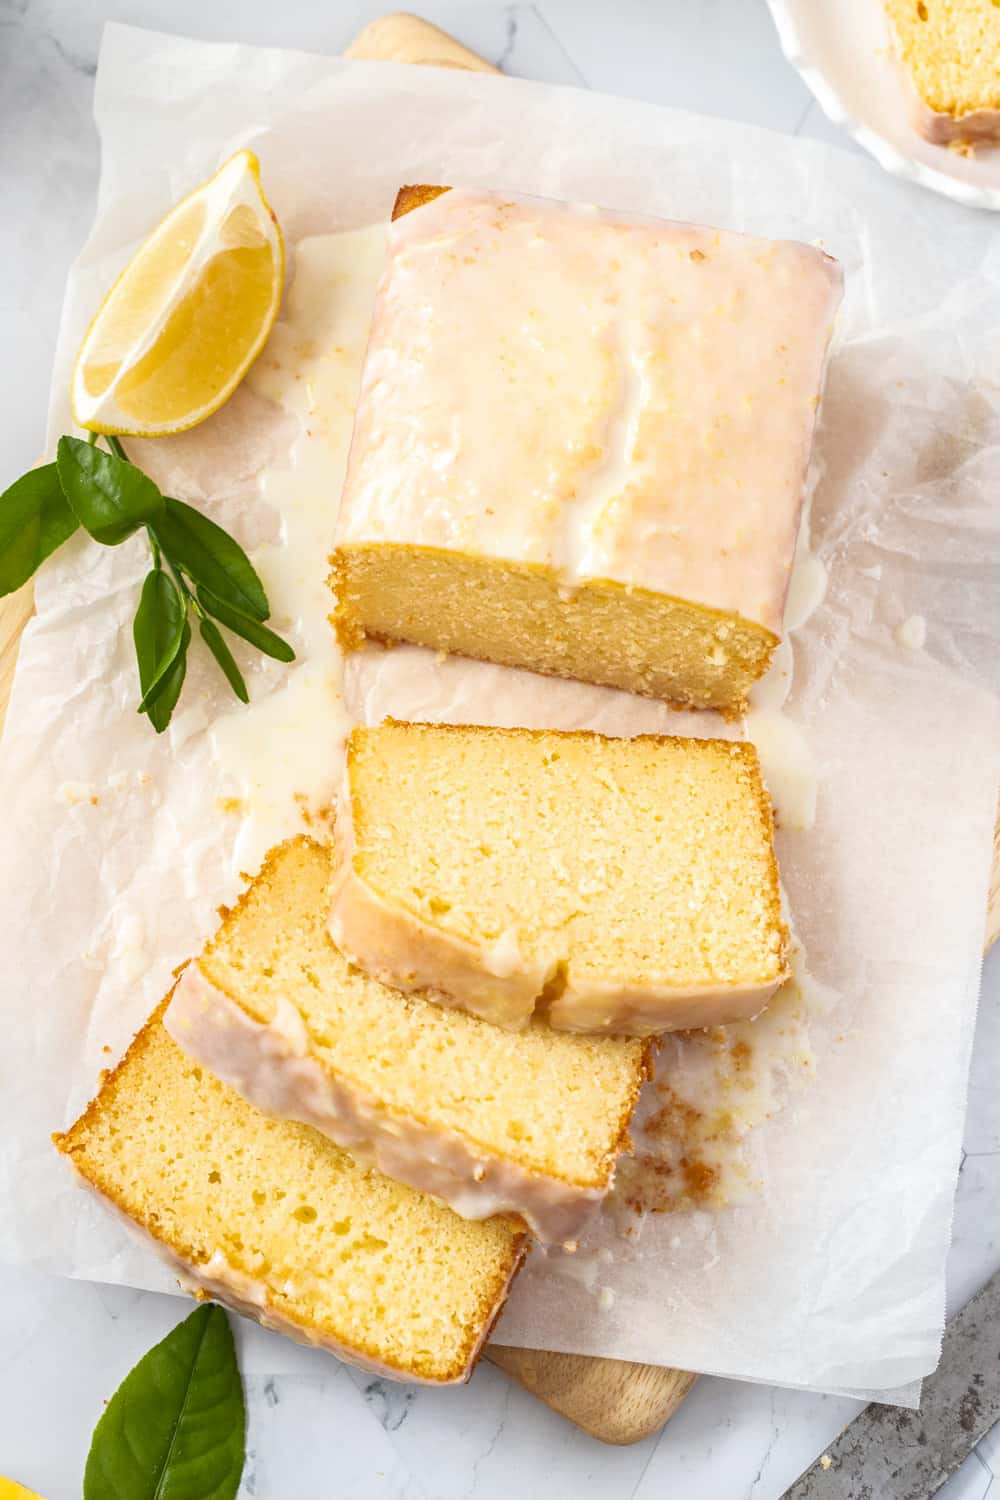
Birdseye view of a glazed cake on a sheet of baking paper.

Moist Lemon Pound Cake

Marie here from Sugar Salt Magic and I’m so excited to bring you this recipe. Aside from the uplifting aroma that fills your home while this cake bakes (reason enough to make it asap) the flavor and texture are just what you want from a lemon pound cake.

The crumb is soft but tight, the flavor is buttery and oh so lemony with lemon juice and zest starring in both the batter and glaze. This cake is easy to make and with the simple glaze poured over the top, perfect when you feel like a morning or afternoon pick me up.

What is a Pound Cake?

It’s all in the name. Traditionally a pound cake was made with a pound of flour, a pound of eggs, a pound of butter and a pound of sugar and sometimes a leavened. This results in a very rich and dense cake.leavened

Over time, the classic pound cake has been adjusted and adapted. Having no liquid in the traditional recipe, the cake could be prone to turning out a little dry. Not this one.

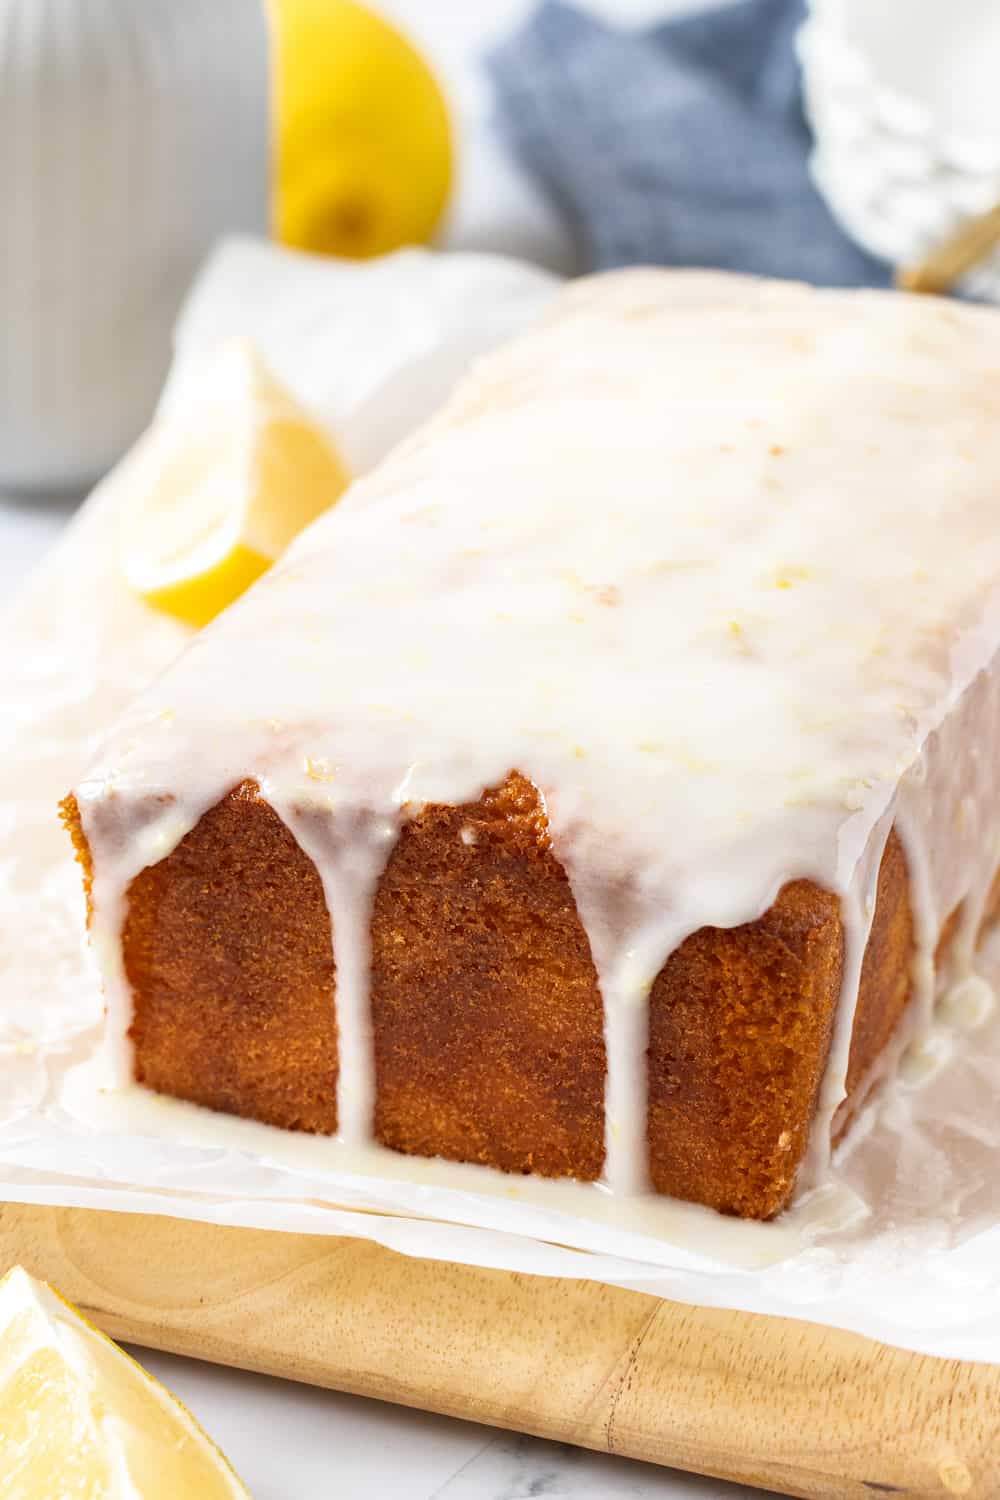
A loaf cake with glaze dripping down the sides.

Ingredients in Lemon Cake

Technically, this would be a half pound cake, having roughly half a pound of those classic pound cake ingredients like flour, butter, sugar and eggs. In addition, this one has these pantry staple ingredients.

  • Baking powder: to help it rise and lighten it up.
  • Salt: Just a touch for balance
  • Vanilla: for flavor and balance
  • Lemon: both zest and juice make this cake bright and zesty, while the juice adds some moisture.
  • Buttermilk: This helps to make the cake moist and tender.

How to Make The Best Lemon Pound Cake

This lemon pound cake has just a few simple steps and is simply glazed so it isn’t difficult to make. The cake batter will look like it’s split at various stages. Don’t worry, it will bake up perfectly. With buttermilk, lemon zest and juice, it has a high acid content which can react with the butter.

  1. Combine the dry ingredients.
  2. Cream together butter and sugar until pale and fluffy.
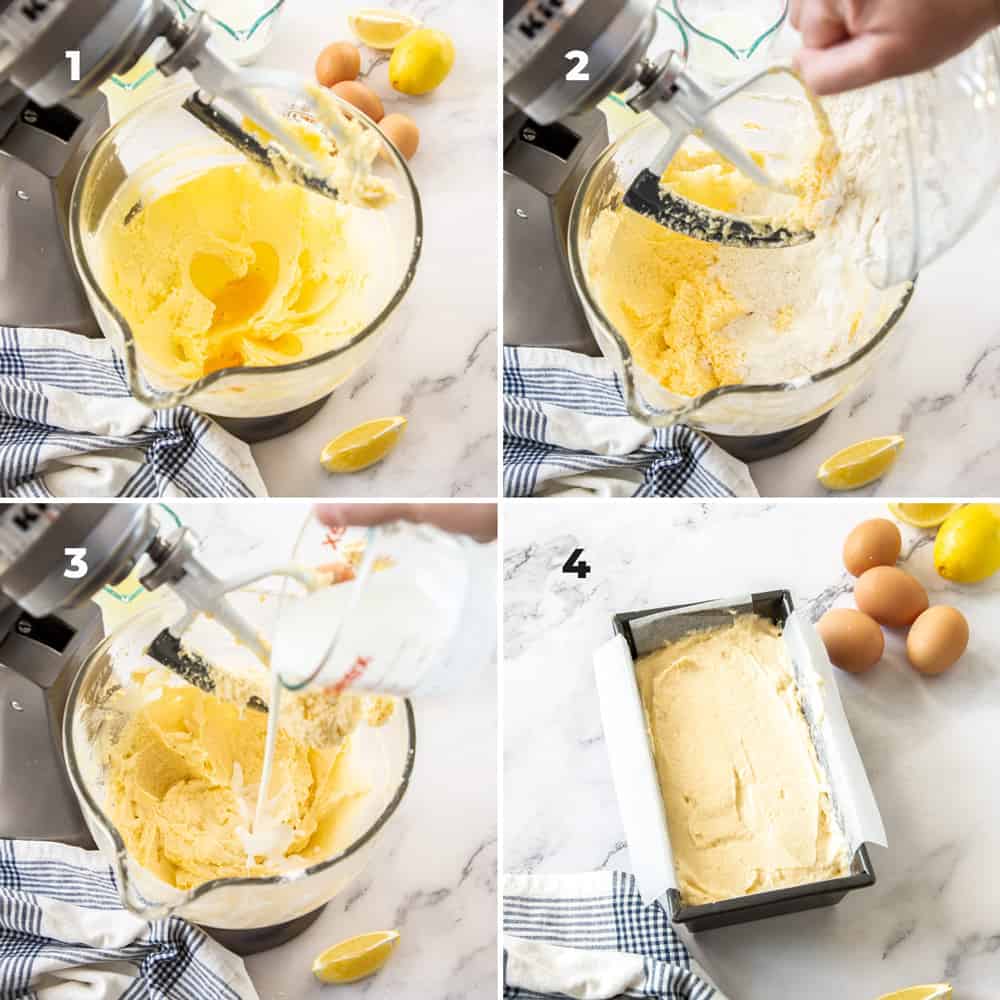
  3. Add the eggs (photo 1) one at a time and making sure to scrape down the sides of the bowl often.
  4. Add vanilla and zest and beat them in.
  5. Alternate the dry ingredients with the buttermilk and lemon juice (photos 2 & 3), stirring until just combined.
  6. Tip it into a lined loaf tin (photo 4) and bake for 50-60 minutes.
  7. Once out of the oven, wait 5 minutes before removing it from the tin and onto a cooling rack. Let it cool before glazing so the glaze doesn’t run straight off.
  8. For the glaze, mix together powdered sugar and zest then gradually add lemon juice mixing until it is just barely pourable.

4 images showing the steps to making pound cake.

Top Tips for Pound Cake!

  • The lemon juice and buttermilk add moisture to this cake but cakes, and particularly pound cakes can over-bake if you aren’t paying attention.
  • When baking with lemons, always zest them first, then juice them: it’s nearly impossible to do the other way round. I use a micro-plane to zest them.
  • Bring the butter, eggs and buttermilk to room temperature before starting. Cold ingredients don’t incorporate so well.

How to Know When Your Pound Cake is Done

Remember: all ovens vary and what takes an hour in mine may take 50 minutes in yours. Always check your bake 5-8 minutes (on longer bakes, 2-3 minutes on shorter bakes) before the recipe suggests by poking a toothpick into the centre.

  • If it comes out wet, it’s still not finished baking.
  • If it comes out with just a couple sticky crumbs on, this is perfectly baked. Remove it from the oven.
  • If it comes out with no crumbs attached, it’s already over-baked. Take it out and remove it from the tin immediately to reduce the risk of it cooking further and drying out more.

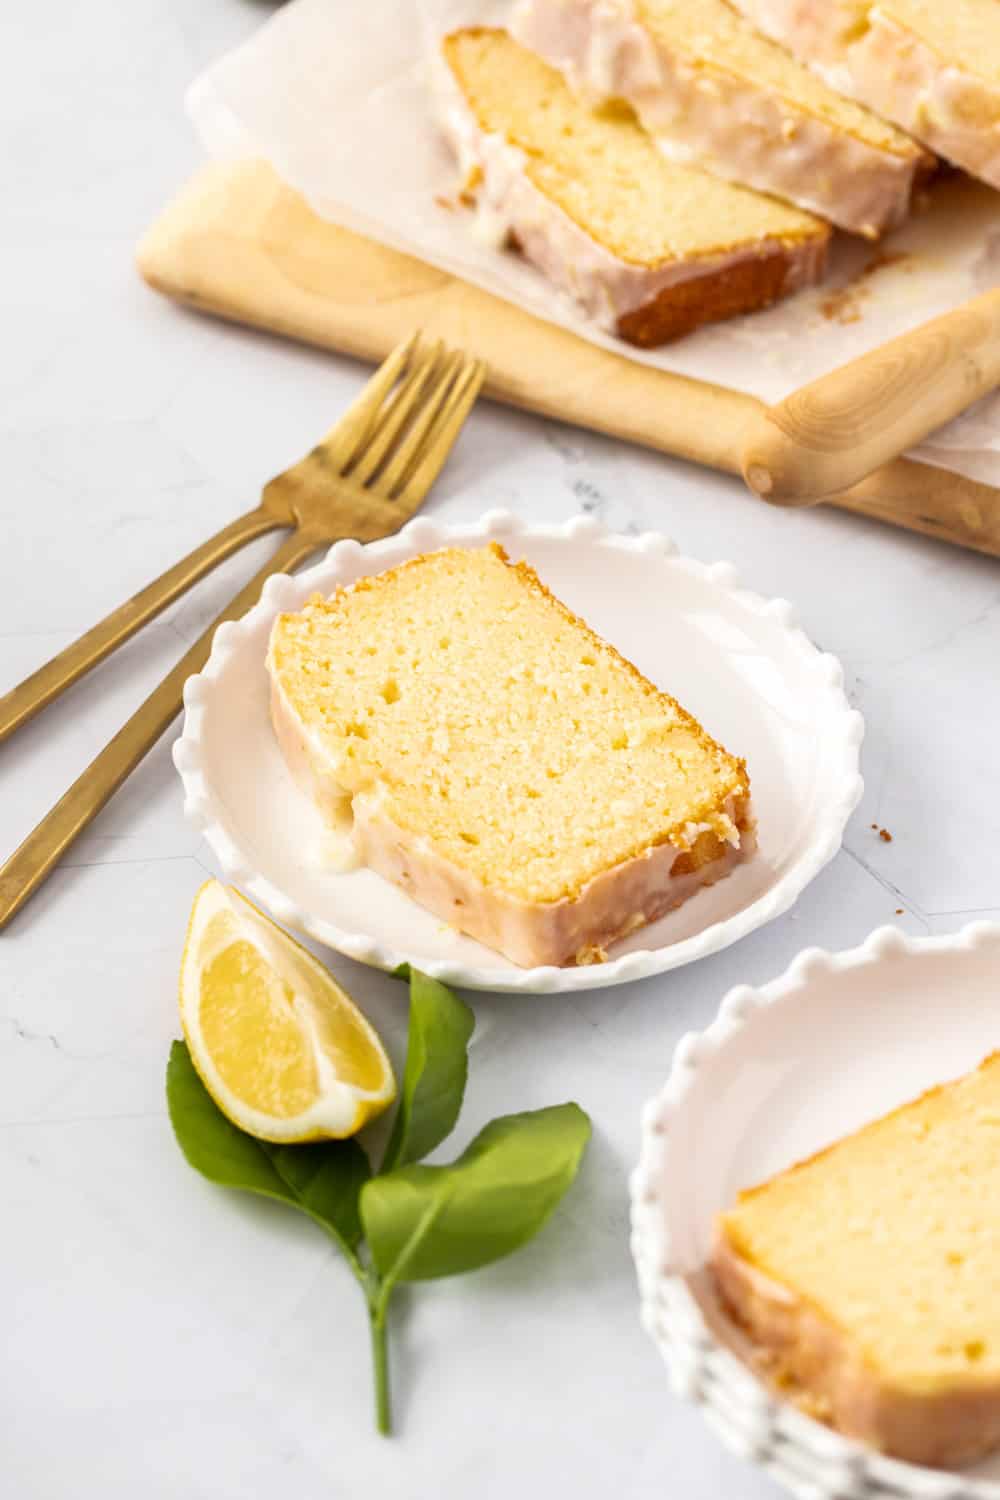
A slice of cake on a white plate with gold fork nearby.

Can I Freeze Glazed Lemon Pound Cake?

Lemon pound cake has a low moisture content so it’s best eaten within 1-2 days, however it freezes beautifully. Any leftovers can be wrapped tightly in plastic wrap and frozen for up to 3 months.

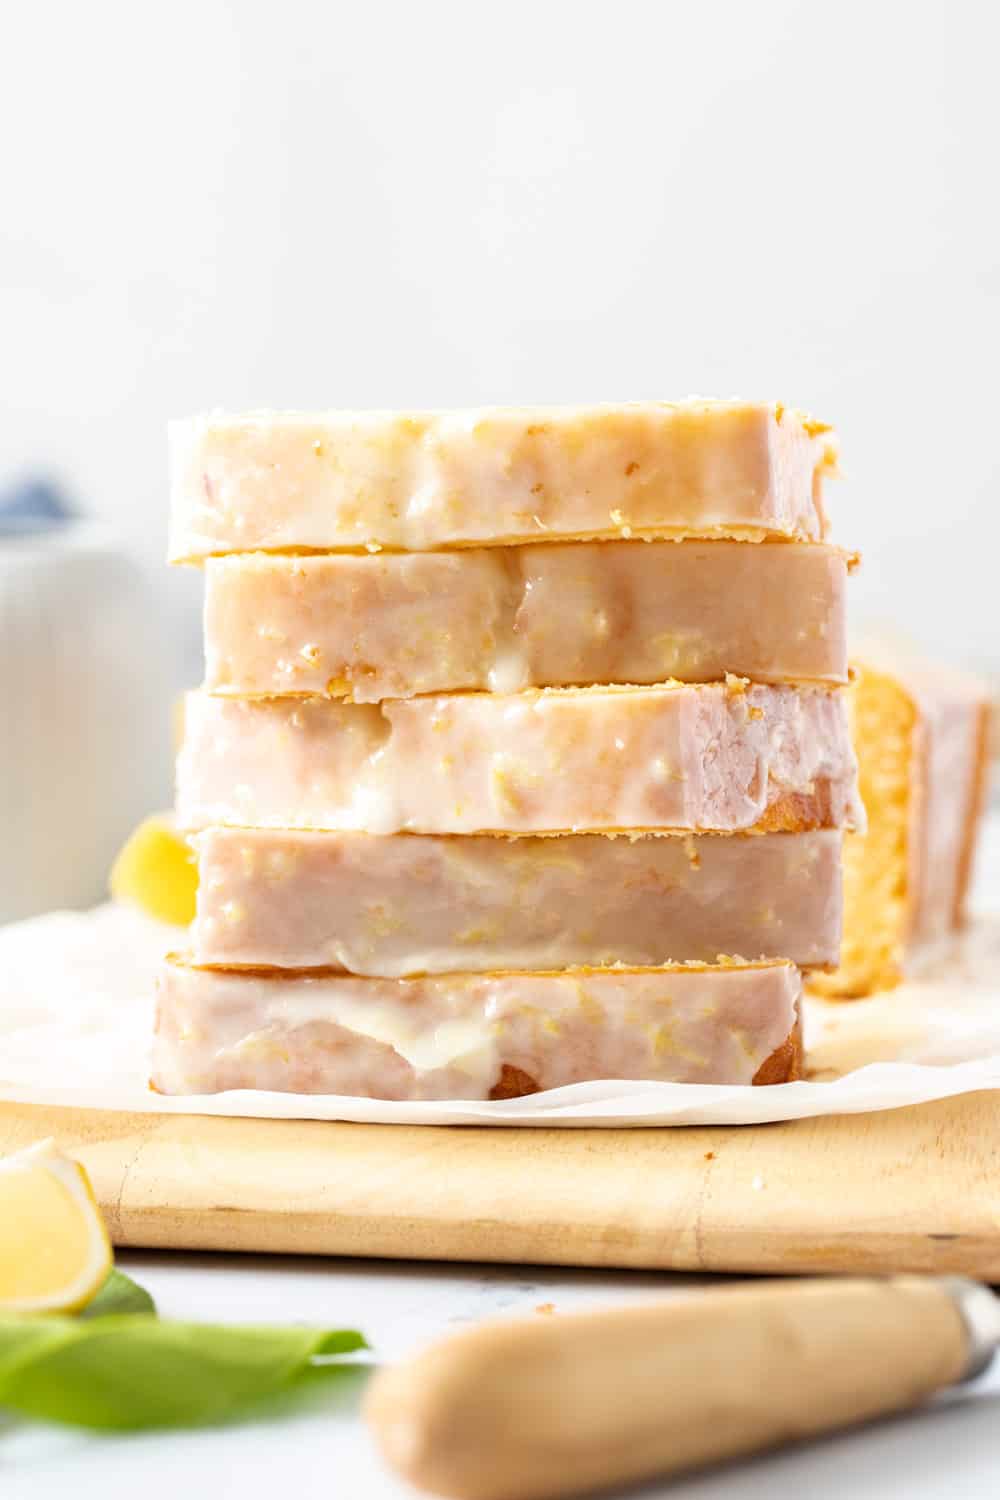
A stack of flat cake slices on a wooden board.

More Lemon Recipes You Will Love

Birdseye view of a glazed cake on a sheet of baking paper.
Print

Glazed Lemon Pound Cake

This bright and zesty glazed lemon pound cake is buttery, soft and topped with an easy lemon glaze. It’s perfect for lemon lovers.
Course Dessert
Cuisine Europe
Keyword glazed lemon pound cake, lemon pound cake
Prep Time 20 minutes
Cook Time 1 hour
0 minutes
Total Time 1 hour 20 minutes
Servings 10 Slices
Calories 371kcal
Author Marie Roffey

Ingredients

For the Cake

  • 1 ½ cups all purpose flour (195g / 6.8oz)
  • 1 teaspoon baking powder
  • ¼ teaspoon salt
  • 1 cup unsalted butter, softened (226g / 8oz / 2 sticks)
  • 1 cup white granulated sugar (200g / 7oz)
  • 4 large eggs, room temp
  • 1 teaspoon vanilla
  • 1 ½ tablespoons lemon zest
  • ¼ cup lemon juice
  • ¼ cup buttermilk, room temp

For the Glaze

  • 1 ¼ cups powdered sugar (163g / 5.7oz)
  • 1 teaspoon lemon zest
  • 6-8 teaspoons lemon juice

Instructions

Making the Cake:

  • Preheat the oven to 350F / 180C / 160C fan forced. Grease and line a 6 cup capacity loaf tin with baking paper so that its sticking up above the sides.
  • In a small bowl combine the flour, baking powder and salt, then whisk to combine well.
  • In a large bowl or the bowl of stand mixer with paddle attachment, beat the butter and sugar until lightened and creamy.
  • Beat in the eggs, one at a time, making sure each is fully incorporated before adding the next. Scrape the sides of the bowl from time to time.
  • Add the vanilla and lemon zest and beat to combine.
  • Add half the flour mixture and mix on low just until combined (no more).
  • Follow with the combined buttermilk and lemon juice, mix in, then the rest of the flour mixing until only just combined.
  • Tip the mixture into the prepared tin, then level out with a spatula.
  • Bake for 50-60 minutes until a toothpick comes out with a crumb or two attached.
  • Remove from tin after 5 minutes using the baking paper to lift it, then allow to cool completely before glazing.

Making the Glaze:

  • Mix together the icing sugar, zest and half the lemon juice. Slowly add more lemon juice until it gets to the desired consistency, then pour it over the cake.

Notes

You'll need 2-3 lemons for this recipe, depending on size and how juicy they are.

Nutrition

Calories: 371kcal | Carbohydrates: 50g | Protein: 2g | Fat: 19g | Saturated Fat: 12g | Trans Fat: 1g | Cholesterol: 49mg | Sodium: 62mg | Potassium: 78mg | Fiber: 1g | Sugar: 35g | Vitamin A: 568IU | Vitamin C: 5mg | Calcium: 28mg | Iron: 1mg


from The Recipe Critic https://ift.tt/3vtiKvF
https://ift.tt/3rKF8yq