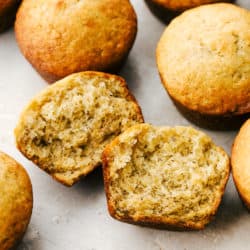
Banana Muffins are a great way to use mushy bananas. Quick and easy you can be eating these in no time, perfect for snacks or breakfast!
I love baked goods with banana in them, they are moist, tender and full of flavor. You have to try these blog favorites Banana Bread, Banana Pudding, and Banana Coffee Cake.

Banana Bread Muffins
I almost get giddy when I see my bananas start to turn really brown on the kitchen counter. It means I get to make banana something! Whether it’s Banoffee Pie, Cinnamon Swirl Banana Bread or these insanely delicious Banana muffins, I love it! These muffins are perfect for a quick breakfast of snack. Packed with flavor and simple to throw together you can have these in and out of the oven in no time.
I love it when I find a recipe that my kids will devour. This is one of those recipes. Muffins are the best! Instead of taking an hour to bake a loaf of bread I can take 20 minutes to make individual sized servings in a muffin tin. It makes waiting to eat them a lot more tolerable. Give them just enough time to cool slightly and then slather them with butter, so delicious!
Ingredients for Healthy Banana Muffins
These are all ingredients you probably have in your pantry right now. I like to always have these staples on hand so I can make these muffins or other goodies whenever I need, or want to!
- Bananas: Overripe and mashed
- Egg: Use a large or Extra Large egg.
- Vanilla Extract: The perfect complimentary flavor to banana.
- Butter: Adds moisture to the muffins.
- Brown Sugar: Adds a bit of sweetness but will also help the muffins be nice and moist.
- White Sugar: White sugar adds sweetness and helps them be soft and tender.
- Flour: I used all purpose flour, unbleached works too.
- Baking Soda: This is one of the leavening agents that will give the banana muffins their rise.
- Baking Powder: The other leavening agent needed for fluffy muffins.
- Salt: Salt balances and enhances the flavors.
- Cinnamon: The best spice to add to banana muffins, it is so good.
How to Make the Best Banana Muffins
Super easy and fast. It is the best way to use up those brown bananas.
- Prep: Preheat the oven to 375 degrees. Grease a muffin tin or line with muffin liners.
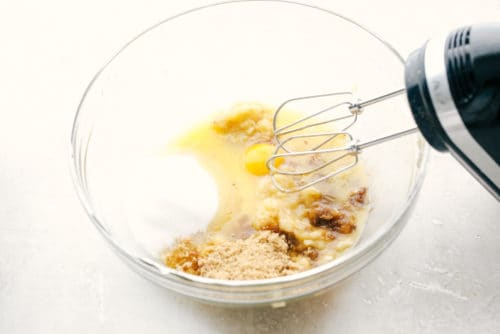
- Mix: In a large bowl, beat together the bananas, egg, brown and white sugar, vanilla, and melted butter.
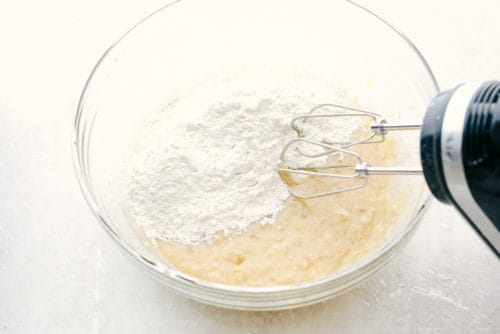
- Combine: In a different bowl, stir together the flour, baking soda, baking powder, salt and cinnamon.
- Put together: Combine the dry ingredients to the wet ingredients.
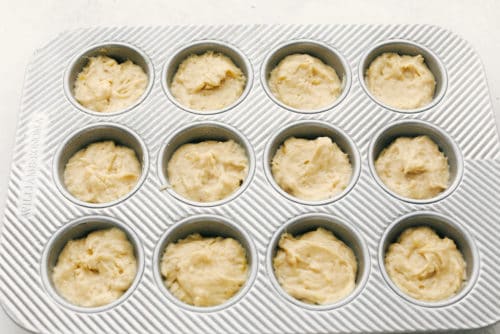
- Batter: Fill each muffin cup ¾ full of the batter.
- Bake: Bake for 18-22 minutes or until a toothpick comes out clean when inserted into the center of the muffins.

Tips For Easy Muffins!
Let’s face it, banana muffins beat out banana bread almost every time, just because they are faster and just as delicious. You do not lose out on the flavor, just the extra time!
- Bananas: The more ripe the banana the better the flavor. It’s also a lot easier to mash overly ripe brown yucky bananas then ripe green ones. If you know you want to make these and your bananas are not quite ripe, you can throw them in a brown paper bag for a day. If you need to ripen them right now, place bananas with the peel still on, on a cookie sheet and place in a 300 degree oven. When the peels turn black, they are ready to use. Let them cool slightly and mash away.
- Do Not Overmix: When muffins are not light and fluffy but short and dense, it is usually because the batter has been overmixed. If you are afraid of overmixing, mix it by hand.
- Make Extras: Trust me, this first batch of banana muffins is going to disappear fast! Make a double batch and freeze the extras for snacks or a breakfast down the road.
- Freeze and Store: Keep the muffins in an airtight container at room temperature for up to 4 days. Freeze in a freezer bag for up to 2 months. Thaw at room temperature or warm in the microwave.

Variations For Moist Banana Muffins
Use this banana muffin recipe as your base and then get creative with it.
- Nuts: Chopped pecans or walnuts add taste and texture:
- Chocolate: Banana and chocolate are an ideal combination. Use mini chocolate chips, regular chocolate chips, dark chocolate chips or even peanut butter chips!
- Other: Stir in oats, flaxseed meal, raisins, blueberries, or flaked coconut.
- Streusel: Whip up this quick and easy streusel and place on top before baking to add a bit more sweetness and crunch.
- Spread it: What you spread on these amazing banana muffins can be just as delightful. Besides butter, try a cinnamon butter, jam, peanut butter, cream cheese and honey.

Muffin Mania!
Muffins are the so fun to eat and so easy to make. Whether they are sweet or savory, they are perfectly proportioned and ready to eat. We love muffins at our house, they are just so delicious. I think it’s because they are so cute and little. Like a mini cake or bread that you can eat all by yourself. You do not have to share, it’s the best! Here are a few tried and true favorites from the blog to try and add to your muffin recipes!
- Lemon Poppyseed Muffins
- Perfect Pumpkin Muffins
- Apple Cream Cheese Crumb Muffins
- Easy Egg Muffins
- Strawberry Cheesecake Streusel Muffins
Easy Banana Muffins
Ingredients
- 3 large bananas mashed
- 1 large egg
- 1 teaspoon vanilla extract
- 5 tablespoons butter melted
- 4 tablespoons brown sugar
- 1/2 cup white sugar
- 1 1/2 cups white flour
- 1 teaspoon baking soda
- 1 teaspoon baking powder
- 1/2 teaspoon salt
- 1/4 teaspoon ground cinnamon
Instructions
-
Preheat the oven to 375 degrees F. Grease a muffin tin or line with muffin liners.
-
In a large bowl, beat together the bananas, egg, brown and white sugar, vanilla, and melted butter.
-
In another bowl, stir together the flour, baking soda, baking powder, salt, and cinnamon. Combine the dry ingredients to the wet ingredients.
-
Fill each muffin cup ¾ full of the batter.
-
Bake for 18-22 minutes or until a toothpick comes out clean when inserted into the center of the muffins.
Notes
Nutrition
from The Recipe Critic https://ift.tt/2QxR60L
https://ift.tt/3cZxwBZ