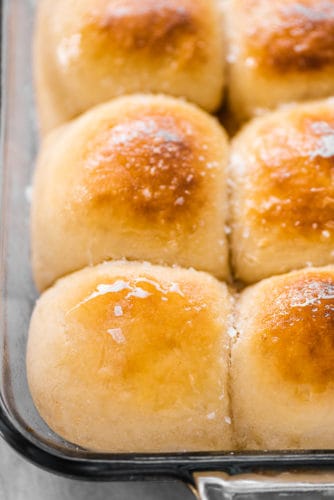
These potato rolls are light, fluffy, and absolutely delicious. They make the perfect dinner buns and are great for sandwiches and dipping into soup, too.
Complete the meal with Roast Lamb, Mashed Potatoes, and some Stuffing.

Potato Buns
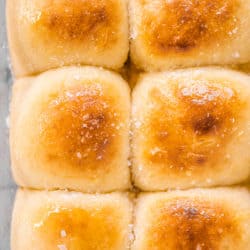
Dinner buns don’t get any lighter or fluffier than these potato rolls. They’re made with mashed potatoes in the dough, which keeps them unbelievably soft. You’ve probably tried potato rolls from your local grocery store or bakery so you know how good they can be. But homemade is so much better. And when you serve them still slightly warm from the oven and spread with salted butter they are little bites of heaven.
How to Make this Potato Roll Recipe?
Potato rolls are yeast bread, which means that they take a little time to make as you need to let them rise. But don’t worry, they’re very easy to make. Here’s how you do it:
- Make mashed potatoes with lots of butter and milk. Easy!
- Mix a little sugar into some of the potato cooking water (or plain warm water) then add the yeast. After a few minutes, it will start to bubble which means it’s ready to use.
- Now add the mashed potatoes, eggs, flour, and salt to the yeast and mix it until the dough forms. Now let it rise for one hour.
- Time to make the buns! Divide the dough into buns and put them in a baking dish or on a sheet pan. Let them rise for one more hour.
- All that you have to do now is pop them into your oven.
Making potato buns takes a little time, but it’s really easy. (Full recipe instructions are in the recipe card below.)

Can I Use Leftover Mashed Potatoes To Make This Recipe?
Yes! Leftover mashed potatoes work well, however, you will need to adjust the amount of flour you use. Start by adding 2 tablespoons of extra flour at a time until the dough comes together and is no longer sticky.
Pro Tip!
Let your leftover mashed potatoes come to room temperature or warm them slightly in the microwave before using them in this recipe.
How Long Do Potato Rolls Last?
Potato rolls will last for up to 7 days. But we find that they are best eaten within 4-5 days.
What Is The Best Way To Store These Buns?
To store potato rolls, put them into a sealable container and store them on your counter.

Potato Roll Variations
- Cheesy: add ½ cup grated cheddar or parmesan cheese.
- Herbed: add 2 teaspoons Italian seasoning.
- Sweet: Add ⅓ cup of sugar.
- Buns: form them into hamburger-sized buns and bake them on a tray.
How to Serve Potato Rolls
These rolls are a MUST with any big holiday meal. We’ll be serving them beside some classic honey glazed ham at Easter for sure! But they’re just as welcome at a Sunday pot roast dinner or with garlic roasted chicken with vegetables.
But it doesn’t stop there. Potato rolls make amazing sandwiches. Fill them with leftover butter herb turkey or your favorite deli meats. Or try stuffing them with the best egg salad. Or butter up a bun and dunk it into your favorite soup.
With so many delicious ways to eat potato rolls, they won’t last long!

Popular bread recipes
- Easy Cheesy Garlic Bread
- Focaccia Bread
- Buttery Beer Bread
- Grandma’s Perfect Homemade Bread
- No Yeast Bread with Herbs and Cheese
Potato Rolls
Ingredients
- 1 (15-ounce) Russet potato, peeled and quartered
- ¼ cup softened butter
- ¼ cup milk
- 1/2 cup potato cooking water
- 1 tablespoon sugar
- 2 ½ teaspoons active-dry yeast
- 2 large eggs
- 4 ½ cups all-purpose flour
- 1 teaspoon salt
Optional Honey Butter
- 1 tablespoon butter
- 1 tablespoon honey
- 1 teaspoon flaky sea salt
Instructions
-
Put the quartered Russet potato into a pot and cover it with water. Bring the pot to a boil over high heat and continue to boil until the potato is soft, about 10 minutes. Reserve ½ cup of the cooking water then drain the potatoes.
-
Add the butter and milk to the potatoes and mash well.
-
Put the potato water into the bowl of your stand mixer or large mixing bowl and add the sugar. Let the water cool until it is lukewarm then add the active dry yeast. Let the yeast bloom for 5 minutes.
-
Add the mashed potatoes and eggs to the bowl and mix using a dough hook or a wooden spoon.
-
Add the flour and salt and continue to mix in your stand mixer for 2-3 minutes, or until the dough comes together into a ball. If you're mixing the dough by hand, turn it out onto your counter and kneed it for 5 minutes.
-
Transfer the dough to a lightly oiled bowl and cover tightly. Place the bowl in a warm (not hot) place for 1 hour, or until the dough has doubled in size.
Bake as pull apart potato buns
-
Divide the dough into 15 balls. Place each ball seam-side down in a lightly oiled baking dish. They will be quite close together. Cover the baking dish and let the buns rise for 45 minutes.
-
Preheat your oven to 350 degrees. Bake the buns for 30-35 minutes, or until they are golden on top and they reach an internal temperature of 200 degrees Fahrenheit.
-
Let the buns cool before removing them from the baking dish.
Bake as individual potato buns
-
Divide the dough into 16 balls. Place each ball seam-side down on a lightly oiled baking sheet, spaced 2-inches apart. Bake the buns for 20-25 minutes, or until they are golden on top and they reach an internal temperature of 200 degrees Fahrenheit.
-
Let them cool slightly before serving.
Honey Butter Buns
-
Melt the butter and honey in a small bowl. Once the buns have cooled, brush the tops of the buns with the honey butter then sprinkle with some flaky sea salt.
Notes
Nutrition
from The Recipe Critic https://ift.tt/39PFr4j
https://ift.tt/3fwUvr9