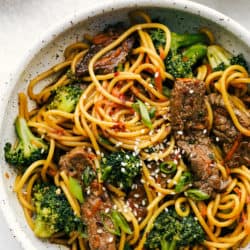
Beef and Broccoli Lo Mein has melt in your mouth tender beef with broccoli, carrots, and noodles. The sauce adds such amazing flavor to this incredibly easy meal!
Try this beef and broccoli combo in a slow cooker or insta pot too. Slow Cooker Beef and Broccoli or Insta Pot Beef Broccoli are two flavorful recipes your whole family will enjoy.

20 Minute Garlic Beef and Broccoli Lo Mein
Quick and easy meals to make for your family are always top priority. I especially love creating easy meals that don’t require a lot of effort, but are absolutely delish! For example, this Beef and Broccoli Lo Mein is a tried and true family favorite of ours. The beef and broccoli coated in the sticky and sweet sauce is a dinner we all crave often!
This is THEE perfect meal to make for your family and especially for the busy back to school time. I put this meal together in under 20 minutes without rushing around. It is simple and easy to throw together at the last minute or to make ahead. This is the perfect filling and satisfying dinner at home and I know that you are going to love it as much as we did!
Ingredients for Beef and Broccoli Lo Mein
This list of ingredients may look long, but don’t worry, you probably have most of these items on hand. Traditional asian ingredients like hoisin sauce, soy sauce, and sesame oil are staples you will use again and again for delicious asian flavors. This Garlic and Beef Broccoli Lo Mein also uses a little bit of garlic, brown sugar, and pepper give the best spice to the sauce!
- Lo mein noodles or spaghetti noodles: Either will be delicious!
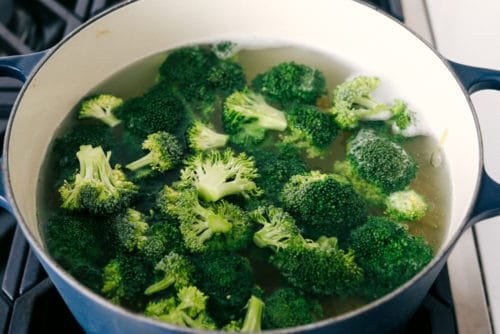
- Broccoli florets: Add to boiling water in the last 5 minutes of cooking the pasta.
- Olive oil: Coat skillet with oil before adding in steak to cook it perfectly.
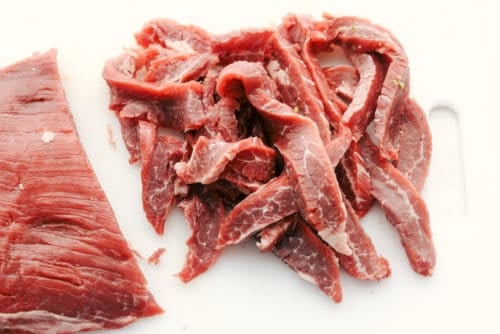
- Flank steak: sliced against the grain
- Garlic cloves: Minced will give a great flavor to the steak.
- Carrot: Shredded carrots quickly cook in the skillet with garlic after steak is done.
- Brown sugar: Measure packed for a great rich sweetness in the sauce.
- Soy sauce: Reduced-sodium adds a perfect amount of saltiness.
- Hoisin sauce: Adds thick glaze-like texture and sweet and salty flavor.
- Sesame oil: Combine with soy sauce, hoisin, ginger, and seasonings for the perfect sticky-sweet sauce.
- Ground ginger: Warm spicy flavor that is a little sweet.
- Crushed red pepper flakes: Adds a bit of heat.
- Pepper: To taste!
Let’s Make Lo Mein!
Beef and Broccoli Lo Mein is so easy to put together with just 2 pans and 20 minutes. It is a restaurant quality meal that you can make at home.
- Cook pasta: In a large pot with boiling water, cook the noodles according to package directions. Add the broccoli the last 5 minutes of cooking and let them cook until tender. Drain the noodles and broccoli.
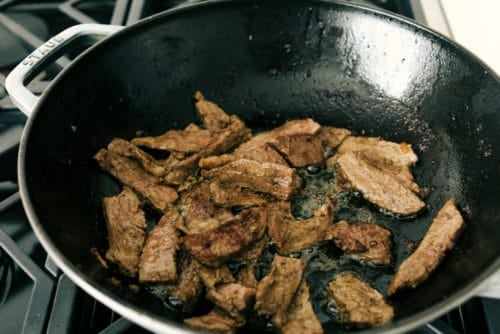
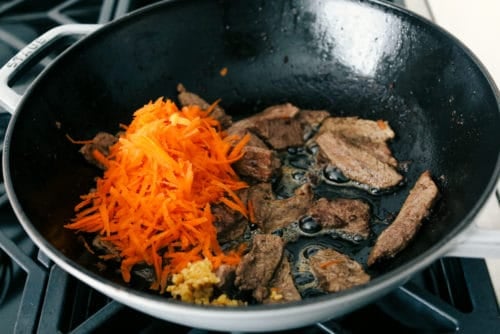
- Cook steak: While the pasta is cooking, add olive oil to a medium sized skillet. Cook the steak until no longer pink. Add the garlic, and carrots and cook for a minute more.
- Mix sauce: In a small bowl whisk together the brown sugar soy sauce, hoisin sauce, sesame oil, ginger, red pepper and pepper.
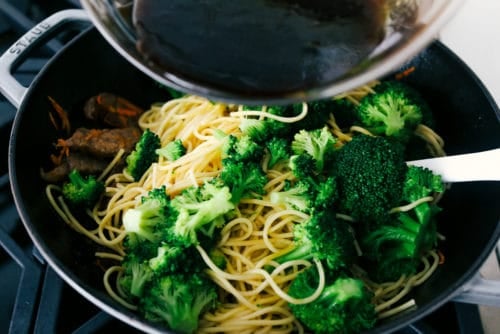
- Toss everything together: Add the spaghetti to the skillet and pour the sauce on top and toss until incorporated.

Variations of Lo Mein
Traditionally Lo Mein is a stir fry meal that is made up of noodles tossed with veggies or meats and an asian sauce. The great thing about it is that you can customize this incredible mixture of flavors and textures depending on what veggies and meats you have on hand. Variations will make this meal more convenient and fast, while still giving the same great tasting results!
- No noodles: Leave out the noodles for a simple veggie and meat stir fry. The thick and sweet sauce is insanely delicious and gives the dish so much flavor you will not even miss those carbs!
- Protein: Swap out the beef for chicken or shrimp if that’s what you have handy. Also try Chicken Chow Mein or Shrimp Stir fry for great tasting recipes your family will go crazy over.
- Veggies only: Leave out the meat for a delicious vegetarian version of this meal. For more details on how to create the BEST veggie Lo Mein be sure to read my 20 Minute Vegetable Lo Mein recipe. Easiest Vegetable Stir Fry is a great recipe to check out too!
Can You Make Beef and Broccoli Lo Mein Ahead?
Yes! This is a fantastic recipe to make ahead as part of your family’s meal prepping! Allow it to cool completely and store in an airtight container. It will remain good in the refrigerator for 3-4 days. Or, freeze it for up to 6 months. Thaw in the refrigerator then heat on a skillet until warm throughout.

More Savory Beef and Broccoli Recipes
- Mongolian Beef and Broccoli
- Slow Cooker Cashew Beef and Broccoli Stir Fry
- Garlic Beef and Broccoli Noodles
- Slow Cooker Korean Beef
- Super Easy Mongolian Beef
20 Minute Garlic Beef and Broccoli Lo Mein
Ingredients
- 8 ounces lo mein noodles or spaghetti noodles
- 3 cups broccoli florets
- 1 Tablespoon olive oil
- 8 ounce flank steak sliced against the grain
- 3 garlic cloves minced
- 1 medium carrot shredded
- ¼ cup packed brown sugar
- ¼ cup reduced-sodium soy sauce
- 2 Tablespoons hoisen sauce
- 2 teaspoons sesame oil
- ¼ teaspoon ground ginger
- ¼ teaspoon crushed red pepper flakes
- ¼ teaspoon pepper
Instructions
-
In a large pot with boiling water, cook the noodles according to package directions. Add the broccoli the last 5 minutes of cooking and let them cook until tender. Drain the noodles and broccoli.
-
Cut the flank steak across the grain in ¼ inch strips.
-
While the pasta is cooking, add olive oil to a medium sized skillet. Cook the steak until no longer pink.
-
Add the garlic, and carrots and cook for a minute more.
-
In a small bowl whisk together the brown sugar soy sauce, hoisin sauce, sesame oil, ginger, red pepper and pepper.
-
Add the spaghetti to the skillet and pour the sauce on top and toss until incorporated.
Video
Notes
Nutrition
from The Recipe Critic https://ift.tt/2RYByP9
https://ift.tt/3rO5VsZ