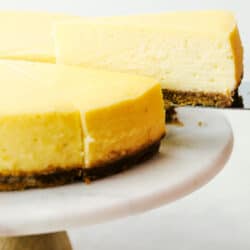
New York Cheesecake is a smooth, creamy dessert that is decant and always a favorite! This is an easy cheesecake that anyone can make.
Rich in flavor cheesecake is always gorgeous looking and tastes impeccable! Try these cheesecake favorites for your next party like this No-Bake, Mini or Dessert Cups.

Truly the BEST Cheesecake Ever
When you walk out with this rich decadent creamy dessert in your hands, you are going to become the most popular person in the room. Everyone loves a good cheesecake, but this is an incredible cheesecake, that surprisingly simple to make. Anyone can do this and become the hero of dessert. Cheesecake is a dessert that will be devoured, so be prepared. You may not have very many leftovers.
A wonderful thing about this New York Cheesecake, is it is a blank canvas of richness ready to be topped with your favorites. But it can also stand alone.You do not need to know all the ends and outs of making a cheesecake, I will give them to you here. If you haven’t attempted a cheesecake before, this is the recipe to try it with. Everyone loves a good cheesecake, and this one will not disappoint.
Perfect Cheesecake Ingredients
Super simple ingredients! Most of these ingredients you already have in your pantry.
- Graham cracker crumbs about 12 crackers: Crush them easily in a food processor if you have one. Or pound in a ziplock bag with a rolling pin.
- Sugar: White sugar adds just enough sweetness to the crust.
- Butter melted: This will combine the crust ingredients together and make them stick into the perfect crust.
- Pinch salt: This will balance the sweetness so do not leave it out.
- 2 lbs cream cheese softened (4 8oz packages): I take out my cream cheese while I prepare and bake the crust, at least a good 30 minutes will do.
- Sour cream: Adds a beautiful tang to the cream cheese and lightens it so it is not too heavy.
- Sugar: Adds the sweet we all love.
- Eggs: Use room temperature eggs for the best results. Remove them from the fridge when you take out your cream cheese.
- Vanilla: Use a good quality vanilla for a rich flavor.
- Lemon zest: You are going to love the zing it creates,
How to Make the Crust
Simple and delicious, this buttery sweet crumb crust is the perfect bottom layer for New York Cheesecake!
- Prep: Preheat oven to 325. Prepare your springform pan by spraying with cooking spray, placing a parchment round on the bottom, and spraying the top of the parchment with cooking spray.
- Combine: Mix graham cracker crumbs, sugar, and melted butter together. This should resemble damp sand.
- Press: Pour your crumb mixture into the prepared springform pan and press evenly into the pan. You can use the bottom of a flat glass or a flat measuring cup to really press it in well and get a nice, even crust.
- Cook: Bake for 10 minutes.
- Cool: Allow cooling completely.

How to Make a New York Cheesecake with no Cracks
Whether there is a crack or not in your New York Cheesecake will not affect the taste at all, this is all about being pleasing to the eye. When I am eating cheesecake, it really does not matter to me how it looks. These are just some great tips to help try and avoid the cracks.
- Cream: Add your softened cream cheese to the mixing bowl of your stand mixer and beat with a paddle at medium/high speed for about 1 minute. Scrape down the sides and bottom of the bowl and beat for a few seconds more.
- Add: Pour the sugar and sour cream into the mixer and mix at medium/low speed until just combined. Scrape the bowl again and mix 10 seconds.
- Eggs: Crack the eggs into the bowl and beat on low speed until combined, about 30 seconds-1 minute. Scrape the bowl again.
- Flavor: Add vanilla and lemon zest. Beat until just combined. At this point your batter should be smooth and fairly runny.

Prep the Pan for Baking
- Water prep: Using 18 inch heavy-duty aluminum foil, wrap the outside of your springform pan with 4 sheets of foil. You can use regular foil, but it may take a couple more sheets to ensure the water does not get into your pan.
- Situate: Place your wrapped pan in a deep roasting pan. You can alternatively use a baking sheet, so long as the sides are about 2 inches deep.
- Pour the batter: Add your cheesecake batter to the springform pan.

Baking the Cheesecake
- Water: Using very hot water, add water to the baking sheet/ until thee is about 1 ½ inch of water around the springform pan. On a rack in the lower 3rd of the oven, carefully move your pan into the oven.
- Cook: Bake for 1-1 ½ hours. After about an hour of baking, check the cheesecake’s consistency. A slight jiggle of the pan (while still in the oven) should tell you if it’s ready or needs more time. The cheesecake should be jiggly, but not liquid. If it seems very liquidy still, give it 15 more minutes and check it again.
- Cool: Once the cheesecake is firm, yet jiggly, turn the oven off but leave the cheesecake in the oven for another hour or so, until the oven has cooled down. Resist the temptation to open the oven during this time! The purpose of this step is to allow the cheesecake to cool slowly as the oven cools. Doing this will prevent it from cracking, as one of the biggest reasons cheesecakes crack is the drastic temperature change going from the hot oven into the much cooler kitchen.
- Remove: Once the oven and the cheesecake are cooled, remove from the oven and carefully remove the foil lining the pan.
- Refrigerate: Chill in the fridge for at least 6 hours.
- Release: Before serving, run a knife around the edge of the pan to ensure an easy release when the springform is removed.
- Top it: Top with desired toppings and enjoy!

Tips For The Best New York Cheesecake
I am not sure I have ever had a bad cheesecake, but this is definitely the BEST I have ever made or had. Here are some tips to make yours the same.
- Use Full Fat: For the best consistency and richness in your cheesecake use full fat cream cheese and sour cream. Now is not the time to use full fat. Save that for your other recipes, you will love the difference it creates when seeing how velvety smooth it is.
- Room Temperature Ingredients: To create that smooth luscious filling you will want all your ingredients (cream cheese, sour cream, eggs, etc) at room temperature. If your ingredients are too cold they can cause lumps. Take your ingredients out and let them sit for up to 2 hours.
- Do Not Overbeat: When you overbeat your batter, it will put too much air in the mixture, which can cause it to split or rise and fall drastically. Beat with a paddle on low to medium speed and stop as soon as it is all mixed.
- Grease Your Spring Form Pan: Even if your springform pan is non-stick you will want to grease it. Lightly oil with a cooking spray or with some cold butter rubbed over all the surfaces very lightly. The extra work is worth the peace of mind that it will come out.
- Keeping it Moist: You may shudder at the fact you must cook your cheesecake in a water bath. But it is the only way to guarantee the creamiest most decadent New York-style cheesecake. If you do not want to place the cheesecake in the water bath you can achieve the same results by putting the pan of water on the rack directly beneath the cheesecake.
- No Peeking: After you have gone to all that trouble of the water bath, you need to let it do its job. Resist the urge to open the oven and peek at your cheesecake. You will release all that hard-earned steam and could cause your cheesecake to crack. Exposing the cake to extreme temperatures is not ideal.
- Let it Cool: You will know your cheesecake is done when there is a slight wobble to the center. Do not stick a knife or a thermometer inside it. It will crack it. Once it is done, turn off the oven and let it come to room temperature inside the oven. This takes about an hour and helps it from cracking. Remove from oven and place in the fridge for 6-8 hours or overnight.

What to Top Your New York Cheesecake With
This is a gorgeous tasty stand alone dish, or you can top it to your heart’s content. I like to have lots of topping choices available for people to choose from. Almost like a cheesecake topper buffet.
- PIe Filling: Use your favorite, think cherry, strawberry, blueberry, apple and peach.
- Sauces: A good drizzle of chocolate or caramel are good starters. But you can use this amazing Lemon Curd, Strawberry Sauce or this tangy Cranberry Sauce that is so good.
- Fresh Fruit: The options here are limitless, top with whipped cream too.
- Crushed Cookies or candy: Oreos, Nutter Butters, chocolate chips, snicker bars and heath bars are all good!

Related Recipes
Desserts
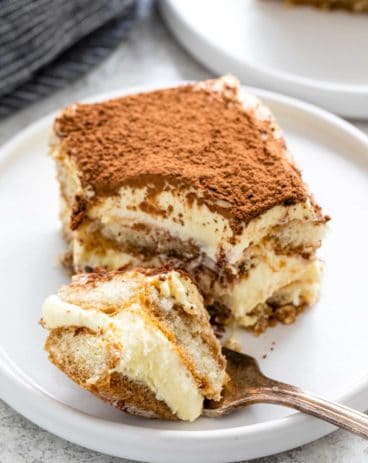
Easy Tiramisu Recipe
Desserts
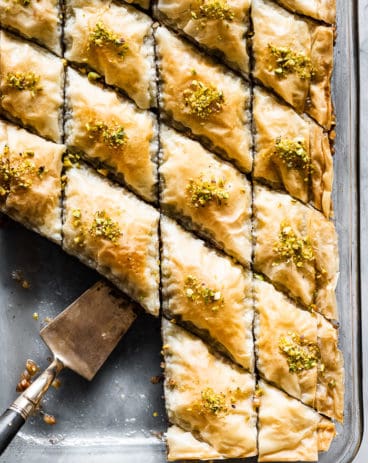
Baklava (Step by Step Instructions!)
Cake
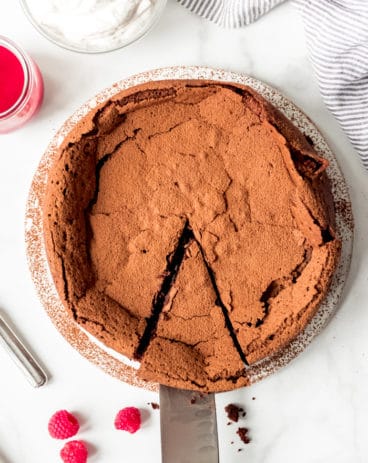
Chocolate Torte
Desserts
Kentucky Butter Cake
New York Cheesecake
Ingredients
Crust
- 1 ½ cup graham cracker crumbs about 12 crackers
- ¼ cup sugar
- ¼ cup butter melted
- 1 Pinch salt
Cheesecake
- 2 pounds cream cheese softened 4 {8 ounces packages}
- 8 ounces sour cream
- 1 ½ cup sugar
- 5 eggs
- 1 Tablespoon Vanilla
- 1 Tablespoon lemon zest
Instructions
The Crust
-
Preheat oven to 325. Prepare your springform pan by spraying with cooking spray, placing a parchment round on the bottom then spraying the top of the parchment with cooking spray.
-
Mix graham cracker crumbs, sugar, and melted butter together. This should resemble damp sand.
-
Pour your crumb mixture into the prepared springform pan and press evenly into the pan. You can use the bottom of a flat glass or a flat measuring cup to really press it in well and get a nice, even crust.
-
Bake for 10 minutes.
-
Allow to cool completely.
Cheesecake Filling
-
Add your softened cream cheese to the mixing bowl of your stand mixer and beat with a paddle at medium/high speed for about 1 minute. Scrape down the sides and bottom of the bowl and beat for a few seconds more.
-
Add sugar and sour cream and mix at medium/low speed until just combined. Scrape the bowl again and mix 10 seconds.
-
Add eggs and beat on low speed until combined, about 30 seconds-1 minute. Scrape the bowl again.
-
Add vanilla and lemon zest. Beat until just combined. At this point your batter should be smooth and fairly runny.
Prep the pan for baking
-
Using 18 inch heavy duty aluminum foil, wrap the outside of your springform pan with 4 sheets of foil. You can use regular foil, but it may take a couple more sheets to ensure the water does not get into your pan.
-
Place your wrapped pan in a deep roasting pan. You can alternatively use a baking sheet, so long as the sides are about 2 inches deep.
-
Add your cheesecake batter to the springform pan.
Baking the cheesecake
-
Using very hot water, add water to the baking sheet/ until thee is about 1 ½ inch of water around the springform pan. On a rack in the lower 3rd of the oven, carefully move your pan into the oven.
-
Bake for 1-1 ½ hours. After about an hour of baking, check the cheesecake’s consistency. A slight jiggle of the pan (while still in the oven) should tell you if it’s ready or needs more time. The cheesecake should be jiggly, but not liquid. If it seems very liquidy still, give it 15 more minutes and check it again.
-
Once the cheesecake is firm, yet jiggly, turn the oven off but leave the cheesecake in the oven for another hour or so, until the oven has cooled down. Resist the temptation to open the oven during this time! The purpose of this step is to allow the cheesecake to cool slowly as the oven cools. Doing this will prevent it from cracking, as one of the biggest reasons cheesecakes crack is the drastic temperature change going from the hot oven into the much cooler kitchen.
-
Once the oven and the cheesecake are cooled, remove from the oven and carefully remove the foil lining the pan.
-
Chill in the fridge for at least 6 hours.
-
Before serving, run a knife around the edge of the pan to ensure an easy release when the springform is removed.
-
Top with desired toppings and enjoy!
Notes
Nutrition
from The Recipe Critic https://ift.tt/2QHarwr
https://ift.tt/2P9sIlN