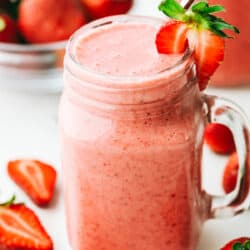
Strawberry Smoothie is creamy, refreshing, and the perfect way to satisfy your sweet tooth! It tastes just like a milkshake, but more nutritious!
Smoothies make a great quick breakfast! Pair them with Cinnamon Rolls, German Pancake, or Breakfast Casserole for a breakfast worth waking up for.

Perfect Strawberry Smoothie
Keeping it simple is almost always best, and this strawberry smoothie is as simple as they come. With just four ingredients, it comes together quickly and is bursting with strawberry flavor. Sweet, luscious strawberries, and nothing else. It does not get much better than this. And that color! Do me a favor and make sure you have something clear to pour this smoothie into, so you can show off that beautiful shade of pink. The pretty color appeals to kids and adults of all ages, meaning it will disappear fast!
Strawberry smoothies are a delicious way to get your vitamins and protein! Your loved ones won’t even know that it is so good for them! Strawberries are packed with vitamin C and antioxidants. Greek yogurt not only adds creaminess and tang but protein and calcium. It tastes and seems like you are sipping a strawberry milkshake, but it is so much better for you. So let’s get back to basics and make a classic strawberry smoothie.
Ingredients for the Best Strawberry Smoothie
Simple and easy, these ingredients combine to make a refreshing drink ready for any occasion.
- Frozen strawberries: Using frozen strawberries thickens and cools the smoothie to be more like a milkshake.
- Greek Yogurt: Adds creaminess, and calcium. Use non-fat Greek Yogurt for less fat.
- Honey: Natural sweetener that has antioxidants in it as well.
- Apple Juice: Also adds a bit of sweetness, but minimal flavor.
Let’s Make a Strawberry Smoothie!
Super fast and easy, this is a great idea for a grab-and-go breakfast or snack when you are short on time. In a blender add the frozen strawberries yogurt, honey, and apple juice. Blend until smooth.

Variations of Homemade Strawberry Smoothie
This recipe is basic, which means it is very customizable. Get creative and make this strawberry your own.
- Juice: Instead of apple juice use orange juice, almond milk, milk, or even water.
- Bananas: Frozen bananas add even more creaminess, and can add the extra sweetness you want.
- Protein: Add a scoop of your favorite protein powder. They come in so many fun flavors, you can really get creative with them. I personally like good vanilla with my strawberry.
- Nut Butter: A spoonful of peanut butter or almond butter for texture and flavor. It will taste like a sandwich in a straw.
- Greens: Of course you can add kale or spinach to your smoothie for iron and nutrients. I do have to warn you the color will be a little unappealing, but still delicious.
- Chocolate: Add in a scoop of cocoa powder for a chocolate-covered strawberry smoothie.
Tips For The Ideal Smoothie
This is one of those basic recipes that you just cannot get wrong, but there are things you should always keep in mind whatever kind of smoothie you are making.
- Order Matters: To get that perfectly smooth creamy texture you want to layer your greens and liquid closest to the blades. Then add your frozen fruit and add-ins. So if your blade is on the bottom layer the liquid then greens, then the rest. If your blade is the lid, place half the liquid in the bottom, add in the frozen fruit and add-ins, place the greens last and add the rest of your liquid.
- The Mixer is Vital: You want to make sure your blender is up to the task. If you are a smoothie addict, it is worth investing in a powerful blender that can get the job done and not burn out.
- Leave The Ice Out and Opt for Frozen Fruit: Adding ice to make your smoothie cold actually just dilutes your smoothie. Using frozen fruit will create a thick smooth cold smoothie with all the flavor intact.
- Sneak in Those Greens: Smoothies are a great way to add greens to your diet without having to actually taste them. Adding spinach and kale are two of the favorites which add nutrients without a ton of flavor. Use baby kale and spinach for sweeter flavors which are easier to blend.
- Protein and Fats: Smoothies are a great way to add in protein and healthy fats that can help you feel fuller longer. Nut butter, chia seeds, hemp, flaxseed, and even frozen avocado. Trust me avocado creates the smoothest creamiest smoothie you’ll ever have.
More Drinks to Sip On

Beverages
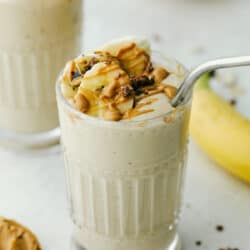
Peanut Butter Banana Smoothie
Beverages
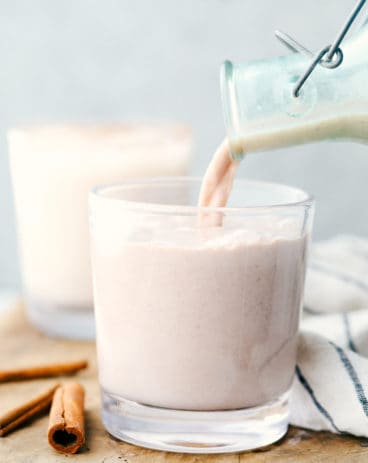
Best Ever Horchata
Beverages
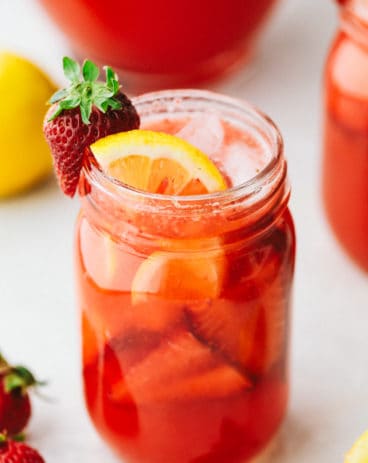
Homemade Strawberry Lemonade
Beverages
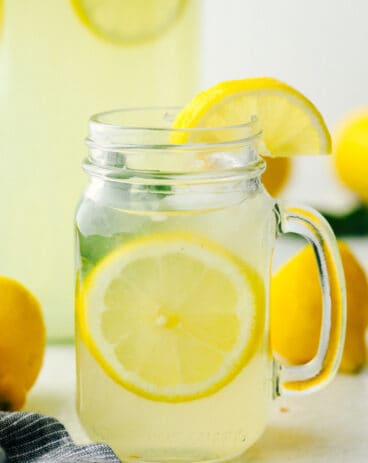
Copycat Chick fil A Lemonade
Strawberry Smoothie
Ingredients
- 3 cups frozen strawberries
- 1/4 cup greek yogurt
- 1 Tablespoon Honey
- 1- 1/2 cup apple juice
Instructions
-
In a blender add the frozen strawberries yogurt, honey and apple juice. Blend until smooth.
Nutrition
from The Recipe Critic https://ift.tt/3nqDVef
https://ift.tt/3tV1le6