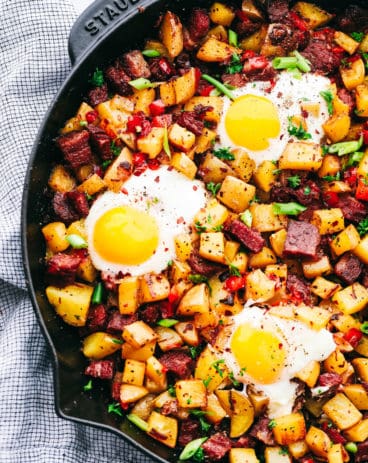
रविवार, 2 मई 2021

Churros

All I have to hear is the word, Churros, and my mouth starts to water. Light fluffy dough is fried and then covered in cinnamon and sugar, totally heavenly!

That cinnamon and sugar flavor is a complete classic that makes for fantastic treats! Try my Waffles, Cheesecake, or Cupcakes to see what I mean!
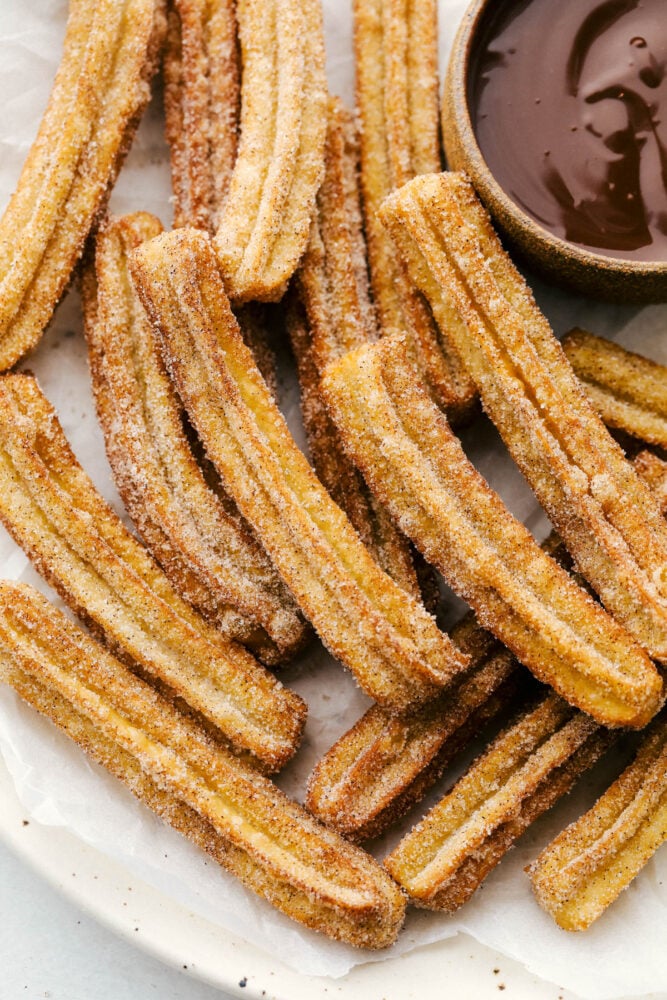
A pile of fried churros with a side of chocolate dipping sauce.

Homemade Churros Recipe

Whether your love for churros began at your local fair or from the well-known Disneyland favorite, with this churro recipe, you can now make them at home. When you place these golden, sweet crisp-tender bites on the table, be prepared to receive oohs and ahhs! Then watch them disappear faster than you can fry them. You could probably bribe your kids to do just about any chore with the promise of these homemade churros at the end of the day!

Churros are way easier than you think and they always taste way better from scratch! They might seem tricky, but churros just take time and a bit of attention to detail. Then you will have crispy sweet outside, soft and chewy inside, and the best tasting churros you have ever had!

Ingredients for Easy Churros

You probably have all the ingredients you need in your pantry right now to make these churros. Simple ingredients, but big on flavor!

  • Water: You will bring this to a boil with other wet ingredients.
  • Butter: Adds flavor and helps to build texture.
  • Sugar: Adds just a bit of sweetness.
  • Salt: Just a pinch to balance things out.
  • Flour: All-purpose flour works here.
  • Egg: Chilled large egg.
  • Vanilla: Vanilla is one of the best flavors, mild and perfect.
  • Oil: This is for frying, use peanut or canola oil.

How to Make Churros at Home

These homemade churros are not as hard as you may think, you can be munching on these delectable treats in no time.

  1. Oil: Heat oil in a heavy-bottomed pot. Use a candy or oil thermometer to bring it to 350 degrees. Turn down the heat to maintain 330-350 during frying. It may need time between batches to come back up in temp.
  2. Prep your frying station with your sugar and cinnamon mixture in a shallow dish, and a plate with paper towels to drain the hot churros.
  3. Boil: In a medium saucepan, heat water, butter, sugar, and salt over medium heat until it boils.
  4. Add Flour: Once boiling, remove from heat and stir in the flour until it is fully incorporated with the water mixture. It will form a stiff ball of dough.
  5. Stir like mad: Add the egg and vanilla, either stirring vigorously by hand or using a hand mixer to blend. The egg won’t incorporate right away but keep mixing and it will eventually incorporate into the dough. Be sure to keep stirring so the egg doesn’t cook in the hot pan.
  6. Pipe: Using a large star tip (I used Ateco 852) and a sturdy pastry bag, fill the bag with the finished dough and twist tightly.
  7. Fry: When the oil has reached 350, pipe a few 4-6 inch long strips of dough into the oil. Fry for 1 minute 30 seconds on one side, and 1 minute on the other side. Remove from the oil to the paper towel-lined plate. Allow cooling for 15-30 seconds before tossing in the cinnamon sugar.
  8. Serve: Best served immediately.
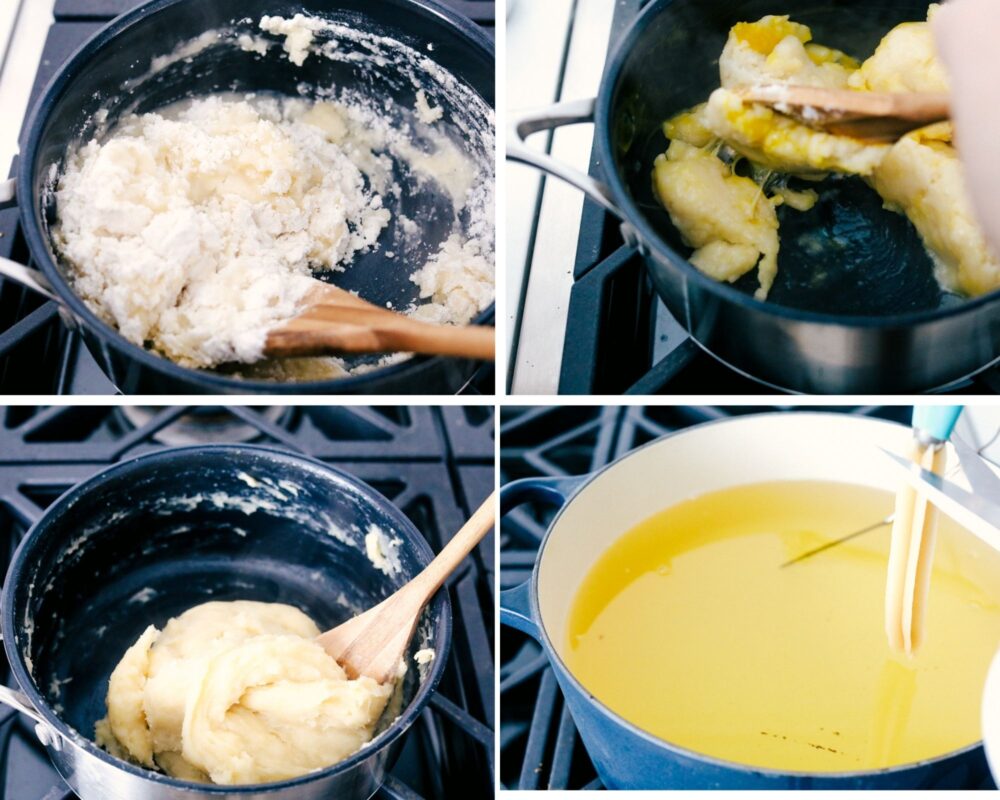
Making the dough in the saucepan and frying them in a dutch oven.

The Best Churro Dough Tips

When you are craving something sweet but light and tasty, these churros are just the dessert you will love. The dough will resemble an eclair pastry. The stiffness helps the churros retain their ridges when frying.

  • The Dough: If you have never made churros or eclairs before, this dough will seem weird to you. But trust the recipe. It will work and it will taste amazing. When you boil the ingredients and stir it should form a ball. You should not have a bunch of dough at the bottom of the pan. It should come together nicely. If it hasn’t keep cooking and stirring for a minute longer.
  • Cool Slightly: Before adding the egg, stir the dough off of the heat to help release some of the heat. You do not want scrambled eggs. Make sure your egg is good and cold as well. After about 5 minutes of rest or stirring, beat in the egg.
  • The Egg will Mix in I promise: At first it will seem like the egg is not incorporating into the dough. Keep stirring and it will slowly work together.
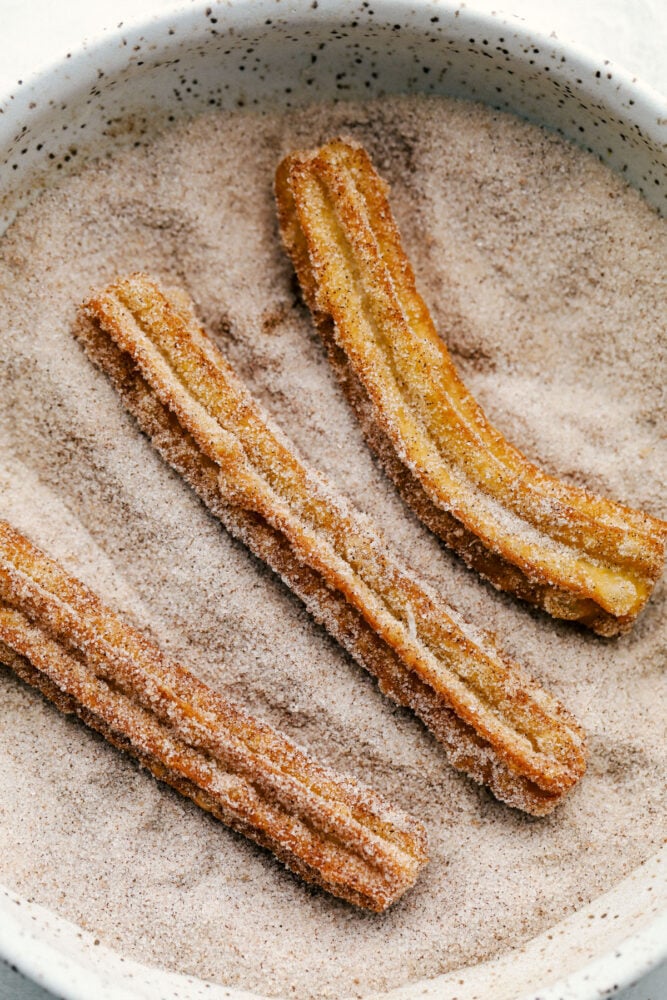
Rolling the Churros in cinnamon and sugar.

Frying Tips for your Favorite Churros

This is the most delicate part when making churros. You do not want them burnt on the outside and raw in the middle. Take your time and make sure that your oil and churro dough is ready when you are.

  • Temperature: It is important that you keep the oil at the right temperature to ensure the churros cook at the right rate. Use a candy thermometer to keep the oil at 350 degrees. It is ok if it goes up some like to 365, but you do not want it to go lower.
  • Piping: Pipe your churros about 4-6 inches long is all. If they get much longer they will curl and be hard to turn. If you do not have pipping tip, you can either pipe them without one or droop by small dough balls for churro donuts.
  • Pipe right into the Oil: For easiness, pipe the churros right into the oil, using scissors to cut the dough. Oil the scissors before using them so that the dough does not stick to the blade.
  • Only a few at a time: Only fry 3-4 at a time. This will prevent the oil temperature from dropping too low.
  • Roll Immediately: To get the best cinnamon and sugar coverage, roll the churros while they are still warm.
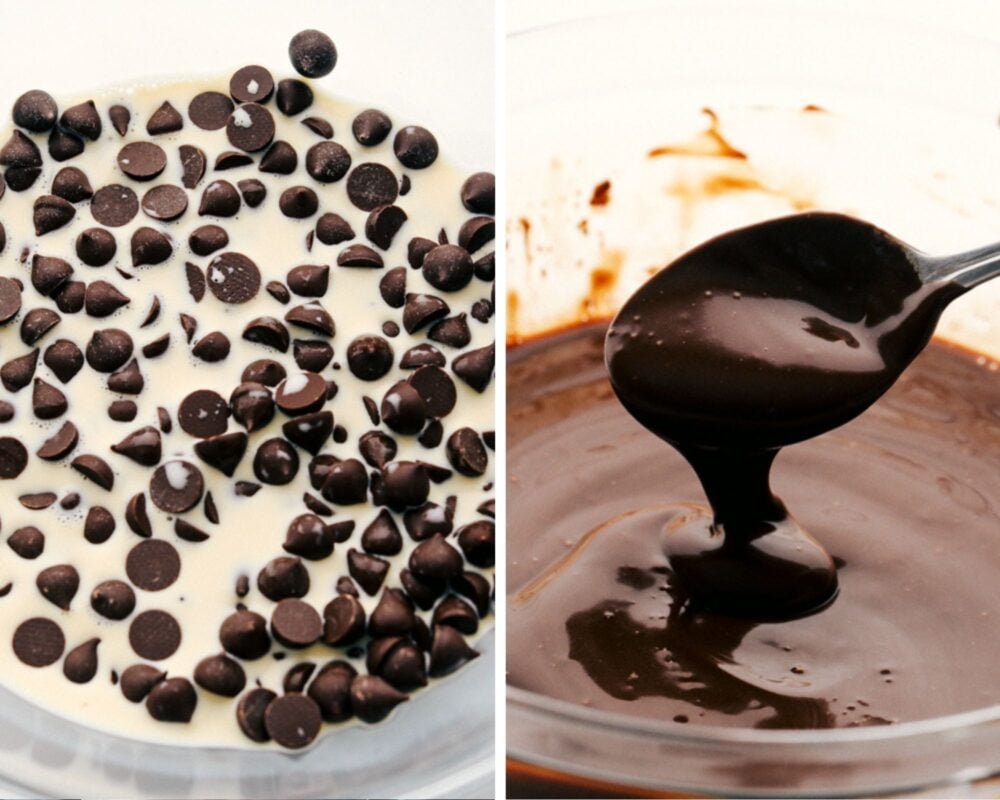
Melting chocolate chips and cream for the dipping sauce.

How To Serve Your Churros

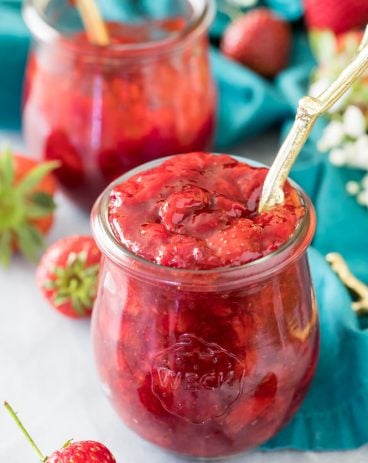
Serve churros plain or serve them with sauce, however you serve them though, they will be everyone’s favorite. There are other options besides chocolate like strawberry or caramel sauce that you can try with homemade churros.

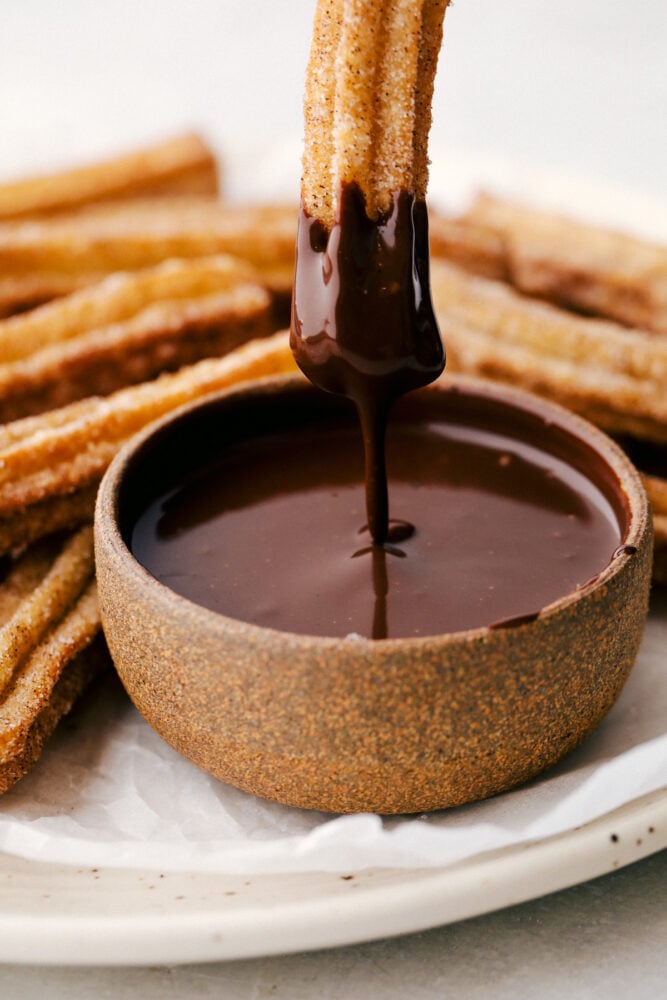
Dipping a churro in chocolate sauce.

Make-Ahead and Storing Fried Churros

Another great thing about churros is you can make the dough ahead of time. And then all you have left to do is fry them. And even though these are best served immediately, you can store these for a treat later on.

  • Storing: Keep cooled and coated churros in an air-tight container with a paper towel for up to two days. Reheat in the oven at 400 degrees for 8-12 minutes.
  • Freeze: Place the done churros on a baking sheet and freeze for 1 hour. Transfer to a freezer-safe bag and freeze for up to 2 months. Thaw at room temperature.
  • Make-Ahead and Refrigerate: After you have made the dough, place it in an air-tight container. I like to wrap the dough as well in plastic wrap to keep it moist. Keep in the fridge for 2 days. Place in a piping bag and fry according to directions.
  • Make-Ahead and Freeze: Form the churros on a parchment-lined cookie sheet. Freeze for 1 hour and then transfer the frozen dough to a freezer-safe bag. Freeze for up to 1 month. When ready to cook, no need to thaw. Just fry according to directions.
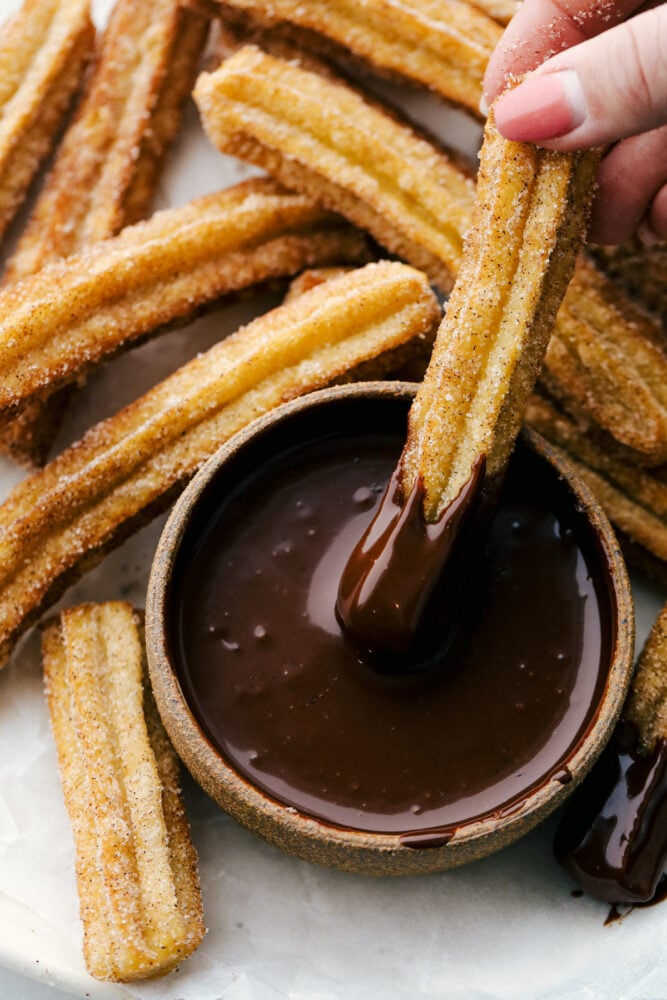
Holding a churro with chocolate sauce on it, with fired churros all around.
Print

Churros

All I have to hear is the word, Churros, and my mouth starts to water. Light fluffy dough is fried and then covered in cinnamon and sugar, totally heavenly!
Course Dessert
Cuisine Mexican
Keyword churro recipe, churros, homemade churros
Prep Time 15 minutes
Cook Time 30 minutes
Total Time 45 minutes
Servings 16 Churros
Calories 1126kcal
Author Alyssa Rivers

Ingredients

Churros

  • 1 cup water
  • 3 tbsp butter
  • 1 tablespoon sugar
  • Dash salt
  • 1 cup flour
  • 1 large egg
  • 1 teaspoon vanilla
  • 2 quarts canola oil

Cinnamon sugar

  • 1 ½ teaspoon cinnamon
  • ½ cup sugar

Instructions

  • Heat oil in heavy bottomed pot. Use a candy or oil thermometer to bring it to 350 degrees. Turn down the heat to maintain 330-350 during frying. It may need time between batches to come back up in temp.
  • Prep your frying station with your sugar and cinnamon mixture in a shallow dish, and a plate with paper towels to drain the hot churros.
  • In a medium sauce pan, heat water, butter, sugar, and salt over medium heat until it boils.
  • Once boiling, remove from heat and stir in the flour until it is fully incorporated with the water mixture. It will form a stiff ball of dough.
  • Add the egg and vanilla, either stirring vigorously by hand or using a hand mixer to blend. The egg won’t incorporate right away, but keep mixing and it will eventually incorporate into the dough. Be sure to keep stirring so the egg doesn’t cook in the hot pan.
  • Using a large star tip (I used Ateco 852) and a sturdy pastry bag, fill the bag with the finished dough and twist tightly.
  • When the oil has reached 350, pipe a few 4-6 inch long strips of dough into the oil. Fry for 1 minute 30 seconds on one side, and 1 minute on the other side. Remove from the oil to the paper towel lined plate. Allow to cool for 15-30 seconds before tossing in the cinnamon sugar.
  • Best served immediately.

Notes

This can be mixed by hand or by hand mixer, but mixing by hand will take some patience and strength to make sure the eggs don’t curdle in the pan.
Make sure to fry in small batches as the churros with brown more evenly and the oil will maintain it’s temperature better.
Instead of mixing the cinnamon sugar in a shallow dish, it can be mixed in a paper bag and the hot churros can be dropped in, the bag closed, and shaken to coat with sugar.

Nutrition

Calories: 1126kcal | Carbohydrates: 13g | Protein: 1g | Fat: 121g | Saturated Fat: 10g | Trans Fat: 1g | Cholesterol: 17mg | Sodium: 24mg | Potassium: 15mg | Fiber: 1g | Sugar: 7g | Vitamin A: 83IU | Vitamin C: 1mg | Calcium: 6mg | Iron: 1mg


from The Recipe Critic https://ift.tt/3xIwsfe
https://ift.tt/33bzESw
English Muffin Breakfast Sandwiches

Homemade English Muffin Breakfast Sandwiches are the best thing to happen to your mornings! These are super easy, freezer friendly, and absolutely delicious!

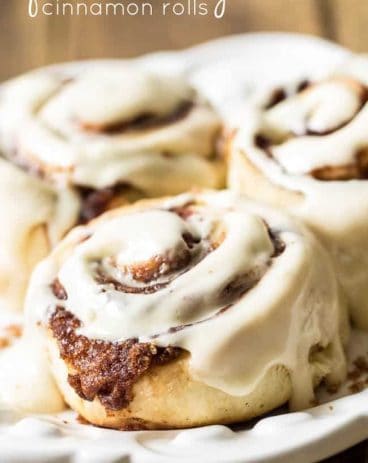
Mornings can be hectic, and whenever I can make breakfast go smoother, I know I have already won the day! Add this Casserole, Oats, and Cinnamon Rolls for other delicious breakfast ideas.

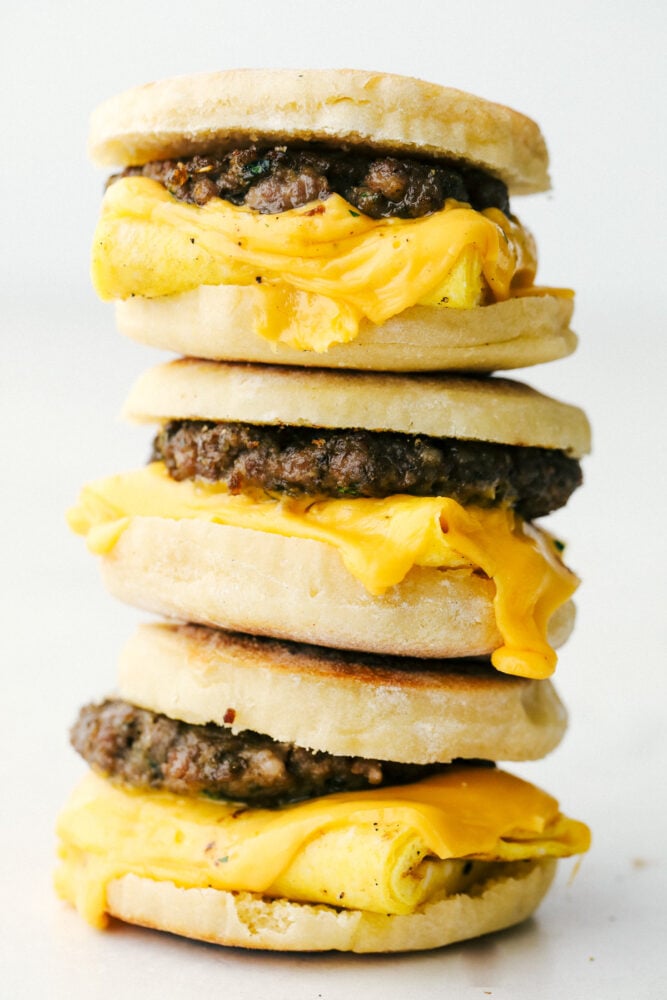
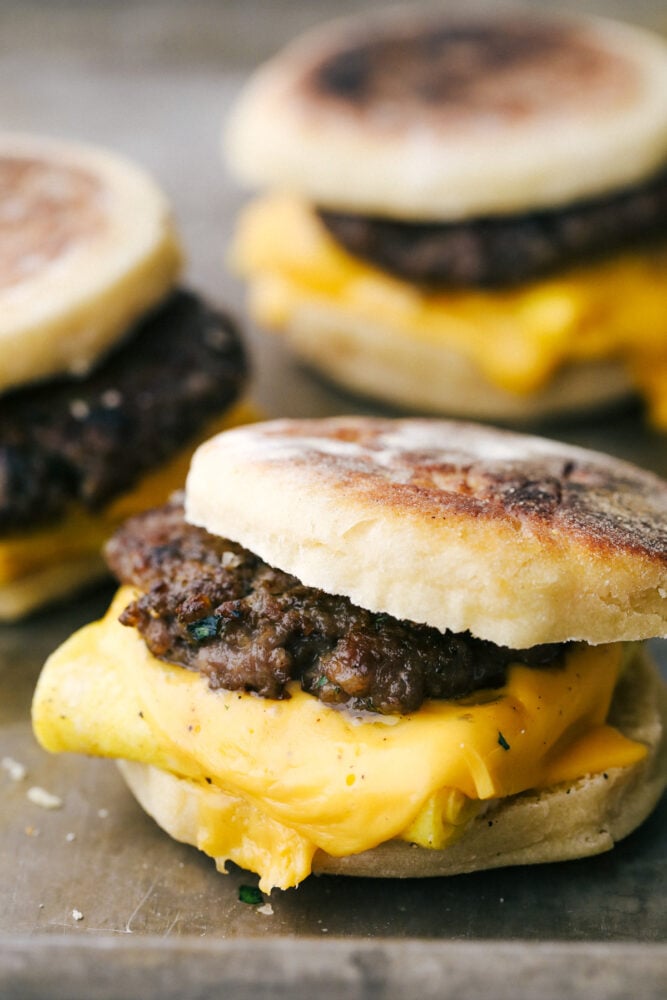
English muffin breakfast sandwiches stacked on top of each other.

Homemade English Muffin Breakfast Sandwiches

These English muffin breakfast sandwiches are worth getting up for in the morning. In fact, you are going to want to wake up because of these tasty, quick sandwiches. English muffins provide the base and hold it all together. Perfect with their little crooks and crannies to hold in all the delicious toppings. Add perfectly cooked eggs and easy flavorful sausage and a slice of cheese for the perfect stacked English muffin breakfast sandwich.

The best part about being homemade is you can make breakfast sandwiches, and customize them any way you want. You know exactly what is in the food you’re are serving your family. Make a large batch and freeze the extras for breakfasts and even dinners, that are quick and delicious. So let’s make these popular fast food sandwiches in the comfort of your own home. These English muffin breakfast sandwiches taste way better than anything you could ever get in the freezer section or the restaurant!

What You Need For Easy English Breakfast Muffin Sandwiches

These are so yummy and if you use homemade english muffins and homemade sausage, they taste superior!

  • English Muffins: Make your own English muffins for incredible results. If you are in a hurry you can definitely use store-bought.
  • Sausage: You really need to try making your breakfast sausage here. It is going to change your life, and it is so easy. It elevates these sandwiches!
  • Eggs Use 4 Large eggs at room temperature.
  • Heavy Whipping Cream: This creates eggs that are creamy, moist, and richer. perfect for breakfast sandwiches.
  •  American Cheese: The ultimate melting cheese.

How to Make English Muffin Breakfast Sandwiches

Truly this is why English muffins were created. This has to be hands down one of the best way to eat them. Ok, Eggs Benedict is close second!

  1. Prep: Make the English muffins and sausage according to the recipe.
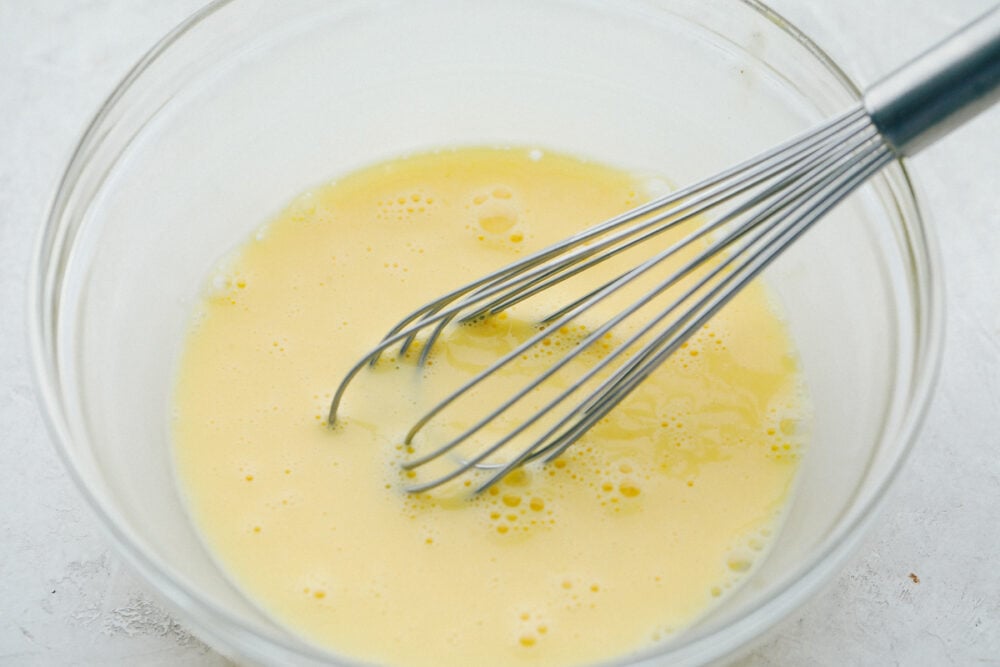
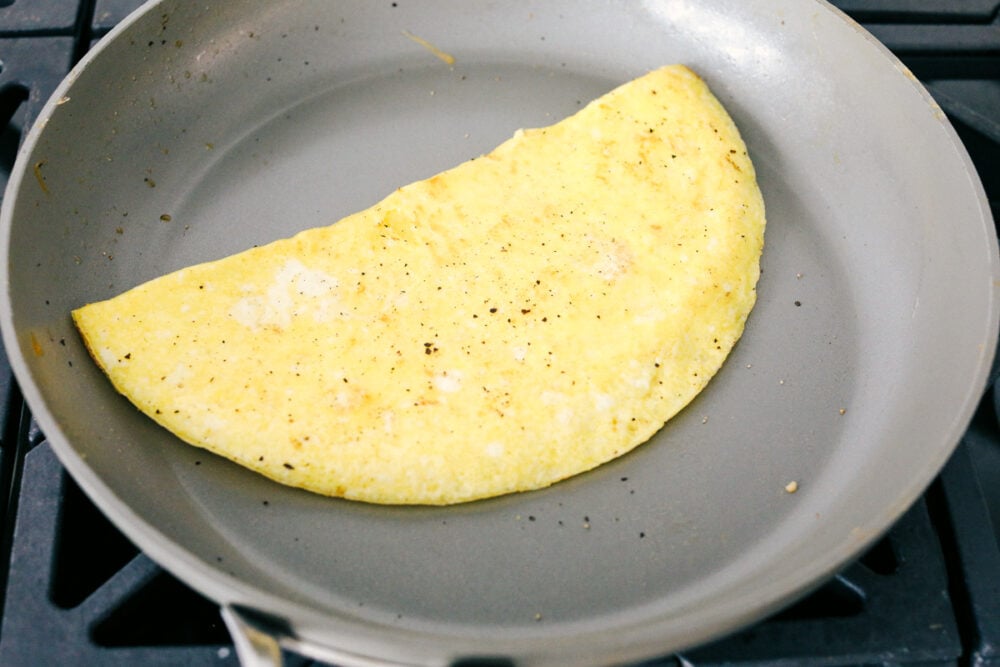
  2. To make the eggs: Whisk together eggs and heavy cream. Add to a medium non-stick skillet over medium heat. Flip when the egg starts to set and flip again.
  3. To assemble: Slice the egg into fourths and fold on the bottom of the English muffin. Top with cheese, and sausage patty and English muffin top
Mixing eggs for cooking in a glass bowl.

Quick Tips and Variations For The Best English Muffin Sandwiches

Super customizable you can make these any way you want. Just make them!

  • Egg: Flipping the egg gives it an extra layer, if you want a thinner sandwich, do not flip it. But you do want eggs similar to the omelet consistency. This way they will stay on the English muffin better. You can also make a large amount of egg at once in the oven. Use 12 eggs, 2 Tablespoons of cream, and salt and pepper. Whisk till it’s super good and mixed. Place in a well-greased 9×13 pan and bake at 325 for 18-22 minutes. then cut into squares.
  • Meat Options: Sausage isn’t the only thing you can use. Bacon, Ham, or no meat at all are all good options.
  • Cheese: Not a fan of American, no problem you can use any kind of good melty cheese you’d like. Havarti, cheddar, swiss, pepper jack, and Colby jack are all good options.
  • Toasting: This is a must in my book. Toast the English muffins and lightly butter them before assembling. This will keep them from getting soggy when you freeze them. Also, place the cheese on last, place them on a cookie sheet and broil for 1-2 minutes or till cheese is good and melty. Remove from oven and top with the other half of the English Muffin.
Cooked egg in a fry pan ready to use in sandwiches.

English Muffin Breakfast Sandwich Combos

These english muffin sandwiches make a wonderful meal on their own, but I love to combine them with sides to make a complete meal when time allows.  So if you have time try serving these sandwiches some of these delicious other options. You are going to love it.

Egg, sausage and cheese on an English muffin.

How to Freeze English Muffin Breakfast Sandwiches

This is so worth the extra effort. If you are going to make one of the breakfast sandwiches, you might as well make a dozen or more for those times you really need a meal idea. These are so easy to freeze and reheat, it’s a real-time saver!

  • To Freeze: Wrap each sandwich in plastic, parchment, or tin foil and place in a gallon sealable freezer-safe bag. Freeze for up to 2 months.
  • Thaw: If you can thaw in the fridge overnight. Or remove the outer covering and wrap it in a paper towel. Heat the sandwich in the microwave at 50% for 40seconds to 1 min. Flip and repeat. Once warmed, heat it for 15 seconds on full power to heat it all the way through. They can also be heated in the oven at 350 degrees for 10-15 minutes without the paper towel. Or in a toaster oven.
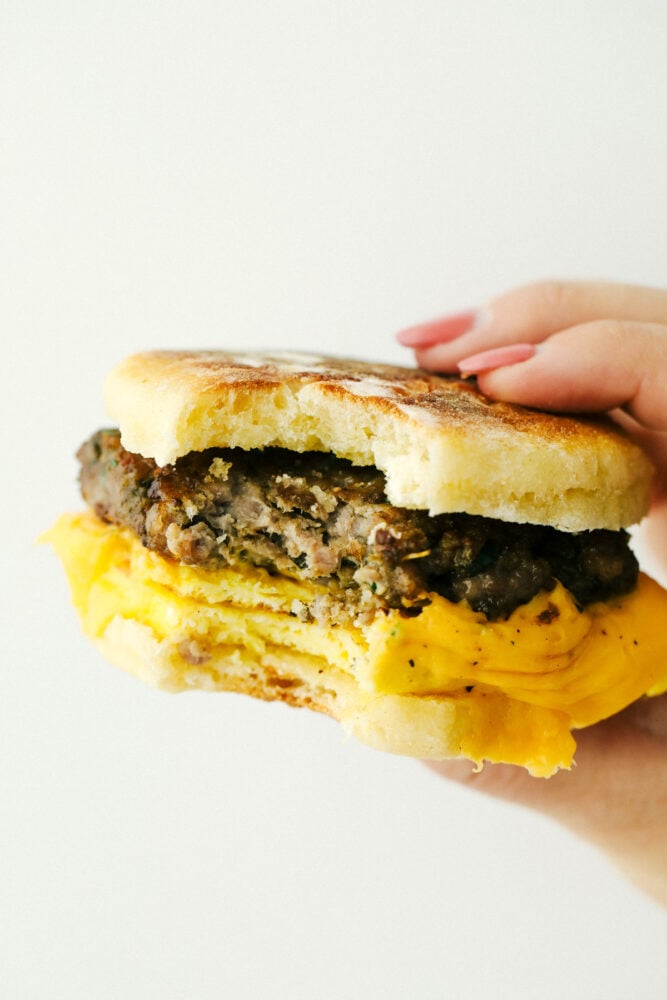
Holding an English muffin sandwich with a bite out of it.
Print

Homemde English Muffin Breakfast Sandwiches

Homemade English Muffin Breakfast Sandwiches are the best thing to happen to your mornings! These are super easy, freezer friendly, and absolutely delicious!
Course Breakfast
Cuisine American
Keyword homemade english muffin breakfast sandwich
Prep Time 10 minutes
Cook Time 10 minutes
Total Time 20 minutes
Servings 1 sandwich
Calories 913kcal
Author Alyssa Rivers

Ingredients

  • 1 English Muffins
  • 1 Homemade Sausage
  • 4 large eggs
  • 1 Tablespoon heavy whipping cream
  • 4 slices American cheese

Instructions

To make the eggs:

  • Whisk together eggs and heavy cream. Add to a medium non stick skillet over medium heat. Flip when the egg starts to set and flip again.

To assemble:

  • Slice the egg into fourths and fold on the bottom of the English muffin. Top with cheese, and sausage patty and English muffin top.

Nutrition

Calories: 913kcal | Carbohydrates: 31g | Protein: 51g | Fat: 64g | Saturated Fat: 29g | Trans Fat: 1g | Cholesterol: 879mg | Sodium: 2228mg | Potassium: 578mg | Fiber: 2g | Sugar: 3g | Vitamin A: 2126IU | Vitamin C: 1mg | Calcium: 1033mg | Iron: 5mg


from The Recipe Critic https://ift.tt/3tcqTlM
https://ift.tt/3aVhaKv

शनिवार, 1 मई 2021

Homemade Breakfast Sausage

Homemade Breakfast Sausage is easier to make than you think and tastes way better than you can imagine! This is going to change the way you do breakfast.

These are going to make the perfect breakfast addition. Serve alongside German Pancakes, Pancakes or this Blueberry Breakfast Cake.

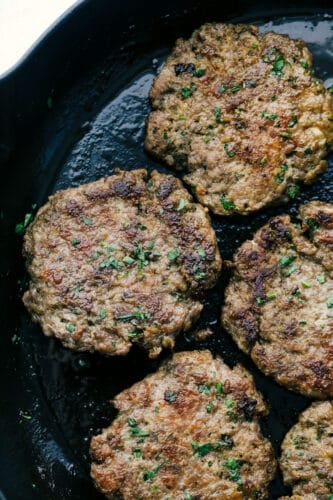
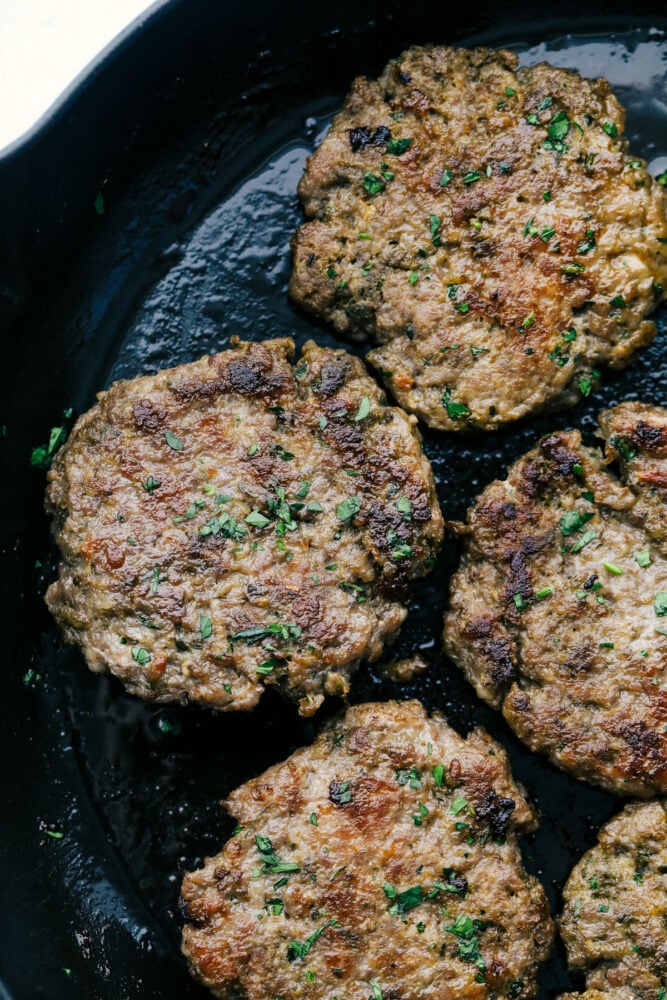
Homemade sausage sizzling in a pan.

Breakfast Sausage Recipe

Nothing beats homemade, and when it comes to homemade breakfast sausage it could not be more true. This is so easy, do not get scared away by the thought of making your own sausage, once you try it, you will wonder why you haven’t tried it sooner. Literally, this takes about 10 minutes to mix together and then all you have to do is cook it. Simple, delicious, and amazing!

One of the best things about homemade breakfast sausage is you get to control the flavors. You add the spices to your liking and you can control what does not go into it, like MSG, preservatives, additives and even colorings. When you control your food and flavors you can feed your family with confidence that you know it is going to be good, and better for you! With these breakfast sausages, you get to control the size of your patties and make them big or small depending on what you are using them for.

Breakfast Sausage Ingredients

This breakfast sausage recipe is easy to double! You can even refrigerate or freeze the homemade sausage to use the next day or later on.

  • Ground Pork: Ground pork is easy to find in the meat section of your grocery store.
  • Sage: Classic flavor in the most sausage that is earthy and slightly peppery.
  • Thyme: This is a sharper flavor that is also peppery and a bit sweet.
  • Rosemary: The minty, lemony flavor of rosemary pairs well with sage and thyme.
  • Garlic: Mince fresh garlic for the best flavor.
  • Fresh Parsley: This has a clean peppery flavor that is best fresh, chop it finely.
  • Brown Sugar: Adds a bit of sweetness to your best breakfast sausage.
  • Salt: Have to have salt to bring out all the best flavors.

How To Make Homemade Sausage

Truly, this homemade breakfast sausage is super easy to mix together and you are going to love it how it all cooks up. It is tender and flavorful in every patty.

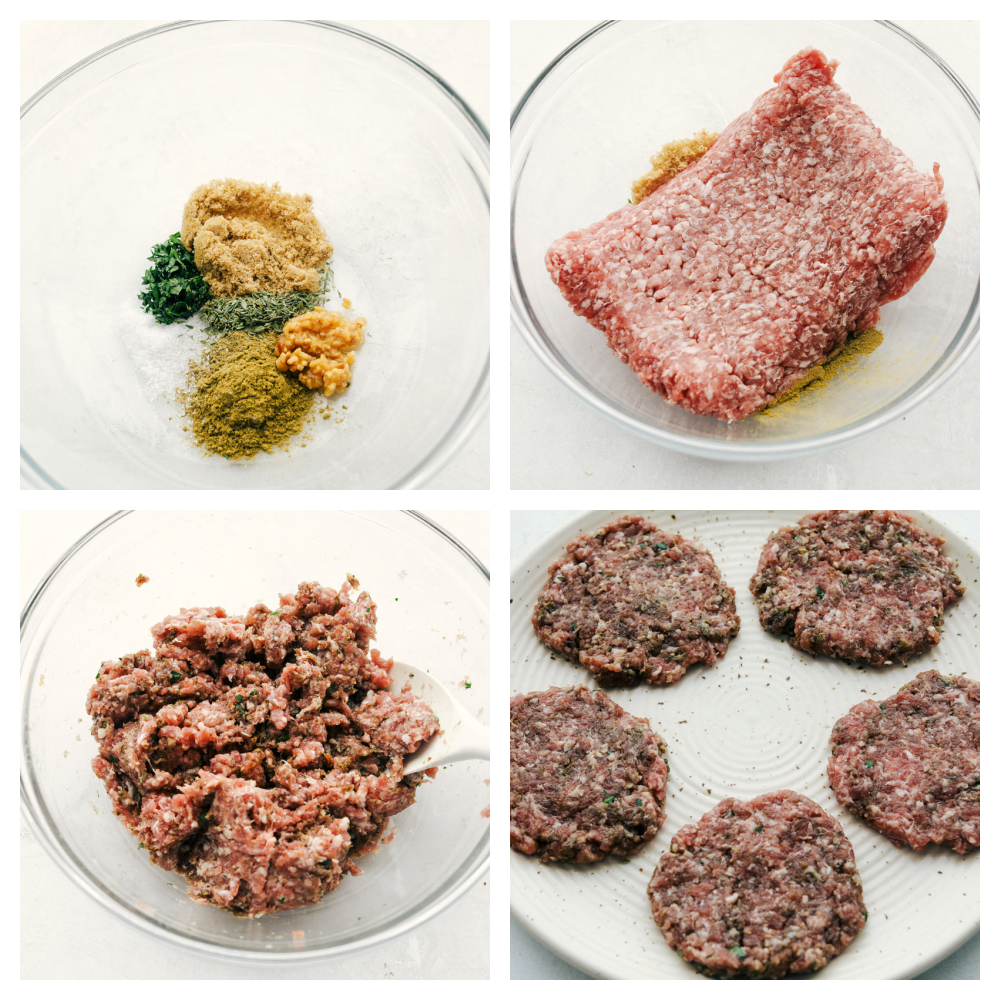
  1. Spices: In a medium-sized bowl combine the ground pork, sage, thyme, rosemary, garlic, parsley, brown sugar, and salt.
  2. Form: Shape into 2 inch balls and flatten.
  3. Cook: Preheat a medium-sized skillet over medium-high heat. Add the patties to the skillet and cook for 3-4 minutes on each side or until no longer pink.
Spices in a bowl, being mixed with ground pork and formed into patties.

Quick and Easy Tips and Variations For Your Breakfast Sausage

Making your own homemade sausage sounds so gourmet, and your family will think you are truly a gourmet cook when you serve them these delectable savory patties. With these easy tips, you will see how easy this breakfast sausage is to make right in your own home.

  • The Meat: Ground pork of course is the first meat of choice, but it isn’t the only one you have to use. Try using ground chicken, and turkey to lighten your sausage up a bit. You can even mix the meats together to create a flavor all your own.
  • Bacon: Speaking of flavor, try adding some finely chopped bacon to your sausage for a flavor explosion.
  • Spices: Remember you can spice these breakfast sausages anyway you want to. Add red pepper flakes for a bit of spice, smoked paprika, fennel seeds, and for a maple flavor try some maple smokehouse rub.
  • Cook it: Whether you bake them in the oven or fry them in a cast iron on the stove make sure your patties come to 160 degrees (165for poultry). There should be no pink in your patties.

What Goes with Your Easy Breakfast Sausage

There are so many possibilities of what to serve these breakfast sausages with, but here are some good ideas.

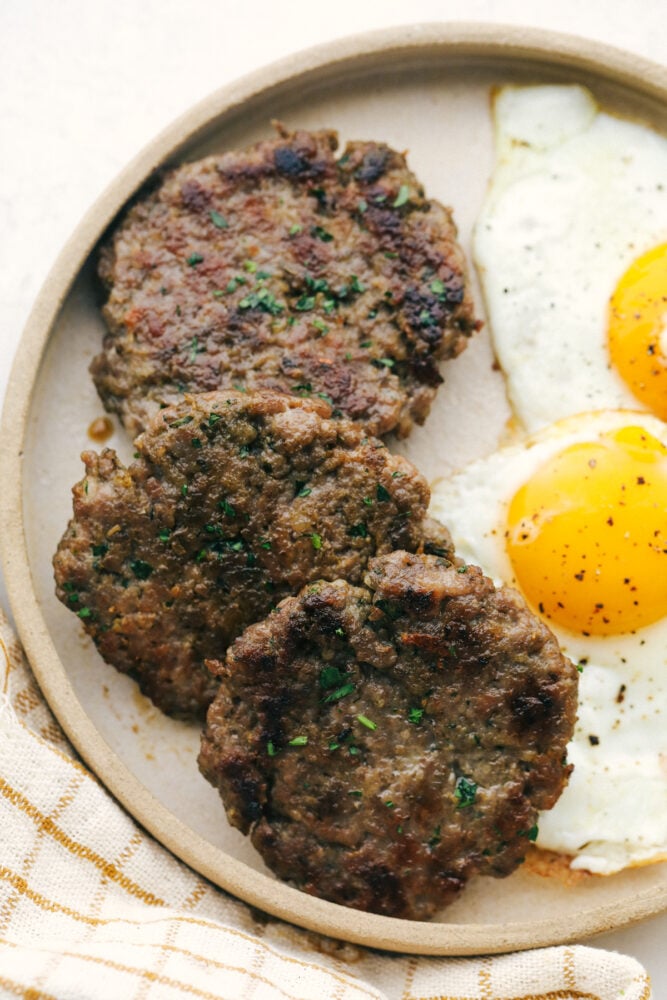
A plate of sausage with eggs on the side.

Storing The Best Homemade Sausages

If you are going to make breakfast sausages, you might as well make a double or triple batch and save some for later. These homemade breakfast sausages freeze well and last up to two months.

  • Fridge: Leftover sausages can be kept in the fridge for up to a week when they are tightly covered.
  • Freeze: This may be the most exciting thing about breakfast sausages. Let the sausage cool completely. Wrap in plastic and then in foil and place in a freezer-safe bag. They will keep for up to 2 months. Thaw in the fridge or for a quick thaw, place in the microwave and finish crisping it in a pan on the stove.
Print

Homemade Breakfast Sausage

Homemade Breakfast Sausage is easier to make than you think and tastes way better than you can imagine! This is going to change the way you do breakfast.
Course Breakfast
Cuisine American
Keyword breakfast sausage, homemade breakfast sausage, homemade sausage
Prep Time 5 minutes
Cook Time 10 minutes
Total Time 15 minutes
Servings 6 Sausages
Calories 210kcal
Author Alyssa Rivers

Ingredients

  • 1 pound ground pork
  • 1 Tablespoon Sage
  • 1/2 tablespoon thyme
  • 1 teaspoon dried rosemary
  • 1 teaspoon minced garlic
  • 1 Tablespoon fresh parsley chopped
  • 1 Tablespoon brown sugar
  • 1 teaspoon salt

Instructions

  • In a medium sized bowl combine the ground pork, sage, thyme, rosemary, garlic, parsley, brown sugar and salt.
  • Shape into 2 inch balls and flatten.
  • Preheat a medium sized skillet over medium high heat. Add the patties to the skillet and cook 3-4 minutes on each side or until no longer pink.

Nutrition

Calories: 210kcal | Carbohydrates: 3g | Protein: 13g | Fat: 16g | Saturated Fat: 6g | Cholesterol: 54mg | Sodium: 431mg | Potassium: 235mg | Fiber: 1g | Sugar: 2g | Vitamin A: 90IU | Vitamin C: 3mg | Calcium: 24mg | Iron: 1mg


from The Recipe Critic https://ift.tt/3e7e7kd
https://ift.tt/337mkyA