मंगलवार, 4 मई 2021

Homemade Refried Beans

Homemade Refried Beans are simple and packed with so much flavor, you will never reach for a can again. These creamy refried beans are perfect for your next Tex-Mex night!

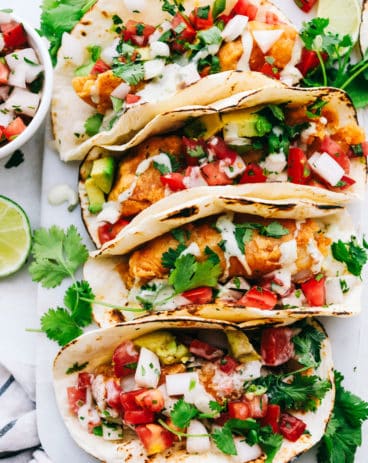
We love Mexican-inspired foods at our house, and keeping it real and simple tastes the best! Add these homemade beans to these other favorites like chimichangas, empanadas, and Barbacoa.

A bowl of refried beans topped with cilantro and limes.

Easy Refried Beans

It is easy to reach for a can of refried beans when you are in a hurry, but guys, have you had them made fresh?! It is so much better! The flavor is irresistible and totally worth the extra effort with these homemade refried beans. Plus canned beans are often heavily laden with extras like lard, preservatives, and even sugar, which you just do not need! And when you make homemade, you control the spices and the flavor. These homemade refried beans are so good!

Refried beans are not fried again. The word comes from its Spanish origins that mean “well fried.” Really, the most important part of making homemade refried beans is going to be the mashing. They could be called “well mashed” beans instead. Whatever you call them, how about we just make them. You won’t be sorry to ditch the can, I promise!

What You Need For Refried Beans

Super easy and luscious, you’ll wonder why you have not made homemade refried beans before!

  • Olive Oil: This is for “frying” the beans in.
  • White onion: Finely diced super well, almost diced. Unless you like chunks of onion.
  • Garlic cloves: Mince your garlic and use fresh for the best flavor.
  • Pinto beans*: I used canned beans, but you can also use dried, I give those instructions below.
  • Cumin: Classic Mexican spice.
  • Chili powder: You can definitely add more or less to your liking.
  • Juice of half a lime: It adds a nice freshness to the beans.
  • Salt: Add to taste, and trust me, you will want some salt, but not a lot.

How to Make Refried Beans at Home

The most important step here when making homemade refried beans is the mashing. You are in control of the consistency. Leave it chunky or make it smooth. It’s up to you.

  1. Saute: In a medium-sized saucepan over medium-high heat add the olive oil and the onion. Sauté until tender.
  2. Combine: Add the beans, cumin, chili powder, lime, and salt. Heat until warm.
  3. Mash: Remove from the stove and mash the beans until they reach desired consistency.
  4. Garnish: Top with cilantro, and cojita cheese if desired.
Sauteing onions, beans and spices and mashing them to eat.

Tips For The Best Refried Beans

Customizable, this homemade refried beans recipe is easy and quick and totally delicious.

  • Beans: Pinto beans are the best beans for making refried beans. They are super creamy and almost buttery in flavor. You can also use black beans for variety. You would just add them instead of pinto and cook as directed.
  • Onions: You definitely want to chop your onions very finely and cook till very tender. Biting into large undercooked onion in your refried beans isn’t very pleasant.
  • Add Spice: Want to spice up your beans, you can add finely chopped jalapeno peppers along with your onions and garlic. Or add a tablespoon or two of diced green chilies.
  • Top It: Melt cheddar cheese or jalapeno or other cheese on top if you desire. Adding fresh cilantro is absolutely divine.
Soaking dried beans in a glass bowl.

How to Make Refried Beans with Dried Beans

Just a few extra steps will get you the same result. And using an Instant pot makes it even easier when making homemade refried beans.

  • Stove Top: Soak the dry beans overnight. Rinse the beans and place them in a large pot. Fill with at least 3 inches of water on the top. Bring to a boil and simmer uncovered for about 2 ½ hours. the beans are done when they are soft and the skin is starting to break open. Drain and continue with the recipe as written.
  • Instant Pot: Place the beans in the instant pot and fill with water to the top fill line. Turn to seal and cook on high pressure for 30-35 minutes. Release the pressure and string the beans. Add them to the recipe as directed.

How to Use Refried Beans and Storing Them

Make big batch and store them for the next time you need them. But these homemade refried beans are easy enough, you can make them fresh every time too!

  • Store: Once made these will keep for up to 5 days in the fridge. Keep tightly covered.
  • Freeze: When the beans have cooled you can freeze meal portions in freezer safe bags for up to 4 months. If they are dry when you thaw them, add a bit of oil or water.
  • How to Use: These are great as a side dish along with Mexican Rice or use with chips and Queso for a tasty appetizer. They will make your Mexican Pinwheels and 7 Layer Dip taste incredible. Throw them in tacos, burritos, enchiladas, Navajo Tacos, and quesadillas.
A bowl of refried beans in a black bowl.
Print

Homemade Refried Beans

Homemade Refried Beans are simple and packed with so much flavor, you will never reach for a can again. These creamy refried beans are perfect for your next Tex-Mex night!
Course Side Dish
Cuisine Mexican
Keyword homemade refried beans, refried beans
Prep Time 5 minutes
Cook Time 10 minutes
Total Time 15 minutes
Servings 6 people
Calories 51kcal
Author Alyssa Rivers

Ingredients

  • 2 Tablespoons Olive Oil
  • 1/2 white onion finely diced
  • 2 garlic cloves minced
  • 3 (15 ounce cans) pinto beans*
  • 2 teaspoon cumin
  • 1 teaspoon chili powder
  • juice of half a lime
  • salt to taste

Instructions

  • In a medium sized saucepan over medium high heat add the olive oil and the onion. Sauté until tender.
  • Add the beans, cumin, chili powder, lime and salt. Heat until warm.
  • Remove from the stove and mash the beans until they reach desired consistency.
  • Top with cilantro, and cojita cheese if desired.

Nutrition

Calories: 51kcal | Carbohydrates: 2g | Protein: 1g | Fat: 5g | Saturated Fat: 1g | Sodium: 7mg | Potassium: 38mg | Fiber: 1g | Sugar: 1g | Vitamin A: 108IU | Vitamin C: 1mg | Calcium: 12mg | Iron: 1mg


from The Recipe Critic https://ift.tt/3xHSOOb
https://ift.tt/3efzBLQ

सोमवार, 3 मई 2021

Tres Leches Cupcakes

Tres Leches Cupcakes are drenched in a three milk mixture, just like classic Tres Leches Cake, but in the handheld form! Topped with whipped cream, cinnamon, and strawberries, these make a wonderful finish to any Mexican dinner!

Celebrate Cinco de Mayo or plan a Mexican-inspired feast with these tres leches cupcakes as the perfect dessert! Make a complete meal with these Fajitas or Chimichangas and creamy Horchata (a delicious Mexican cinnamon rice drink).

an unwrapped tres leches cupcake

Homemade Tres Leches Cupcakes

These light and fluffy cupcakes that are soaked in a decadent three milk mixture! Tres Leche cupcakes are a combination of easy but impressive and fun! These cupcakes always stand out at parties. Plus, they can be made ahead for stress-free planning!

While we love tres leches cake in its classic form, this cupcake version is just too much fun! They would be great for bake sales or backyard cookouts because you don’t know forks and plates to enjoy them.

a cupcake with a bite taken out of it

Ingredients You’ll Need

You might think there is an ingredient missing in this recipe: butter or oil. But actually no! This cupcake is made without any added fat. This gives the tres leches cupcakes the proper texture to absorb all of the deliciously sweet “three kinds of milk” that tres leches are named for.

  • Flour: All-purpose flour works great for these cupcakes. It is best to measure the flour by spooning it in and leveling it off the top.
  • Sugar: The cake itself isn’t overly sweet since it gets soaked in a sweet milk mixture. There is just enough sugar to keep things balanced.
  • Eggs: Separate the egg whites from the yolks and beat them to stiff peaks. This helps lighten the cupcakes so they are light and fluffy.
  • Vanilla extract: This ingredient gives a wonderful vanilla flavor. Use Mexican vanilla if you have some for the most authentic flavor.
  • Baking powder & baking soda: These two leavening agents work in tandem to provide lift so the cupcakes rise beautifully.
  • “Three kinds of milk”: This trio plays a starring role in the recipe. Sweetened condensed milk, evaporated milk, and whole milk makes for a creamy, moist bite that is just right!
  • Heavy cream: Instead of overly sweet frosting, tres leches cupcakes are topped with lightly sweetened whipped cream.
  • Strawberries or Maraschino Cherries: Strawberries on our tres leches cupcakes are our favorite. You can even use maraschino cherries will add the same pop of color and burst of flavor.
  • Cinnamon: Just a tiny amount for dusting.
ingredients

How to Make Tres Leches Cupcakes

These cupcakes are easy to make but take a little time and patience. The cupcakes need time to get all of the milk mixtures to soak in.

  1. Prepare the batter: This is batter gets a lot of its lift from stiffly beaten egg whites. This will ensure a light and airy cake.
  2. Drench the cupcakes in a 3 milk mixture: Combine the milk then poke holes in the cupcakes with a fork.
  3. Refrigerate: Place the soaked cupcakes in the fridge for at least 2 hours or overnight. This helps the milk mixture have time to fully soak the cupcakes and disperse. If not, it will all be concentrated in the bottom.
  4. Top with Whipped Cream: Before serving, whip the heavy cream with a little powdered sugar and vanilla extract. Do this until the stiff peaks form.

Must-Read Tips for the Best Tres Leche Cupcake

Go slow and just add a little of the 3 milk mixture to each cupcake at a time rather than trying to force it. Going over each cupcake 2-3 times lets the milk soak in better.

  • Batter: Folding the egg whites into the batter creates a fluffy cake batter that bakes up into cupcakes with a structure that can soak in the milk mixture.
  • Milk Mixture: Slowly drizzle the milk mixture over the top of the cake. You can spoon or slowly pour the milk mixture on top, but we found it easiest to do using a squeeze bottle and going slow so there is time for each cupcake to soak up 2-3 tablespoons of the liquid until it is all used up.
  • Refrigerate: You will be surprised at how you can unwrap these cupcakes and the milk mixture won’t gush out thanks to the cupcake structure that absorbs it all!
  • Toppings: Pipe or spoon the whipped cream on top of each cupcake, then lightly dust with cinnamon and top with a couple of slices of strawberry or a maraschino cherry.
3 milk mixture soaking into cupcakes

What Milks are Used in Tres Leches Cupcakes?

We used sweetened condensed milk, evaporated milk, and regular whole milk (can be whole milk or 2%) in this tres leches cupcakes recipe. If you want to add a little coconut flavor to your tres leches cupcakes, you could replace the regular milk in both the cupcake batter and the 3 milk mixture with coconut milk instead.

Will the Milk Soak through the Cupcake Liners?

No, actually! Even paper cupcake liners hold up to the milk mixture because the cake does its job of soaking all that deliciously sweet tres leches milk up. But just to be on the safe side, we like to use foil liners which give double protection. Plus, they always make cupcakes seem extra fancy!

Make-Ahead and Storage Instructions

While the cake part of these cupcakes can be made in advance and even frozen for 3 months, we don’t recommend soaking the cupcakes in the 3 milk mixture more than 48 hours before serving. They are really best eaten within 2-3 days of making them and should always be kept in the fridge because of the milk involved.

tres leches cupcakes on a wire rack
Print

Tres Leches Cupcakes

Light, fluffy Tres Leches Cupcakes are drenched in a three milk mixture, just like classic Tres Leches Cake, but in handheld form! Topped with sweetened whipped cream, a light dusting of cinnamon, and fresh strawberries, these make a wonderful finish to any Mexican dinner!
Course Cake, Dessert
Cuisine Mexican
Keyword tres leches cupcakes
Prep Time 25 minutes
Cook Time 15 minutes
2 hours
Total Time 2 hours 40 minutes
Servings 24 cupcakes
Calories 161kcal
Author Amy Nash

Ingredients

Cupcakes

  • 1 and 1/2 cups all-purpose flour
  • 1 teaspoon baking powder
  • 1/2 teaspoon baking soda
  • 1/4 teaspoon salt
  • 1 cup granulated sugar, divided
  • 5 large eggs, separated
  • 1 teaspoon vanilla extract
  • 1/3 cup whole milk

Tres Leches Soak

  • 1 (14-ounce) can sweetened condensed milk
  • 1 (12-ounce) can evaporated milk
  • 1/2 cup whole milk

Decorating

  • 2 cups heavy cream
  • 1/2 cup powdered sugar
  • 2 teaspoons vanilla extract
  • ground cinnamon, for sprinkling
  • strawberries or maraschino cherries, for garnish

Instructions

  • Preheat oven to 350 degrees F. Line two 12-count muffin tins with foil cupcake liners. Whisk flour, baking powder, baking soda, and salt together in a bowl and set aside. Separate egg yolks and whites into separate bowls.
  • In a large bowl, beat the egg yolks and ¾ cup of the sugar on medium-high speed for 2-3 minutes until creamy and light in color. Add the milk and vanilla, beating and scraping down the sides and bottom of the bowl to combine.
  • Add the flour mixture, mixing just to combine. The batter will be thick.
  • Beat the egg whites on medium-high speed using an electric mixer until frothy, about 1 minute. Gradually add the remaining ¼ cup of sugar and beat until stiff peaks form.
  • Gently fold the egg whites into the cake batter so as not to deflate the egg whites. Use an ice cream scoop to evenly divide the batter between the cupcake liners.
  • Bake for 15-16 minutes until golden brown on top and the cupcakes bounce back to the touch or a toothpick inserted into the center of the cupcakes comes out clean. Cool completely.
  • Pierce the tops of each cupcake several times with the tines of a fork to create holes down into the cupcakes. Whisk the sweetened condensed milk, evaporated milk, and whole milk, then transfer to a squeeze bottle.
  • Soak each cupcake with the milk mixture, a little at a time, until all of the milk has been soaked up. It may seem like too much at first, but if you do a little on each cupcake, then let it soak in while you move on to the others, you can return to the first ones and repeat the process a couple of times until all of the milk mixture has been soaked up. Refrigerate for two hours.
  • Beat the heavy cream, powdered sugar, and vanilla in a bowl until stiff peaks form. Pipe or spoon onto the tops of the soaked cupcakes, then sprinkle with a dusting of ground cinnamon. Top with sliced strawberries or maraschino cherries, then serve.

Notes

  • You can make the cupcakes in advance and freeze them without soaking for up to 3 months. Just thaw on the counter, poke the whole, and add the milk mixture when you are ready to serve.
  • Don’t top with the whipped cream until just before serving. The cupcakes can be made and soaked up to 2 days in advance and refrigerated until ready for topping.

Nutrition

Calories: 161kcal | Carbohydrates: 18g | Protein: 3g | Fat: 9g | Saturated Fat: 5g | Trans Fat: 1g | Cholesterol: 67mg | Sodium: 74mg | Potassium: 67mg | Fiber: 1g | Sugar: 11g | Vitamin A: 362IU | Vitamin C: 1mg | Calcium: 37mg | Iron: 1mg


from The Recipe Critic https://ift.tt/3vz0ZdN
https://ift.tt/3nJ5gZx

रविवार, 2 मई 2021

Churros

All I have to hear is the word, Churros, and my mouth starts to water. Light fluffy dough is fried and then covered in cinnamon and sugar, totally heavenly!

That cinnamon and sugar flavor is a complete classic that makes for fantastic treats! Try my Waffles, Cheesecake, or Cupcakes to see what I mean!

A pile of fried churros with a side of chocolate dipping sauce.

Homemade Churros Recipe

Whether your love for churros began at your local fair or from the well-known Disneyland favorite, with this churro recipe, you can now make them at home. When you place these golden, sweet crisp-tender bites on the table, be prepared to receive oohs and ahhs! Then watch them disappear faster than you can fry them. You could probably bribe your kids to do just about any chore with the promise of these homemade churros at the end of the day!

Churros are way easier than you think and they always taste way better from scratch! They might seem tricky, but churros just take time and a bit of attention to detail. Then you will have crispy sweet outside, soft and chewy inside, and the best tasting churros you have ever had!

Ingredients for Easy Churros

You probably have all the ingredients you need in your pantry right now to make these churros. Simple ingredients, but big on flavor!

  • Water: You will bring this to a boil with other wet ingredients.
  • Butter: Adds flavor and helps to build texture.
  • Sugar: Adds just a bit of sweetness.
  • Salt: Just a pinch to balance things out.
  • Flour: All-purpose flour works here.
  • Egg: Chilled large egg.
  • Vanilla: Vanilla is one of the best flavors, mild and perfect.
  • Oil: This is for frying, use peanut or canola oil.

How to Make Churros at Home

These homemade churros are not as hard as you may think, you can be munching on these delectable treats in no time.

  1. Oil: Heat oil in a heavy-bottomed pot. Use a candy or oil thermometer to bring it to 350 degrees. Turn down the heat to maintain 330-350 during frying. It may need time between batches to come back up in temp.
  2. Prep your frying station with your sugar and cinnamon mixture in a shallow dish, and a plate with paper towels to drain the hot churros.
  3. Boil: In a medium saucepan, heat water, butter, sugar, and salt over medium heat until it boils.
  4. Add Flour: Once boiling, remove from heat and stir in the flour until it is fully incorporated with the water mixture. It will form a stiff ball of dough.
  5. Stir like mad: Add the egg and vanilla, either stirring vigorously by hand or using a hand mixer to blend. The egg won’t incorporate right away but keep mixing and it will eventually incorporate into the dough. Be sure to keep stirring so the egg doesn’t cook in the hot pan.
  6. Pipe: Using a large star tip (I used Ateco 852) and a sturdy pastry bag, fill the bag with the finished dough and twist tightly.
  7. Fry: When the oil has reached 350, pipe a few 4-6 inch long strips of dough into the oil. Fry for 1 minute 30 seconds on one side, and 1 minute on the other side. Remove from the oil to the paper towel-lined plate. Allow cooling for 15-30 seconds before tossing in the cinnamon sugar.
  8. Serve: Best served immediately.
Making the dough in the saucepan and frying them in a dutch oven.

The Best Churro Dough Tips

When you are craving something sweet but light and tasty, these churros are just the dessert you will love. The dough will resemble an eclair pastry. The stiffness helps the churros retain their ridges when frying.

  • The Dough: If you have never made churros or eclairs before, this dough will seem weird to you. But trust the recipe. It will work and it will taste amazing. When you boil the ingredients and stir it should form a ball. You should not have a bunch of dough at the bottom of the pan. It should come together nicely. If it hasn’t keep cooking and stirring for a minute longer.
  • Cool Slightly: Before adding the egg, stir the dough off of the heat to help release some of the heat. You do not want scrambled eggs. Make sure your egg is good and cold as well. After about 5 minutes of rest or stirring, beat in the egg.
  • The Egg will Mix in I promise: At first it will seem like the egg is not incorporating into the dough. Keep stirring and it will slowly work together.
Rolling the Churros in cinnamon and sugar.

Frying Tips for your Favorite Churros

This is the most delicate part when making churros. You do not want them burnt on the outside and raw in the middle. Take your time and make sure that your oil and churro dough is ready when you are.

  • Temperature: It is important that you keep the oil at the right temperature to ensure the churros cook at the right rate. Use a candy thermometer to keep the oil at 350 degrees. It is ok if it goes up some like to 365, but you do not want it to go lower.
  • Piping: Pipe your churros about 4-6 inches long is all. If they get much longer they will curl and be hard to turn. If you do not have pipping tip, you can either pipe them without one or droop by small dough balls for churro donuts.
  • Pipe right into the Oil: For easiness, pipe the churros right into the oil, using scissors to cut the dough. Oil the scissors before using them so that the dough does not stick to the blade.
  • Only a few at a time: Only fry 3-4 at a time. This will prevent the oil temperature from dropping too low.
  • Roll Immediately: To get the best cinnamon and sugar coverage, roll the churros while they are still warm.
Melting chocolate chips and cream for the dipping sauce.

How To Serve Your Churros

Serve churros plain or serve them with sauce, however you serve them though, they will be everyone’s favorite. There are other options besides chocolate like strawberry or caramel sauce that you can try with homemade churros.

Dipping a churro in chocolate sauce.

Make-Ahead and Storing Fried Churros

Another great thing about churros is you can make the dough ahead of time. And then all you have left to do is fry them. And even though these are best served immediately, you can store these for a treat later on.

  • Storing: Keep cooled and coated churros in an air-tight container with a paper towel for up to two days. Reheat in the oven at 400 degrees for 8-12 minutes.
  • Freeze: Place the done churros on a baking sheet and freeze for 1 hour. Transfer to a freezer-safe bag and freeze for up to 2 months. Thaw at room temperature.
  • Make-Ahead and Refrigerate: After you have made the dough, place it in an air-tight container. I like to wrap the dough as well in plastic wrap to keep it moist. Keep in the fridge for 2 days. Place in a piping bag and fry according to directions.
  • Make-Ahead and Freeze: Form the churros on a parchment-lined cookie sheet. Freeze for 1 hour and then transfer the frozen dough to a freezer-safe bag. Freeze for up to 1 month. When ready to cook, no need to thaw. Just fry according to directions.
Holding a churro with chocolate sauce on it, with fired churros all around.
Print

Churros

All I have to hear is the word, Churros, and my mouth starts to water. Light fluffy dough is fried and then covered in cinnamon and sugar, totally heavenly!
Course Dessert
Cuisine Mexican
Keyword churro recipe, churros, homemade churros
Prep Time 15 minutes
Cook Time 30 minutes
Total Time 45 minutes
Servings 16 Churros
Calories 1126kcal
Author Alyssa Rivers

Ingredients

Churros

  • 1 cup water
  • 3 tbsp butter
  • 1 tablespoon sugar
  • Dash salt
  • 1 cup flour
  • 1 large egg
  • 1 teaspoon vanilla
  • 2 quarts canola oil

Cinnamon sugar

  • 1 ½ teaspoon cinnamon
  • ½ cup sugar

Instructions

  • Heat oil in heavy bottomed pot. Use a candy or oil thermometer to bring it to 350 degrees. Turn down the heat to maintain 330-350 during frying. It may need time between batches to come back up in temp.
  • Prep your frying station with your sugar and cinnamon mixture in a shallow dish, and a plate with paper towels to drain the hot churros.
  • In a medium sauce pan, heat water, butter, sugar, and salt over medium heat until it boils.
  • Once boiling, remove from heat and stir in the flour until it is fully incorporated with the water mixture. It will form a stiff ball of dough.
  • Add the egg and vanilla, either stirring vigorously by hand or using a hand mixer to blend. The egg won’t incorporate right away, but keep mixing and it will eventually incorporate into the dough. Be sure to keep stirring so the egg doesn’t cook in the hot pan.
  • Using a large star tip (I used Ateco 852) and a sturdy pastry bag, fill the bag with the finished dough and twist tightly.
  • When the oil has reached 350, pipe a few 4-6 inch long strips of dough into the oil. Fry for 1 minute 30 seconds on one side, and 1 minute on the other side. Remove from the oil to the paper towel lined plate. Allow to cool for 15-30 seconds before tossing in the cinnamon sugar.
  • Best served immediately.

Notes

This can be mixed by hand or by hand mixer, but mixing by hand will take some patience and strength to make sure the eggs don’t curdle in the pan.
Make sure to fry in small batches as the churros with brown more evenly and the oil will maintain it’s temperature better.
Instead of mixing the cinnamon sugar in a shallow dish, it can be mixed in a paper bag and the hot churros can be dropped in, the bag closed, and shaken to coat with sugar.

Nutrition

Calories: 1126kcal | Carbohydrates: 13g | Protein: 1g | Fat: 121g | Saturated Fat: 10g | Trans Fat: 1g | Cholesterol: 17mg | Sodium: 24mg | Potassium: 15mg | Fiber: 1g | Sugar: 7g | Vitamin A: 83IU | Vitamin C: 1mg | Calcium: 6mg | Iron: 1mg


from The Recipe Critic https://ift.tt/3xIwsfe
https://ift.tt/33bzESw