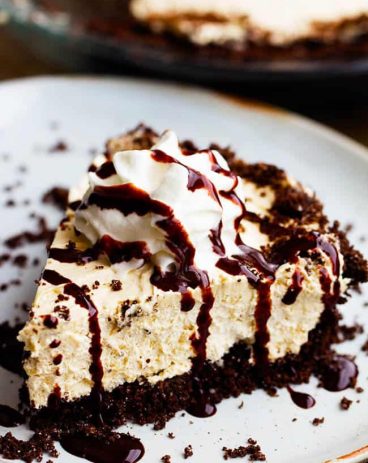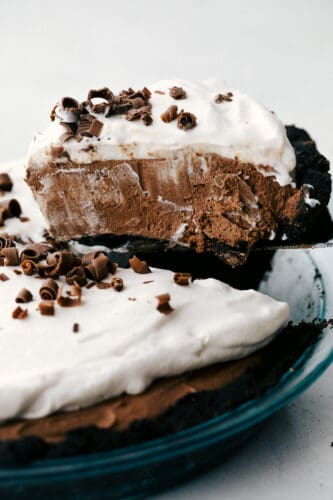
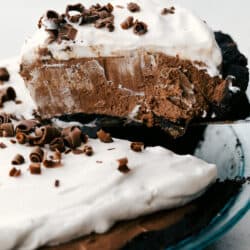
No Bake Chocolate pie is silky smooth, rich and incredibly indulgent! The perfect option when you want something exquisite, but don’t want to heat up the kitchen!
Being a in love with chocolate is a real thing, and I am here to say it is okay! I have more recipes to help you out, like this Cheesecake, Cake, and Shortbread!

Easy No-Bake Chocolate Pie
This is the perfect no-bake pie for when you need a rich chocolate fix, but you do not want to heat the house up or spend a ton of time on it. The hardest part will be waiting for it to chill. Your patience though will be heavily rewarded. This pie is incredible. It has all you could ever want in a chocolate pie. The cookie crust is a perfect blend of cookies and butter that melts in your mouth. The rich creamy filling is just the right balance of sweetness and luscious chocolate. This no-bake chocolate pie is going to hit the spot, I promise!
I love this no-bake chocolate pie for when I need to something quick and easy. Friends and family are going to go crazy about this no-bake chocolate pie, so be prepared. It is rich and it is insanely delicious! If you are more of a milk chocolate pie, use this recipe which is lighter and not as rich. This is not your Jell-o pudding pie, it is so much better and so much more.
What You Need for Chocolate Pie
All you need are these simple ingredients combined to make this no-bake chocolate pie. It is easy to make and comes together quickly!
Crust and Filling Ingredients:
- Butter: Melt your butter.
- Oreo cookie crumbs: It takes about 24 cookies.
- Semi-sweet chocolate: Use good quality chocolate for the best flavor, chop it finely. chopped
- Heavy whipping cream: You could use half and a half here if you wanted but the heavy cream makes it awesome!
- Vanilla: Did you know adding vanilla actually helps chocolate taste more like chocolate, it does!
- Instant espresso powder: This give the chocolate pie a richer more dark chocolate flavor. You can leave it out if you want to.
- Heavy whipping cream: I would not recommend using half and a half here. You need the fat and the cream to help set up the filling.
- Granulated sugar: Adds a bit of sweetness.
Topping Ingredients
- Heavy whipping cream: Ideal for whipping up to a creamy topping.
- Granulated sugar: Adds a bit more sweetness.
- Vanilla: Adds that touch of sweet flavor.
- Chocolate shavings: These are optional, but sure do make it look pretty.
How to Make the Crust for a No-Bake Chocolate Pie
Easy to throw together, this makes a great make ahead dessert! This no-bake chocolate pie has a few easy steps and
- Crush: In a blender or a food processor, add 24 Oreos and pulse until it becomes a wet powder resembling set sand. This can alternatively be done by hand in a large ziplock bag with a rolling pin.
- Combine: Melt ¼ cup butter and mix with the oreo crumbs.
- Place in Pie Tin: Press evenly into a 9-inch pie pan and put in the fridge to chill while you prepare the filling.
Mixing the Filling Together
- Prep the chocolate: Chop chocolate into small pieces and put in a heat-proof bowl.
- Melt Heat 2/3 cup of cream for about 45 seconds in the microwave, until steaming. Pour over the chopped chocolate and allow to sit for several minutes.
- Combine: Add vanilla and espresso powder to the chocolate and cream. Whisk together to make a thick ganache. Allow to cool completely.
- Whip: While the ganache is cooling, add your 1 ½ cup cream and granulated sugar to a clean mixing bowl and whip until stiff peaks form. Be careful to not over whip your cream! Peaks should stand on their own and not flop over at all.
- Mix: When the ganache is cooled completely, add to the bowl of whipped cream. Gently fold the chocolate into the cream until it just incorporated, with no streaks of dark chocolate or white cream. Pour into chilled pie shell.
- Refrigerate: Chill for at least 6 hours.
Topping it All Off!
- Whip: In a clean mixing bowl, whip 1 cup cream, granulated sugar, and vanilla together until soft peaks form.
- Add: Remove chilled pie from fridge and top with whipped cream. Add optional chocolate curls for garnish.
- Time to Eat: Serve and enjoy!

Tips For the Best Chocolate Pie
Here are a few things to keep in mind when making this indulgent no-bake chocolate pie.
- Chocolate: Use good quality chocolate, think Lindt, Ghirardelli, or Godiva. The better quality the chocolate the better the flavor of the pie. Do not skimp on the chocolate. And do not use Chocolate chips. They have stabilizers in them that keep them from melting smoothly. Your pie could end up lumpy.
- Crust: If you want to lighten up the chocolate flavor, use a graham cracker crust instead. You can substitute an equal amount of graham cracker for the Oreos.
- Cream: You can use half and half to melt the chocolate if you desire. But use heavy whipping cream for both the rest of the filling and the topping. For the topping, if you are in a hurry you can use cool whipped topping instead.
- Topping: You can place the whipped topping on each slice as you serve it, instead of spreading it on the whole pie if you would like. This will make storing leftovers easier.
- Espresso Powder: Espresso powder is darkly roasted coffee beans that have been ground, brewed, dried, and then ground to a very fine powder. They help give the chocolate a richer, more intense flavor. You can leave out the espresso powder and still have an indulgent dessert. It is optional.
- Garnish: There are other options besides the chocolate curls. Crushed Oreos, or Reese’s peanut butter cups, chopped nuts, or heath bar crumbles all make a great topping.

Storing Chocolate No-Bake Pie
You may not have any leftovers, but just incase you do, here is how to keep this no-bake chocolate pie around for a little longer.
- Fridge: Because of the high dairy content, this needs to be kept in the fridge. Cover loosely with plastic wrap, I like to use toothpicks to keep it from squishing my whipped topping. Keep in the fridge for up to 4 days.
- Freeze: This freezes beautifully. It is best if you know you are going to freeze it, to not put the whipped topping on top. Wrap in plastic wrap and then with foil for a double layer. Freeze for up to 2 months. Let it thaw overnight in the fridge before serving.

More Chocolate Recipes to Love
Cake
Chocolate Torte
Dressings, Sauces, and Dips
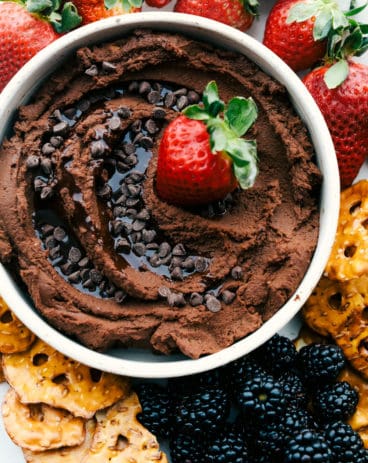
Chocolate Hummus (5 Minutes!)
Desserts
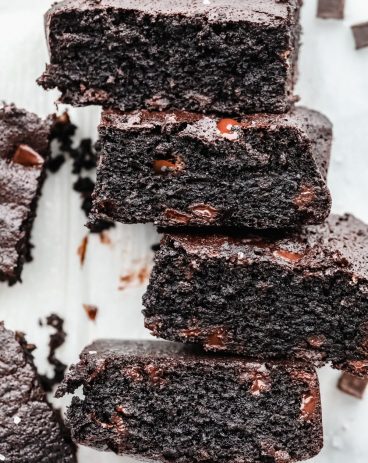
The Best Keto Brownies Recipe
Cheesecake
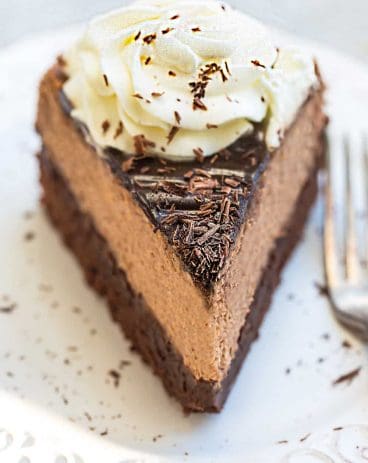
Chocolate Brownie Cheesecake
No Bake Chocolate Pie
Ingredients
Crust:
- ¼ cup butter melted
- 2 cups oreo cookie crumbs about 24 cookies
Filling:
- 8 ounces Semi sweet chocolate chopped
- 2/3 cups heavy whipping cream
- ¾ teaspoons vanilla
- 1 teaspoons instant espresso powder
- 1 ½ cups heavy whipping cream whipped to stiff peaks
- 2 Tablespoon granulated sugar
Topping:
- 1 Cup heavy whipping cream
- 1 Tablespoon granulated sugar
- ½ teaspoons vanilla
- Chocolate shavings optional
Instructions
Crust
-
In a blender or a food processor, add 24 Oreos and pulse until it becomes a wet powder resembling set sand. This can alternatively be done by hand in a large ziplock bag with a rolling pin.
-
Melt ¼ cup butter and mix with the oreo crumbs.
-
Press evenly into a 9 inch pie pan and put in the fridge to chill while you prepare the filling.
FIlling
-
Chop chocolate into small pieces and put in a heat proof bowl.
-
Heat 2/3 cup of cream for about 45 seconds in the microwave, until steaming. Pour over the chopped chocolate and allow to sit for several minutes.
-
Add vanilla and espresso powder to the chocolate and cream. Whisk together to make a thick ganache. Allow cooling completely.
-
While the ganache is cooling, add your 1 ½ cup cream and granulated sugar to a clean mixing bowl and whip until stiff peaks form. Be careful to not over whip your cream! Peaks should stand on their own and not flop over at all.
-
When the ganache is cooled completely, add to a bowl of whipped cream. Gently fold the chocolate into the cream until it just incorporated, with no streaks of dark chocolate or white cream. Pour into chilled pie shell.
-
Chill for at least 6 hours.
Topping
-
In a clean mixing bowl, whip 1 cup cream, granulated sugar and vanilla together until soft peaks form.
-
Remove chilled pie from fridge and top with whipped cream. Add optional chocolate curls for garnish.
-
Serve and enjoy!
Nutrition
from The Recipe Critic https://ift.tt/3h1Chyu
https://ift.tt/2RmNJKq