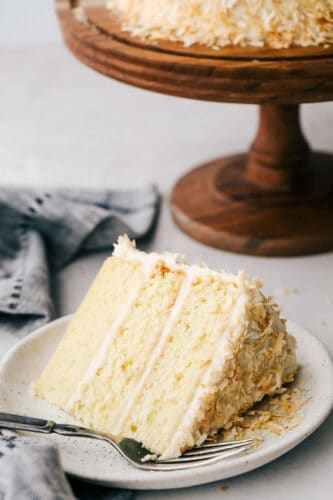
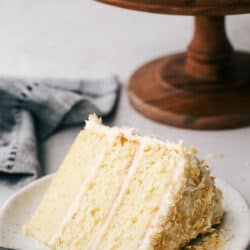
Coconut Cream Cake with Coconut Cream Cheese Frosting is super moist and delicious with the best coconut cream cheese frosting! This cake will be devoured and loved by all!
I love the sweet nutty flavor of coconut, it can transport me somewhere tropical in minutes! We love coconut in these tried and true recipes, Bread Pudding, Lemon Bars, and Pie!

Coconut Cream Cake with Coconut Cream Cheese Frosting
This coconut cake is a deliciously decadent dessert! One bite and you are going to think you’ve died and gone to tropical heaven. The cake is light and moist, just like a cake should be. Buttermilk adds the unique moisture and texture that is absolutely divine. The flavor of the coconut cream cake is sweet and nutty, with a touch of a rich butter flavor. It will be hard to not just eat the cake by itself. But you will want to wait for the creamy luscious cream cheese frosting that goes with it.
Rich, thick, and creamy this frosting is the perfect combination to go with the cake. Cream cheese combines with butter, powdered sugar and then you’ll add coconut extract to really help that coconut flavor pop. Then you will toast coconut which creates a deeper flavor with a hint of vanilla to the coconut and coat the cake. Giving it a natural decoration and flavor.
What you Need to Make Coconut Cream Cake and Frosting
There are a few steps and ingredients that go into this coconut cream cake, but it will be so worth it! The recipe card has all the measurements for you but here is a list of all ingredients and why they are so important to make this perfect coconut cake.
- Butter: Soften the butter or use room temperature.
- White sugar: White sugar actually helps the cake not only be sweet but moist.
- Cream of coconut: Coco Lopez is the one I used. It can be found by the drink mixers at your grocery store
- Eggs: The eggs should be at room temperature.
Dry Ingredients
- Flour: All-purpose flour or unbleached flour.
- Baking powder: Rising agent to help the cake be nice and fluffy.
- Baking soda: Another rising agent that is important to use.
- Salt: Provides balance to the sweet and helps the coconut taste like coconut.
Additional Ingredients
- Buttermilk: This creates tang and moisture that is impeccable.
- Coconut extract: Adds an extra bit of coconut pizazz!
Coconut Cream Cheese Frosting
- Butter: The butter needs to be softened or at room temperature.
- Cream cheese: Soften your cream cheese, or have it at room temperature.
- Coconut extract: Because the more coconut extract, the better!
- Powdered sugar: The base of sweetness for this frosting.
- Milk: Add as needed to create the right consistency.
- Toasted Coconut* see below

How do you Make Coconut Cream Cake?
This coconut cream cake takes time but it is worth every single minute! Take your time and follow the steps for the best cake EVER!
- For the Cake: Separate eggs, set whites aside. Beat wet ingredients together including egg yolks until fluffy. Sift dry ingredients together and stir well. Add dry ingredients to wet using a mixer on low speed alternating with buttermilk/extract mixture.
- Beat and Bake: In a clean bowl, beat egg whites with a pinch of salt until stiff. Fold egg whites into batter. Bake at 275-degrees in two 9-inch pans (sprayed with baking spray and floured or what works BEST is lining the bottom and sides of the pan with parchment paper) for about 90 minutes (it seems they finish much nicer in the lower heat). After about 60 minutes, do the “toothpick test”, repeating every 5-10 min or so until the toothpick comes out clean.
- Baked and ready: After the cake is out of the oven and transfer to parchment paper or a cooling rack, poke each cake with a few holes (making sure not to poke all the way through) and drizzle the remaining coconut cream over (about ½ cup total). This is optional and just keeps the cake extra moist. After the cake cools, transfer to the freezer and freeze overnight.
- Frosting: Frost immediately (see frosting recipe below) after removing from the freezer. Allow thawing for about an hour before serving. If you want to do a layered cake, put a layer of frosting in between the two cakes and then continue to frost the remainder of the cake. Sprinkle with lightly toasted, shredded coconut (see below).
All About the Coconut Cream Cheese Frosting
This frosting is light, sweet and a tropical deliciousness! The flavors all blend together creating one coconut cream cake dream!
- Making the Frosting: Beat butter, cream cheese, and coconut extract together, adding powdered sugar little by little until reaching desired consistency. If it seems to get too stiff, add about 1 tsp of milk at a time until you get the consistency you want. (add milk to thin it out, add powdered sugar to thicken it up).
- Toasted Coconut: Place contents of about ½ bag of sweetened, shredded coconut on a cookie sheet. Spread it out so it takes just a single layer. Bake for appx. 8-10 minutes in a 325-degree oven. Some pieces will still be white and soft, some browned slightly with a little crunch
Tips For the Best Coconut Cake
This tropical coconut cake is super moist, super delicious and a total showstopper!
- Plan Accordingly: This cake takes two days to make because of the freezing. Make sure you plan ahead and leave yourself enough time.
- What if you do not have time to freeze overnight? Freezing the cake makes it easier to frost. You can make the cake in the morning and freeze it for as long as possible or chill for as long as possible. It may be harder to frost, but it will still be amazing.
- Room Temperature Ingredients: I cannot stress this enough, it will make a difference in your bake. Take out your cold ingredients an hour or two before using them. Measure out exactly what you need and leave out, putting the rest back in the fridge. This is extremely important for butter, eggs, and cream cheese to be at room temperature and softened.
- Can I Use Cake Flour: No, you should not. This recipe is for regular flour, cake flour is different consistency, and components so your cake will not turn out the same. It is a good idea not to substitute flours in baked goods unless it tells you otherwise.
- Prep your pans: The last thing you want is your beautiful cake to stick to your pans. Grease and flour generously. You can also grease and then cut parchment to fit your pan and grease again.

More Ways to Bake a Coconut Cake with Frosting
Not everyone has time to make a two or three-layer cake every time, you can make this without the fancy layers and still have an out-of-this-world cake on your table!
- 9×13: Bake for 40 minutes or until a toothpick comes out clean. If you have extra batter use it in a small pan or make as cupcakes.
- Bundt: This will fit into a large 10 cup or bigger bundt pan. Bake for about an hour.
- Cupcakes: The oven should be at 350 degrees and bake for 20 minutes or until done.
- Decorate as Desired: I highly recommend using cream cheese frosting and toasted coconut, but you can decorate your cake with extras anyway you want. Make it your own.
How to Store Your Coconut Cake
Cake can be tricky to keep moist when storing, and a dry cake is no fun. Here are some tips to store your coconut cream cake in the fridge or even freezer.
- Fridge: Because it does have a cream cheese frosting you will want to store it in the fridge. To prevent the frosting from coming off in your plastic wrap, let the frosting and toasted coconut set and cool before covering. Use toothpicks to also prevent the plastic wrap from sitting right on the frosting. This will keep in the fridge for up to 2 days.
- Freeze: I like to freeze my cakes with frosting on them to ensure they stay good and moist. Set your cake in the freezer without any wrap and let the frosting freeze. Then tightly wrap in a layer of plastic wrap and then another of foil. It should keep for up to 3 months. Thaw in the refrigerator.

More Cake Recipes You are going to LOVE
Desserts
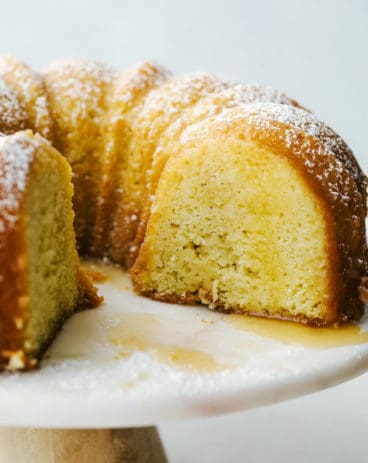
Kentucky Butter Cake
Desserts
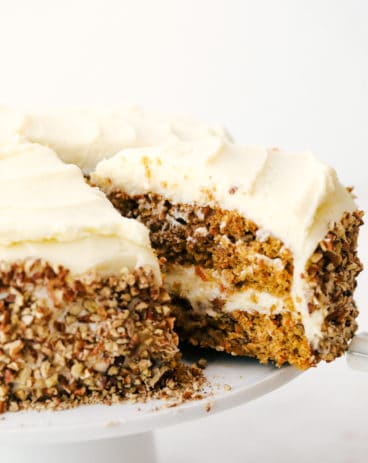
The BEST Carrot Cake Recipe EVER!
Desserts
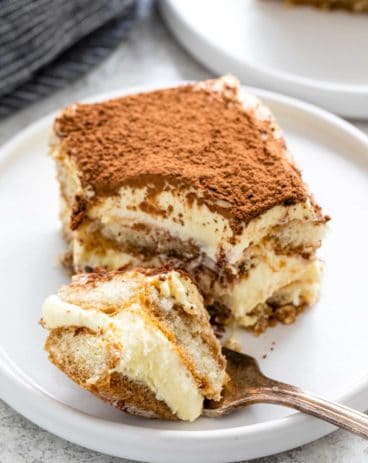
Easy Tiramisu Recipe
Desserts
Perfect Pineapple Upside Down Cake
Coconut Cream Cake with Coconut Cream Cheese Frosting
Ingredients
COCONUT CREAM CAKE:
Wet Ingredients:
- 1 cup butter softened
- 1 3/4 cup white sugar
- 1 cup cream of coconut Coco Lopez is the one I used.. it can be found by the drink mixers at your grocery store
- 4 large eggs
Dry Ingredients:
- 2 1/2 cup flour
- 1 teaspoon baking powder
- 1/2 teaspoon baking soda
- 1/2 teaspoon salt
Additional ingredients:
- 1 cup buttermilk
- 1 teaspoon coconut extract
Coconut Cream Cheese Frosting
- 1/2 cup butter softened
- 8 ounces block cream cheese softened
- 1 teaspoon coconut extract
- 2 pounds powdered sugar one bag
- milk as needed
- Toasted Coconut* see below
Instructions
Cake Instructions
-
Preheat oven to 315 degrees. Prepare two 8 inch cake pans by spraying with cooking spray and dusting with flour. You can add a parchment round as well for easier release from the pan.
-
On medium speed, beat together butter, sugar, cream of coconut, and egg yolks until fluffy.
-
In another bowl, sift together flour, baking powder, baking soda, and salt.
-
In a liquid measuring cup, measure out the buttermilk and add the coconut extract.
-
Add the dry ingredients and the buttermilk to the butter and sugar mixture, alternating between the buttermilk and dry ingredients. Scrape down the bowl and mix again briefly.
-
In a clean bowl, beat the egg whites until stiff peaks form. Gently fold egg whites into the cake batter.
-
Separate the batter equally into the two pans.
-
Bake for 50 minutes. Test the center for doneness. This can be done with a toothpick inserted into the center to see if it comes out clean, or you can gently press your fingertips against the center of the cake. If it is done, the top will spring back. If it needs more time, add 10 minutes and check again until done.
-
Remove from oven and place on a cooling rack.
-
OPTIONAL: If you would like to add extra moistness to your cake, while the cake is still hot use a pastry brush to brush the remaining cream of coconut (should be about ½ a cup) over the tops of the cake.
-
Once cooled, wrap the cakes in plastic wrap and store them in the fridge overnight, or at least 4 hours.
Frosting Instructions
-
Beat together butter, cream cheese, and coconut extract until smooth and fluffy.
-
Add half of the powdered sugar and mix at low speed for 1 minute. Add the rest of the powdered sugar and mix on low until all the sugar has been incorporated. Bring the speed up to medium and beat for 3 minutes until smooth. If the icing seems too stiff, add milk one tablespoon at a time until it has reached the desired consistency. Don’t let it get soupy! You will want the icing fairly stiff to still be able to frost the cake.
-
Frost your cake, using icing between the one or two layers (depending on how many layers you make).
Toasted Coconut
-
Preheat oven to 350 degrees. Spread about 1-1 ½ cups of sweetened coconut flakes on a parchment-lined baking sheet.
-
Bake for about 8-10 minutes, stirring every couple of minutes.
-
Allow cooling. Press the toasted flakes around the entire freshly iced cake.
-
Serve and enjoy!
Video
Notes
Nutrition
from The Recipe Critic https://ift.tt/3y6S1Xk
https://ift.tt/3uriTyS