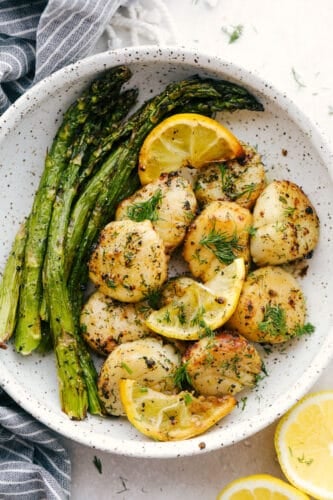
Air Fryer Lemon Dill Scallops are going to change the way you eat scallops! These are chock full of flavor, tender, juicy and succulent!
Scallops are a favorite, they are mild in flavor so they take on your seasonings beautifully. Try these scallops in Tuscan Garlic, Grilled Lemon, and Pan Seared, all insanely delicious recipes!

Air Fryer Scallops
These scallops done in the air fryer are going to blow your tastebuds. The air fryer just infuses the lemon and dill into the scallops which creates a deep rich yet bright and zingy dish. Perfect for summer. Air Fryers are a cook’s dream come true! They are fast, healthier, and cook everything to perfection! Plus dishes are reduced and you do not have to heat up the kitchen to cook. Perfect for those hot days. Now you can have incredible luscious meals, save time, stay cool and eat like a king!
Some of our favorite air fryer dishes include Steak, Chicken, and Potatoes. And now you can add these scallops to those favorites. They come out impeccable, your whole family is going to love these. Pair them with a side salad, some pasta or vegetables. Keep in mind scallops do not keep well so only make what you will eat that night for best results. I tend to serve 4-6 per person. You have to try these!
Lemon and Dill Scallop Ingredients
These air fryer scallops are so full of flavor, they are going to wow your taste buds!
- Scallops: Fresh, rinsed, and patted dry.
- Olive Oil: This will coat the scallops and help the flavorings stick.
- Butter: Melt your butter to stir in the mix.
- Garlic: Freshly minced garlic
- Lemon: Freshly squeezed for zing and tartness.
- Dill chopped: I used freshly chopped dill, but you can use dried, see my tips.
- Salt and pepper: Add to taste.
How to Make Scallops in the Air Fryer
Using the air fryer makes these scallops almost effortless, and so insanely delicious.
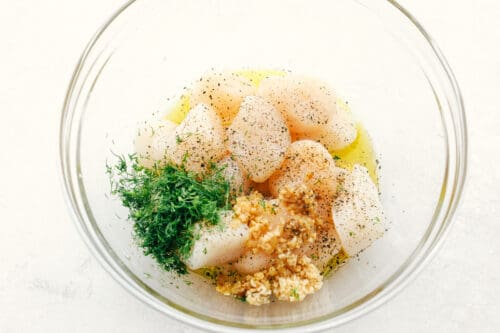
- Mix the Flavor: In a medium-sized bowl combine scallops, olive oil, butter, garlic juice of one lemon, dill, and salt and pepper.
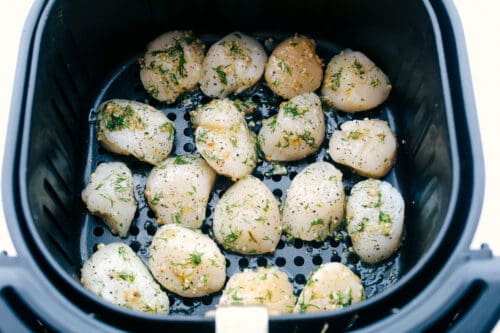
- Scallops: Add the scallops in a single layer in the basket of your air fryer.
- Air Fry: Cook at 400 degrees for 6-8 minutes or until it reaches an internal temperature of 120 degrees.

How to Cook Scallops
Air Fryer Scallops are a delicate slightly sweet tasting shellfish. They are absolutely divine when cooked properly. So here is all you need to know.
- Buying: There are two ways to buy scallops, fresh and frozen. Both will work for this recipe. Be sure to thaw frozen scallops overnight in the fridge. Do not use a microwave to thaw.
- Frozen: Look for wild-caught scallops without the roe for ease. The roe is a bright orange or coral-colored crescent shape that can still be attached. It can taste a bit bitter. If that is all you can find simply remove it before cooking. Whole scallops will also come with the roe and the muscle that attaches it to the shell, which too will need to be removed.
- Fresh: When you go to find fresh, they will either come packed in water, which is preservatives, or dry-packed. Whichever kind you buy, look for scallops that are a uniform pearly white color with firm, slightly moist flesh. Make sure they don’t look mangled or shredded and off in color.
- Cleaning: Scallops are a breeze to clean and prepare for cooking. Simply rinse under cool running water and then pat them dry. If you feel a tag of tissue on the side of the muscle that is a bit tougher than the rest, that’s the side muscle and needs to be removed. Just pinch and tear and it will come away easily. If you do not find one, no worries, most of the time they come off in the harvesting process.
- Do NOT overcook: If people like shellfish, but not scallops, it’s often because they have had ones that are overcooked. They will become tough and rubbery so cook just till they are done, 120 degrees, they will continue to cook when removed reaching the optimal 130 degrees inside.
Air Frying Scallop Tips
Air Frying makes these super easy and absolutely divine, every single time!
- Do not overcrowd: When you place them in the air fryer be sure to not overcrowd them or they will not cook evenly.
- Every Air Fryer is Different: The number one rule when trying out a new recipe in your air fryer is to check your food often, some air fryers are more powerful than others and you do not want food that is undercooked or overcooked, so check it!
- Do not use Cooking Spray: Cooking spray has additives that can ruin the basket. If you feel like you need to oil your basket do it with an oil pump instead.
- These will not brown like pan searing: Do not wait for these to turn brown to know if they are done. You will need an internal thermometer.
- Dill: If you cannot find fresh dill, you can use dried. Use half the amount called for as dried herbs are potent than fresh.

More Seafood Recipes to Try

Air Fryer Lemon Dill Scallops
Ingredients
- 1 pound scallops
- 1 Tablespoons olive oil
- 2 Tablespoons butter melted
- 3 cloves garlic minced
- juice of one lemon
- 1 Tablespoons dill chopped
- salt and pepper
Instructions
-
In a medium sized bowl combine scallops, olive oil, butter, garlic juice of one lemon, dill, and salt and pepper.
-
Add the scallops in a single layer in the basket of your air fryer.
-
Cook at 400 degrees for 6-8 minutes or until it reaches an internal temperature of 120 degrees.
Nutrition
from The Recipe Critic https://ift.tt/3vVLqgw
https://ift.tt/3y38Zph