रविवार, 16 मई 2021

How to Grill the Most Amazing Beef Burger

Grilled Beef Burgers are one of the most amazing things you can sink your teeth into, especially when they are done right! Be prepared, because these will be the best burgers you have ever had!

Cooking on the grill is a fantastic way to eat, especially in the summer when you do not want to heat up the kitchen. To have incredible food and still stay cool, try these tried and true, Huli Huli, Avocado Chicken and Steak!
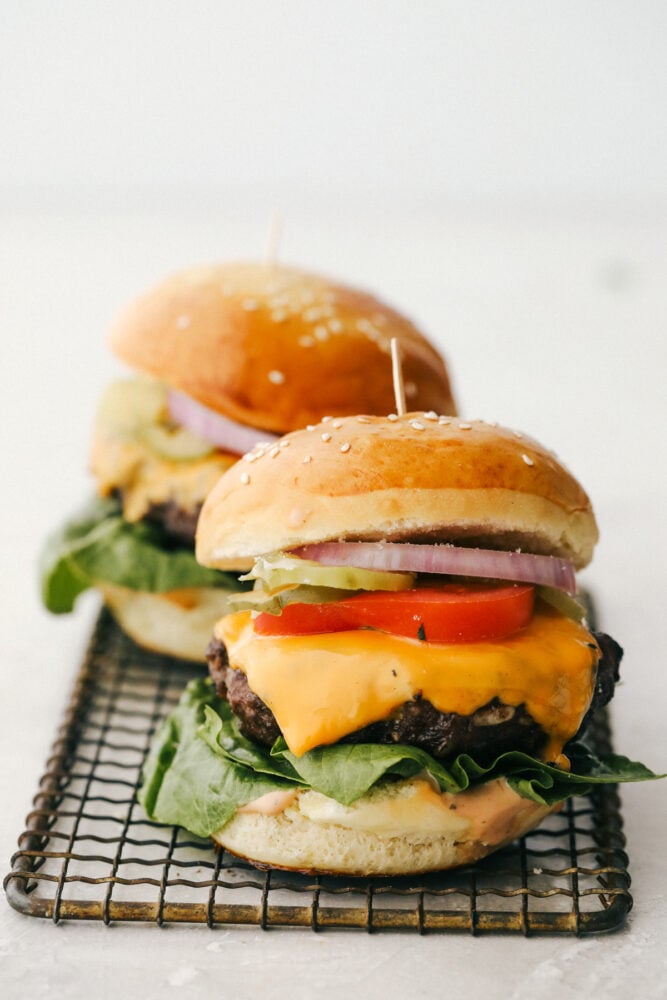
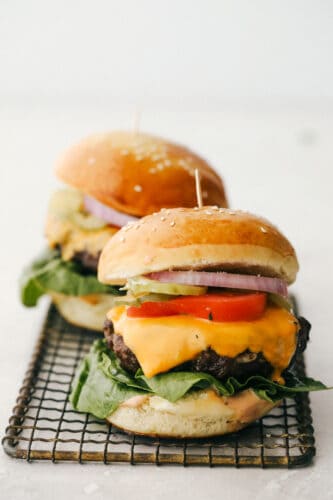
Hamburgers with all the toppings ready to be served.

Amazing Grilled Beef Burgers

I love everything about summer. The pool parties, vacations, and of course the food! Fresh fruits and vegetables are everywhere and everyone is getting their grills out! Some of the best foods come from over the open flame. From shrimp, to corn and even fruit, grilling just makes heavenly food! These beef burgers are going to be a favorite addition to your grilling recipes.

Do not let grilling scare you, it is so easy and I have all the tips and tricks so you can make the BEST hamburgers Ever! These beef burgers will come out perfectly juicy, full of flavor and grilled to perfection. Everyone loves a good burger, but a grilled burger is epic, and it all starts here! So let’s grill!

What You Need For The Best Beef Burgers

Grilled burgers are the perfect picnic or large gathering food. Skip the frozen burgers and make your own for the best tasting!

  • 80/20 Ground Beef: Make sure your beef is cold and not at room temperature.
  • Garlic cloves: Freshly minced will give the best flavor.
  • Minced onion: Dried minced onion will give tons of flavor without the bulk.
  • Worcestershire sauce: This is a must in homemade burgers, it adds the best umami flavor.
  • BBQ sauce: Gives a bit of sweet, a bit of tang and heat all in one.
  • Salt and Pepper: Add to taste:
  • Buns: Because homemade burgers deserve the best Homemade buns!

Optional Toppings for the Best Burgers

  • Sliced Red Onion: A bold flavored onion that goes well with the burger.
  • Pickles: Dill pickles all the way!
  • Lettuce: Use nice crisp iceberg lettuce.
  • Tomato: Slice it thin to fit on the burger best.

Let’s Get Grilling!

Grilling is so much easier than you think, and it all starts with forming the perfect burgers.

  • Mix: In a medium sized bowl combine the ground beef, garlic, minced onion, worcestershire sauce, BBQ sauce, and salt, pepper. Mix ingredients together but be careful not to overmix.
  • Form: Shape the patties and create a divot in the center of each patty. This helps the burgers from puffing up or shrinking to much while cooking.
  • Grill: Heat the grill to 400 degrees. Place the burgers on direct heat and grill for 4-5 minutes on each side until desired doneness.
  • Cheese: Add the cheese to the burgers and let melt. Serve on toasted butter hamburger buns with desired toppings.
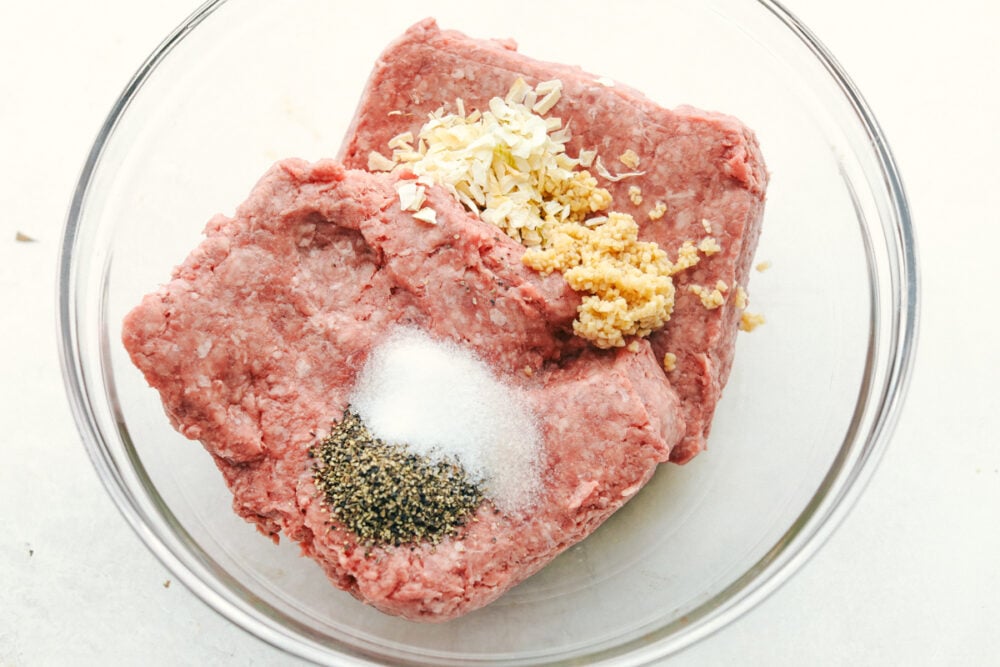
All the hamburger ingredients in a bowl ready to be mixed.

Tips For The Best Grilled Hamburgers

There are a few tips to make sure your hamburgers are juicy and delectable. Every time you make grilled burgers you will know they will turn out with these tips!

  • 80/20 Ground Beef: You might be thinking that these are a bit fatty for your taste, but you need the fat to create the juicy, full of flavor, interior. Without the fat, your burgers will dry out before they are done, leaving you with overcooked tasteless dry pucks of beef. Most of the fat will cook off as you grill it so it’ll be ok, but trust me you will need the fat. You could go down to 85/15 without losing the juiceness or flavor, but I would not go lower.
  • Divot: The divot is extremely important for ensuring your hamburgers cook evenly and without too much shrinkage. There is nothing worse than having not enough burger for your bun. Denting the beef prevents the burger from puffing up in the middle which will make it difficult to cook, leaving the edges burnt and dry before the center is done. It is a must do!
  • Thickness: For optimal burger to bun ratio the standard is ¾ of an inch thick. If they are thinner than that you will need to adjust the grilling time. Also form the patties about an half an inch to an inch bigger than the circumference of the bun. This way the burger is sure to fit the bun.
  • Keep it Cold and do not overmix: You need the beef to stay cold so that the fat doesn’t melt. When that happens to much of the fat will cook off and leave you with a dry hamburger. Overmixing will also break down the fibers causing your burger to crumble and become dry.
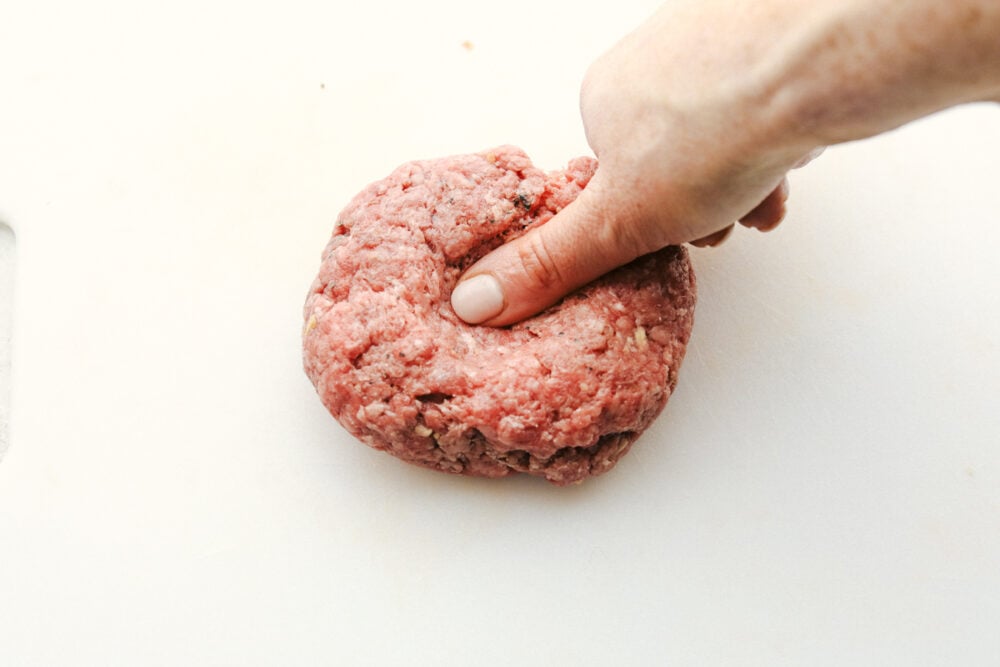
Putting a divot in the burger with a thumb.

Grilling Burgers for Beginners

There are lots of little tidbits to keep in mind when you are making the best burgers. You will love how simple these grilled burgers come together!

  • Resist The Temptation: Try not to press down on the burger while it cooks. This squeezes out all those lovely juices that are meant to be inside.
  • Let it Rest: Let the hamburger rest for 5-10 minutes after grilling to redistribute the juices throughout the meat.
  • Got Fire: If you get a flare up on your grill, cut off the oxygen to the flame by closing the lid. This should put it out. And have a glass of water on hand, just in case.
  • Variations: There are many ways to vary your burger from the kind of meat you use, to the seasonings and the toppings. Once you feel you have the basics down good, experiment with flavors and textures. Keep in mind any time you change the meat, you will change the cook time, temperature, and seasonings. Besure to do your homework before working with different meats in your burgers so that you can still have the best, juiciest and most flavorful burger around.
  • Toppings: Get creative with your tastebuds and try different toppings. Some ideas include grilled onions or mushrooms, pineapple and teriyaki sauce, pepper jack cheese and avocado spread. Melt blue cheese and top with bacon. The possibilities are endless. Let the grilling begin!
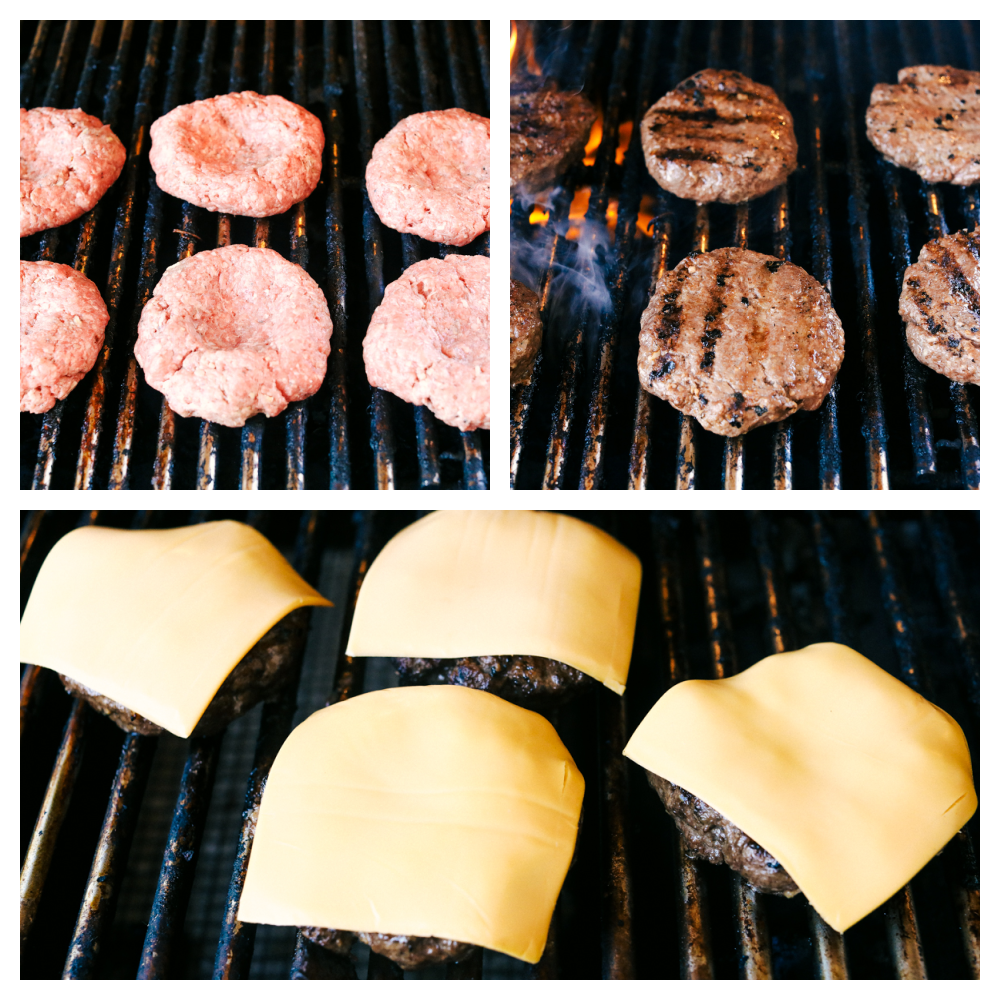
Grilling the burgers, flipping them and placing the cheese on top.

How To Know Your Burgers Are Done

Everyone likes their burgers are done a bit differently, but there is something to keep in mind when grilling your burgers. Bacteria which lives on the surface of meat, like steak, is cooked or seared and in doing so the bacteria dies. Hamburger takes that surface bacteria and grinds it up in all together so that the bacteria is throughout the meat. It is recommended that ground beef is cooked till the internal temperature reaches 160 degrees. Killing the bacteria throughout making it the safest temperature to eat. Those are the recommendations that should be followed especially for children and elderly as they are more susceptible to foodborne illness.

Hamburger Doneness Internal Temperature Center Color
Medium Rare 130-135 °F Pink
Medium 135-145 °F Some Pink
Well 145-155 °F Sliver of Light Pink
Well Done 155-165 °F Mostly Brown
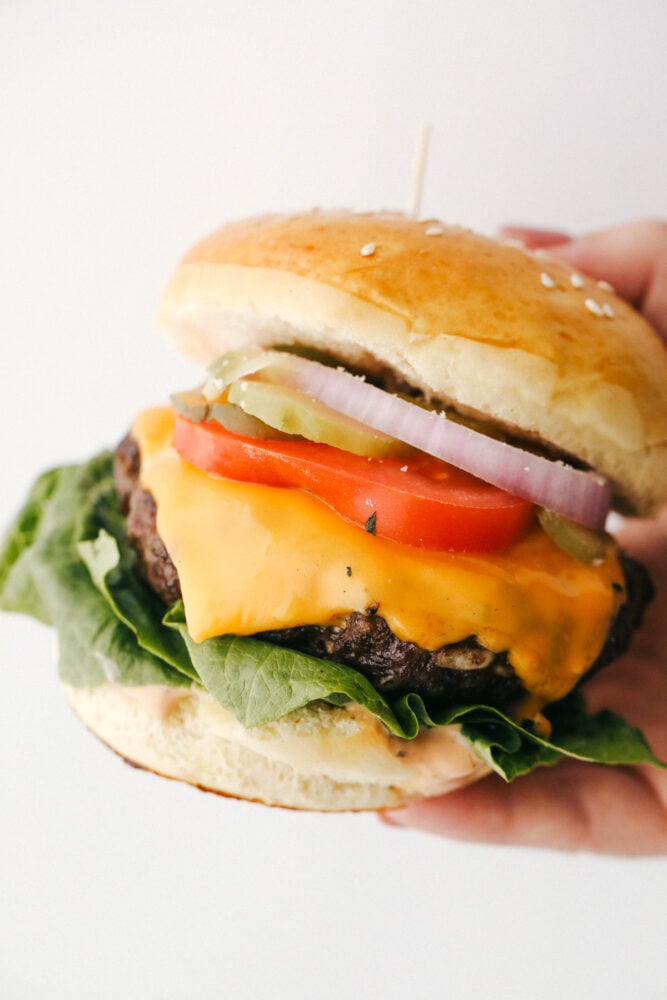
Holding a perfect juicy hamburger with toppings on a homemade bun.
Print

Grilled Burger Recipe

Grilled Beef Burgers are one of the most amazing things you can sink your teeth into, especially when they are done right! Be prepared, because these will be the best burgers you have ever had!
Course Dinner, Main Course
Cuisine American
Keyword beef burger, grilled burger recipe
Prep Time 10 minutes
Cook Time 15 minutes
Total Time 25 minutes
Servings 4 burgers
Calories 598kcal
Author Alyssa Rivers

Ingredients

  • 2 pounds 80/20 ground beef cold
  • 3 garlic cloves minced
  • 1 Tablespoon minced onion
  • 1 Tablespoon Worchestershire sauce
  • 2 Tablespoons BBQ sauce
  • 1 teaspoon salt
  • 1/2 teaspoon pepper
  • Homemade Hamburger Buns

Optional toppings:

  • Sliced Red Onion
  • Pickles
  • Lettuce
  • Tomato

Instructions

  • In a medium sized bowl combine the ground beef, garlic, minced onion, wochestershire sauce, BBQ sauce, and salt, pepper. Mix ingredients together but be careful not to overmix.
  • Shape the patties and create a divot in the center of each patty. This helps the burgers from puffing up or shrinking to much while cooking.
  • Heat the grill to 400 degrees. Place the burgers onto direct heat and grill for 4-5 minutes on each side until desired doneness.
  • Add the cheese to the burgers and let melt. Serve on toasted butter hamburger buns with desired toppings.

Nutrition

Calories: 598kcal | Carbohydrates: 5g | Protein: 39g | Fat: 45g | Saturated Fat: 17g | Trans Fat: 3g | Cholesterol: 161mg | Sodium: 865mg | Potassium: 679mg | Fiber: 1g | Sugar: 3g | Vitamin A: 25IU | Vitamin C: 1mg | Calcium: 54mg | Iron: 5mg


from The Recipe Critic https://ift.tt/3eRdI61
https://ift.tt/33OeM4o
Strawberry Streusel Bars

Strawberry Streusel Bars are buttery, sweet and the perfect summertime treat! With a tasty shortbread and mouth watering crumble top, everyone is going to love these!

Strawberries are such a beautiful fruit to use in your cooking, their sweetness adds so much flavor. Try them in this Salad, Pie, and Bread!

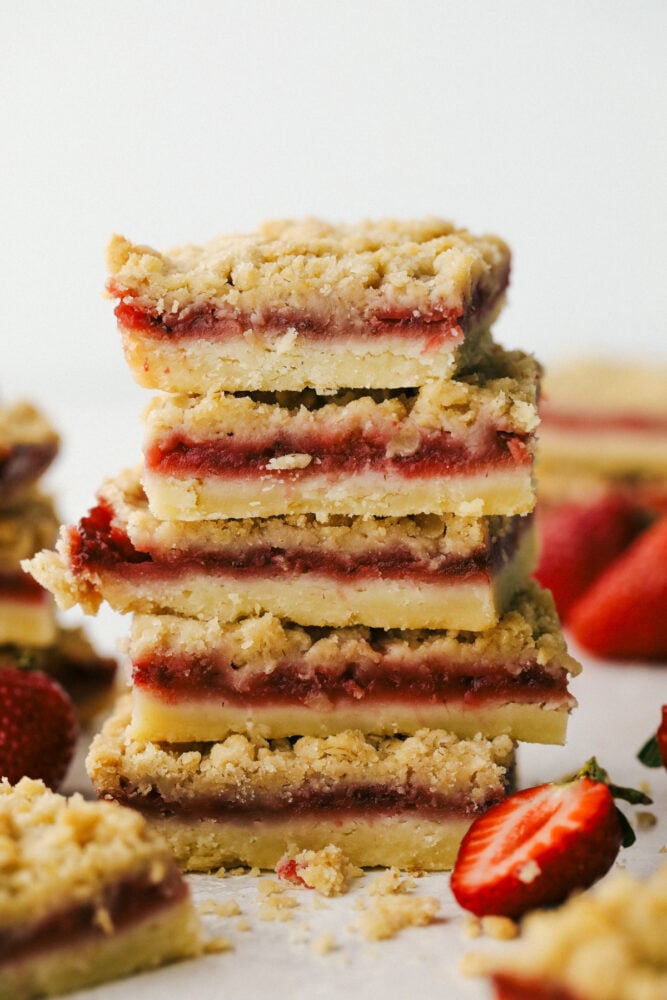
Strawberry streusel bars stacked on top of eachother ready to eat.

Amazing Strawberry Streusel Bars

I love when strawberry season is here! I cannot help but buy strawberries every time I go to the store or farmers market. They are red, juicy and super sweet! I have several strawberry recipes on the blog that are delicious just like these strawberry streusel bars. These cookie bars are the perfect blend of sweetness, tartness and a bit of rich butteriness that is going to win everyone over!

Strawberry streusel bars are a surefire crowd pleaser! They are buttery, sweet, and a little bit crunchy. The texture and color alone are enough to draw a crowd. These are perfect for a potluck, or family gathering. Bars make some of the best desserts because I can make a large batch of desserts all at once and they are not overly messy to serve. Perfect for little hands to hold. Just try these other bar favorites, Neiman Marcus Bars, Lemon Bars and Cherry Pie Bar!

Ingredients for These Incredible Strawberry Bars

You may have everything you need right now in your pantry. So grab some strawberries and let’s start baking! For the full recipe print or read the recipe card below.

  • Flour: All-purpose flour will work perfectly.
  • Powdered sugar: It mixes a bit easier than regular sugar.
  • Salt: Balances out the sweetness.
  • Butter: Have your butter cold, and cubed.

Strawberry Filling

  • Cornstarch: Is used as a thickener.
  • Sugar: Balances the tartness.
  • Fresh strawberries diced: It is ok if they are about to turn.
  • Strawberry preserves: Adds a little bit more strawberry flavor and helps it all stick together.
  • Lemon zest: Helps to keep the strawberries fresh tasting, without adding a bunch of lemon flavor.

Streusel Topping

  • Flour: All-purpose, again is what I used.
  • Oats rolls or quick: They will both work, it just depends on what you want.
  • Brown sugar: Gives a deeper flavor than white.
  • Salt: Balances the sweetness and helps everything taste better.
  • Butter:  Again use cold cubed butter.

How to Make Dessert Bars

These strawberry streusel bars come together quickly and then you pop them in the oven and let it do all the work for you.

Bake the Crust

  1. Prep: Preheat oven to 350. Grease and flour a 9×13 pan and set aside.
  2. Blend it till crumbly: Mix together flour, powdered sugar, and salt. Add the cold, cubed butter. Using a fork or a pastry blender, cut butter into the dry ingredients until it starts to get crumbly. You can continue with the fork or pastry blender, but I find it easiest to mix the rest of the way with clean hands.
  3. Press: Evenly drop clumps of dough into the pan and then use your fingers to press down into the pan. Bake for 25-30 minutes, until the edges start to get golden. Meanwhile, prepare the filling and streusel topping.

Layer the Strawberry Filling

  1. Combine: Mix together the cornstarch and sugar, set aside.
  2. Strawberries: Dice the strawberries into small pieces. Mix together with the sugar mixture, strawberry preserves, and lemon zest.
  3. Layer it: Spread evenly across the par-baked crust.

Oatmeal Streusel Topping

  1. Mix: Combine flour, brown sugar, oats, and salt.
  2. Crumble: Add butter and cut it in with a fork or pastry. Mix until the butter is about pea-sized and clumpy.
  3. Place: Spread evenly across the top of the strawberry filling.
  4. Cook: Bake for 30-35 minutes, until the streusel topping begins to brown.
  5. Enjoy: Allow the strawberry streusel bars to cool before serving.
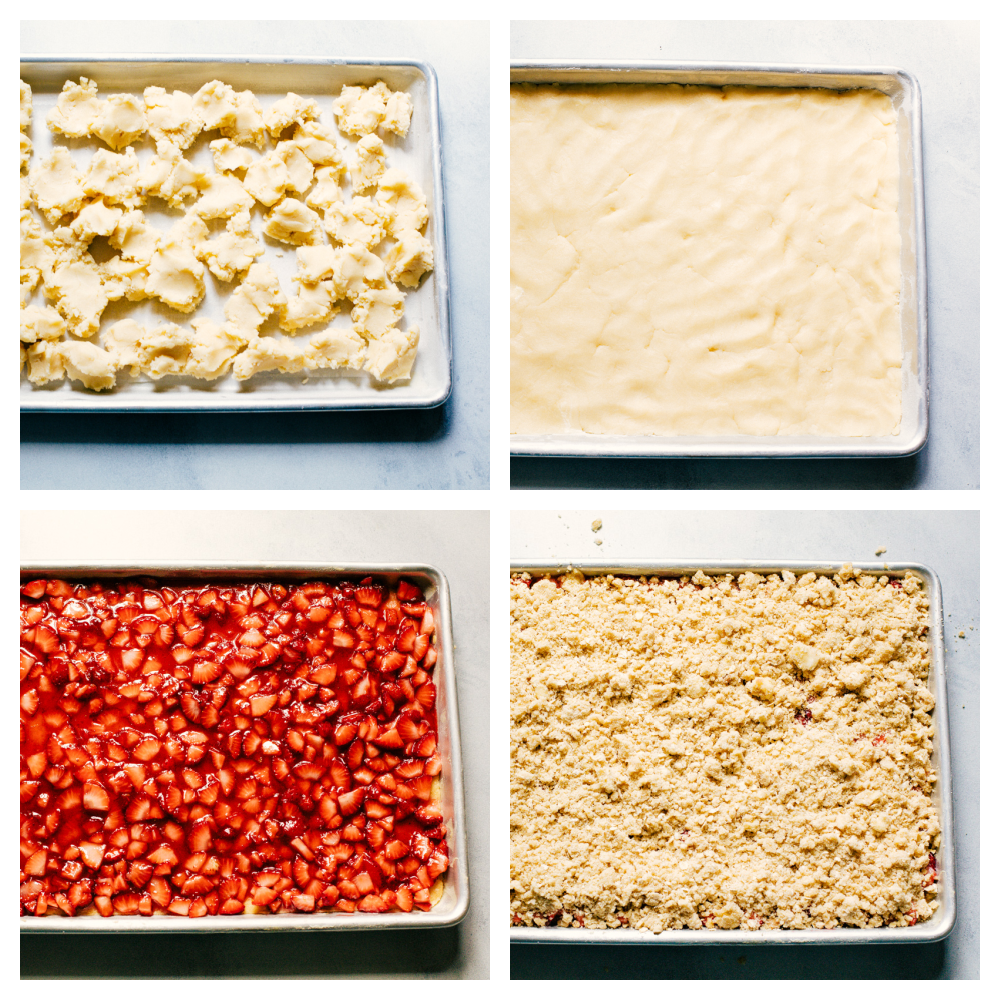
Four photos of the process of making strawberry streusel bars.

Tips For the Best Strawberry Streusel Bars

Simple and decadent these strawberry streusel bars are going to disappear as fast as you can put them out.

  • Strawberries: Be sure to dice the strawberries evenly. If you want to cover more area chop the strawberries up a bit more so they are smaller but still chunky enough to give you a mouthful of goodness.
  • Cold: Normally you see me tell you to bring your butter, eggs etc to room temperature, but not here. You want your butter to be cold and stay cold. If the butter “melts” too much before it hits the oven, you’ll end up with greasy blobs instead of light strawberry squares.
  • Get your Hands Dirty: Mixing usually works best if you use your hands. Using a spoon will work too, but there is just something about using your hands that mixes it up best. Just do not overwork it to the point where it starts to melt the butter.
  • Let them Cool: While these are insanely delicious warm, they will fall apart if you try to eat them without letting them cool first.
  • Oats: Which kind of oats you use is totally a personal preference. The regular oats will give you more of a bite and substance whereas the quick will blend in more.
  • Add a Glaze: If you want to really kick it up a notch, whip up a lemon glaze to drizzle on top. Use 1 cup of powdered sugar and about 2 Tablespoons of fresh lemon juice and mix well. Drizzle over warm strawberry streusel bars and let cool. YUM!

How to Store Leftover Streusel Bars

I am not sure you will have leftovers, but incase you do, let’s make sure these strawberry streusel bars get put away right!

  • Room Temperature: Cover tightly and keep at room temperature for 2-3 days.
  • Fridge: Strawberry Streusel Bars really do store best in the fridge. Make sure they are in an airtight container and they will keep in the fridge ro up to 1 week.
  • Freeze: I love freezing leftovers to pull out when I need them but do not have time to make them. I wrap the strawberry bars in plastic wrap, then place in a freezer safe bag sealed tightly for up to 3 months. Let thaw at room temperature, or fridge.
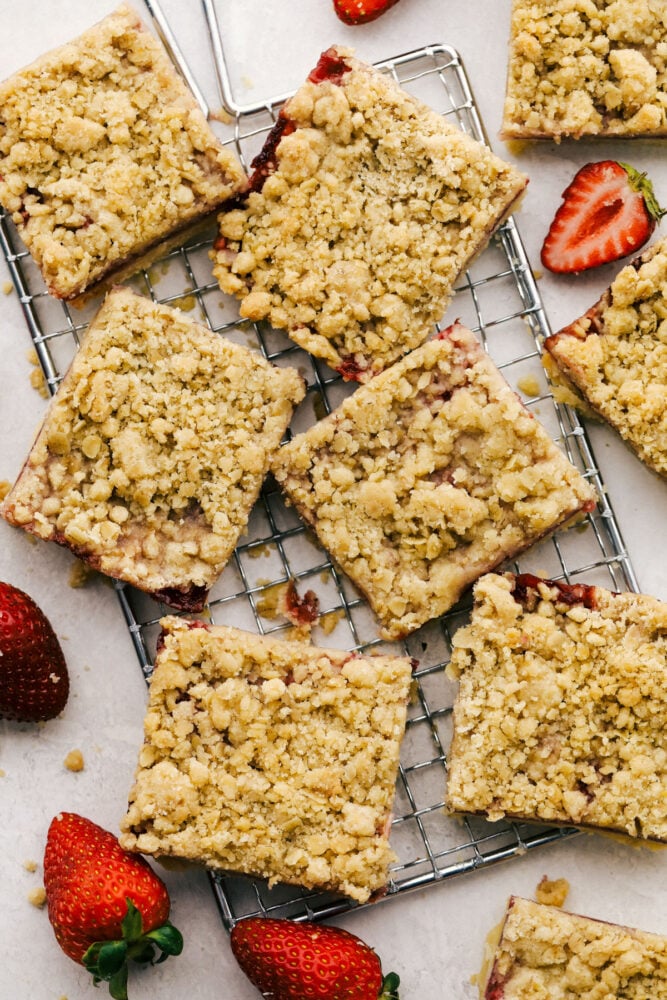
Strawberry streusel bars cut into squares for easy grabbing.
Print

Strawberry Streusel Bars

Strawberry Streusel Bars are buttery, sweet and the perfect summertime treat! With a tasty shortbread and mouth watering crumble top, everyone is going to love these!
Course Dessert
Cuisine American
Keyword strawberry bars, strawberry streusel bars, streusel bars
Prep Time 30 minutes
Cook Time 1 hour
Total Time 1 hour 30 minutes
Servings 16 bars
Calories 319kcal
Author Alyssa Rivers

Ingredients

Crust

  • 1 ¾ cup Flour
  • 2/3 cup powdered sugar
  • ¼ teaspoon salt
  • 1 Cup butter cold, cubed

Filling

  • 1 teaspoon cornstarch
  • 2 Tablespoon sugar
  • 2 cups fresh strawberries diced
  • 6 Tablespoon strawberry preserves
  • 1 teaspoon lemon zest

Streusel Topping

  • 1 cup flour
  • ½ cup oats rolls or quick
  • ½ cup brown sugar
  • ¼ teaspoon salt
  • ½ cup butter cold, cubed

Instructions

  • Preheat oven to 350. Grease and flour a 9×13 pan and set aside.

CRUST

  • Mix together flour, powdered sugar, and salt. Add cold, cubed butter. Using a fork or a pastry blender, cut butter into the dry ingredients until it starts to get crumbly. You can continue with the fork or pastry blender, but I find it easiest to mix the rest of the way with clean hands.
  • Evenly drop clumps of dough into the pan and then use your fingers to press down into the pan. Bake for 25-30 minutes, until the edges start to get golden. Meanwhile, prepare the filling and streusel topping.

FILLING

  • Mix together the cornstarch and sugar, set aside.
  • Dice the strawberries into small pieces. Mix together with the sugar mixture, strawberry preserves, and lemon zest.
  • Spread evenly across the par-baked crust.

STREUSEL

  • Combine flour, brown sugar, oats, and salt.
  • Add butter and cut in with a fork or pastry. Mix until the butter is about pea sized and clumpy.
  • Spread evenly across the top of the strawberry filling.
  • Bake for 30-35 minutes, until the streusel topping begins to brown.
  • Allow to cool before serving.

Nutrition

Calories: 319kcal | Carbohydrates: 38g | Protein: 3g | Fat: 18g | Saturated Fat: 11g | Trans Fat: 1g | Cholesterol: 46mg | Sodium: 230mg | Potassium: 80mg | Fiber: 1g | Sugar: 18g | Vitamin A: 534IU | Vitamin C: 11mg | Calcium: 20mg | Iron: 1mg


from The Recipe Critic https://ift.tt/3bpor5B
https://ift.tt/3hu3Wso

शनिवार, 15 मई 2021

Air Fryer Potato Wedges

Air Fryer Potato Wedges are crispy with seasoning on the outside and perfectly tender on the inside! These are so insanely delicious you are going to love them!

Air Fryers were made for potatoes, seriously. Try out these tried and true air fryer potato recipes to see why, Baked, Roasted, and of course Fries.

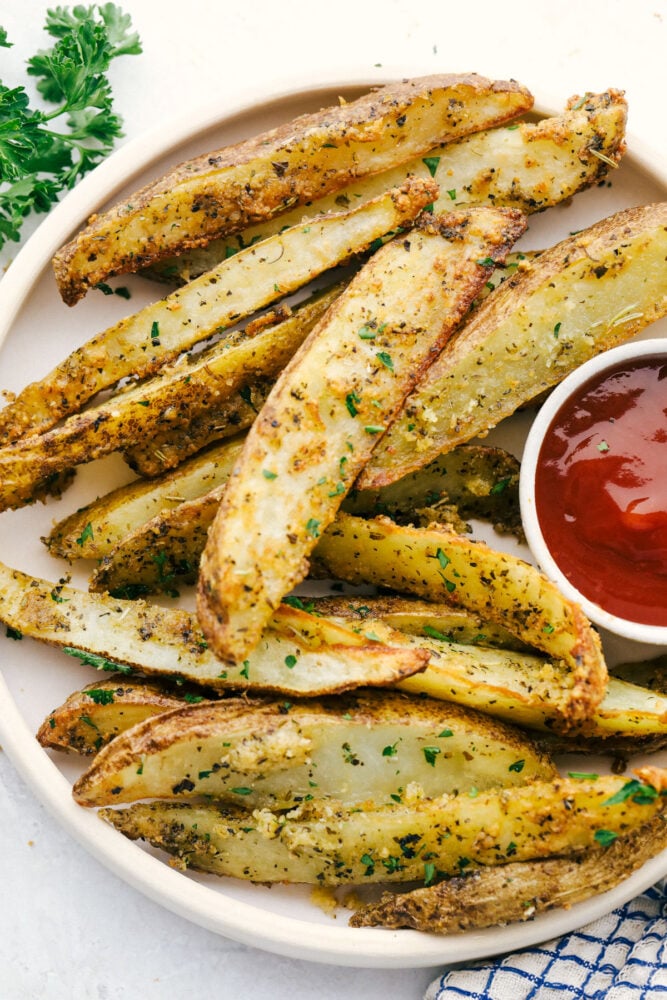
Air Fryer potato wedges on a plate with ketchup.

Air Fryer Potato Wedges

Oh my goodness! I love potatoes, whether they are fried, mashed, baked, or made into a heavenly cheesy side dish. Not to mention the velvety soups, potato hash, roasted potatoes, and even potato chips! Now, these! I have always loved them baked in the oven and still do, but the air fryer makes it so much faster! Sometimes it doesn’t matter how well I plan, I am always scrambling to get side dishes for my main dishes. Often they get skipped completely because they take too long to cook. Not with the Air Fryer!

The air fryer will give you incredible crispy crusty outsides and tender fluffy insides in less than half the time, and with less oil. I can less fat and get even better results with the air fryer. The big bonus is I do not have to heat up the kitchen to bake them too. Awesome! These potato wedges go perfectly with just about anything but I love them with hamburgers, grilled chicken, and steak!

What You Need For Potato Wedges in the Air Fryer

Change the seasonings to your likings. Suggestions below.

  • Russet potatoes: Perfect for frying, they get beautifully crisp.
  • Extra virgin olive oil: This helps crisp them up and helps the seasoning stick.
  • Garlic powder: This will stick better than minced garlic and is not quite as strong as the fresh.
  • Italian seasoning: A perfect blend of spices and herbs.
  • Salt or to taste: Got to have a bit of salt for flavor.
  • Freshly ground black pepper or to taste: Not too much, you do not want it to overpower.
  • Freshly grated Parmesan: Can use jarred parmesan, but make sure it is finely grated.
  • Chopped fresh parsley for garnish: This is optional but adds color and a bit of freshness.

Let’s Make Potato Wedges

These are going to be done in no time and go perfect with just about anything.

  1. Prep Potatoes: Cut each potato lengthwise in half. Cut each half into three wedges.
  2. Seasonings: In a large bowl add the potato wedges, olive oil, garlic powder, Italian seasoning, grated parmesan salt, and pepper.
  3. Air Fry: Place the potatoes in the basket of your air fryer. Cook for 390 for 15 minutes. Shake the basket every 5 minutes until crispy and golden brown.
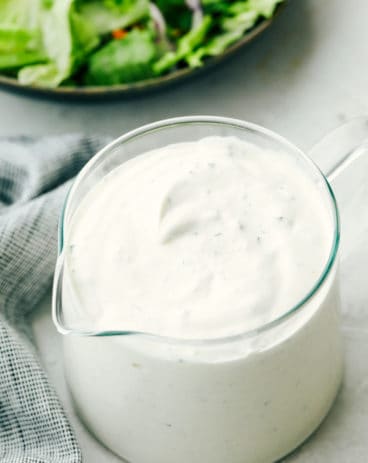
  4. Serve: Garnish with fresh parsley and serve with ketchup, ranch, or sauce of choice.
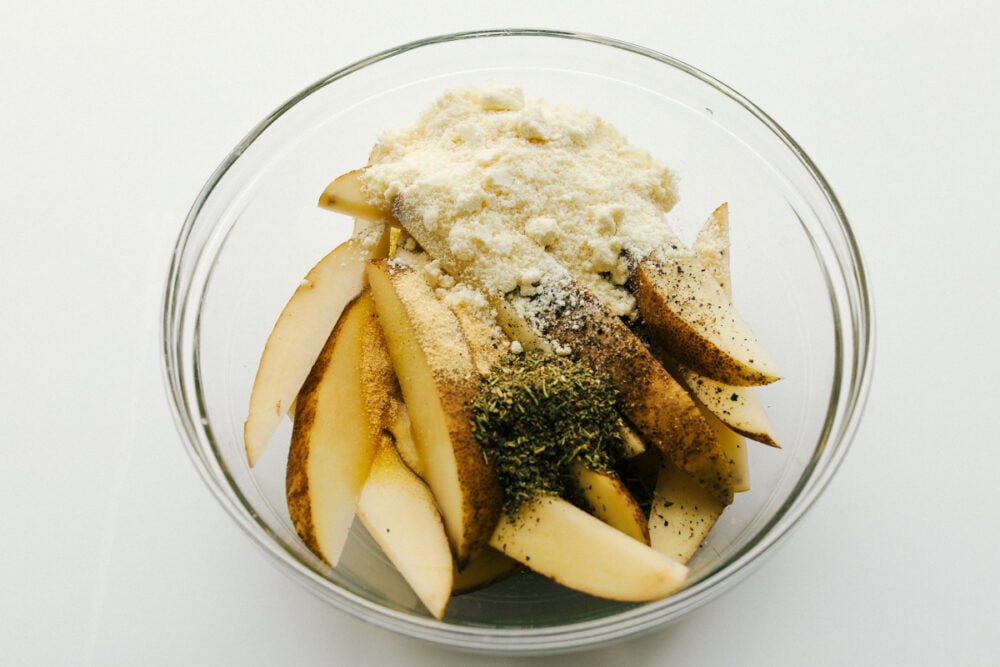
Potato wedges in a bowl with seasonings.

How to Make the Best Air Fryer Potato Wedges

Baking them in the air fryer gives the perfect texture you’d expect in less than half the time.

  • Even: To ensure that your wedges get done at the same time and cook to the same doneness, cut them as evenly as possible. You want the potatoes to be the same thickness as well as length.
  • Potatoes: Russets are the potato of choice to use here. They will crisp up the best and still be tender on the inside. Reds and Yukons are waxier and will not get as crispy.
  • How to Cut Wedges: Cutting a potato into wedges is easy. Cut the potato in half-length ways. Then cut each half lengthways again, and again till you get the desired thickness.
  • Air Fryer: The air fryer is a mini countertop convection oven that uses circulating air to cook the potatoes. You can overlap the potatoes wedges a bit, but shake them halfway through cooking to get them crispy all over.
  • Soak: If you want even extra crunchy outsides, soak the cut potatoes in cold water for 30 minutes. This helps remove some of the starch and allows them to crisp up nicer in the air fryer. Be sure to dry the potatoes really well with paper towels or a clean dish towel before adding oil and seasonings. Otherwise, the excess moisture will cause the potatoes to steam instead of air fry, leaving them soggy.
  • Leftovers: These will keep in the fridge for up to 3-4 days, they will get soggy in the fridge so I recommend reheating them in the air fryer at 400 for 2-3 minutes or till crisp again.
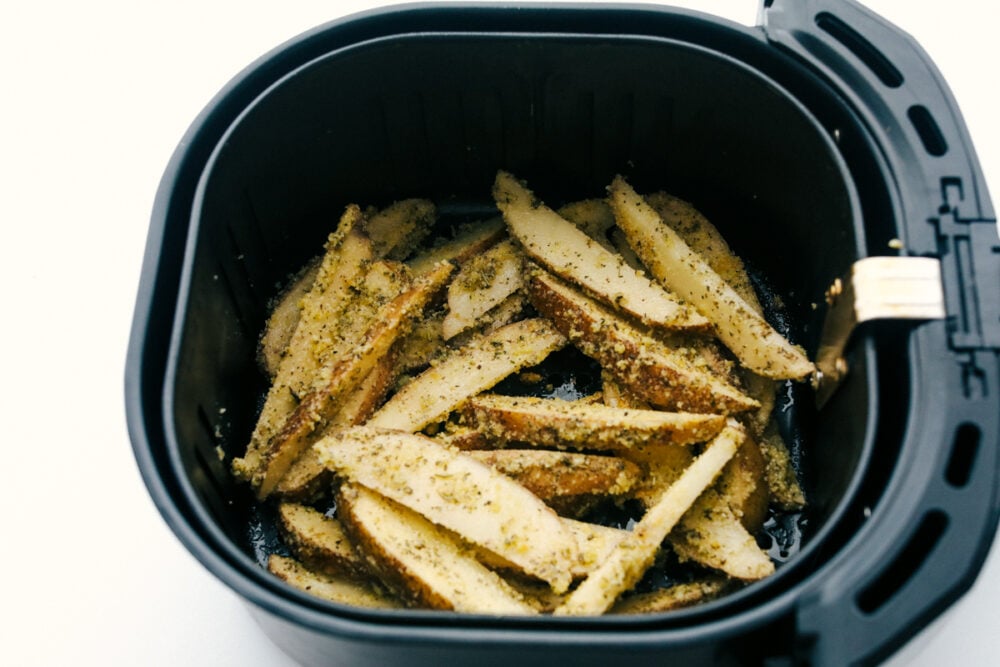
Air fryer basket full of wedges ready to cook.

Potato Wedge Variations

You are going to love how fast these cook, you can have an easy delectable side dish in a breeze.

  • Seasoning: Depending on what you are serving your wedges with, you might want to change up the spices. Trade out the Italian seasoning for taco seasoning and omit the parmesan cheese. When done baking sprinkle with cotija cheese instead and serve with guacamole and sour cream.
  • Spice it Up: Trade out the Italian seasoning for chipotle chili powder, cumin, and smoked paprika for a smokey spicy potato wedge. Top with cheddar cheese and serve warm.
  • Ranch: Keep the parmesan and stir the potatoes with ranch mix for out-of-this-world ranch potatoes.
  • Everything seasoning: This seasoning is not just for bagels. Toss it with these potatoes for a unique taste.
  • Basic: There is nothing basic about these but if you just want a classic fry flavor, forgo the cheese and herbs and season with just salt and pepper. I also like to use season salt too.
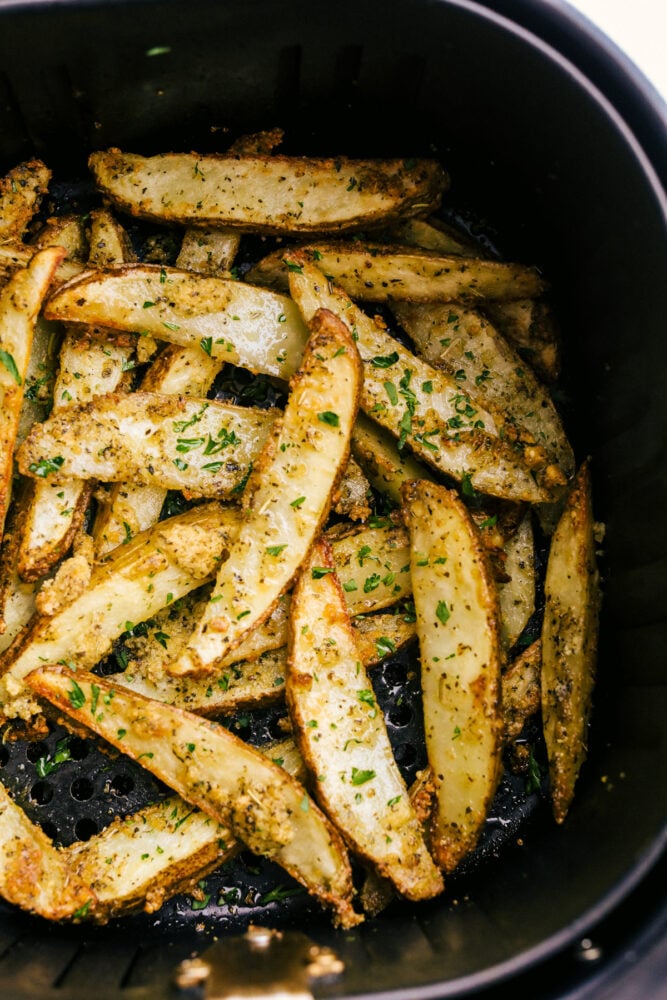
Cooked potato wedges in the air fryer ready to eat.

Dipping Sauces

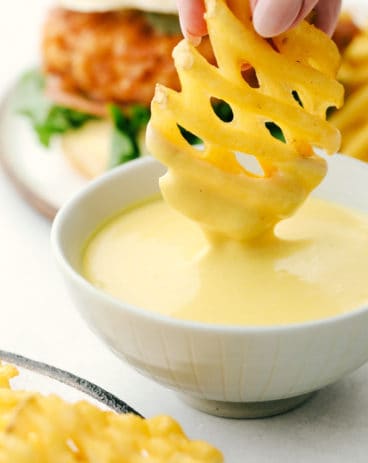
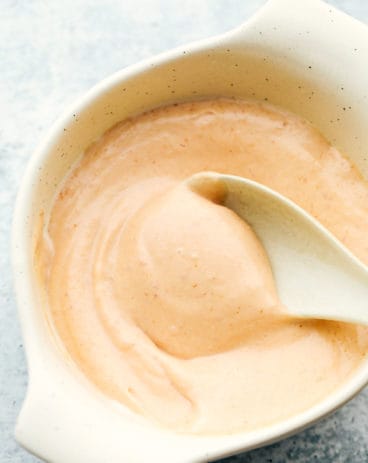
These potato wedges were made for dipping or smothering, either way, they will be exquisite. Ketchup is an easy go-to for dipping, but sometimes you want to spice it up, these sauces below will do just that. If you like to smother your potatoes, make chili and cover them with it and then top it off with cheese and sour cream. We also like to drizzle this heavenly cheese sauce over the potato wedges, so yummy! I do not think there is a wrong way to serve these delectable potato wedges.

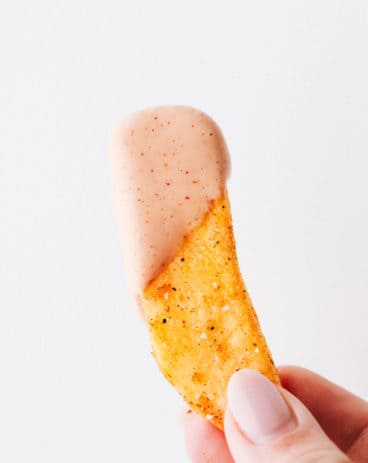
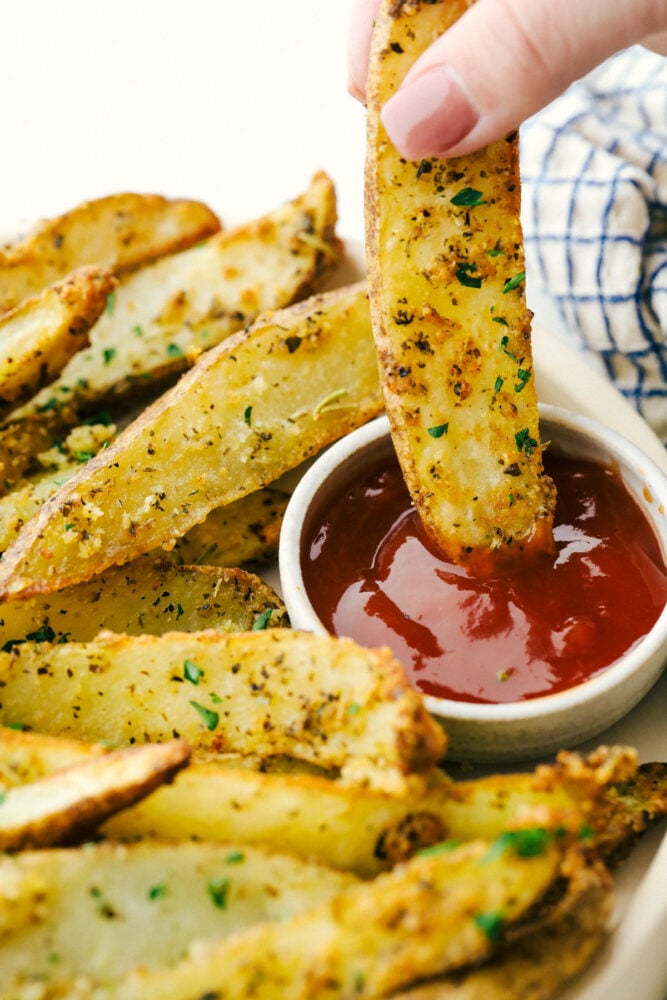
Dipping a potato wedge in some ketchup.
Print

Air Fryer Potato Wedges

Air Fryer Potato Wedges are crispy with seasoning on the outside and perfectly tender on the inside! These are so insanely delicious you are going to love them!
Course Side Dish
Cuisine American
Keyword air fryer potato wedges
Prep Time 5 minutes
Cook Time 15 minutes
Total Time 20 minutes
Servings 4 servings
Calories 402kcal
Author Alyssa Rivers

Ingredients

  • 3-4 large russet potatoes
  • 1/4 cup extra virgin olive oil
  • 1 Tablespoon garlic powder
  • 1 Tablespoon Italian seasoning
  • 1 teaspoon salt or to taste
  • 1/4 teaspoon Freshly ground black pepper or to taste
  • 1/2 cup freshly grated Parmesan
  • Chopped fresh parsley for garnish

Instructions

  • Cut each potato lengthwise in half. Cut each half into three wedges.
  • In a large bowl add the potato wedges, olive oil, garlic powder, Italian seasoning, grated parmesan salt and pepper.
  • Place the potatoes in the basket of your air fryer. Cook for 390 for 15 minutes. Shake the basket every 5 minutes until crispy and golden brown.
  • Garnish with fresh parsley and serve with ketchup, ranch, or sauce of choice.

Nutrition

Calories: 402kcal | Carbohydrates: 53g | Protein: 11g | Fat: 17g | Saturated Fat: 4g | Cholesterol: 11mg | Sodium: 207mg | Potassium: 1209mg | Fiber: 4g | Sugar: 2g | Vitamin A: 132IU | Vitamin C: 16mg | Calcium: 196mg | Iron: 3mg


from The Recipe Critic https://ift.tt/3eQVmCi
https://ift.tt/3v2Od7D