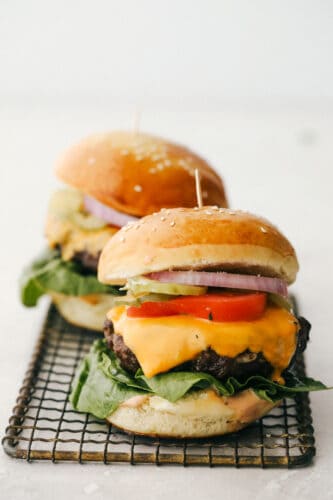
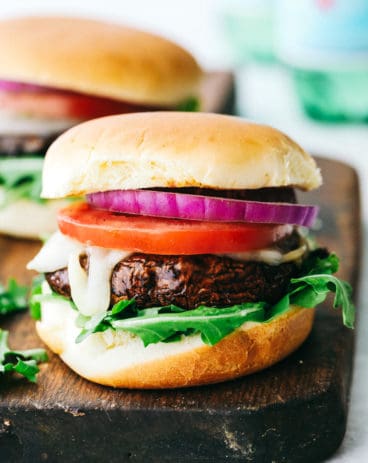
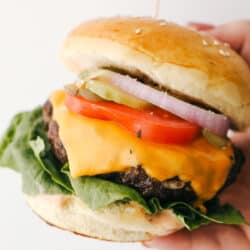
Grilled Beef Burgers are one of the most amazing things you can sink your teeth into, especially when they are done right! Be prepared, because these will be the best burgers you have ever had!
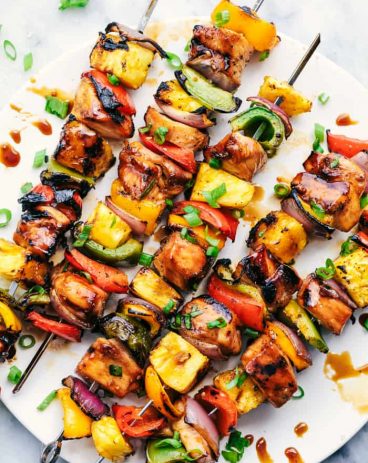
Cooking on the grill is a fantastic way to eat, especially in the summer when you do not want to heat up the kitchen. To have incredible food and still stay cool, try these tried and true, Huli Huli, Avocado Chicken and Steak!

Amazing Grilled Beef Burgers
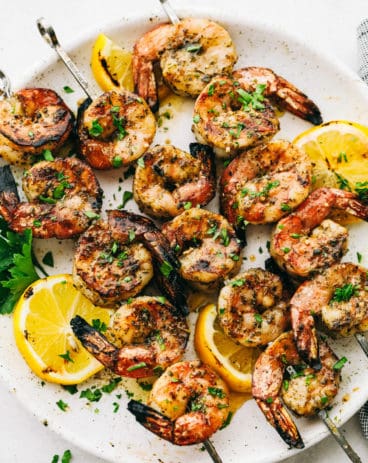
I love everything about summer. The pool parties, vacations, and of course the food! Fresh fruits and vegetables are everywhere and everyone is getting their grills out! Some of the best foods come from over the open flame. From shrimp, to corn and even fruit, grilling just makes heavenly food! These beef burgers are going to be a favorite addition to your grilling recipes.
Do not let grilling scare you, it is so easy and I have all the tips and tricks so you can make the BEST hamburgers Ever! These beef burgers will come out perfectly juicy, full of flavor and grilled to perfection. Everyone loves a good burger, but a grilled burger is epic, and it all starts here! So let’s grill!
What You Need For The Best Beef Burgers
Grilled burgers are the perfect picnic or large gathering food. Skip the frozen burgers and make your own for the best tasting!
- 80/20 Ground Beef: Make sure your beef is cold and not at room temperature.
- Garlic cloves: Freshly minced will give the best flavor.
- Minced onion: Dried minced onion will give tons of flavor without the bulk.
- Worcestershire sauce: This is a must in homemade burgers, it adds the best umami flavor.
- BBQ sauce: Gives a bit of sweet, a bit of tang and heat all in one.
- Salt and Pepper: Add to taste:
- Buns: Because homemade burgers deserve the best Homemade buns!
Optional Toppings for the Best Burgers
- Sliced Red Onion: A bold flavored onion that goes well with the burger.
- Pickles: Dill pickles all the way!
- Lettuce: Use nice crisp iceberg lettuce.
- Tomato: Slice it thin to fit on the burger best.
Let’s Get Grilling!
Grilling is so much easier than you think, and it all starts with forming the perfect burgers.
- Mix: In a medium sized bowl combine the ground beef, garlic, minced onion, worcestershire sauce, BBQ sauce, and salt, pepper. Mix ingredients together but be careful not to overmix.
- Form: Shape the patties and create a divot in the center of each patty. This helps the burgers from puffing up or shrinking to much while cooking.
- Grill: Heat the grill to 400 degrees. Place the burgers on direct heat and grill for 4-5 minutes on each side until desired doneness.
- Cheese: Add the cheese to the burgers and let melt. Serve on toasted butter hamburger buns with desired toppings.

Tips For The Best Grilled Hamburgers
There are a few tips to make sure your hamburgers are juicy and delectable. Every time you make grilled burgers you will know they will turn out with these tips!
- 80/20 Ground Beef: You might be thinking that these are a bit fatty for your taste, but you need the fat to create the juicy, full of flavor, interior. Without the fat, your burgers will dry out before they are done, leaving you with overcooked tasteless dry pucks of beef. Most of the fat will cook off as you grill it so it’ll be ok, but trust me you will need the fat. You could go down to 85/15 without losing the juiceness or flavor, but I would not go lower.
- Divot: The divot is extremely important for ensuring your hamburgers cook evenly and without too much shrinkage. There is nothing worse than having not enough burger for your bun. Denting the beef prevents the burger from puffing up in the middle which will make it difficult to cook, leaving the edges burnt and dry before the center is done. It is a must do!
- Thickness: For optimal burger to bun ratio the standard is ¾ of an inch thick. If they are thinner than that you will need to adjust the grilling time. Also form the patties about an half an inch to an inch bigger than the circumference of the bun. This way the burger is sure to fit the bun.
- Keep it Cold and do not overmix: You need the beef to stay cold so that the fat doesn’t melt. When that happens to much of the fat will cook off and leave you with a dry hamburger. Overmixing will also break down the fibers causing your burger to crumble and become dry.

Grilling Burgers for Beginners
There are lots of little tidbits to keep in mind when you are making the best burgers. You will love how simple these grilled burgers come together!
- Resist The Temptation: Try not to press down on the burger while it cooks. This squeezes out all those lovely juices that are meant to be inside.
- Let it Rest: Let the hamburger rest for 5-10 minutes after grilling to redistribute the juices throughout the meat.
- Got Fire: If you get a flare up on your grill, cut off the oxygen to the flame by closing the lid. This should put it out. And have a glass of water on hand, just in case.
- Variations: There are many ways to vary your burger from the kind of meat you use, to the seasonings and the toppings. Once you feel you have the basics down good, experiment with flavors and textures. Keep in mind any time you change the meat, you will change the cook time, temperature, and seasonings. Besure to do your homework before working with different meats in your burgers so that you can still have the best, juiciest and most flavorful burger around.
- Toppings: Get creative with your tastebuds and try different toppings. Some ideas include grilled onions or mushrooms, pineapple and teriyaki sauce, pepper jack cheese and avocado spread. Melt blue cheese and top with bacon. The possibilities are endless. Let the grilling begin!

How To Know Your Burgers Are Done
Everyone likes their burgers are done a bit differently, but there is something to keep in mind when grilling your burgers. Bacteria which lives on the surface of meat, like steak, is cooked or seared and in doing so the bacteria dies. Hamburger takes that surface bacteria and grinds it up in all together so that the bacteria is throughout the meat. It is recommended that ground beef is cooked till the internal temperature reaches 160 degrees. Killing the bacteria throughout making it the safest temperature to eat. Those are the recommendations that should be followed especially for children and elderly as they are more susceptible to foodborne illness.
| Hamburger Doneness | Internal Temperature | Center Color |
|---|---|---|
| Medium Rare | 130-135 °F | Pink |
| Medium | 135-145 °F | Some Pink |
| Well | 145-155 °F | Sliver of Light Pink |
| Well Done | 155-165 °F | Mostly Brown |

It's Grilling Time
Grilled Burger Recipe
Ingredients
- 2 pounds 80/20 ground beef cold
- 3 garlic cloves minced
- 1 Tablespoon minced onion
- 1 Tablespoon Worchestershire sauce
- 2 Tablespoons BBQ sauce
- 1 teaspoon salt
- 1/2 teaspoon pepper
- Homemade Hamburger Buns
Optional toppings:
- Sliced Red Onion
- Pickles
- Lettuce
- Tomato
Instructions
-
In a medium sized bowl combine the ground beef, garlic, minced onion, wochestershire sauce, BBQ sauce, and salt, pepper. Mix ingredients together but be careful not to overmix.
-
Shape the patties and create a divot in the center of each patty. This helps the burgers from puffing up or shrinking to much while cooking.
-
Heat the grill to 400 degrees. Place the burgers onto direct heat and grill for 4-5 minutes on each side until desired doneness.
-
Add the cheese to the burgers and let melt. Serve on toasted butter hamburger buns with desired toppings.
Nutrition
from The Recipe Critic https://ift.tt/3eRdI61
https://ift.tt/33OeM4o