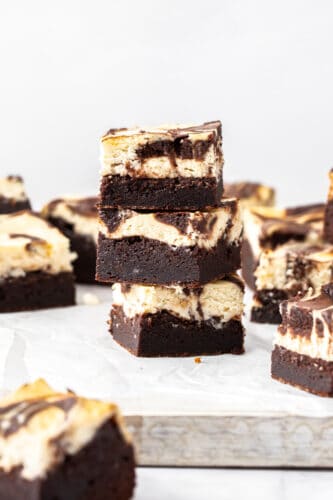
Super fudgy brownies, topped with a layer of creamy cheesecake, these deliciously indulgent Cheesecake Brownies are easy to make in just two bowls.
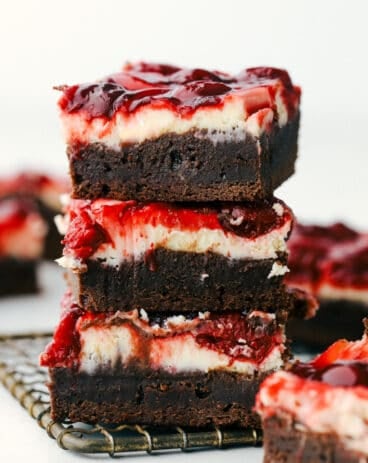
You’ll just love these Cherry and Hershey’s Cheesecake Brownies too.

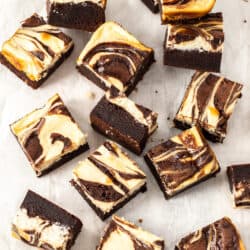
Cheesecake Brownies Recipe
Rich, sweet, and incredibly fudgy, the brownie base on these is cheesecake brownies is everything you could ask for. Add to that a tangy and just lightly sweetened cheesecake topping and you have yourself a winning combo.
These brownies are an absolute crowd-pleaster, disappearing in minutes whenever I serve them up.
Ingredients for Cheesecake Brownies
- Butter: Soften your butter just enough that it is soft to the touch.
- Chocolate: Use semi-sweet chocolate for the best flavor.
- Sugar: Two types – regular white granulated and dark brown. The dark brown sugar adds extra moisture and chewiness.
- Flour: Not too much so these cheesecake brownies stay fudgy and not dry.
- Eggs: You’ll need large eggs for this.
- Vanilla: This adds flavor intensity.
- Cocoa: I use dutched process cocoa for it’s dark color and smooth flavor but you can use regular unsweetened cocoa.
- Salt: All sweets benefit from a pinch of salt to intensify and balance the flavors.
- Cream cheese: Use full fat for the best results.
- Sour cream: Full fat or light will work.
How to Make Cheesecake Brownies
With just a couple of bowls and a baking tin, these cheesecake brownies are so simple to make.
- Melt the butter and chocolate together in a bowl (you can use the microwave or over a pot of simmering water) then let it cool a little.
- Add the sugars, eggs and vanilla and whisk until smooth.
- Now mix in the dry ingredients, just until combined.
- Holding back ¼ cup of batter, pour the rest into an 8inch square baking tin
For the Cheesecake Topping
Cheesecake topped brownies truly don’t get easier than this! Mix together and bake!
- Beat the sugar and cream cheese until smooth.
- Add the remaining ingredients and beat through.
- Pour the cheesecake mix over the brown batter.
- Dot the remaining ¼ cup of brownie batter over the cheesecake and swirl with a knife.

Pro Tips for the Best Cheesecake Brownies
These tips will help you make this dessert one of the best with your family. You will love how easy it is to make these brownies!
- Weigh ingredients or spoon and level things like flour and cocoa so that you don’t add too much, which might result in dry or cakey brownies.
- Don’t overmix the batter. Once you add the dry ingredients just mix gently until all combined.
- Let the brownies cool completely before cutting them.
- For nice clean slices, wipe the knife clean between each cut.

How to Store Cheesecake Brownies
- Storing: These brownies are best eaten in 3-4 days.
- Frozen: They can be frozen too. Cut into squares and freeze in an airtight container for up to 2 months.

More Indulgent Brownies Recipes
Brownies are an easy dessert to quickly make and share with so many. These Biscoff Brownies or this Fudgy Marshmallow Brownies are fun and delicious to try as well as these tried and true favorites!
Desserts
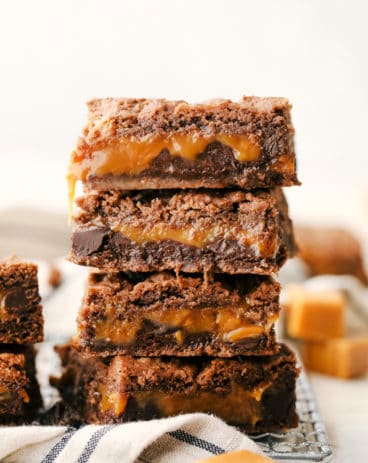
Easy Caramel Brownies
Desserts
Cherry Cheesecake Brownies
Desserts
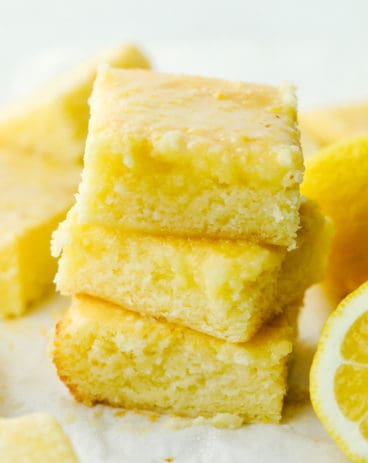
Glazed Lemon Brownies
Desserts
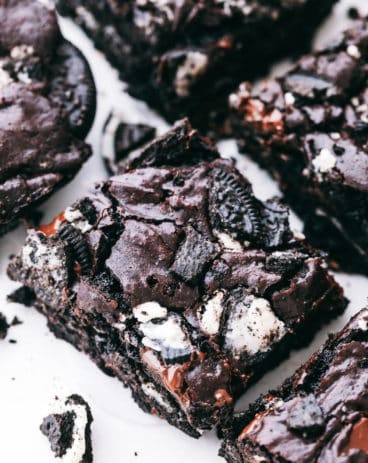
Gooey Oreo Brownies
Cheesecake Brownies
Ingredients
FOR THE BROWNIE BASE
- 3 ounces unsalted butter (¾ stick / 85g)
- ¼ cup finely chopped semi-sweet chocolate (1.8oz / 50g)
- ¾ cup packed dark brown sugar (5.3oz / 150g)
- ¾ cup granulated white sugar (5.3oz / 150g)
- 3 large eggs
- 1 teaspoon vanilla
- ¾ cup all-purpose flour (95g / 3.4oz) (notes)
- ½ cup dutched process cocoa (1.8oz / 50g) (notes)
- ½ teaspoon salt
FOR THE CHEESECAKE LAYER
- 225 grams cream cheese, softened (8oz)
- ¼ cup granulated white sugar (1.8oz / 50g)
- 1 large egg, room temp
- 2 teaspoons vanilla extract
- ¼ cup sour cream, room temp (60ml)
Instructions
-
Preheat the oven to 350F and line an 8 inch square tin with parchment paper.
-
In a large bowl, melt together the butter and chocolate either over a saucepan of simmering water or in the microwave (stirring well every 30 seconds).
-
Let it cool slightly.
-
Add both sugars, the eggs and the vanilla to the chocolate mix and whisk with a balloon whisk until well combined.
-
Sift in the flour, cocoa and salt, then mix gently until just combined.
-
Set aside ¼ cup of the brownie mix and pour the rest into the prepared tin.
-
In a medium bowl, beat together the cream cheese and sugar until smooth and creamy (about 1 minute with an electric beater).
-
Add the egg, sour cream and vanilla and beat until smooth.
-
Pour the cheesecake mixture over the brownie batter in the tin, and level out.
-
Use a teaspoon to dot brown batter over the top of the cheesecake mix, then run a knife through to swirl it.
-
Bake for 45-50 minutes, or until a toothpick comes out with just a sticky crumb or two attached.
Notes
- Flour & cocoa: if using cups, spoon ingredient into cups, then level with the back of a knife so you don’t add too much.
- Cocoa: You can use regular unsweetened cocoa too.
Nutrition
from The Recipe Critic https://ift.tt/3fF1GMp
https://ift.tt/3yoyAcJ