Moist, fluffy Hawaiian Sweet Rolls are a staple you will want to use for all your weekday meals. Whether you use them for sliders, sides, or just eat them as-is like me, they will be gone in no time with how sweet and buttery-soft they are!
Making your bread at home really upgrades its flavor and texture. It gives your kitchen that perfect bakery smell, too, which is always a plus. My cinnamon, focaccia, and buttery beer breads are more recipes that will leave you with an irresistibly warm and soft result.

Homemade Hawaiian Sweet Roll Recipe
There is nothing better than a good roll. Sweet Hawaiian Rolls are always my default when I shop for sandwich fixings. The truth is, I typically just end up eating them straight out of the bag because of how sweet, soft and delicious they are. Making them from scratch is a game-changer, though, and they will become your new bread of choice. These turned out so perfectly soft and warm, they are amazing on their own or with just a dollop of cinnamon honey butter, Texas Roadhouse style.
Making bread does not have to be complicated. I have broken this recipe down into simple steps that create the perfect sweet roll every time I have made them. My family is always requesting these for dinner- and for good reason! With their melt-in-your-mouth, sweet inside and outer layer baked to a lovely golden brown, I cannot wait to share this Hawaiian Sweet Roll recipe with you!
Hawaiian Sweet Rolls Ingredients
Time to pull these simple ingredients out of your pantry and get to baking! All individual measurements can be found in the recipe card below.
- Pineapple Juice: For sweetness and Hawaiian flair.
- Instant Yeast: To keep your rolls light, fluffy, and rising. Does not have to be activated. Simply mix into your dough.
- Granulated Sugar: Adds sweetness and tenderizes your bread.
- Butter: Softened. Butter works to add more fat to the dough, resulting in a softer, richer bread. I like to use salted butter to enhance flavor.
- Vanilla: Pure vanilla extract works best to add flavor.
- Large Egg: To bind ingredients together and provide structure.
- All-Purpose Flour: For light and fluffy texture.
- Salt: To taste.
- Egg Yolk and Water: For the egg wash.
Making Hawaiian Sweet Rolls
Making your own breads does not have to be intimidating. Since we are using instant rather than active yeast, this recipe is straightforward and fool-proof for making delicious rolls with every batch.
- Mix Wet Ingredients, Yeast, and Sugar: In the bowl of a mixer, add the pineapple juice, yeast, sugar, butter, and vanilla. Use the paddle to mix it until combined. Add in the egg and mix again.
- Mix With Dough Hook, Add Flour, and Salt: Switch to the dough hook attachment and add 2 cups of flour and the salt. Mix on low speed until combined into a wet dough.
- Add the Remaining Flour: Add ½ cup at a time, allowing it to become fully incorporated. The dough will pull away from the sides of the bowl but still be pretty sticky. Continue to mix on low for about 4 minutes, until the dough is smooth.
- Transfer Dough to Bowl: Transfer the dough to an oiled bowl and cover with plastic wrap that has been sprayed with pan spray. Let the dough rise until doubled, about 2 hours or so.
- Separate Into Balls: Once the dough has doubled in size punch the dough down in the bowl and then split into 12 equal pieces and form into balls.
- Prep Pan and Let Rolls Rise: Grease a 9×13 pan and place the rolls in the pan. Cover with plastic wrap sprayed with pan spray again, and let rise until doubled again.
- Preheat Oven: When the rolls are almost doubled, preheat the oven to 350°
- Create Egg Wash: Combine the egg yolk and water together and brush egg wash over the top of the rolls.
- Bake: Bake for 18-20 minutes, until golden brown.
- Serve: Serve warm or at room temperature.

The Best Roll-Making Tips
Making a few simple fixes can make all the difference in how your rolls turn out.
- Watch for Over-Kneading: When using a mixer and dough hook to mix knead, it is easy to over-knead your dough. When your dough looks like a smooth ball, that is when you need to turn off the mixer. Dough that is kneaded too much will start to clump and break apart.
- Let Rolls Rise: Patience is key when letting your rolls rise before popping them into the oven. Wait at least 30 minutes. Rolls that are under-proofed will be too dense and lack the light, soft fluffiness that makes them so good!
- Skipping the Egg Wash: Do not skip the egg wash! That is what is going to give your rolls their shiny, glistening finish. When brushing this on, be super careful, because, at this point in the cooking process, the rolls will be delicate. A heavy hand could cause them to deflate.
- Using Too Much Flour: Using too much flour to make bread at home is a common mistake but will leave you with a tough and dry result.
- Using Other Types of Flour: I recommend using all-purpose flour because other flours with a high protein content can leave you with leathery rolls.
- What to Serve With Hawaiian Sweet Rolls: The sky is the limit with these versatile rolls. They are sturdy enough to be used as sliders and little sandwiches, but because of their natural sweetness, my favorite way to serve these is with honey or cinnamon butter, or a dollop of homemade strawberry jam. There is nothing better than a sweet, warm roll with butter and jam.

Storing Hawaiian Sweet Rolls
Having rolls on hand makes it easy to have warm, delicious bread ready to go for quick dinners.
- In the Freezer: Unbaked rolls can be stored in the freezer for up to 2 months in sealed plastic bags. This is perfect if you want to make more rolls later. Baked rolls can also be frozen.
- To Reheat: Wrap frozen baked rolls in tin foil and bake at 300 degrees Fahrenheit for 15-20 minutes.

More Homemade Bread Recipes to Try
Bread
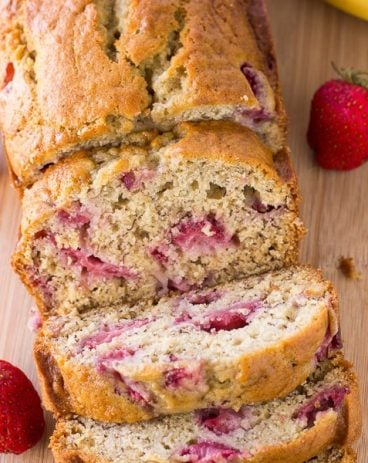
Strawberry Banana Bread

Bread
Focaccia Bread
Bread
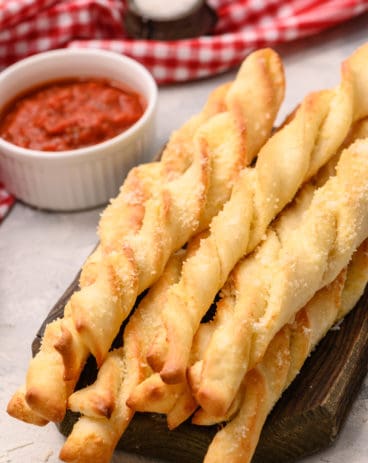
Homemade Breadtwists

Desserts
Cinnamon Roll Breadtwists

Hawaiian Sweet Rolls
Ingredients
- ¾ Cup Pineapple Juice
- 1 packet instant yeast
- ½ cup granulated sugar
- ¼ cup butter softened
- ½ teaspoon vanilla
- 1 large egg
- 3 ½ cups All Purpose Flour
- ½ teaspoon salt
- 1 egg yolk for egg wash
- 2 Tablespoon water
Instructions
-
In the bowl of a mixer, add the pineapple juice, yeast, sugar, butter and vanilla. Use the paddle to mix it until combined. Add in the egg and mix again.
-
Switch to the dough hook attachment and add 2 cups of flour and the salt. Mix on low speed until combined into a wet dough.
-
Add the remaining flour ½ cup at a time, allowing it to become fully incorporated. The dough will pull away from the sides of the bowl but still be pretty sticky. Continue to mix on low for about 4 minutes, until the dough is smooth.
-
Transfer the dough to an oiled bowl and cover with plastic wrap that has been sprayed with pan spray. Let the dough rise until doubled, about 2 hour or so.
-
Once the dough has doubled in size punch the dough down in the bowl and then split into 12 equal pieces and form into balls.
-
Grease a 9×13 pan and place the rolls in the pan. Cover with plastic wrap, sprayed with pan spray again, and let rise until doubled again.
-
When the rolls are almost doubled, preheat the oven to 350°
-
Combine the egg yolk and water together and brush egg wash over the top of the rolls. Bake for 18-20 minutes, until golden brown.
-
Serve warm or room temperature.
Nutrition
from The Recipe Critic https://ift.tt/2UlPGYR
https://ift.tt/3Any1Az