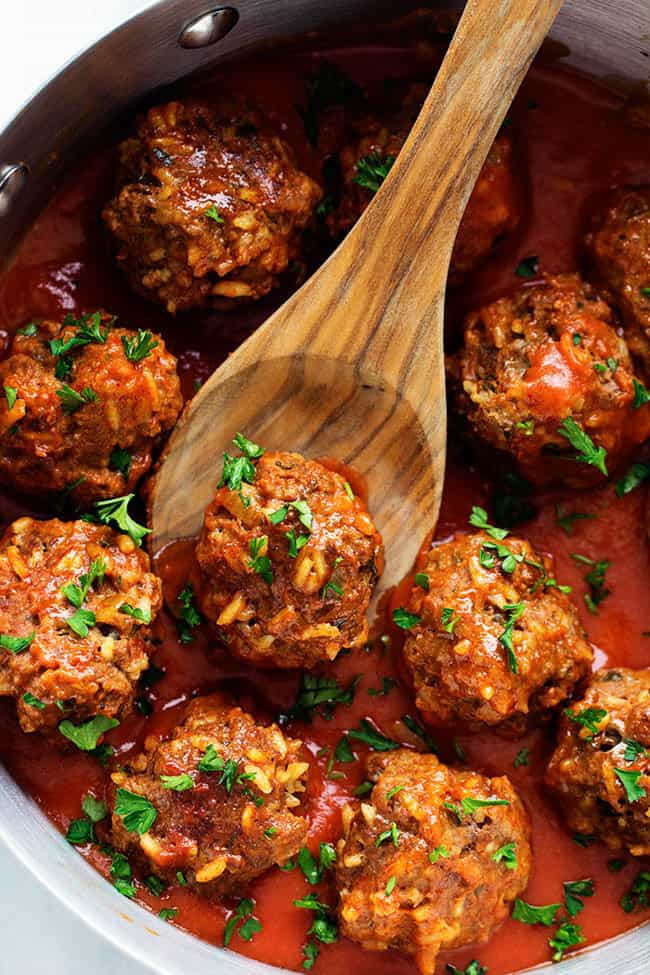
Buffalo chicken meatballs are spicy, tender, and full of flavor. Drizzle these amazing meatballs with blue cheese and serve with a side of celery.
Buffalo flavor is a classic flavor and a favorite spice for many. Try these different ways to use the buffalo flavor with Cauliflower, Dips, and even Enchiladas.

Buffalo Chicken Meatballs Recipe
Taking a note from my Buffalo Wings, these buffalo chicken meatballs have all the flavor, but easier to eat. I love wings, but every now and then I just want to eat the meat without having to pick them off the bone. That’s where these chicken meatballs have it all. With meatballs, you can pop them into your mouth without trying to pick it off the bone and you get all the buffalo flavor.
Using chicken makes these low-fat and the buffalo sauce gives them a nice kick. These are quick and super easy which makes them ideal for a quick appetizer or a fun main dish. Serve them with a side of celery, carrots, and ranch dressing. Add them to rice or pasta and drizzle with extra buffalo sauce, blue cheese, and green onions for a full meal.
Ingredients for Buffalo Meatballs
Simple Ingredients come together for a delicious buffalo chicken meatballs dish! These meatballs are so simple to make and baked to perfection in the oven. For all measurements, see the recipe card below.
- Ground chicken: Look for gound chicken next to the ground beef.
- Panko bread crumbs: These are lighter and bit finer than bread crumbs.
- Celery: Finely dice the celery, you don’t want it too chunky.
- Minced garlic: Fresh garlic will give you the best flavor.
- Egg: This is the binder for the meatballs and helps it all stick together.
- Green onion: Chop the green onions finely.
- Onion powder: This adds a bit of flavor that blends idealy with the chicken.
- Salt and pepper: Add tp taste.
- Buffalo sauce: Make your own buffalo sauce, which is super easy and absolutly divine.
- Blue cheese crumbles and sliced green onions: This is optional but I highly recommend.
- Ranch for serving: This homemade ranch dressing is creamy, delicious and goes well with these.
How to Bake Buffalo Chicken Meatballs in the Oven
These buffalo chicken meatballs are super easy to make and taste amazing! They are light and tasty with just the right amount of heat. Enjoy these for game night, your next party or get together.
- Prep and mix: Preheat the oven to 400 degrees. Line a sheet pan with parchment paper and set aside. In a medium sized bowl combine ground chicken, panko, celery, garlic, egg, green onion, onion powder, and salt and pepper to taste and ¼ cup buffalo sauce.
- Form and Bake: Shape into 1 inch balls and place on the parchment paper. Bake for 14-20 minutes or until cooked through.
- Sauce and Serve: Remove from the oven and toss in remaining sauce. Serve with blue cheese crumbles, ranch drizzle, and green onions.

The Best Chicken Meatball Tips
Use more or less sauce depending on your preference. If you are hoping for your buffalo chicken meatballs to not be as spicy or extra spicy, you get to control the heat in your own home.
- Chicken: Chicken is a lean source of protein and a great combination for the buffalo sauce. If you can’t find chicken you can use ground turkey instead.
- Panko: These are lighter and crispier than breadcrumbs. Since chicken is low-fat panko works best with the chicken. It binds the chicken and provides moisture.
- Celery: These add crunch and texture which is a nice touch with buffalo sauce
- Buffalo Sauce: Make your own for better flavor, and control over the spice.
- How to make sure they are done: The chicken meatballs should register an internal temperature 165 degrees.
- Don’t over work: Don’t over work the chicken mixture or it will be dry and tough.

How To Cook Chicken Buffalo Meatballs in an Instant Pot and Slow Cooker
You can make these buffalo chicken meatballs and keep them warm for a potluck or dinner! Here are more ways to enjoy meatballs.
- Slow Cooker: Place the formed chicken meatballs on a parchment lined cookie sheet. Bake for 4-5 minutes or till lightly browned all over. Placed the browned chicken meatballs in the slow cooker. Pour the desired amount of buffalo sauce and toss gently to coat. Cook on low for 2 hours and serve. Drizzle with ranch or blue cheese and garnish with green onions.
- Instant Pot: Form the balls and turn the instant pot on to saute. Place the meatballs in the instant pot and brown in batches till all the meatballs are slightly browned. Then place all the meatballs back in the instant pot. Pour the rest of the buffalo sauce over the chicken meatballs. Press the poultry button and set the timer for 5 minutes. Quick release the pressure, once the pressure is released remove the lid and stir the meatballs gently. Serve immediately.

More Meatball Recipes to Try
Dinner
Porcupine Meatballs

Dinner
The Best Swedish Meatballs

Dinner
Greek Meatballs (Keftedes)
Dinner
Mozzarella Stuffed Meatballs

Buffalo Chicken Meatballs
Ingredients
- 1 pound ground chicken
- 1 cup Panko bread crumbs
- 1/4 cup celery finely diced
- 1 teaspoon minced garlic
- 1 large egg
- 2 Tablespoons green onion chopped
- 1/2 teaspoon onion powder
- salt and pepper to taste
- 3/4 cup buffalo sauce divided
- blue cheese crumbles and sliced green onions for garnish
- homemade ranch for serving
Instructions
-
Preheat the oven to 400 degrees. Line a sheet pan with parchment paper and set aside. In a medium sized bowl combine ground chicken, panko, celery, garlic, egg, green onion, onion powder, and salt and pepper to taste and ¼ cup buffalo sauce.
-
Shape into 1 inch balls and place on the parchment paper. Bake for 14-20 minutes or until cooked through.
-
Remove from the oven and toss in remaining sauce. Serve with blue cheese crumbles, ranch drizzle, and green onions.
Nutrition
from The Recipe Critic https://ift.tt/36Lp8n8
https://ift.tt/3exOwB3