रविवार, 18 जुलाई 2021

Buffalo Chicken Meatballs

Buffalo chicken meatballs are spicy, tender, and full of flavor. Drizzle these amazing meatballs with blue cheese and serve with a side of celery.

Buffalo flavor is a classic flavor and a favorite spice for many. Try these different ways to use the buffalo flavor with Cauliflower, Dips, and even Enchiladas.
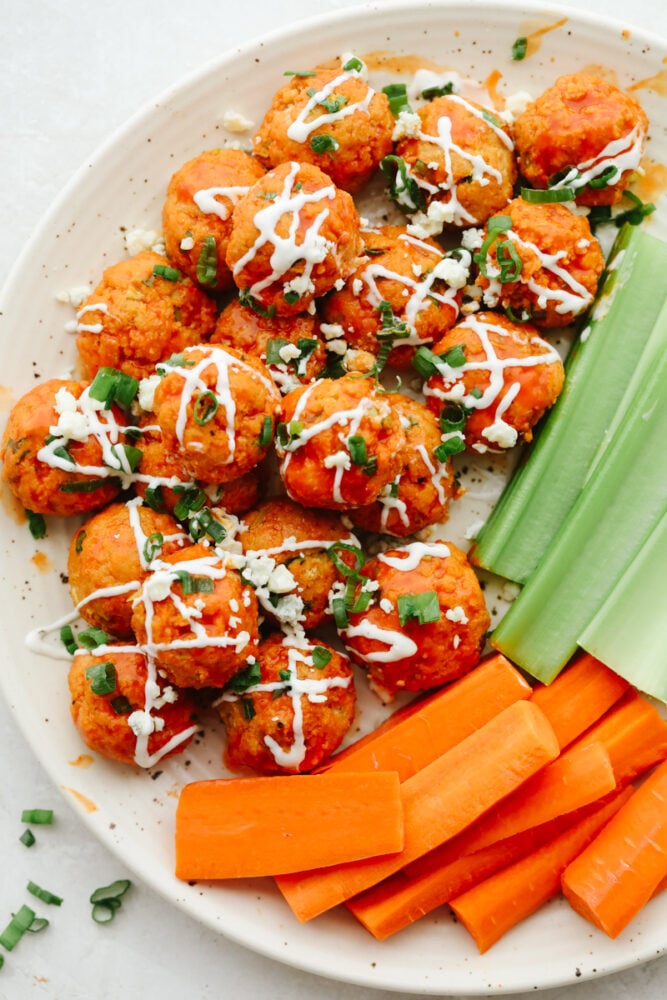
Buffalo chicken meatballs on a white plate with celery sticks.

Buffalo Chicken Meatballs Recipe

Taking a note from my Buffalo Wings, these buffalo chicken meatballs have all the flavor, but easier to eat. I love wings, but every now and then I just want to eat the meat without having to pick them off the bone. That’s where these chicken meatballs have it all. With meatballs, you can pop them into your mouth without trying to pick it off the bone and you get all the buffalo flavor.

Using chicken makes these low-fat and the buffalo sauce gives them a nice kick. These are quick and super easy which makes them ideal for a quick appetizer or a fun main dish. Serve them with a side of celery, carrots, and ranch dressing. Add them to rice or pasta and drizzle with extra buffalo sauce, blue cheese, and green onions for a full meal.

Ingredients for Buffalo Meatballs

Simple Ingredients come together for a delicious buffalo chicken meatballs dish! These meatballs are so simple to make and baked to perfection in the oven. For all measurements, see the recipe card below.

  • Ground chicken: Look for gound chicken next to the ground beef.
  • Panko bread crumbs: These are lighter and bit finer than bread crumbs.
  • Celery: Finely dice the celery, you don’t want it too chunky.
  • Minced garlic: Fresh garlic will give you the best flavor.
  • Egg: This is the binder for the meatballs and helps it all stick together.
  • Green onion: Chop the green onions finely.
  • Onion powder: This adds a bit of flavor that blends idealy with the chicken.
  • Salt and pepper: Add tp taste.
  • Buffalo sauce: Make your own buffalo sauce, which is super easy and absolutly divine.
  • Blue cheese crumbles and sliced green onions: This is optional but I highly recommend.
  • Ranch for serving: This homemade ranch dressing is creamy, delicious and goes well with these.

How to Bake Buffalo Chicken Meatballs in the Oven

These buffalo chicken meatballs are super easy to make and taste amazing! They are light and tasty with just the right amount of heat. Enjoy these for game night, your next party or get together.

  1. Prep and mix: Preheat the oven to 400 degrees. Line a sheet pan with parchment paper and set aside. In a medium sized bowl combine ground chicken, panko, celery, garlic, egg, green onion, onion powder, and salt and pepper to taste and ¼ cup buffalo sauce.
  2. Form and Bake: Shape into 1 inch balls and place on the parchment paper. Bake for 14-20 minutes or until cooked through.
  3. Sauce and Serve: Remove from the oven and toss in remaining sauce. Serve with blue cheese crumbles, ranch drizzle, and green onions.
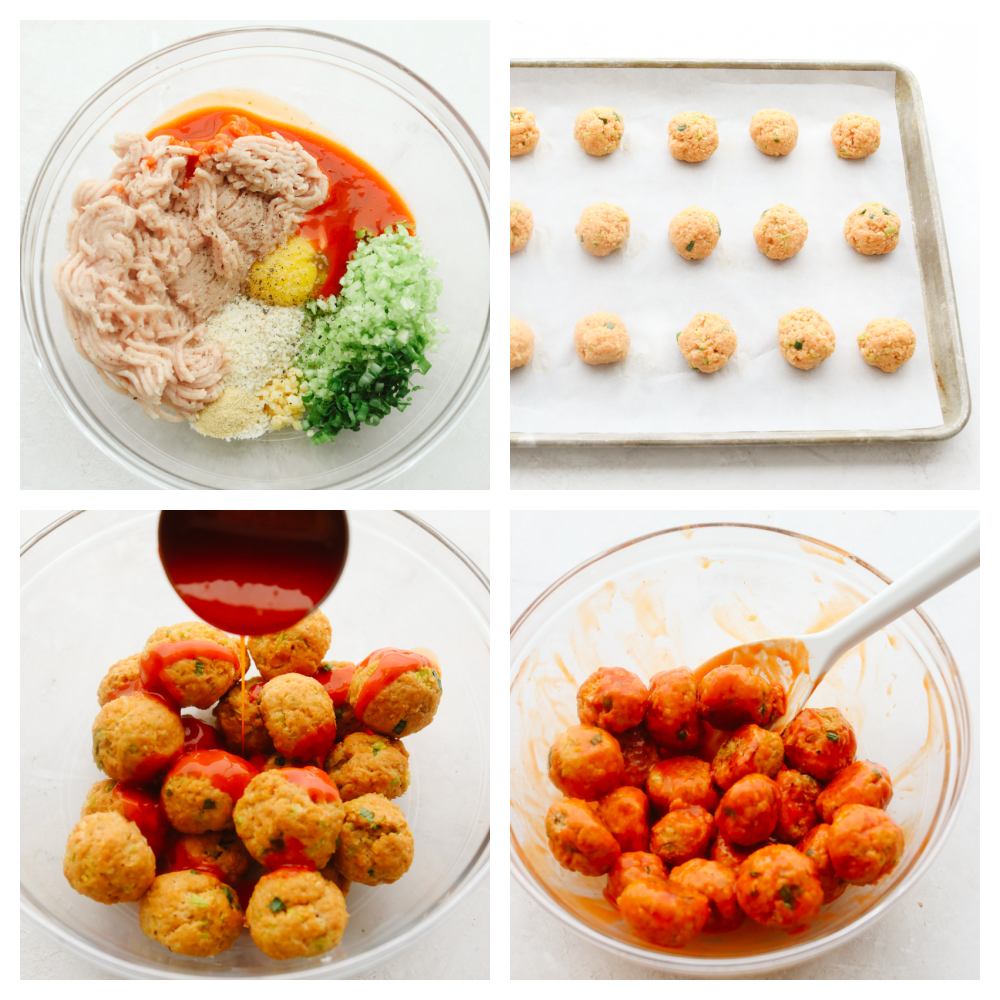
The process of making buffalo chicken meatballs.

The Best Chicken Meatball Tips

Use more or less sauce depending on your preference. If you are hoping for your buffalo chicken meatballs to not be as spicy or extra spicy, you get to control the heat in your own home.

  • Chicken: Chicken is a lean source of protein and a great combination for the buffalo sauce. If you can’t find chicken you can use ground turkey instead.
  • Panko: These are lighter and crispier than breadcrumbs. Since chicken is low-fat panko works best with the chicken. It binds the chicken and provides moisture.
  • Celery: These add crunch and texture which is a nice touch with buffalo sauce
  • Buffalo Sauce: Make your own for better flavor, and control over the spice.
  • How to make sure they are done: The chicken meatballs should register an internal temperature 165 degrees.
  • Don’t over work: Don’t over work the chicken mixture or it will be dry and tough.

Up close photo of a chicken meatball on a fork.

How To Cook Chicken Buffalo Meatballs in an Instant Pot and Slow Cooker

You can make these buffalo chicken meatballs and keep them warm for a potluck or dinner! Here are more ways to enjoy meatballs.

  • Slow Cooker: Place the formed chicken meatballs on a parchment lined cookie sheet. Bake for 4-5 minutes or till lightly browned all over. Placed the browned chicken meatballs in the slow cooker. Pour the desired amount of buffalo sauce and toss gently to coat. Cook on low for 2 hours and serve. Drizzle with ranch or blue cheese and garnish with green onions.
  • Instant Pot: Form the balls and turn the instant pot on to saute. Place the meatballs in the instant pot and brown in batches till all the meatballs are slightly browned. Then place all the meatballs back in the instant pot. Pour the rest of the buffalo sauce over the chicken meatballs. Press the poultry button and set the timer for 5 minutes. Quick release the pressure, once the pressure is released remove the lid and stir the meatballs gently. Serve immediately.

Buffalo chicken meatballs with a bite out of one of them.
Print

Buffalo Chicken Meatballs

Buffalo chicken meatballs are spicy, tender, and full of flavor. Drizzle these amazing meatballs with blue cheese and serve with a side of celery.
Course Appetizer
Cuisine American
Keyword buffalo chicken meatballs, chicken meatballs
Prep Time 10 minutes
Cook Time 20 minutes
Total Time 30 minutes
Servings 4 people
Calories 243kcal
Author Alyssa Rivers

Ingredients

  • 1 pound ground chicken
  • 1 cup Panko bread crumbs
  • 1/4 cup celery finely diced
  • 1 teaspoon minced garlic
  • 1 large egg
  • 2 Tablespoons green onion chopped
  • 1/2 teaspoon onion powder
  • salt and pepper to taste
  • 3/4 cup buffalo sauce divided
  • blue cheese crumbles and sliced green onions for garnish
  • homemade ranch for serving

Instructions

  • Preheat the oven to 400 degrees. Line a sheet pan with parchment paper and set aside. In a medium sized bowl combine ground chicken, panko, celery, garlic, egg, green onion, onion powder, and salt and pepper to taste and ¼ cup buffalo sauce.
  • Shape into 1 inch balls and place on the parchment paper. Bake for 14-20 minutes or until cooked through.
  • Remove from the oven and toss in remaining sauce. Serve with blue cheese crumbles, ranch drizzle, and green onions.

Nutrition

Calories: 243kcal | Carbohydrates: 12g | Protein: 23g | Fat: 11g | Saturated Fat: 3g | Polyunsaturated Fat: 2g | Monounsaturated Fat: 5g | Trans Fat: 1g | Cholesterol: 144mg | Sodium: 1581mg | Potassium: 662mg | Fiber: 1g | Sugar: 1g | Vitamin A: 96IU | Vitamin C: 1mg | Calcium: 47mg | Iron: 2mg


from The Recipe Critic https://ift.tt/36Lp8n8
https://ift.tt/3exOwB3
शनिवार, 17 जुलाई 2021

Blueberry Scones

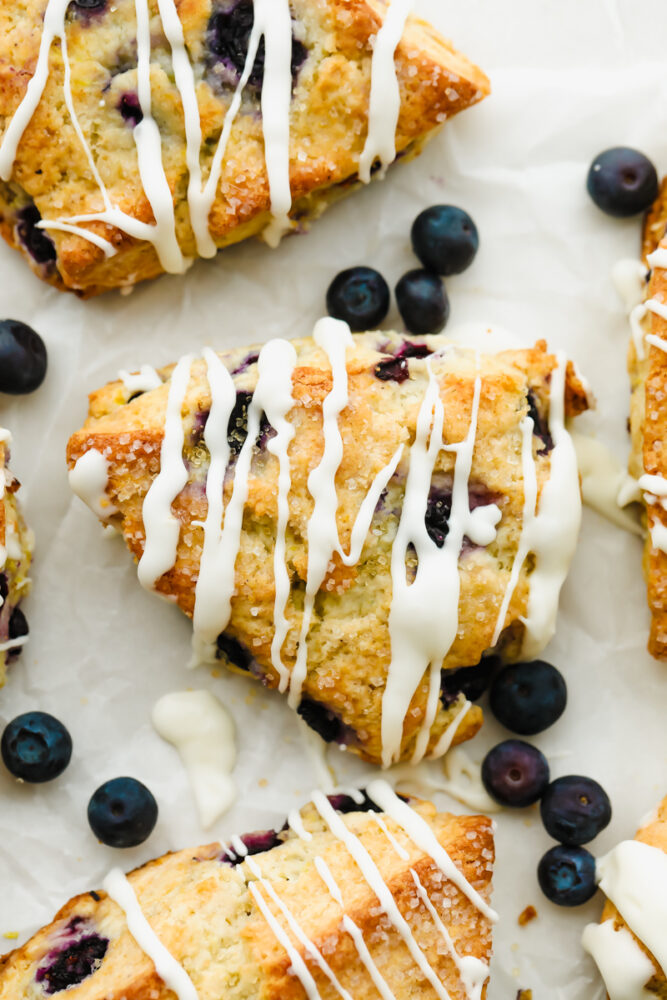
Baked to a buttery golden brown, these blueberry-filled scones are a soft, flaky treat bursting with tart and juicy flavor. Drizzled with a perfectly sweet, homemade icing, this mouthwatering pastry is going to be your new favorite way to start your day!

There isn’t anything better than a warm, flaky pastry. For breakfast, with coffee, or just to satisfy a sweet craving danishes, muffins, and rolls are other pastry recipes sure to deliver!

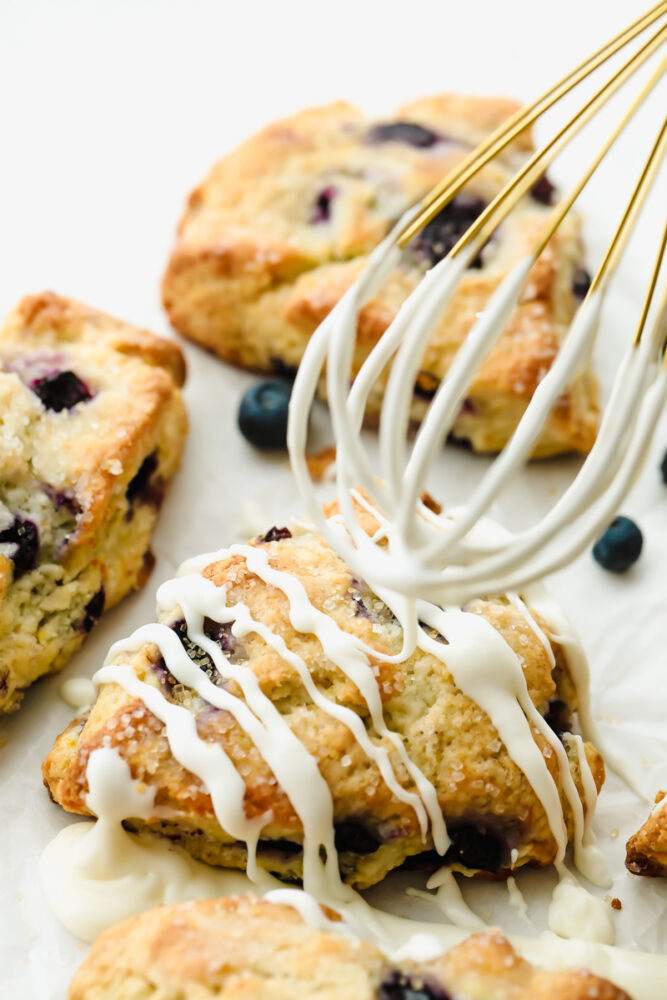
Blueberry Scones with icing drizzled on top.

Homemade Blueberry Scones Recipe

Pastries are so hard to resist. I find myself wanting them all throughout the day! There are not a lot of things better than a warm, perfectly golden pastry filled with pockets of fresh fruit. I decided to make these tasty homemade blueberry scones showcasing one of my favorite summer fruits. Plump, sweet blueberries encased in a crumbly, buttery shell is truly a match made in heaven.

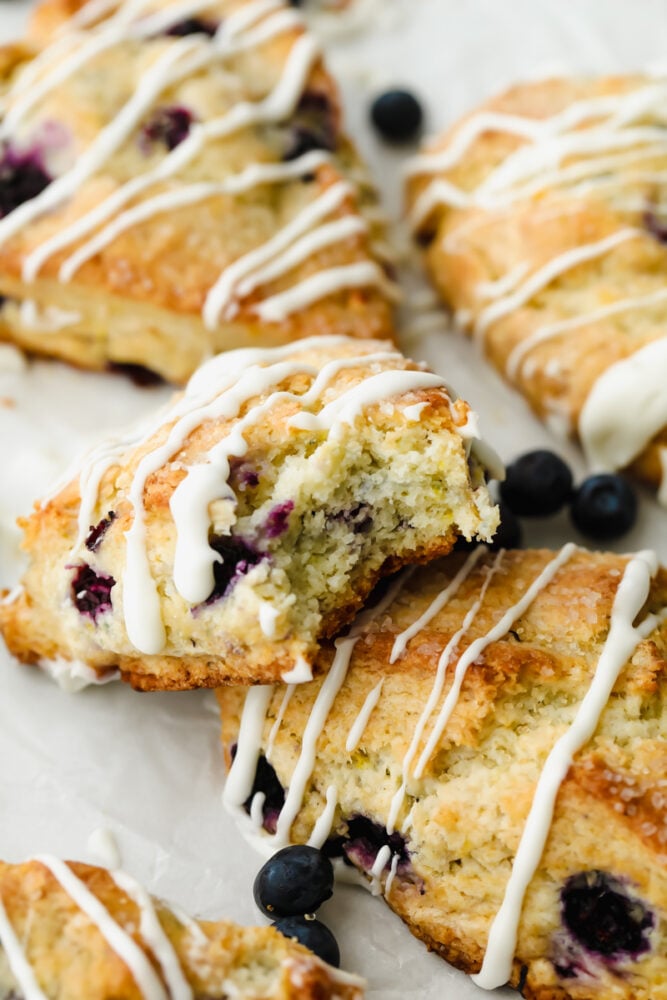
This is a recipe that anyone can make. A few simple baking techniques and fresh ingredients are all you need. In less than an hour, you will have the most delicious, warm, flaky result that just pulls apart perfectly in your hands- revealing a moist, buttery center filled with fresh blueberries. It is time to turn your kitchen into a bakery and make these delicious blueberry scones! They are so tasty, they will be gone in an instant!

Blueberry Scones Ingredients

These pantry-ready ingredients come together to create the most flaky, fruity and delicious blueberry scones! All individual measurements can be found in the recipe card below.

  • All Purpose Flour: Because of its low protein content, All Purpose Flour works great to make so many different kinds of light, fluffy treats. You can also use pastry flour.
  • Granulated Sugar: Adds sweetness to your dough and melds ingredients together when baked.
  • Baking Powder: Helps your scones to rise during baking.
  • Salt: To enhance flavor and help raise the dough with the baking powder.
  • Lemon Zest: Adds a hint of tangy flavor to your dough.
  • Butter: Unsalted, chilled. If you live in a very hot and humid climate, freeze your butter before preparing your scones.
  • Heavy Cream: Chilled. Adds fat content and moisture to your scones. Also used in making your icing.
  • Egg: When baking it is best to leave out your eggs ahead of time to have them at room temperature.
  • Vanilla Extract: I like using pure vanilla extract for the best flavor.
  • Blueberries: Frozen, not thawed. Adding thawed blueberries can make your scones too mushy.
  • Sugar Crystals: This is a great topping to add over the blueberry scones for texture and extra sweetness.
  • Powdered Sugar: Adds sweetness and a smooth texture to your icing.

How to Make the Best Blueberry Scones

You are going to love the way these delicious blueberry scones turn out. They are so rich and scrumptious and will make your kitchen smell absolutely divine in the baking process! It only takes a few easy steps to get them in the oven. From there, it’s hands-off and you are free add more brunch dishes like egg muffins for a complete meal!

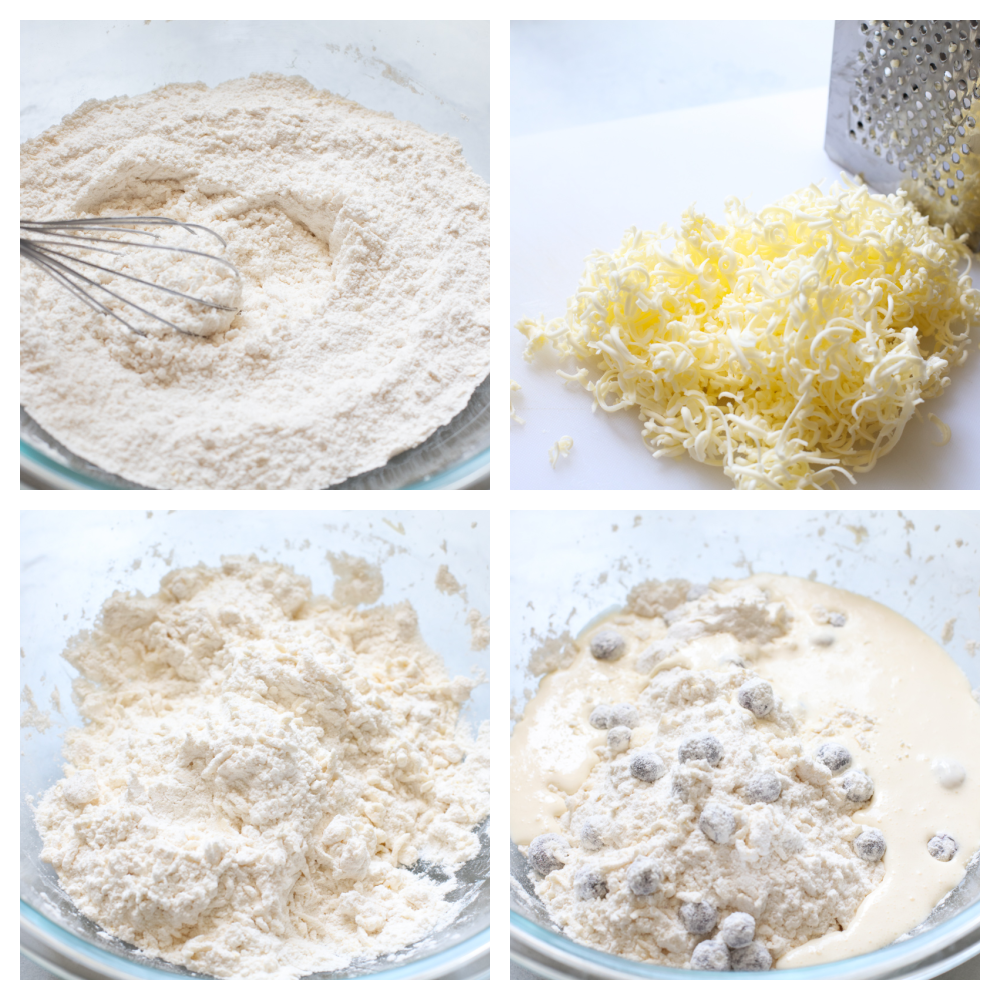
  1. Preheat Oven and Prep Baking Sheet: Preheat oven to 400° and line a baking sheet with parchment paper. Set aside.
  2. Whisk Dry Ingredients: In a large bowl, whisk the flour, sugar, baking powder, salt and lemon zest together.
  3. Prepare Shredded Butter: Use a small grater to grate the cold butter into the dry ingredients. Use your hands to lightly mix the butter into the flour. Add the frozen blueberries and toss gently.
  4. Mix Wet and Dry Ingredients: In a medium bowl, combine the cream, egg and vanilla extract. Pour over the butter and dry ingredients and stir to combine.
The process of making blueberry scones.

How to Shape Your Blueberry Scones

Shaping the blueberry scones into a triangle shape help it bake up and evenly in the oven. Forming a circling and cutting into triangles is simple and will help with the baking process.

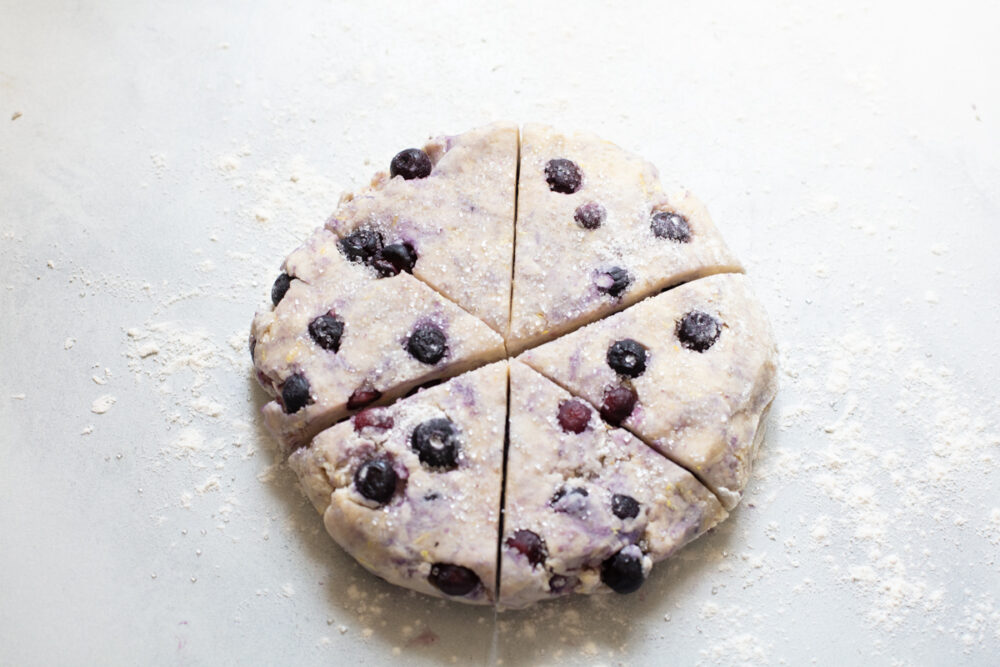
  1. Shape Into Scones: Trying to work the dough as little as possible, turn out onto a lightly floured surface and work into a ball. Flatten into an 8-9 inch disc and sprinkle with turbinado or crystal sugar. Use a sharp knife to cut into 6-8 equal pieces.
  2. Bake: Arrange the pieces on the prepared baking sheet, leaving about 2 inches between each one. Bake for 25-28 minutes, or until nice and golden brown. Allow to cool for at least 5-10 minutes before drizzling the icing over the top.
  3. Mix Icing Ingredients: In a small bowl whisk together the powdered sugar, heavy cream, and vanilla extract. If it seems too thick, add 1 more tablespoon of heavy cream.
Uncooked Blueberry Scones ready for baking.

Scone-Making Tips and Tricks

Use these great tips and tricks to level up your scone-making game and ensure that you end up with the most fluffy, crumbly result possible! These blueberry scones will be a breakfast hit!

  • Coating Butter in Flour: Shredding butter and then coating it in flour is what will make sure that you have a scone that is moist, tender, and crumbly at the same time.
  • Use Cold Butter: Either refrigerate or freeze your butter before use. The lower temperatures will give your scones a better rise.
  • Do Not Overmix: Mix your dough until it is slightly sticky and malleable. It you overmix your dough, your scones will be too tough.
  • Do Not Handle Dough Too Much: The warmth from our hands can cause your butter to melt and keep your scones from having enough rise. When preparing, try to handle your scones as little as possible.
  • Pastry Flour: Use pastry flour for the most light, fluffy scones.
  • When Scones Are Done: You will know your scones are done when they are golden brown on the top and can be pulled off of the pan easily without sticking.
  • Adding Too Much Butter: If you add too much butter to your dough, your scones will end up more dense like cookies.
Drizzling icing on top of Blueberry Scones.

What to Serve Blueberry Scones With

Blueberry scones are perfect for breakfast time. The buttery-sweetness of these pastries pairs so well alongside so many types of dishes. You can serve them up alongside other pastries for more rich, crumbly variety that everyone will love. You can also make a complete brunch by serving Blueberry Scones with muffins, eggs, biscuits, and all the bacon. Then, all you need are friends and mimosas to bring that ‘trendy brunch place’ vibe right to your kitchen!

Blueberry Scones with icing drizzled on top.

Storing Leftover Blueberry Scones

  • At Room Temperature: Store your scones in an airtight container. They will keep for 3 days. Simply pop them in the oven at 300 degrees Fahrenheit for 5 minutes for a quick, warm and tasty treat!
  • In the Refrigerator: Prepare your scone dough in advance, wrap in plastic wrap, and keep in the refrigerator overnight. This way, you have dough ready to bake in the morning!
Blueberry Scone with a bite taken out of it.
Print

Blueberry Scones

Baked to a buttery golden brown, these blueberry-filled scones are a soft, flaky treat bursting with tart and juicy flavor. Drizzled with a perfectly sweet, homemade icing, this mouthwatering pastry is going to be your new favorite way to start your day!
Course Breakfast
Cuisine American
Keyword blueberry scone recipe, blueberry scones
Prep Time 20 minutes
Cook Time 25 minutes
Total Time 45 minutes
Servings 8 Scones
Calories 410kcal
Author Alyssa Rivers

Ingredients

  • 2 cups all purpose flour
  • ½ cup granulated sugar
  • 2 teaspoon baking powder
  • ½ teaspoon salt
  • 3 Tablespoon lemon zest
  • ½ cup unsalted butter chilled
  • ½ cup heavy cream chilled
  • 1 large egg large
  • 1 teaspoon vanilla extract
  • 1 cup frozen blueberries not thawed
  • Sugar crystals for topping
  • 1 cup powdered sugar
  • 2 Tablespoon heavy cream
  • ½ teaspoon vanilla extract

Instructions

  • Preheat the oven to 400° and line a baking sheet with parchment paper. Set aside.
  • In a large bowl, whisk the flour, sugar, baking powder, salt and lemon zest together.
  • Use a small grater to grate the cold butter into the dry ingredients. Use your hands to lightly mix the butter into the flour. Add the frozen blueberries and toss gently.
  • In a medium bowl, combine the cream, egg and vanilla extract. Pour over the butter and dry ingredients and stir to combine. Trying to work the dough as little as possible, turn out onto a lightly floured surface and work into a ball. Flatten into an 8-9 inch disc and sprinkle with turbinado or crystal sugar. Use a sharp knife to cut into 6-8 equal pieces.
  • Arrange the pieces on the prepared baking sheet, leaving about 2 inches between each one. Bake for 25-28 minutes, or until nice and golden brown. Allow to cool for at least 5-10 minutes before drizzling the icing over the top.
  • In a small bowl whisk together the powdered sugar, heavy cream, and vanilla extract. If it seems too thick, add 1 more tablespoon of heavy cream.

Nutrition

Calories: 410kcal | Carbohydrates: 55g | Protein: 5g | Fat: 19g | Saturated Fat: 12g | Polyunsaturated Fat: 1g | Monounsaturated Fat: 5g | Trans Fat: 1g | Cholesterol: 79mg | Sodium: 165mg | Potassium: 180mg | Fiber: 2g | Sugar: 29g | Vitamin A: 673IU | Vitamin C: 5mg | Calcium: 72mg | Iron: 2mg


from The Recipe Critic https://ift.tt/3xNF8AH
https://ift.tt/3icl2JK

शुक्रवार, 16 जुलाई 2021

Trail Mix

Trail Mix is an easy must-have whether your camping or just hanging out! Protein-packed and full of goodness, this customizable mix is scrumptious!

Having a good snack to help fight off cravings is essential, try these tried and true snacks when you need to feed the beast inside. Pizza Bites, Fruit Kabobs, and Million Dollar Dip are always winners.

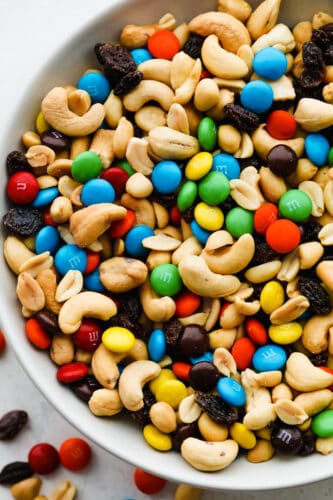
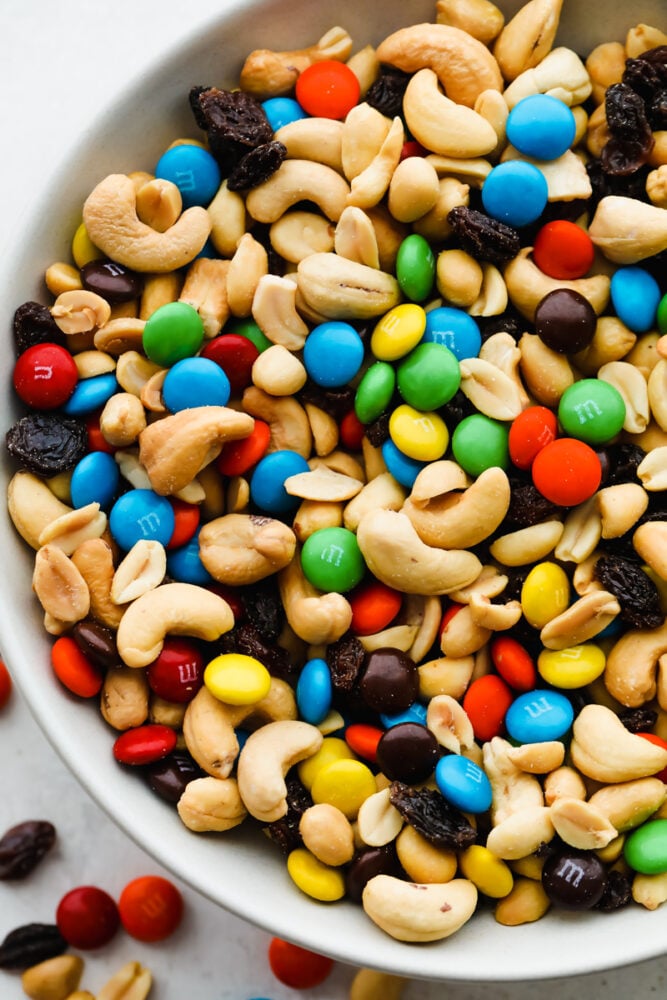
Classic trail mix with cashews, M&Ms peanuts and raisins.

Homemade Trail Mix

There are so many choices out there when it comes to snacking. It can be overwhelming when you want something healthy but satisfying. We often reach for chips, cookies, and candy because it’s easy. Taking some extra time to whip up a trail mix is one of the best ways to satisfy your hunger and keep it healthy. Full of protein, healthy fats, and necessary sugar, trail mix is the way to go.

One of the best things about this mix is that it’s so customizable. Add what your family loves and keep out what they don’t. Making it at home is so much cheaper than buying it at the store and your family gets just what they want in it. Keep a jar or individual snack bags full and easily accessible and watch it disappear. Trial mix isn’t just for hiking or traveling, it’s for any day of the week!

What you Need for a Classic Trail Mix

The ingredients are simple and can be customizable with all your favorite snack items. For all the measurements, see the recipe card below.

  • Peanuts: You can use unsalted, or lightly salted roasted peanuts.
  • Cashews: Roasted cashews will have the best flavor.
  • M&Ms: You can use any variety of M&Ms that you love, they have so many varities now to choose from.
  • Raisins: Both golden and regular raisins are a perfect match in this trail mix.

How to Make Healthy Trail Mix

It is simple to combine the peanuts, cashews, m&ms and raisins together. When done, store in a ziplock bag, jar or an air tight container for one month. Snack as desired. Double the recipe for even more fun!

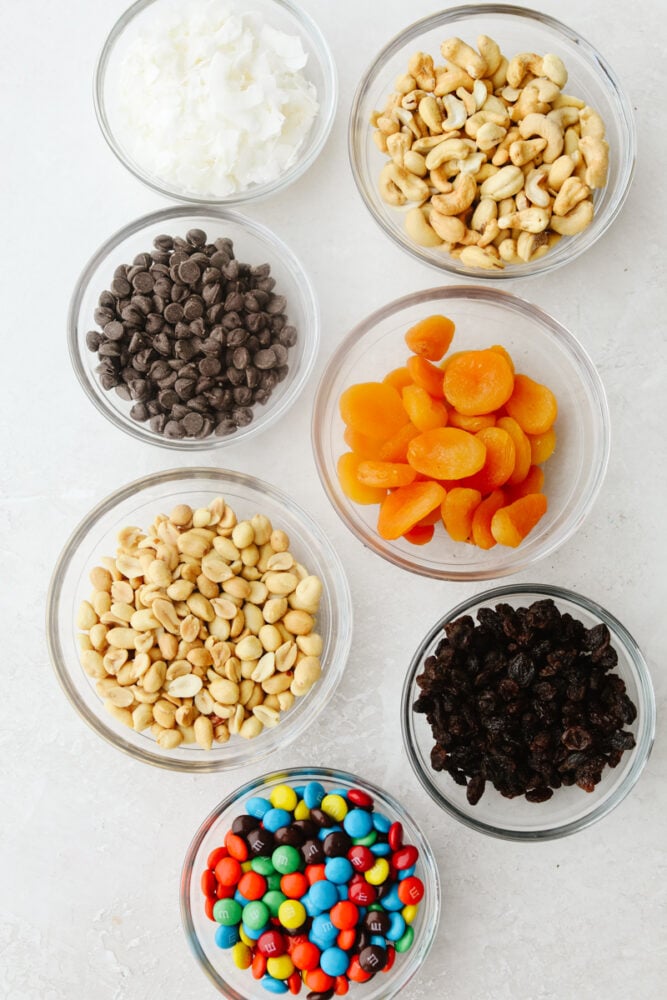
Ingredients for trail mix including peanuts, cashews raisins and dried apricots.

What Makes a Good Trail Mix

Supremely satisfying and energizing, trail mix is a snack of choice. It is so simple to just grab a handful, make mini bags for everyone or leave it in a bowl for snacking throughout the day. It is the perfect snack and filler that is healthy and affordable!

  • Protein: A satisfying trail mix needs a good protein that will quite hunger for a long time. Nuts and seeds are the protein of choice for trail mix. Almonds, pecans, walnuts, macademia, cashews and peanuts are just a few. Pumpkin seeds, and sunflower are nutritional powerhouse that are easy to add in.
  • Dried Fruit: Dried fruit is the perfect option to help with low blood sugar and give you a natural boost of energy. Look for dried fruit that doesn’t have added sugars. Dried raisins, cherries, apricots, bananas, coconut, and even mango all taste great in a trail mix.
  • Carbs or The Fun Stuff: This not only gives you added energy but helps to make it all appetizing. Yes M&Ms and chocolate chips are a favorite, but you can also add things such as peanut butter chips, pretzels, gold fish, cereals and small crackers like Teddy Grahams. All of these round out the trail mix making it a complete snack.

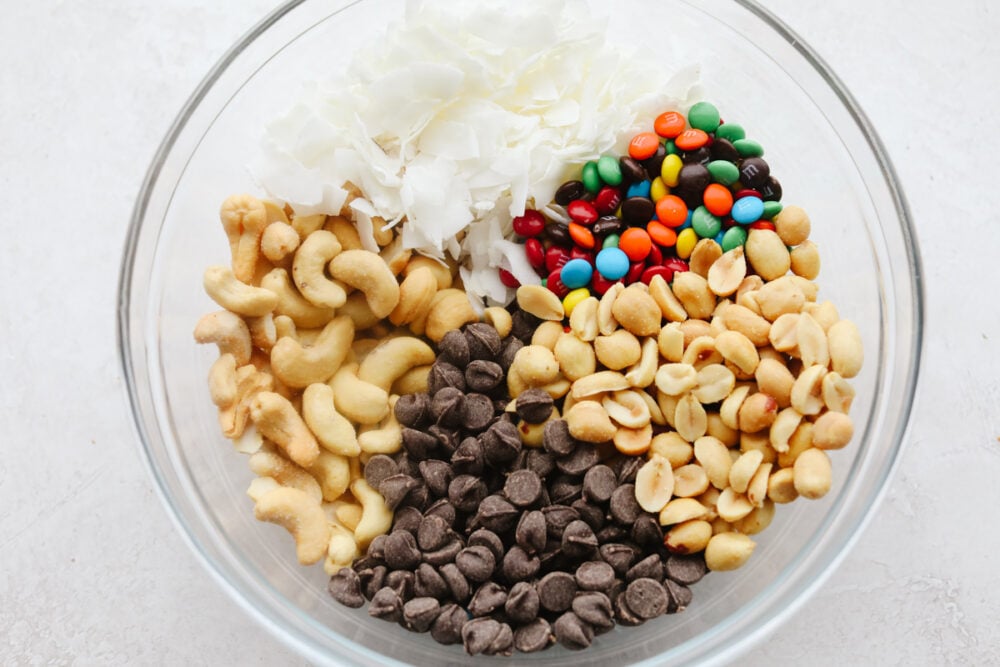
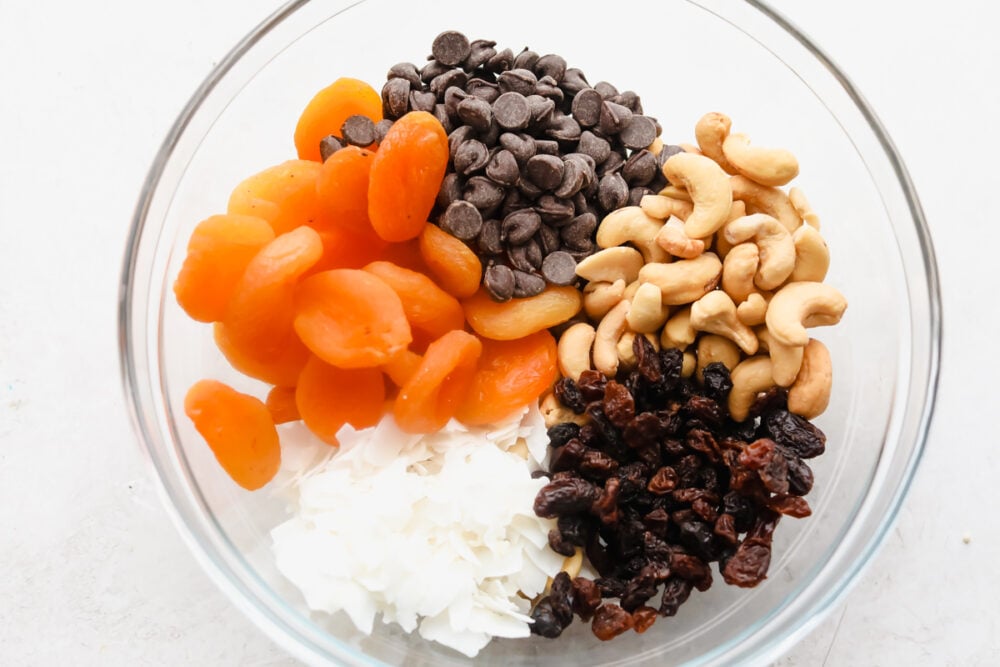
Chocolate Coconut Trail Mix

Classic trail mix is always a winner but sometimes you need to mix it up. Add in all your favorite ingredients to customize it to your liking. You can’t go wrong with trail mix! Here is What you need for Chocolate Coconut Trail Mix.

  • Peanuts: Roasted salted peanuts add a nice saltiness that contrasts with the sweet.
  • M&Ms: There is a huge variety of M&Ms and you can use any of them in this mix.
  • Coconut Flakes: Use large flaked dried coconut and toast it if you desire.
  • Cashews: These are a heavenly nut, but can be substituted for macademia nuts or pecans.
  • Chocolate Chips: I like semi-sweet chocolate chips so it’s not so sweet. You can use milk if you like.
Ingredients for chocolate coconut trail mix.

Dried Fruit Trail Mix

Using dried fruit is smart because it’s a great source of energy with natural sweetness. It pairs perfectly with chocolate and nuts!

  • Dried Apricots: This can be replaced with dried cherries, blueberries or other dried fruit of choice.
  • Cashews: If you are not a cashew fan you can try almonds, hazelnuts, or walnuts.
  • Chocolate Chips: Carob chips can be substituted here if desired.
  • Raisins: Cran-raisins and golden raisins are also great.
  • Flaked Coconut: I like to use large flaked coconut and you can roast it too.
Dried Fruit Trail Mix ingredients.

Storing The Best Trail Mix

Trail mix is one of those snacks that can keep for a long time, especially if the dried fruit you use doesn’t have too much moisture left in it.

Keeping trail mix at room temperature in a tightly sealed container is the best for keeping it fresh. It can be kept in glass jars, plastic ziptop bags, or Tupperware containers with lids that seal tightly. It will keep for at least 1 month and sometimes even longer. Keep individually portioned snack bags filled and ready to go for days on the run.

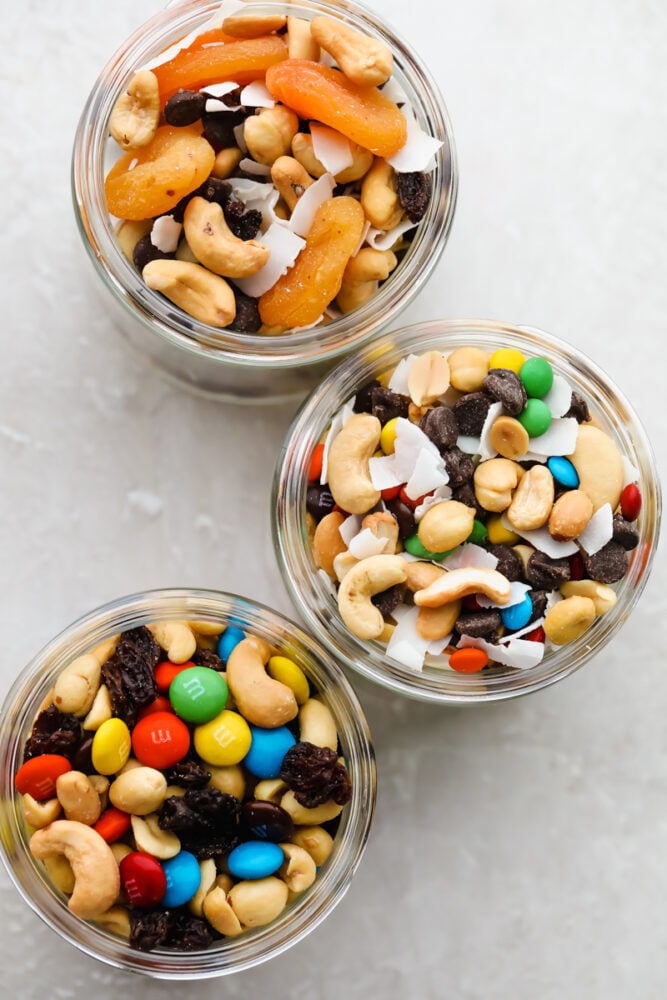
Glass jars filled with all three trail mixes.
Print

Trail Mix

Trail Mix is an easy must-have whether your camping or just hanging out! Protein-packed and full of goodness, this customizable mix is scrumptious!
Course Snack
Cuisine American
Keyword trail mix, trail mix recipe
Prep Time 10 minutes
Total Time 10 minutes
Servings 6 people
Calories 537kcal
Author Alyssa Rivers

Ingredients

  • 1 1/2 cups peanuts
  • 1 cup cashews
  • 1 cup m&ms
  • 1/2 cup raisins

Instructions

  • In a medium size bowl combine the peanuts, cashews, m&ms and raisins.
  • Store in a ziplock bag or jar for up to one month.

Nutrition

Calories: 537kcal | Carbohydrates: 45g | Protein: 15g | Fat: 36g | Saturated Fat: 10g | Polyunsaturated Fat: 8g | Monounsaturated Fat: 13g | Trans Fat: 1g | Cholesterol: 5mg | Sodium: 38mg | Potassium: 513mg | Fiber: 6g | Sugar: 23g | Vitamin A: 78IU | Vitamin C: 1mg | Calcium: 90mg | Iron: 4mg


from The Recipe Critic https://ift.tt/3epbxpH
https://ift.tt/3BaxOkR