शुक्रवार, 24 सितंबर 2021

Cream Cheese Pumpkin Bread

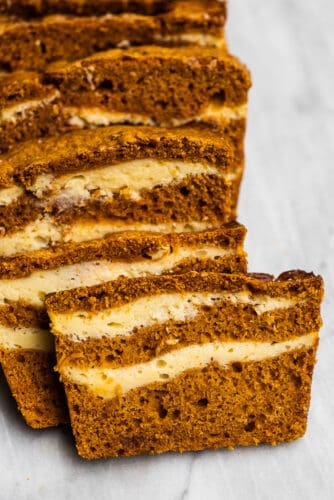
Slices of pumpkin bread with cream cheese swirls.

This cream cheese pumpkin bread recipe is truly the best ever. The moist and tender pumpkin bread is swirled with cream cheese frosting that’s baked right into the loaf. It makes the perfect fall treat!

This bread is so delicious that’ll want to enjoy a slice for breakfast with your morning coffee and have another for dessert later in the day. And if you love pumpkin baking as much as we do, also try these Perfect Pumpkin Muffins and Iced Pumpkin Spice Cookies.
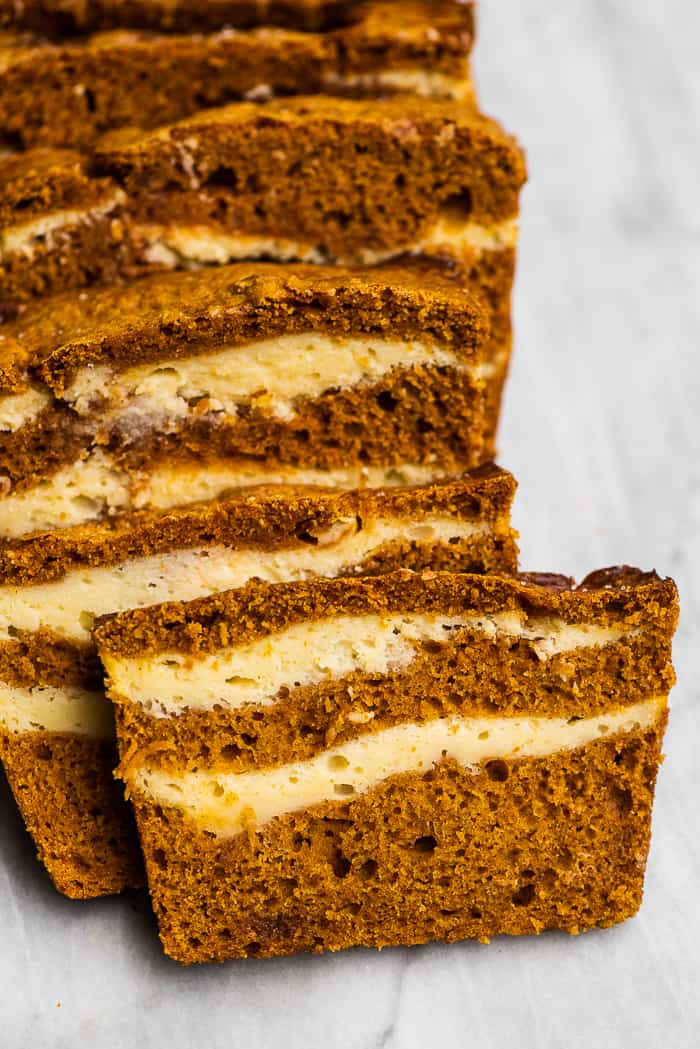
Slices of pumpkin bread with cream cheese swirls.

What makes this the best cream cheese pumpkin bread

Our taste-testers declared that this was the best pumpkin bread they’ve eaten, and we think that they’re right. Here’s why:

  • Cream Cheese: You’ll find more cream cheese in this recipe than most. That’s because the cream cheese layer is so good that we like more of it.
  • Buttermilk: Our “secret ingredient” that adds flavor and keeps the bread wonderfully moist is buttermilk. You can easily make your own homemade buttermilk if you don’t have any on hand!
  • Brown Sugar: Light brown sugar is the primary sweetener here as it gives the pumpkin bread a wonderful malty flavor.
  • Pumpkin Pie Spice: We use more pumpkin pie spice than what many other recipes call for, and it’s one of the reasons this autumn bread tastes so good. Try making homemade pumpkin pie spice!

Ingredients in pumpkin cream cheese bread

  • Pumpkin puree: look for cans of 100% pumpkin puree, not pumpkin pie filling.
  • Egg: use a room temperature egg for the best result.
  • Brown sugar: this gives the bread a deliciously malty flavor.
  • Sugar: this adds a little more sweetness.
  • Vanilla: we use this for added flavor.
  • Buttermilk: adds a subtle flavor to the bread and keeps it wonderfully moist.
  • Oil: we use cooking oil, but melted coconut oil works, too.
  • Flour: all-purpose flour works best in this recip.
  • Pumpkin pie spice: this is what makes the pumpkin bread taste AMAZING!
  • Baking soda and baking powder: both help to make the bread rise.
  • Salt: just a little to enhance the other flavors.

Ingredients in the Cream Cheese Layer

  • Cream cheese: use the brick style of cream cheese as opposed to the whipped-type that you use to spread on bagels.
  • Sugar: we use this to sweeten the cream cheese layer.
  • Flour: all-purpose flour works the best.
  • Egg: this helps to hold the cream cheese together so it doesn’t melt completely.

How to make this pumpkin bread recipe

Making cream cheese pumpkin bread is so easy that you’ll have the loaf pan in your oven in about 10 minutes. (Full recipe is in the recipe card below.)

Pumpkin bread with cream cheese is a surprisingly easy recipe to make that comes together in just four simple steps:
  1. Mix together: Mix the cream cheese layer ingredients in a bowl – an electric mixer or stand mixer works perfectly for this job.
  2. Dry ingredients: Whisk the dry ingredients in a bowl.
  3. Wet Ingredients: Whisk the wet ingredients in another bowl then stir in the dry ingredients.
  4. Bake: Now, all that you have to do is layer the batter and cream cheese in a loaf pan and then put it into your oven.
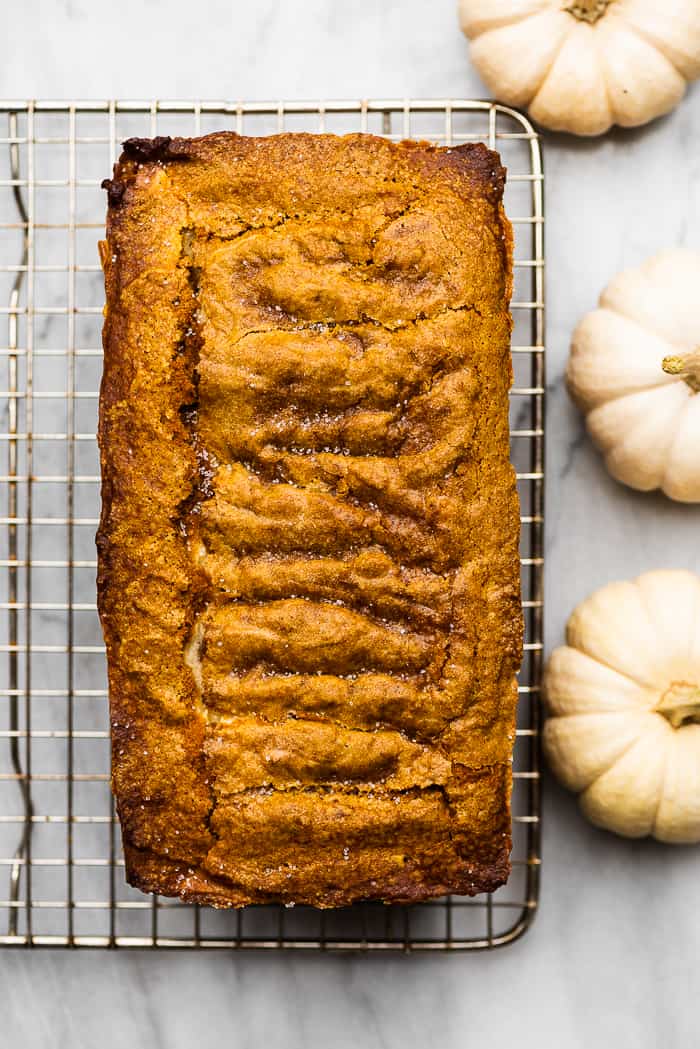
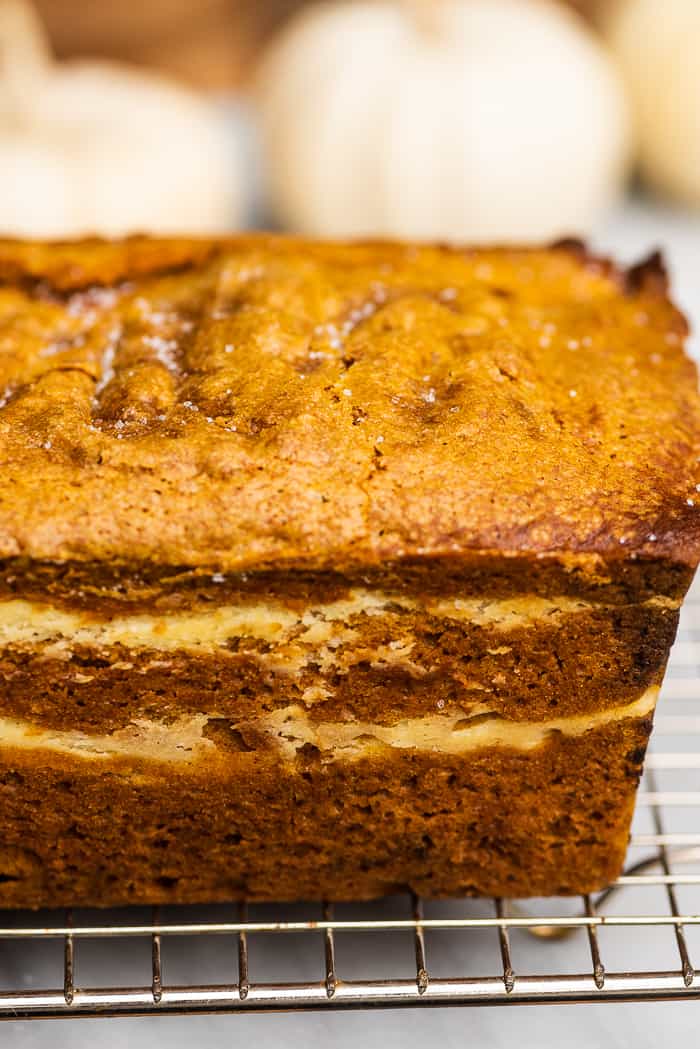
cream cheese pumpkin loaf on a cooling rack surrounded by white pumpkins.

Baking Tips

To make this cream cheese pumpkin bread perfectly, follow these simple tips:

  • Use a 5″x9″ loaf pan. If you use a larger pan, the bread won’t be the right shape.
  • Assemble the loaf and put it into your preheated oven right after you mix the wet and dry ingredients. If you let them sit for a while, the bread will not rise well.
  • Let the cream cheese pumpkin bread cool for at least 20 minutes before you slice into it, preferably even longer.
  • For the best flavor, use 100% pumpkin puree.

What to make with the leftover pumpkin puree

One of our favorite recipes to make with just a little pumpkin puree is this Pumpkin Coconut Latte. Or try these other delicious recipes to use the pumpkin puree that you’ll have leftover after making this cream cheese pumpkin bread:

Side view of layers in this cream cheese pumpkin bread.
How to store cream cheese pumpkin bread

Once the pumpkin bread is completely cool, store it in a resealable bag on your counter. It will keep well for 3 days.

If it’s been more than 3 days and the bread is a little dry/stale, butter it and warm it gently in a pan to make it taste delicious again.

Note: It’s important to make sure that the bread is completely cool before you store it. If you store the pumpkin bread while it’s still warm, the steam will get trapped in the bag and cause your bread to go soggy.
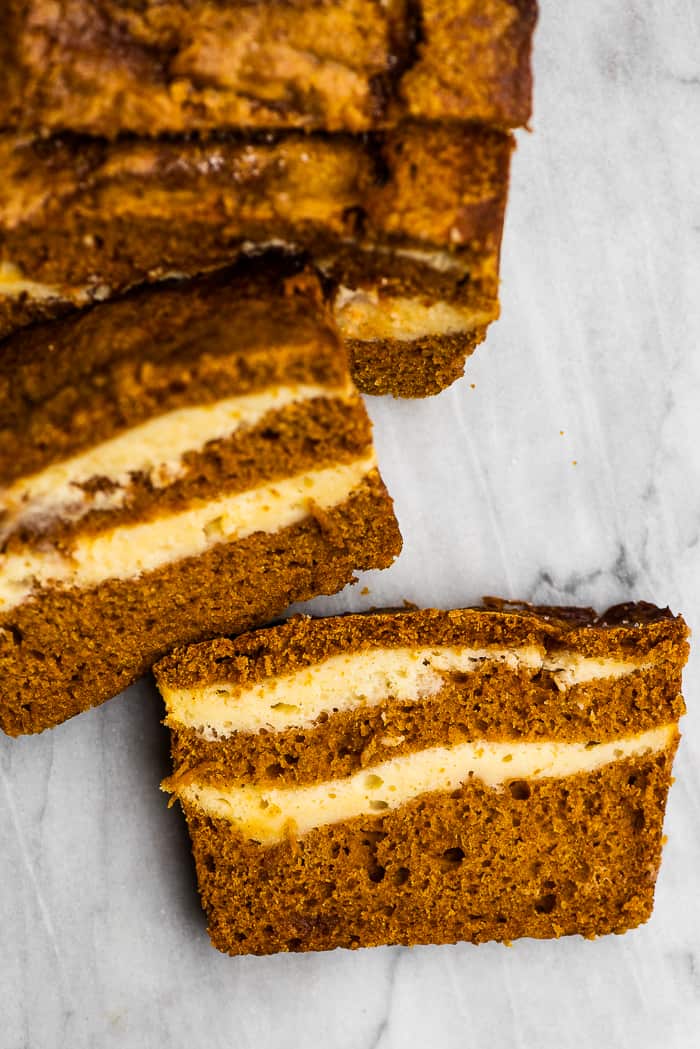
pumpkin cream cheese bread sliced.
Slices of pumpkin bread with cream cheese swirls.
Print

Cream Cheese Pumpkin Bread

This cream cheese pumpkin bread recipe is truly the best ever. The moist and tender pumpkin bread is swirled with cream cheese frosting that's baked right into the loaf. It makes the perfect fall treat!
Course Dessert
Cuisine American
Keyword pumpkin cream cheese bread
Prep Time 10 minutes
Cook Time 50 minutes
Total Time 1 hour
Servings 10 slices
Calories 312kcal
Author Kristen Stevens

Ingredients

Cream Cheese Filling

  • 6 ounces cream cheese at room temperature
  • cup granulated sugar
  • ¼ cup all-purpose flour
  • 1 large egg

Pumpkin Bread

  • 1 cup pumpkin puree
  • ¾ cup brown sugar
  • ¼ cup granulated sugar plus extra to sprinkle on top
  • ¼ cup buttermilk can use regular milk
  • ¼ cup cooking oil
  • 1 large egg
  • 1 ¼ cups all-purpose flour
  • 1 tablespoon pumpkin pie spice
  • ¾ teaspoon baking powder
  • ½ teaspoon baking soda
  • ½ teaspoon salt

Instructions

  • Move one of the baking racks to the lower third of your oven. Preheat your oven to 350 degrees. Grease a 5"x9" loaf pan with butter.
  • Make the cream cheese filling in a medium-sized bowl. Using an electric beater, mix the cream cheese, sugar, flour, and egg.
  • In a large bowl, whisk the pumpkin puree, brown sugar, granulated sugar, buttermilk, oil, and egg.
  • In a medium-sized bowl, whisk the flour, pumpkin pie spice, baking powder, baking soda, and salt.
  • Add the dry ingredients to the large bowl with the pumpkin and stir until it just comes together. Do not overmix.
  • Pour ⅓ of the batter into the loaf pan and smooth it out. Then spread half of the cream cheese on top. Add another ⅓ of the batter followed by the remaining cream cheese. Finish the pumpkin bread with a layer of batter.
  • Sprinkle the top of the pumpkin bread with a little sugar (about 1 teaspoon) then bake it for 45-55 minutes, or until a toothpick inserted into the center of the loaf comes out clean.
  • Let the pumpkin bread cool for 20 minutes then invert the loaf pan to remove the bread and let it finish cooling on a cooling rack.

Nutrition

Serving: 1 slice | Calories: 312kcal | Carbohydrates: 46g | Protein: 5g | Fat: 13g | Saturated Fat: 4g | Polyunsaturated Fat: 2g | Monounsaturated Fat: 5g | Trans Fat: 1g | Cholesterol: 57mg | Sodium: 253mg | Potassium: 172mg | Fiber: 1g | Sugar: 29g | Vitamin A: 4107IU | Vitamin C: 1mg | Calcium: 69mg | Iron: 2mg


from The Recipe Critic https://ift.tt/3i3DjJY
https://ift.tt/3kCRw2v
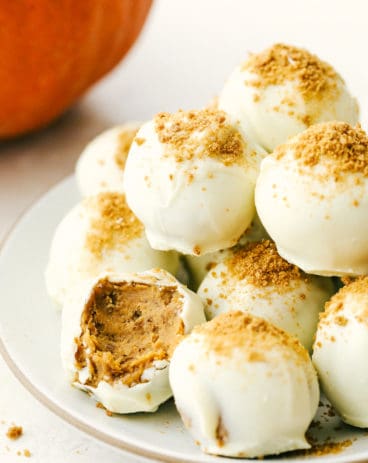
The BEST EVER Homemade Caramel Popcorn

Homemade caramel popcorn is soft, sweet, and absolutely delicious! A family favorite, this homemade popcorn is something you will definitely want to add to your weekly movie nights!

This popcorn is quick and easy to make, even for the most beginner of cooks! It takes about 20 minutes from start to finish! And if you thought this popcorn recipe was good, go ahead and try this Funfetti (Bunny Bait), Grasshopper, and this amazing Salted Caramel Popcorn!

Caramel popcorn in a bowl.

Caramel Popcorn Recipe

Finding a good caramel popcorn recipe is like trying to find a unicorn. It feels impossible! But after you try this recipe, you will not have to look anymore because this is it! This recipe has that delicious crunch of popcorn while being drizzled with the perfect amount of ooey-gooey caramel! It’s not too soggy and it’s not crispy. It’s just right! I felt like every other caramel popcorn had either too much caramel or not enough. The ratio always seemed off making it disappointing. But, after making this recipe, I have found the perfect mix!

This caramel popcorn is SO good that you will definitely want to make more than one batch at once… You know, so you can have a secret stash for yourself to snack on during the week! I love how the texture is not only fantastic, but the caramel taste is just right. In fact, I love making it with these Ranch Pretzels, Muddy Buddies, and this Brown Butter Rice Krispies Treats for our game nights and movie nights! It goes with just about everything! This recipe is a tried and true favorite and I think that it’s definitely one that your family will go crazy for!

Ingredients In Homemade Caramel Popcorn

You probably already have most of these ingredients in your pantry which keeps this simple! In fact, I love a recipe where I already have everything on hand! It makes it an easy yes when deciding if I should make it or not! See the recipe card below for exact measurements.

  • Popcorn kernels: Make sure they are fresh! Old popcorn kernals don’t fully pop and definitely don’t taste as fresh!
  • Brown sugar: My favorite kind of sweetener to use!
  • Butter: The butter is melted with the brown surgae, creating your caramel base.
  • Karo syrup: This brings in an additional sweet flavor and binds the ingredients together.
  • Sweetened condensed milk: One of my favorite ingredients of all time, the sweetened condensed milk is exaclty what will make this caramel stand out!
  • Baking soda: This reacts with the brown sugar and corn syrup! It helps the caramel maintain a soft texture.

Let’s Pop Some Popcorn!

You should take 20 minutes and make this caramel popcorn because it’s not only delicious, but it’s so simple and easy! Actually, it’s a great one to make with the entire family, my kids love watching the popcorn pop. Go ahead and give it a try, I know that you will love it!

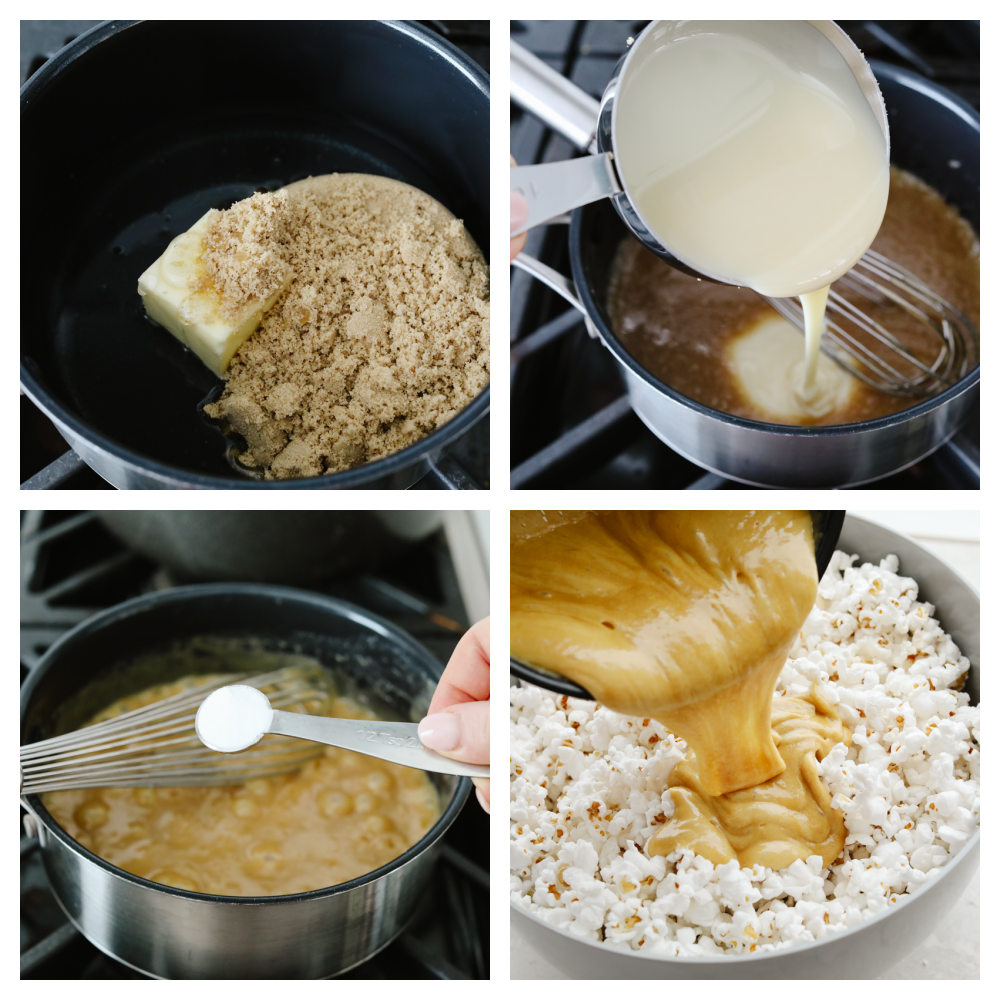
  1. Pop the popcorn: Pop your popcorn kernels in an air popper machine and pop into a large bowl. Set aside.
  2. Mix caramel ingredients: On medium high heat in a medium saucepan, cook the brown sugar, butter, and karo syrup. Allow to come to a boil and then add sweetened condensed milk.
  3. Boil: Allow to softly boil for about 3-4 minutes (until it gets to the softball stage.) Be careful to not cook to long and allow it to burn.
  4. Remove from heat: Remove from heat and carefully stir in baking soda.
  5. Pour, mix, coat and enjoy!: Pour the caramel over the popped popcorn. Then, mix it with a wooden spoon to make sure that it can all be coated evenly. Enjoy!
4 pictures showing how to make caramel popcorn step by step.

Baking Tips

Baking caramel popcorn can be tricky but here are a few things that you can do to make it turn out just right! To help you out, I’ve come up with some tips that will be helpful in making this taste perfect!

  • Getting rid of unpooped kernals: There is nothing worse that biting into the surprise unpopped kernal and almost breaking your teeth! To get rid of these and avoiding that problem, you just have to take one extra step! Once your popcorn is done popping, pour it onto a baking cooling rack. As a result, all of the unpopped kernals will fall through and the popcorn will stay on top! Put the popcorn back into your bowl. Now, after you’ve poured the caramel sauce on the popcorn, you won’t have to worry about biting into those kernals! It’s definitely worth the extra step!
  • Nonstick utinsels: If you use a nonstick pan and a silicone spatula (instead of a wooden spoon), the clean up will be FAR easier!
  • Don’t overcook: Overcooked caramel definitely has a burned taste to it. So, when you are cooking it, your caramel should be a golden brown color. If it’s too dark, then that means that it’s overcooked! So keep a close eye on it and stir it constantly.
Caramel popcorn in a pan.

How to Store Leftovers

If you are lucky enough to have leftovers of this caramel popcorn, here are a few tips on how to store it! In fact, it tastes just as delicious the next day so maybe even make some extra! That way, you will already have a quick snack on hand!

  • At room temperature: Place your cooled caramel popcorn in a sealed, airtight container. Then, you can leave it on the counter and your popcorn can last 7-10 days!
Print

The BEST EVER Homemade Caramel Popcorn

Homemade caramel popcorn is soft, sweet, and absolutely delicious! A family favorite, this homemade popcorn is something you will definitely want to add to your weekly movie nights! 
Course Dessert, Snack
Cuisine American
Keyword caramel popcorn, homemade caramel popcorn
Prep Time 5 minutes
Cook Time 15 minutes
Total Time 20 minutes
Servings 4 people
Author Alyssa Rivers

Ingredients

  • 1/2 cup uncooked popcorn kernels (yields about 13 cups popped)
  • 1 cup brown sugar
  • 1/4 cup butter
  • 1/2 cup light karo syrup
  • 1/2 cup sweetened condensed milk
  • 1/2 teaspoon baking soda

Instructions

  • Pop your popcorn kernels in an air popper machine and pop into a large bowl. Set aside.
  • On medium-high heat in a medium saucepan, cook the brown sugar, butter, and Karo syrup. Allow coming to a boil. Add sweetened condensed milk.
  • Allow to softly boil for about 3-4 minutes until it gets to the softball stage. Be careful to not cook too long and allow it to burn.
  • Remove from heat and carefully stir in baking soda.
  • Pour the caramel over the popped popcorn. Mix with a wooden spoon to make sure that it can all be coated evenly. Enjoy!


from The Recipe Critic https://ift.tt/2XG2zig
https://ift.tt/3CGgNPj

गुरुवार, 23 सितंबर 2021

Homemade Pizza Sauce

Using homemade pizza sauce is the perfect way to level up your pizzas! It’s loaded with sautéed garlic, fresh herbs, and only takes 5 minutes to make!

I love making my own sauces at home. They always taste better than anything you can buy! You have got to try my homemade buffalo and teriyaki sauces, as well as fan-favorite alfredo! Once you make them from scratch, you won’t want them any other way!

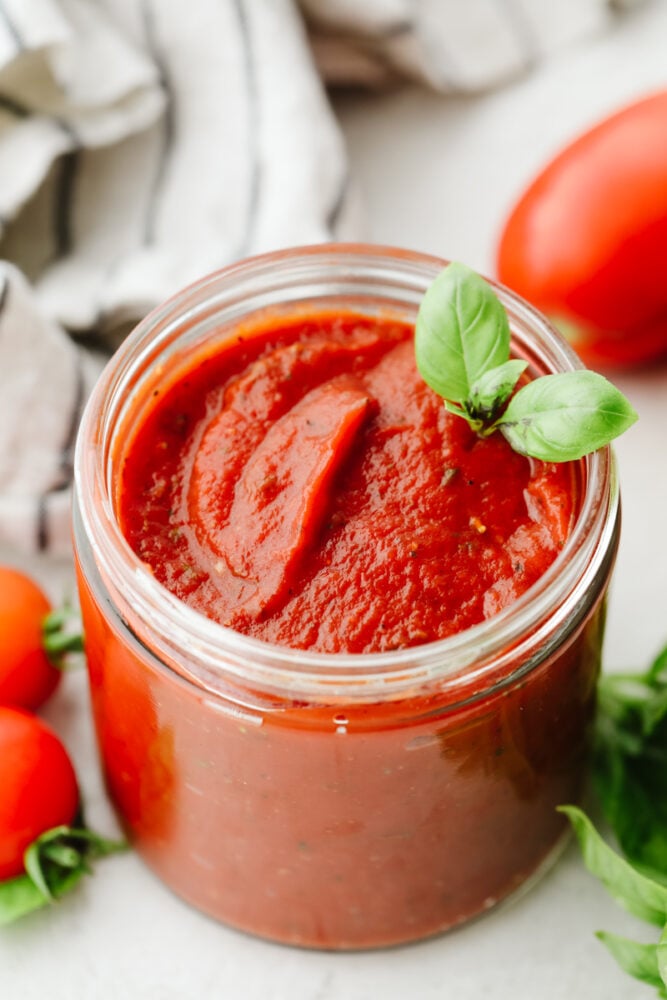
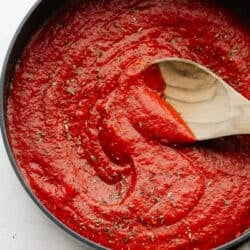
A jar of homemade pizza sauce with

Pizza Sauce Recipe

I’m a lover of all homemade sauces. No matter what dish you are making, they upgrade it! The fresh flavor really can’t be beaten. The best part of it all is that you can add seasonings as you go, taste-test, and adjust! No more picking out a sauce at the store and hoping it has the flavor you’re wanting! Now, I’ve already done recipes for homemade marinara and tomato sauce, but thought a homemade pizza sauce recipe was completely necessary! It is beyond easy to make and is full of savory sautéed garlic and my favorite blend of Italian herbs. You’re going to want to put this on everything!

This homemade pizza sauce tastes amazing no matter what kind of pizza you use it on! Try it on my foolproof dough for a delicious traditional pizza. Top English muffins and biscuits for fun, bite-sized variations. It also tastes amazing on healthy pizza variations like zucchini and eggplant. With how much incredible flavor is loaded into this sauce, no one will know you’re using a vegetable as a crust! My family raves about this sauce! We all agree that it tastes better than takeout. You are going to love the fresh, natural flavors that shine through. The fact that it whips up in less than 5 minutes isn’t bad, either! Let’s make some sauce!

Ingredients for Easy Pizza Sauce

Chances are, if you have some tomato paste on hand, you have everything else needed to make this tasty sauce! It uses so many pantry staple ingredients and spices. Just another reason why I love this recipe so much! It uses the simplest ingredients, but the flavor is anything but simple! You’re going to love the complex sweet, savory, garlicky flavors in each bite of pizza. All individual ingredients can be found in the recipe card below.

  • Olive Oil: Used for adding moisture and binding ingredients together.
  • Minced Garlic: Garlic is going to add the perfect savory flavor to your sauce!
  • Tomato Paste and Tomato Sauce: A blend of both tomato paste and tomato sauce is what is going to give your sauce its perfect texture. If you don’t add tomato paste, your sauce will make your pizza soggy.
  • Italian Seasoning: This is my personal blend of basil, oregano, rosemary, marjoram, and thyme. You can customize the flavors to your liking!
  • Sugar: Granulated sugar is going to balance he flavors of your sauce.
  • Salt: Used to enhance overall flavor!
  • Paprika: Adds a mild spice to your sauce.
  • Pepper: For a hint of sharp, earthy spice.
  • Crushed Red Pepper: A pinch of crushed red pepper adds the perfect amount of heat!

Making the Best Sauce

If you have a frying pan and 5 minutes to spare, you too can make gourmet pizza sauce at home. Since all you need to do is mix everything together, you can’t go wrong! This recipe is foolproof. It’s just up to you to add seasoning and spices to your liking!

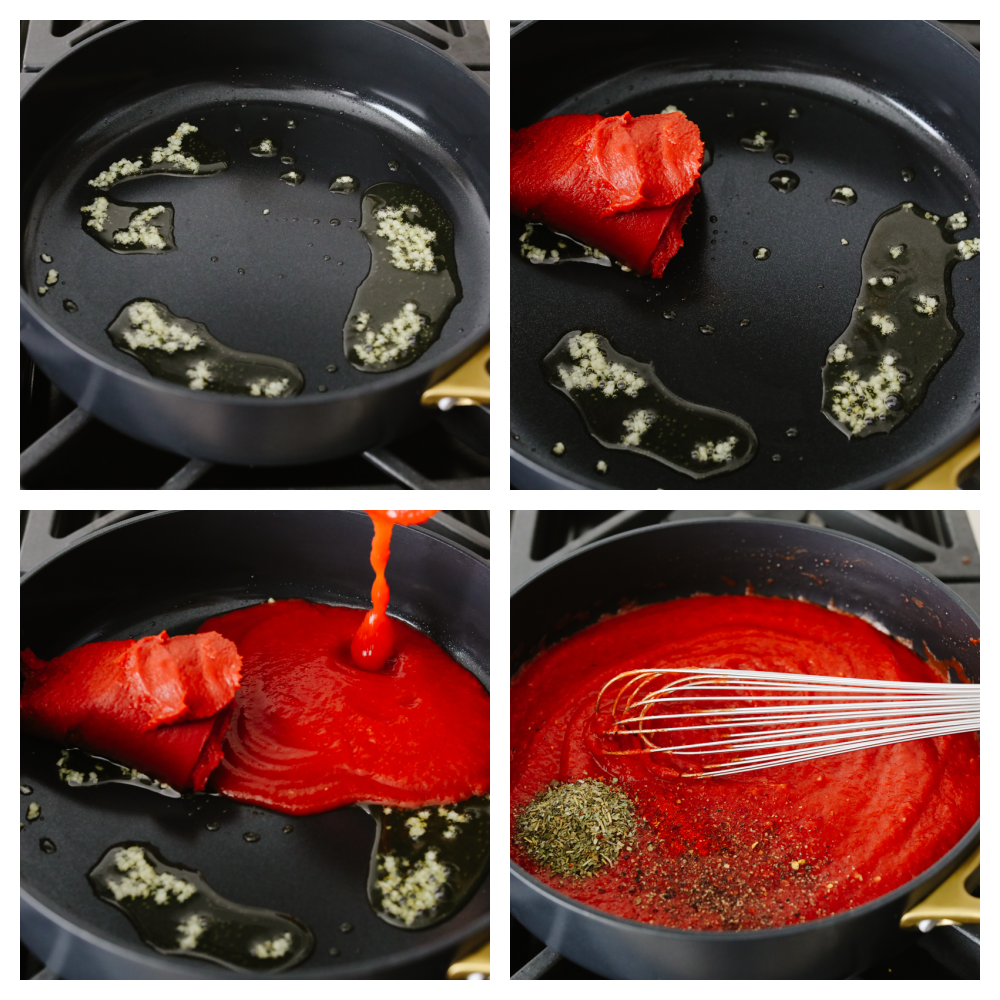
  1. Sauté Garlic in Olive Oil: To begin, in a small saucepan sauté the olive oil and garlic. Whisk in the tomato paste, and tomato sauce.
  2. Mix in Seasonings: Next, add Italian seasoning, sugar, salt, paprika, and pepper.
  3. Heat and Whisk: Whisk everything together and heat for 3-5 minutes until heated throughout.
  4. Add Red Pepper and Serve: Finally, add a pinch of red pepper for some spice if desired. Use in your favorite recipes.
Process shots of adding tomato paste, garlic, and seasonings into a saucepan.

Tips for Making Homemade Pizza Sauce

You are going to love this sauce smothered on all of your favorite pizzas! It is so easy to make and can be easily customized. You’ll never want storebought again!

  • Adding Heat: If you want to kick it up a notch, add in more paprika, chili flakes, or a dash of cayenne.
  • Additional Flavors: Adjust the flavor to your liking! More garlic, herbs, or even a bit of balsamic vinegar can enhance your sauce.
  • Use High Quality Tomatoes: Since this is the base of your sauce, I recommend using the best quality canned tomatoes you can find! If you can find them, fire-roasted tomatoes will add a delicious, complex flavor.
  • Don’t Skip the Sugar: Because tomatoes are naturally very acidic, you need sugar to balance out the flavor.
  • Adjust Thickness: If your sauce is too thin, gradually add more tomato paste. If your sauce is too thick, add more tomato sauce.
  • What Can I Use This Sauce With? Pizza sliders, stuffed pizza bites, deep dish pizza, calzones, you name it!

Storing Homemade Pizza Sauce

This pizza sauce is just as easy to store as it is to make! It keeps really well in the fridge, ready to go for quick weeknight dinners.

  • In the Refrigerator: The best way to store your homemade sauce is in the fridge. Keep tightly sealed in a jar for up to 1 week.
  • In the Freezer: Transfer your sauce to a ziplock freezer bag. It will keep in the freezer for 3-6 months! Let it thaw in the fridge overnight before serving.
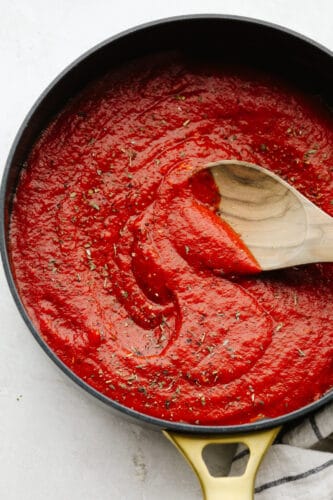
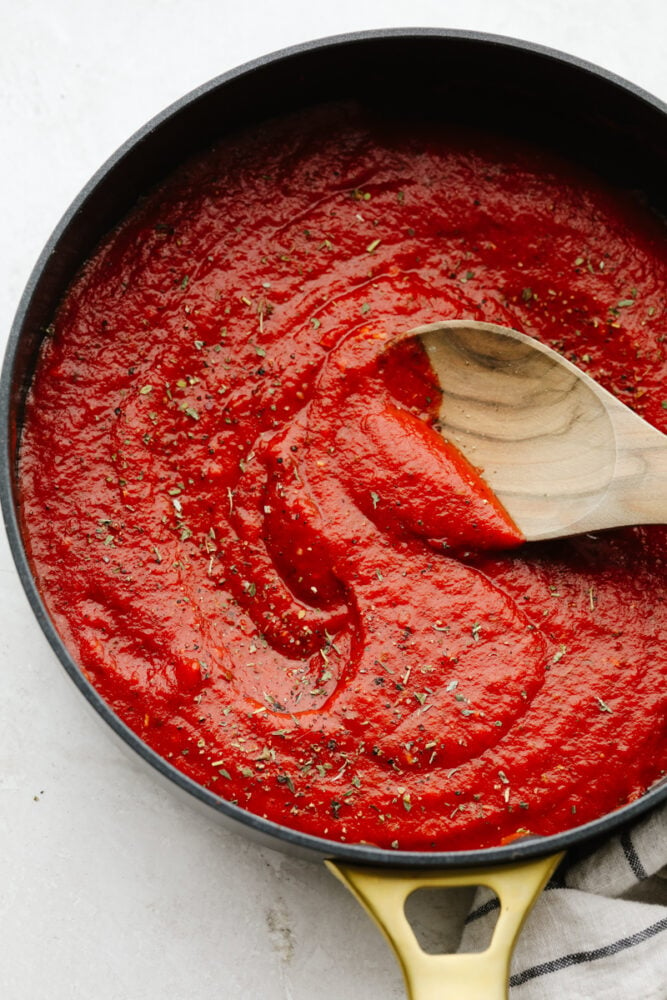
Finished pizza sauce in a saucepan.
Print

Homemade Pizza Sauce

Using homemade pizza sauce is the perfect way to level up your pizzas! It's loaded with sautéed garlic, fresh herbs, and only takes 5 minutes to make!
Course Side Dish
Cuisine American, Italian, Italian American
Keyword homemade pizza sauce, pizza sauce
Prep Time 5 minutes
Cook Time 5 minutes
Total Time 10 minutes
Servings 24 ounces
Calories 7kcal
Author Alyssa Rivers

Ingredients

  • 1 Tablespoon olive oil
  • 3 cloves garlic minced
  • 1 (6 ounce can) tomato paste
  • 1 (15 ounce can) tomato sauce
  • 1 tablespoon Italian seasoning
  • 1/2 tablespoon sugar
  • 1/2 teaspoon salt
  • 1/4 teaspoon paprika
  • 1/4 teaspoon pepper
  • pinch of crushed red pepper optional

Instructions

  • In a small saucepan sauté the olive oil and garlic. Whisk in the tomato paste, and tomato sauce. Add Italian seasoning, sugar, salt, paprika, and pepper.
  • Whisk everything together and heat for 3-5 minutes until heated throughout. Add a pinch of red pepper for some spice if desired. Use in your favorite recipes.

Nutrition

Calories: 7kcal | Carbohydrates: 1g | Protein: 1g | Fat: 1g | Saturated Fat: 1g | Polyunsaturated Fat: 1g | Monounsaturated Fat: 1g | Sodium: 49mg | Potassium: 5mg | Fiber: 1g | Sugar: 1g | Vitamin A: 15IU | Vitamin C: 1mg | Calcium: 4mg | Iron: 1mg


from The Recipe Critic https://ift.tt/3hWuDoH
https://ift.tt/3lQHgmw

Blueberry Banana Bread

This staple blueberry banana bread recipe has the perfect combination of bananas and fresh blueberries. It is so moist, delicious, and super simple to make!

Banana bread is the best. I love that it works as both a breakfast and a dessert! If you need more warm, delicious banana bread in your life, try my strawberry, cinnamon cream cheese, and award-winning banana bread recipes! You won’t regret it!

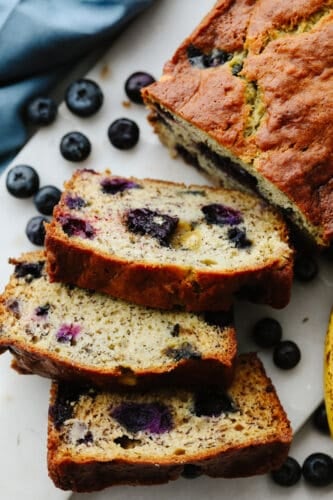
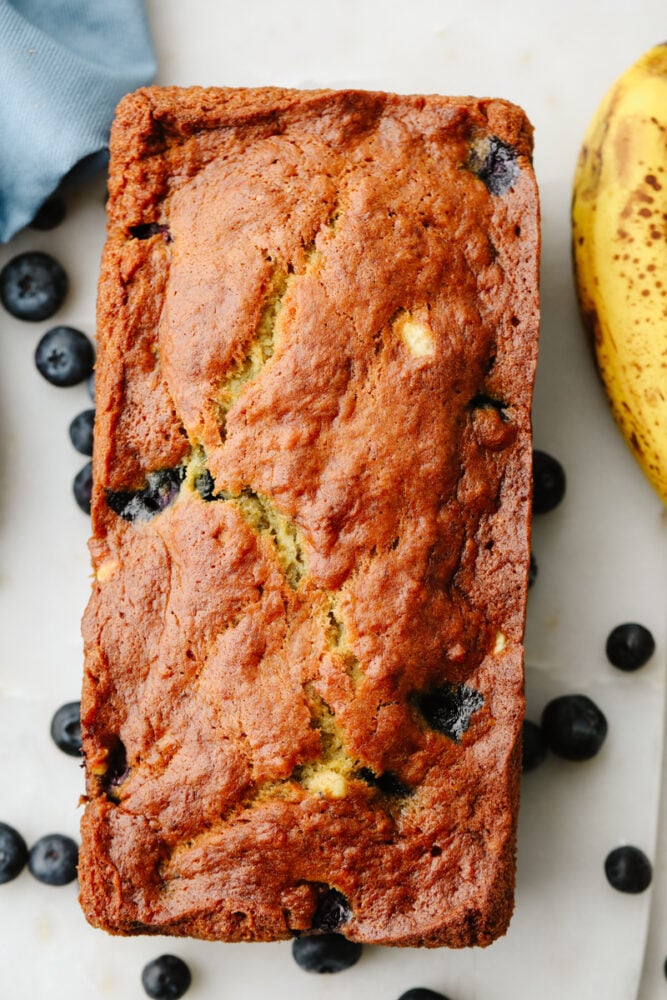
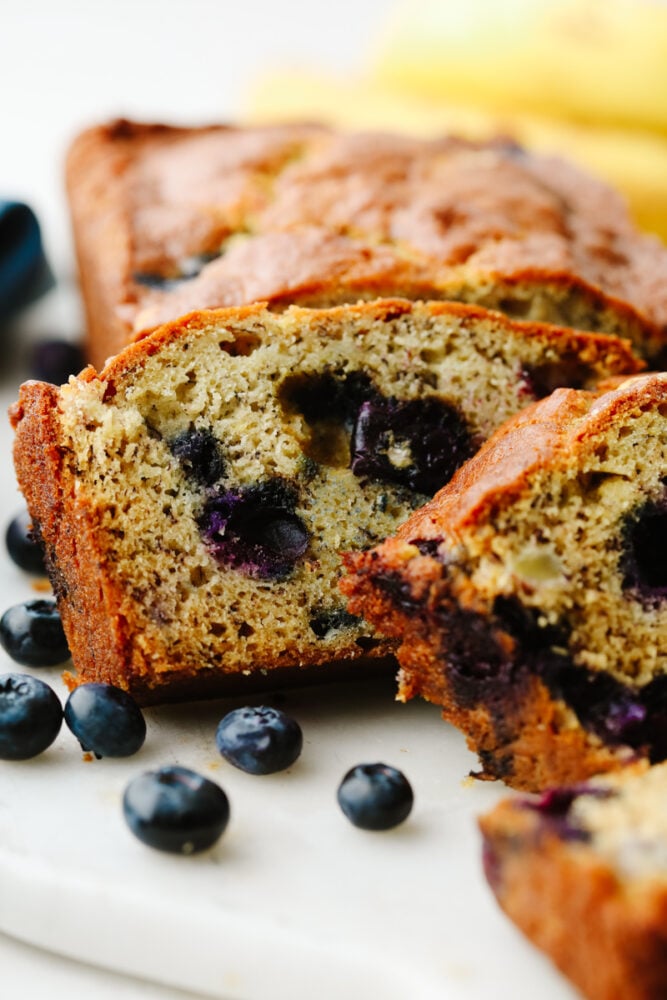
3 slices cut from a loaf of banana bread.

Quick and Easy Blueberry Banana Bread Recipe

This post goes out to all of my sweet bread lovers out there! I’m always so happy when we have banana bread at the house. It’s so hard to refrain from eating the whole loaf in one sitting. I always like to put a little honey butter on top for a treat that is truly divine. Honestly, though, the flavor of this blueberry banana bread is so good, you don’t even need any butter on top! It’s so moist, sweet, and flavorful on its own. It starts with my all-time favorite banana bread recipe. Then, we add some juicy blueberries! Blueberries and bananas make the perfect combination.

And that combination tastes even better surrounded by warm, moist bread! This banana bread is so buttery, rich, and crumbles perfectly in each bite. And the addition of blueberries makes each bite flavorful and juicy! This is one of my favorite kinds of bread to make as a gift for friends and family. It gets compliments wherever it goes! (And speaking of gift-giving, banana bread muffins and bars are also quick and delicious!) It’s time to take advantage of the end of blueberry season and make some homemade bread. You’ll go crazy over the warm, mouthwatering result!

Ingredients for Blueberry Banana Bread

Bananas and blueberries are really all you need here! This recipe uses so many staple ingredients; no grocery trip necessary! It’s perfect for when I have overripe bananas on hand and my sweet tooth hits. All measurements can be found below!

  • Butter: You can use salted or unsalted butter here. Just make sure it is softened so your batter mixes together smoothly!
  • Granulated Sugar: Granulated sugar is going to give your banana bread its perfect sweetness. It also melts down to create a smooth texture when baked.
  • Eggs: Necessary for moisture and to bind ingredients together.
  • Bananas: This is the perfect opportunity to use ripe or even overripe bananas! The softer the better.
  • Flour: Flour is used for tossing your blueberries in. It will keep them from sinking in your loaf.
  • Baking Soda: Baking soda will keep your bread light and fluffy.
  • Salt: To enhance overall flavor, salt is a must!
  • Blueberries: Fresh blueberries work best here, but may be expensive or hard to find if they’re not in season. Feel free to substitute for frozen blueberries!

How to Make the Best Blueberry Banana Bread

Making this delicious bread is as straightforward as it gets. It’s the kind of recipe that both novice and advanced bakers can enjoy! With how insanely good it is, you’ll be coming back for more!

  1. Preheat Oven, Prep Pan: To begin, preheat oven to 375 degrees Fahrenheit. Spray two 9×5 loaf pans with nonstick spray. Set aside.
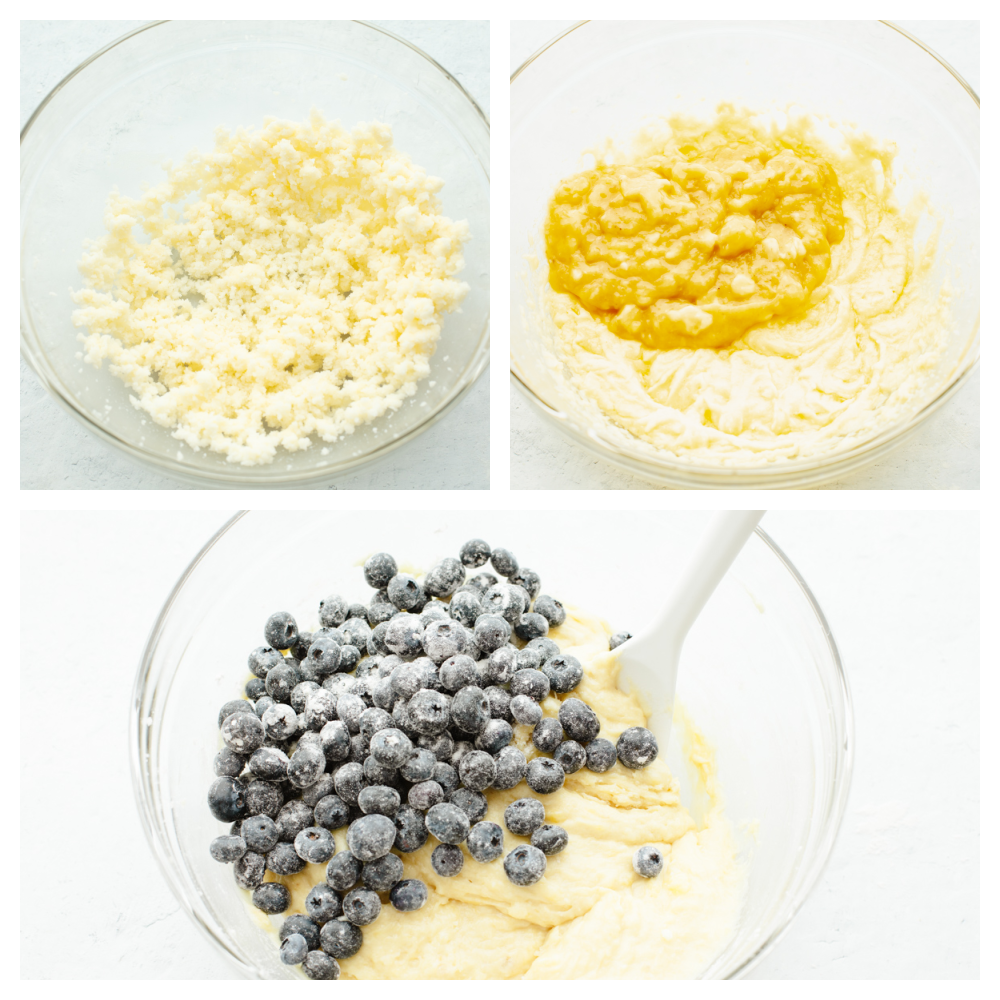
  2. Mix Butter and Sugar: In a large bowl, using an electric or stand mixer with paddle attachment, cream butter and sugar together until light and fluffy.
  3. Add Bananas to Sugar Mixture: In a small bowl, beat eggs using a fork. Then, add eggs to sugar mixture and beat until combined. Add mashed bananas and mix until combined.
  4. Sift and Mix Dry Ingredients: Sift all dry ingredients: flour, baking soda, and salt. Slowly add sifted dry ingredients to banana mixture and mix until flour is just combined. DO NOT OVERMIX! Fold in floured covered blueberries.
  5. Pour Into Pans: Pour batter into prepared loaf pans and bake at 375 degrees Fahrenheit for 15 minutes. Reduce heat to 350 degrees and bake for an additional 30 minutes. Your bread should be done when the edges are slightly brown or a toothpick comes out clean. Let cool completely before removing from loaf pans.
Process shots of making bread dough and tossing blueberries in flour.

Tips for Making the Best Banana Bread Possible

Use these tips and tricks to make sure your blueberry banana bread is the talk of the town! They’re super easy and can help you get the best result every time. You will adore the flavors you create!

  • Use Ripe Bananas: If the peel of your bananas has turned brown, don’t throw them out! Overripe bananas are perfect for bread-making. The longer bananas have to ripen, the sweeter they become. They also have a softer texture which is perfect for making a smooth dough.
  • Bananas Not Ripe Enough: On the flipside, if your bananas are too green, there’s a method to make them softer. You can bake them for 15-20 minutes at 300 degrees Fahrenheit. Once cooled, the insides should be nice and soft!
  • Flavors and Toppings: You can get creative with your flavor combinations in this recipe. Other berries like raspberries and blackberries are absolutely divine! Citrusy things like orange zest, lemon zest, or even lemon curd pair perfectly with the smooth, fruity flavor of blueberry. Adding a glaze or icing, drizzled homemade caramel, or chopped nuts can also enhance your banana bread’s flavor.
  • Don’t Overmix: Overmixing your batter can cause gluten to develop. This makes your bread become too dense when baked.
  • Measure Flour: This is one of the most common mistakes when making baked goods. If you add too much flour, your bread will become hard and dry.
  • Let Cool Completely: Be sure to let your loaf cool down completely before cutting. The banana mixture needs time to set! I like to wait at least 15 minutes before slicing up.
A loaf of blueberry banana bread.

Storing Leftover Blueberry Banana Bread

If you have any leftovers of this bread, I’m proud. It never lasts long at my house! Here are some tips for keeping it fresh for as long as possible.

  • At Room Temperature: Keeping your bread in the fridge will dry it out, so storing it at room temperature is best! Make sure it is tightly wrapped in plastic wrap. It will stay good for 3-4 days.
  • In the Freezer: This bread freezes really well! When wrapped tightly in plastic wrap, it will keep for up to 3 months. Thaw bread overnight in the fridge before serving. You can pop a slice in the microwave for 30 seconds for that freshly-baked effect.
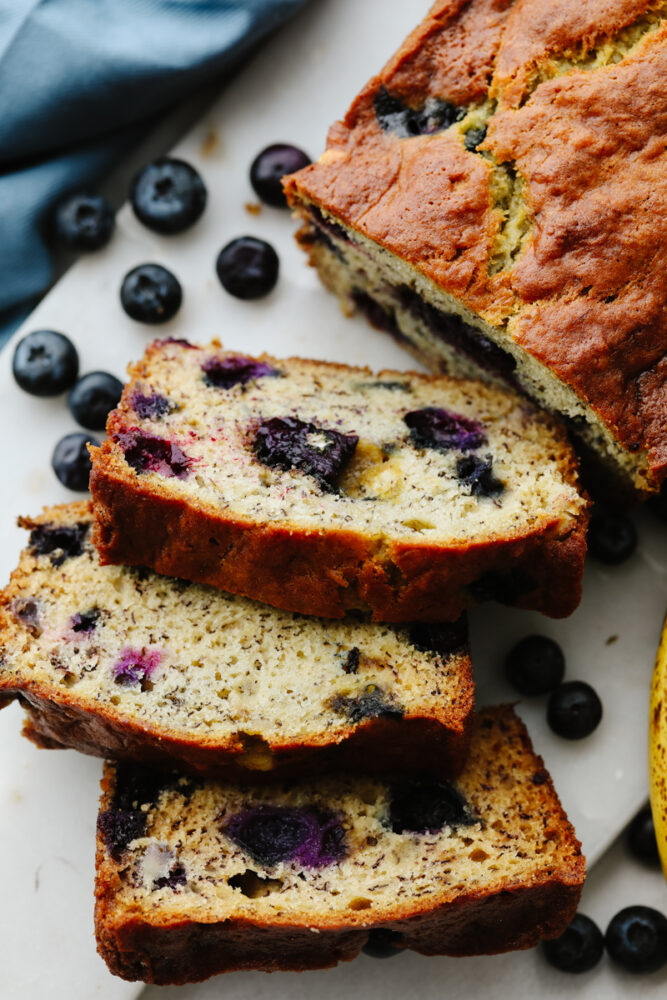
Closeup of blueberry banana bread slices.

A Reader’s Review

“I just finished eating TWO pieces. It turned out AMAZING!!!!! Thank you for this delicious recipe. I did everything the same except added teaspoon of vanilla and cinnamon. Made it in one bread loaf. Cooked about twenty minutes more. Also added additional blackberries. I will forever use this recipe. Yum.”
Lisa
Print

Blueberry Banana Bread

This moist and delicious Blueberry Banana Bread has the perfect combination of bananas and fresh blueberries that is super simple to make!
Course Breakfast, Dessert, Snack
Cuisine American
Keyword blueberry banana bread
Prep Time 15 minutes
Cook Time 45 minutes
Total Time 1 hour
Servings 12 slices
Calories 153kcal
Author Alyssa Rivers

Ingredients

  • 1/2 cup softened (1 stick butter)
  • 1 cup granulated sugar
  • 2 large eggs beaten
  • 3 ripe bananas mashed
  • 2 cups flour
  • 1 teaspoon baking soda
  • 1/2 teaspoon salt
  • 1 1/2 cups fresh blueberries tossed in 1 Tablespoon of flour

Instructions

  • Preheat oven to 375F degrees. Spray two 9×5 loaf pans with nonstick spray. Set aside.
  • In a large bowl, using an electric or stand mixer with paddle attachment cream butter and sugar together until light and fluffy.
  • In a small bowl, beat eggs using a fork. Add eggs to the sugar mixture and beat until combined. Add mashed bananas and mix until combined.
  • Sift all dry ingredients: flour, baking soda, and salt. Slowly add sifted dry ingredients to the banana mixture and mix until flour is just combined. DO NOT OVERMIX! Fold in floured covered blueberries.
  • Pour batter into prepared loaf pans and bake at 375F for 15 minutes. REDUCE heat to 350F and bake for an additional 30 minutes until edges are slightly brown or until come out clean. Let cool completely before removing from loaf pans.

Notes

Updated on September 22, 2021
Originally Posted on April 15, 2016

Nutrition

Calories: 153kcal | Carbohydrates: 25g | Protein: 2g | Fat: 5g | Saturated Fat: 3g | Cholesterol: 29mg | Sodium: 160mg | Potassium: 91mg | Fiber: 1g | Sugar: 13g | Vitamin A: 183IU | Vitamin C: 3mg | Calcium: 7mg | Iron: 1mg


from The Recipe Critic https://ift.tt/3u1sFZ8
https://ift.tt/2ZcWBpN