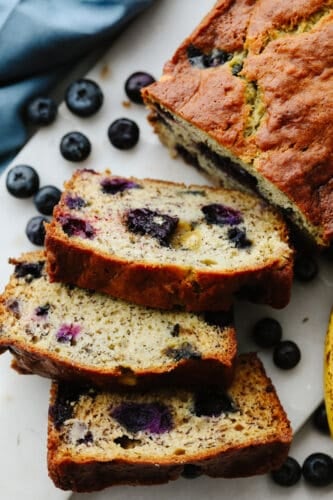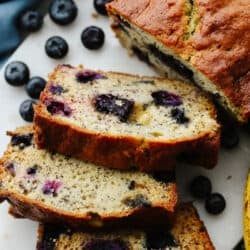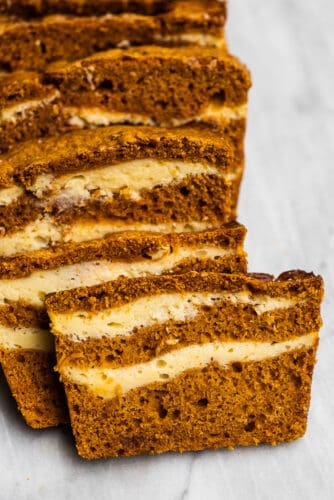
This cream cheese pumpkin bread recipe is truly the best ever. The moist and tender pumpkin bread is swirled with cream cheese frosting that’s baked right into the loaf. It makes the perfect fall treat!
This bread is so delicious that’ll want to enjoy a slice for breakfast with your morning coffee and have another for dessert later in the day. And if you love pumpkin baking as much as we do, also try these Perfect Pumpkin Muffins and Iced Pumpkin Spice Cookies.

What makes this the best cream cheese pumpkin bread
Our taste-testers declared that this was the best pumpkin bread they’ve eaten, and we think that they’re right. Here’s why:
- Cream Cheese: You’ll find more cream cheese in this recipe than most. That’s because the cream cheese layer is so good that we like more of it.
- Buttermilk: Our “secret ingredient” that adds flavor and keeps the bread wonderfully moist is buttermilk. You can easily make your own homemade buttermilk if you don’t have any on hand!
- Brown Sugar: Light brown sugar is the primary sweetener here as it gives the pumpkin bread a wonderful malty flavor.
- Pumpkin Pie Spice: We use more pumpkin pie spice than what many other recipes call for, and it’s one of the reasons this autumn bread tastes so good. Try making homemade pumpkin pie spice!
Ingredients in pumpkin cream cheese bread
- Pumpkin puree: look for cans of 100% pumpkin puree, not pumpkin pie filling.
- Egg: use a room temperature egg for the best result.
- Brown sugar: this gives the bread a deliciously malty flavor.
- Sugar: this adds a little more sweetness.
- Vanilla: we use this for added flavor.
- Buttermilk: adds a subtle flavor to the bread and keeps it wonderfully moist.
- Oil: we use cooking oil, but melted coconut oil works, too.
- Flour: all-purpose flour works best in this recip.
- Pumpkin pie spice: this is what makes the pumpkin bread taste AMAZING!
- Baking soda and baking powder: both help to make the bread rise.
- Salt: just a little to enhance the other flavors.
Ingredients in the Cream Cheese Layer
- Cream cheese: use the brick style of cream cheese as opposed to the whipped-type that you use to spread on bagels.
- Sugar: we use this to sweeten the cream cheese layer.
- Flour: all-purpose flour works the best.
- Egg: this helps to hold the cream cheese together so it doesn’t melt completely.
How to make this pumpkin bread recipe
Making cream cheese pumpkin bread is so easy that you’ll have the loaf pan in your oven in about 10 minutes. (Full recipe is in the recipe card below.)
Pumpkin bread with cream cheese is a surprisingly easy recipe to make that comes together in just four simple steps:- Mix together: Mix the cream cheese layer ingredients in a bowl – an electric mixer or stand mixer works perfectly for this job.
- Dry ingredients: Whisk the dry ingredients in a bowl.
- Wet Ingredients: Whisk the wet ingredients in another bowl then stir in the dry ingredients.
- Bake: Now, all that you have to do is layer the batter and cream cheese in a loaf pan and then put it into your oven.

Baking Tips
To make this cream cheese pumpkin bread perfectly, follow these simple tips:
- Use a 5″x9″ loaf pan. If you use a larger pan, the bread won’t be the right shape.
- Assemble the loaf and put it into your preheated oven right after you mix the wet and dry ingredients. If you let them sit for a while, the bread will not rise well.
- Let the cream cheese pumpkin bread cool for at least 20 minutes before you slice into it, preferably even longer.
- For the best flavor, use 100% pumpkin puree.
What to make with the leftover pumpkin puree
One of our favorite recipes to make with just a little pumpkin puree is this Pumpkin Coconut Latte. Or try these other delicious recipes to use the pumpkin puree that you’ll have leftover after making this cream cheese pumpkin bread:

Desserts
Pumpkin Cream Cheese Truffles
Breakfast
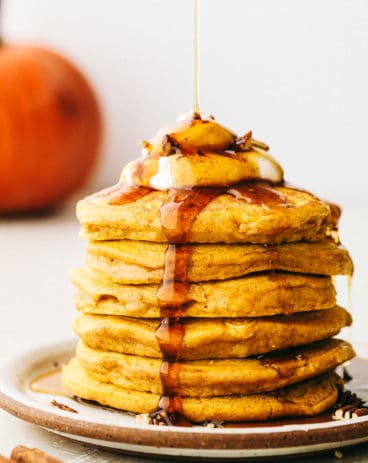
Pumpkin Spice Pancakes
Breakfast
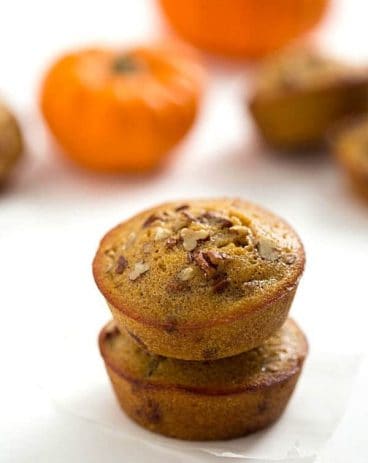
Pumpkin Pecan Pie Muffins
Dressings, Sauces, and Dips
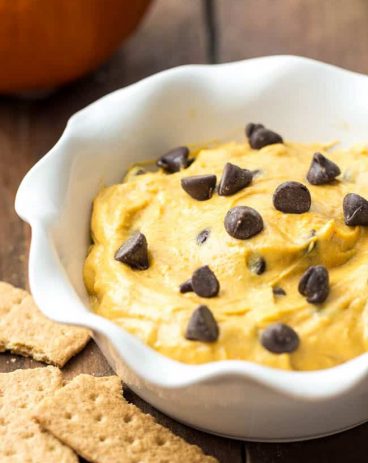
Pumpkin Chocolate Chip Cookie Dough Dip

Once the pumpkin bread is completely cool, store it in a resealable bag on your counter. It will keep well for 3 days.
If it’s been more than 3 days and the bread is a little dry/stale, butter it and warm it gently in a pan to make it taste delicious again.
Note: It’s important to make sure that the bread is completely cool before you store it. If you store the pumpkin bread while it’s still warm, the steam will get trapped in the bag and cause your bread to go soggy.

More Delicious Pumpkin Recipes
Desserts
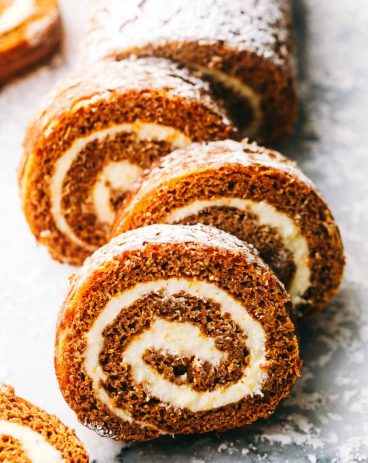
The World’s Best Pumpkin Roll
Breakfast
Pumpkin Spice Pancakes
Desserts
Pumpkin Cream Cheese Truffles
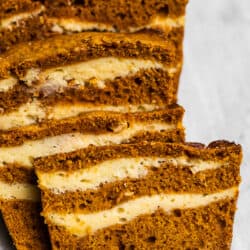
Cream Cheese Pumpkin Bread
Ingredients
Cream Cheese Filling
- 6 ounces cream cheese at room temperature
- ⅓ cup granulated sugar
- ¼ cup all-purpose flour
- 1 large egg
Pumpkin Bread
- 1 cup pumpkin puree
- ¾ cup brown sugar
- ¼ cup granulated sugar plus extra to sprinkle on top
- ¼ cup buttermilk can use regular milk
- ¼ cup cooking oil
- 1 large egg
- 1 ¼ cups all-purpose flour
- 1 tablespoon pumpkin pie spice
- ¾ teaspoon baking powder
- ½ teaspoon baking soda
- ½ teaspoon salt
Instructions
-
Move one of the baking racks to the lower third of your oven. Preheat your oven to 350 degrees. Grease a 5"x9" loaf pan with butter.
-
Make the cream cheese filling in a medium-sized bowl. Using an electric beater, mix the cream cheese, sugar, flour, and egg.
-
In a large bowl, whisk the pumpkin puree, brown sugar, granulated sugar, buttermilk, oil, and egg.
-
In a medium-sized bowl, whisk the flour, pumpkin pie spice, baking powder, baking soda, and salt.
-
Add the dry ingredients to the large bowl with the pumpkin and stir until it just comes together. Do not overmix.
-
Pour ⅓ of the batter into the loaf pan and smooth it out. Then spread half of the cream cheese on top. Add another ⅓ of the batter followed by the remaining cream cheese. Finish the pumpkin bread with a layer of batter.
-
Sprinkle the top of the pumpkin bread with a little sugar (about 1 teaspoon) then bake it for 45-55 minutes, or until a toothpick inserted into the center of the loaf comes out clean.
-
Let the pumpkin bread cool for 20 minutes then invert the loaf pan to remove the bread and let it finish cooling on a cooling rack.
Nutrition
from The Recipe Critic https://ift.tt/3i3DjJY
https://ift.tt/3kCRw2v