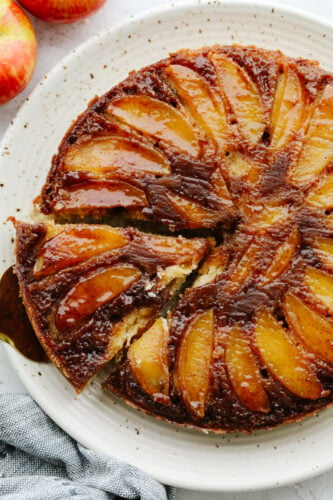
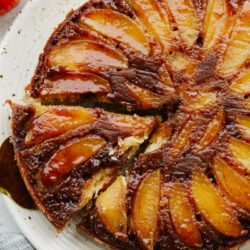
Caramel apple upside-down cake is just the dessert you need for fall! It’s rich, moist, and smothered in a scrumptious caramel glaze!
Can’t get enough of the caramel apple combination? Try out my tasty caramel apple cheesecake bars, cinnamon rolls, and french toast casserole!

Moist and Delicious Caramel Apple Cake
Utah is finally cooling down. We’ve been loving it! Besides being able to wear my comfiest sweaters, fall is my favorite season because of the desserts! Time to put pumpkin spice aside for a second. I love pumpkin season but apple has a special place in my heart. I always have a bowl of fresh apples on hand because my kids and I love them so much. To be honest, I just got done obsessing over apple hand pies. Now it’s time for a perfect fall take on a classic upside-down cake! I can’t wait for you guys to try it!
Let’s talk about this caramel apple upside-down cake. Have you ever made a cake that you couldn’t stop eating because it was so amazing? Yeah, this was one of those. Holy cow it was amazing. When I flipped it upside down, the brown sugar caramel goodness on the bottom drizzled down the sides. The apples were perfectly soft and flavorful! You get those amazing fruity, fall spices in every bite. I had my slice with a scoop of homemade ice cream on top. Whipped cream tastes great, too! Honestly, though, this cake is so moist and flavorful, it tastes incredible served on its own!
Ingredients for Caramel Apple Upside-Down Cake
These are all of the ingredients you need for this perfect cake! It starts with your favorite fresh apples. Add in the delicious spiced cake and you have the ultimate fall dessert! I love that so many of these ingredients are things I already have in my kitchen.
- Butter: Used in caramel glaze and cake base. Butter adds fat content for moisture and also gives your cake a rich flavor!
- Brown Sugar: Brown sugar gives your glaze its amazing color and sweetness.
- Cinnamon: A little ground cinnamon is key for the perfect fall flavor!
- Apples: I use medium apples here, peeled and cut into 1/2-inch wedges.
- All-Purpose Flour: Perfect for a light, airy cake structure.
- Baking Powder: Makes your caramel apple upside-down cake nice and fluffy!
- Salt: Salt is added to enhance overall flavor.
- Granulated Sugar: Adds the perfect sweetness to your upside-down cake. It also melts down when baked for the perfect texture!
- Eggs: Used to add moisture and bind everything together.
- Vanilla: Adds a richer flavor. I like using pure vanilla extract for best results!
- Milk: Used to make the cake batter nice and smooth. I like using whole milk for its fat content. The more fats in your cake, the more moist it will be!
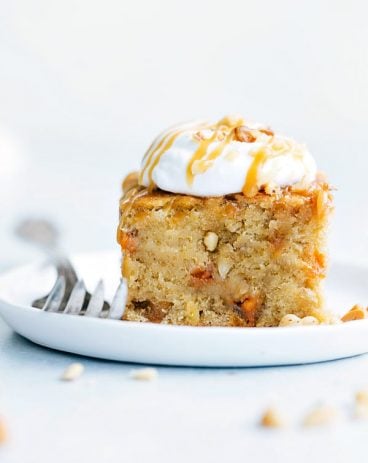
Whipped Cream Topping
Adding whipped cream on top is completely up to you, but I think it is the perfect finishing touch! Once you make whipped cream at home, it is so hard to go back to canned!
- Heavy Whipping Cream: This is the base of your topping.
- Powdered Sugar: Adding a little powdered sugar gives your whipped cream its perfect sweetness. Keeps it nice and smooth, too!
Making Your Cake
Making a caramel apple upside-down cake is super easy! In just a few steps of mixing and baking, you’ll create a flavorful fall treat! It’s the perfect dessert to throw together for parties. These flavors are irresistible!
- Preheat Oven and Prep Pan: First, preheat your oven to 325 degrees. Spray an 9 inch round or square pan with cooking spray. Set aside.
- Melt Glaze Ingredients Together: In a medium saucepan, melt ¼ cup butter over medium heat until melted. Then, add in the brown sugar. Bring it to a boil and remove from heat. Stir in ¼ teaspoon of cinnamon. Pour into the bottom of the greased pan. Next, arrange the apples over the brown sugar mixture.
- Mix Dry Ingredients: In a medium size bowl, whisk together flour, baking powder, ½ teaspoon cinnamon and salt. Set bowl aside.
- Beat Sugar, Butter, Eggs, and Vanilla: In a large bowl or mixer, beat together 1 cup sugar, and ½ cup butter on medium speed until fluffy. Add in eggs and vanilla.
- Mix in Flour and Milk: Next, beat in flour mixture alternating with the milk until smooth. Pour the batter over the apples and spread evenly.
- Bake: Bake 55-60 minutes or until toothpick comes out clean. Cool on a wire rack for 15 minutes.
- Prepare Whipped Topping: Meanwhile, to make the whipped topping, beat whipping cream on high until soft peaks start to form. Add in 2 tablespoons sugar.
- Flip Cake and Serve: Run knife along the edges of the cake and flip upside down on a pan. Serve warm with whipped cream on top.

Caramel Apple Upside-Down Cake Tips and Suggestions
This mouthwatering upside-down cake loaded with the sweet-tart combination of the caramel apple is absolutely delicious. As easy as it is to put together, here are some of my personal tips and tricks on getting the best results every time!
- Grease Pan Well: Use a heavy coating of your favorite nonstick cooking spray before adding apples and cake batter into your pan! Add a little more when you think you’ve added enough. This cake gets really sticky when it bakes, and fruit is notorious for sticking to the bottom. A well-greased pan will help it slide out perfectly once its done!
- Flavor Additions: Adding some chopped walnuts, pecans, or almonds to your cake batter is so delicious! They taste great alongside fall spice.
- Let Cake Cool: It’s important to let your cake cool for 10-15 minutes after pulling it out of the oven. This will help it set into place! Don’t let it cool completely, though, or it may become dense and hard to slide out of the pan.
- Choosing Apples: I like using tart baking apples like Granny Smith or Jonagold in desserts. If you want a sweeter cake, opt for Golden Delicious or Honeycrisp apples!
- Toppings: Aside from ice cream or whipped cream, top your caramel apple upside-down cake with chopped nuts or even some homemade salted caramel sauce for extra decadence!

Storing Leftover Cake
Because this tasty caramel apple upside-down cake has a high moisture content, it will only stay good for a few days. Wrap it tightly and store it in the fridge to keep it fresh for as long as possible!
- In the Refrigerator: Either store your cake in an airtight container or wrap tightly in plastic wrap. It will keep for 3-4 days.
- Reheating: If you want to serve your leftover cake warm, pop it into the microwave for 10-15 seconds.

More Caramel Apple Desserts

Desserts
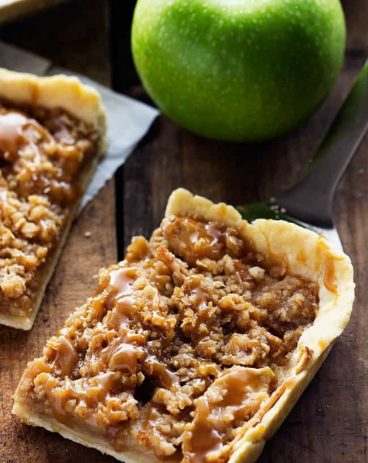
Caramel Apple Pie
Desserts
Caramel Apple Slab Pie
Desserts
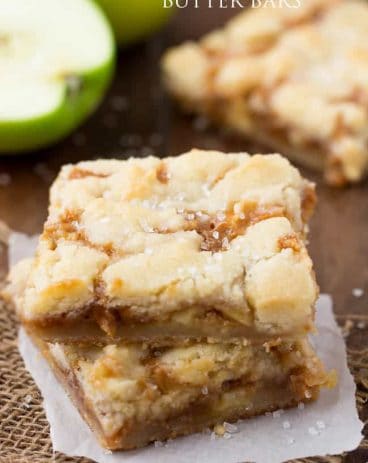
Salted Caramel Apple Butter Bars
Desserts
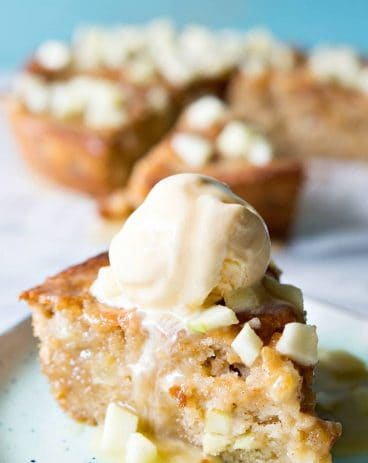
Caramel Apple Skillet Cake
A Reader’s Review
Caramel Apple Upside Down Cake
Ingredients
- 1/4 cup butter
- 2/3 cup brown sugar packed
- 1/2 teaspoon ground cinnamon
- 2 medium apples peeled, cut into 1/2-inch wedges
- 1 1/3 cups all-purpose flour
- 1 teaspoon baking powder
- 1/2 teaspoon ground cinnamon
- 1/4 teaspoon salt
- 1 cup granulated sugar
- 1/2 cup butter softened
- 2 large eggs
- 1/2 teaspoon vanilla
- 1/4 cup milk
Whipped Cream topping:
- 1 cup whipping cream
- 2 tablespoons sugar
Instructions
-
Preheat oven to 325 degrees. Spray a 9 inch round or square pan with cooking spray. Set aside.
-
In a medium saucepan melt ¼ cup butter over medium heat until melted. Add the brown sugar. Bring it to a boil and remove it from heat. Stir in ¼ teaspoon of cinnamon. Pour into the bottom of the greased pan. Arrange the apples over the brown sugar mixture.
-
In a medium-size bowl whisk together flour, baking powder, ½ teaspoon cinnamon, and salt. Set bowl aside.
-
In a large bowl or mixer, beat together 1 cup sugar, and ½ cup butter on medium speed until fluffy. Add in eggs and vanilla.
-
Beat in flour mixture alternating with the milk until smooth. Pour the batter over the apples and spread evenly.
-
Bake 55-60 minutes or until the toothpick comes out clean. Cool on a wire rack for 15 minutes.
-
Meanwhile, to make the whipped topping beat whipping cream on high until soft peaks start to form. Add in 2 tablespoons sugar.
-
Run a knife along the edges of the cake and flip upside down on a pan. Serve warm with whipped cream on top.
Notes
Nutrition
from The Recipe Critic https://ift.tt/3Amr9Cm
https://ift.tt/3muNEAn