रविवार, 10 अक्तूबर 2021

Broccoli and Rice Chicken Casserole

Chicken broccoli and rice casserole is a delicious, easy, family-friendly dish! It is creamy and filled with flavors that perfectly complement each other! You will love it!

This recipe is amazingly delicious and you can’t beat a homemade casserole! After you’ve tried this one, go ahead and make Cowboy Casserole, Corn Casserole, or this yummy Sausage and Biscuit Casserole. You will love them all!
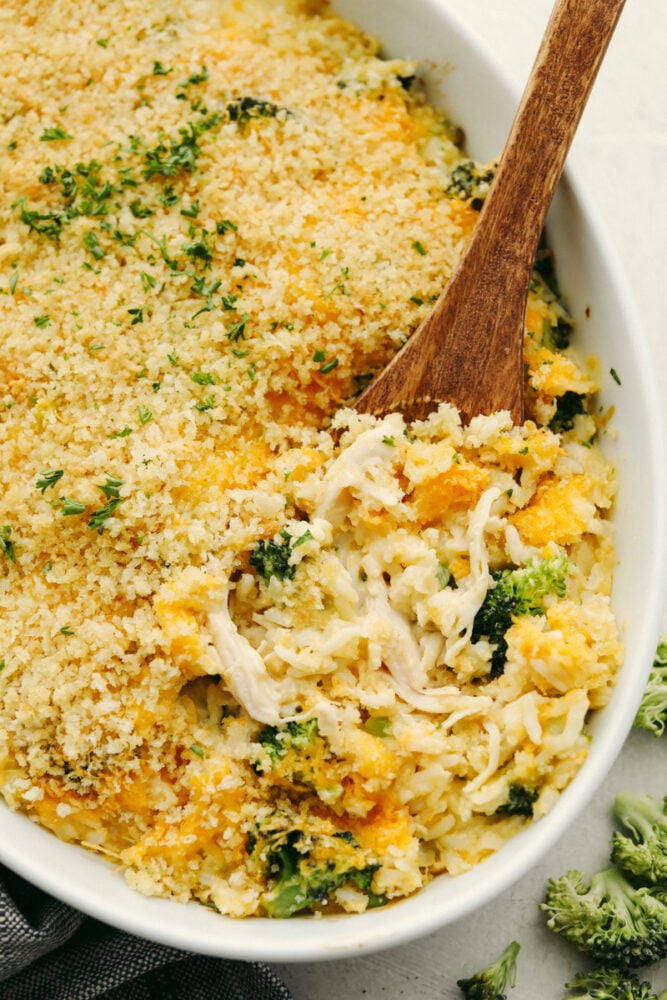
Broccoli, chicken and rice casserole with a wooden serving spoon in it.

Simple and Delicious Casserole

I love a good casserole! There are so many out there that it’s hard to know which ones are worth trying. To help me figure that out, it has to check off a few boxes! It must be simple, quick, and easy to make and not have too many ingredients. Oh, and it has to be delicious! But that goes without saying. This chicken and rice casserole has classic ingredients like this homemade cream of chicken soup that I not only love but that my kids go crazy over! And, if you really want to go above and beyond, then you should make this amazing dessert to go with it. Your family will thank you later!

With a bunch of ingredients that you probably already have in your kitchen, this casserole is something you can make at the last minute! I love that it’s all made in one pan and cooked together all at once. You get your grains, protein, and vegetables in one! This saves me from having to make more sides for dinner and is what makes this perfect for those on the go nights! Once you try it, it will definitely become a family favorite!

Ingredients in Broccoli and Rice Chicken Casserole

Like I said before, the ingredients in this are probably already things that you have in your kitchen! This makes it so simple to put together! See the recipe card below for a list of exact ingredient measurements.

  • Butter: Because you are adding salt later, I like to use unsalted butter for this recipe.
  • Onion: Chop up your onion into pieces similar in size so that it cooks evenly.
  • Broccoli florets: Chop these up big or small, you can do whatever is best for your family to eat!
  • Rice: You will cook this up before mixing it in with all of the other ingredients.
  • Cream of chicken soup: You can use store-bought or you can try making this delicious homemade cream of chicken soup.
  • Sour cream: This helps give the dish that creamy texture.
  • Milk: Using milk will help to mix all of the ingredients together.
  • Salt and pepper: Adding these in will help enhace the flavors of all of the other ingredients and give it some additional flavoring!
  • Garlic powder: I looooove the flavor of garlic! It adds a lot of delicious flavor to this recipe!
  • Cooked chicken: I used a rotissarie chicken but you can also cook up some chicken breast or use canned chicken in a pinch as well!

Topping

  • Panko: When you mix this with the butter, it creates the perfect topping that will get crispy and golden while it bakes!
  • Parmesan: Adds in the perfect flavor to top the casserole.
  • Butter: You will melt the butter to use in the topping and mix with with the cheese and bread crumbs!

How to Make Broccoli and Rice Chicken Casserole

This casserole can be made in about 30 minutes! It’s the perfect last-minute meal that your whole family will go crazy over!

  1. Preheat and sauté: Preheat oven to 350 degrees. In a medium sized saucepan add the butter and onion and sauté over medium high heat until almost tender. Add in the broccoli and sauté until they start to soften about 3-4 minutes.
  2. Combine: In a large bowl combine the broccoli and onion, rice, cream of chicken soup, sour cream, milk, salt, pepper, garlic powder and chicken.
  3. Put in casserole dish: Spread evenly into a 9×13 inch casserole dish.

Topping

  1. Combine, sprinkle and bake: Combine the Panko, parmesan, and butter. Sprinkle on top of casserole and bake for 20-25 minutes or until golden brown on top and heated through.
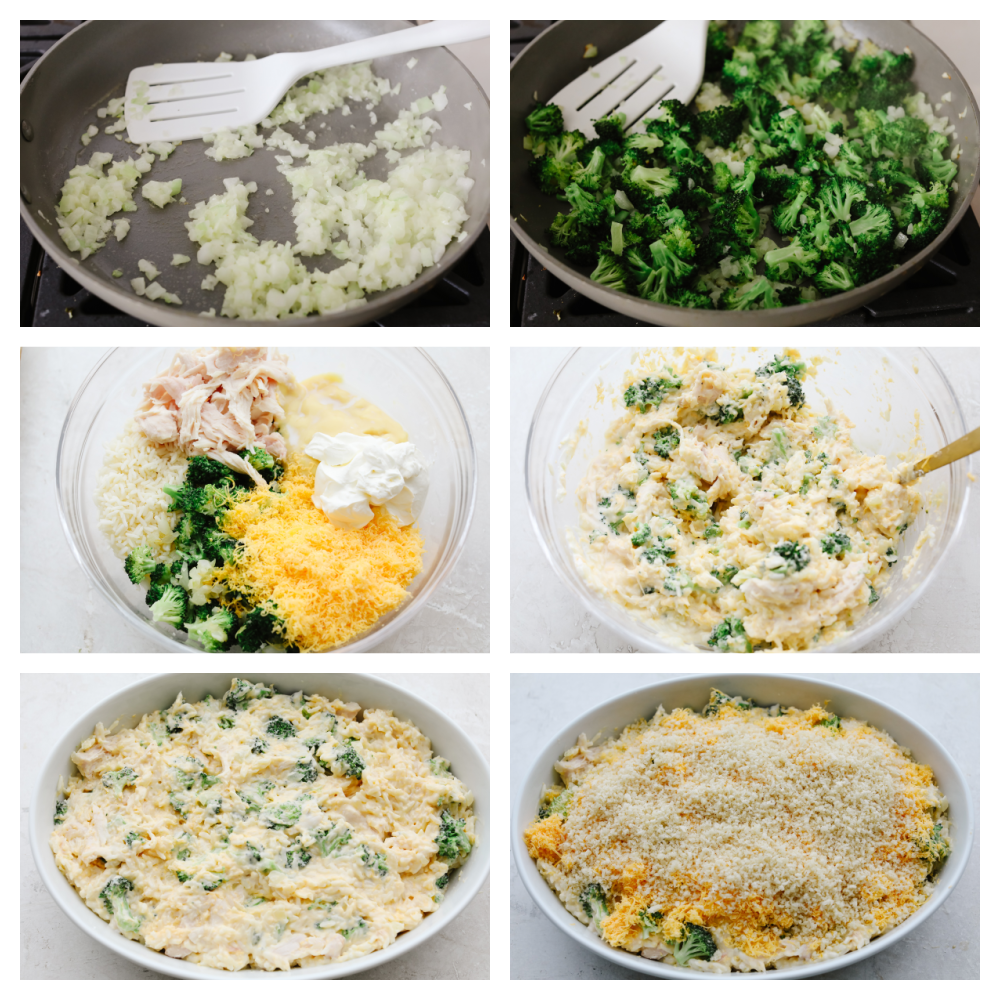
6 pictures showing how to mix ingredients to make a casserole.

Variations to Try

This broccoli and rice chicken casserole is perfect as is but if you want to cook it more often, you can easily switch a few things up and make it taste fresh and new every time! Here are a few ideas!.

  • Vegetables: Try switching out the broccoli for other vegetables that you like! Carrots, peas, green beans or any ones that you really love! Or, you can even add a few more to the broccoli! Just make sure that you adjust the amounts. For example, if you add in one ingredient, make it 2 cups of each. If you want to use 4 veggies, add 1 cup of each!
  • Rice: You can switch the white rice out for brown rice if you like that better. It will alter the taste a bit but be jst as yummy. Make sure to follow the directions on the rice that you are using because brown rice takes a bit longer to cook!
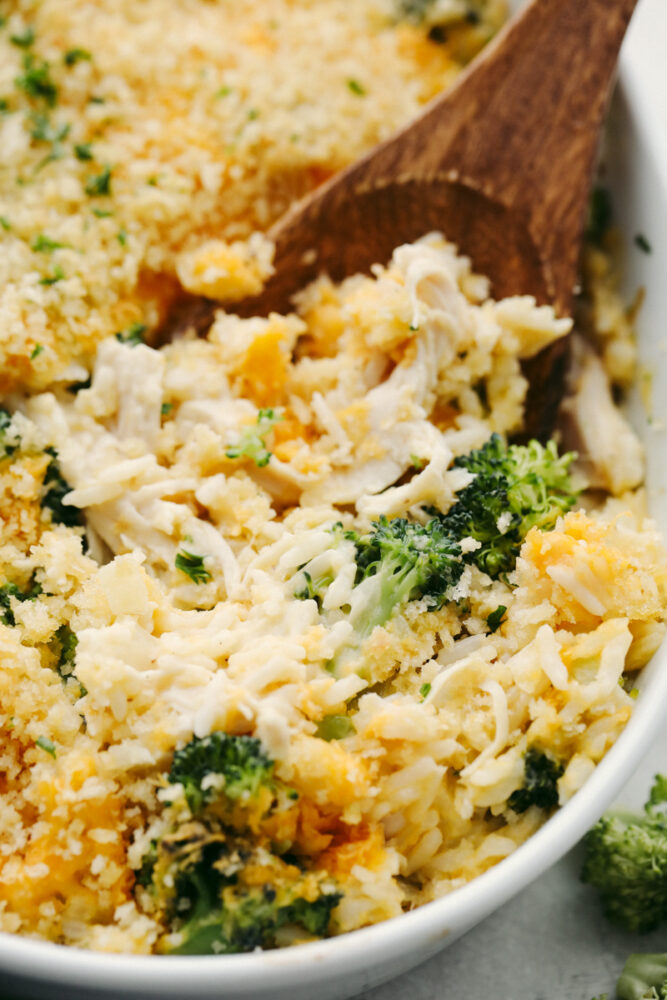
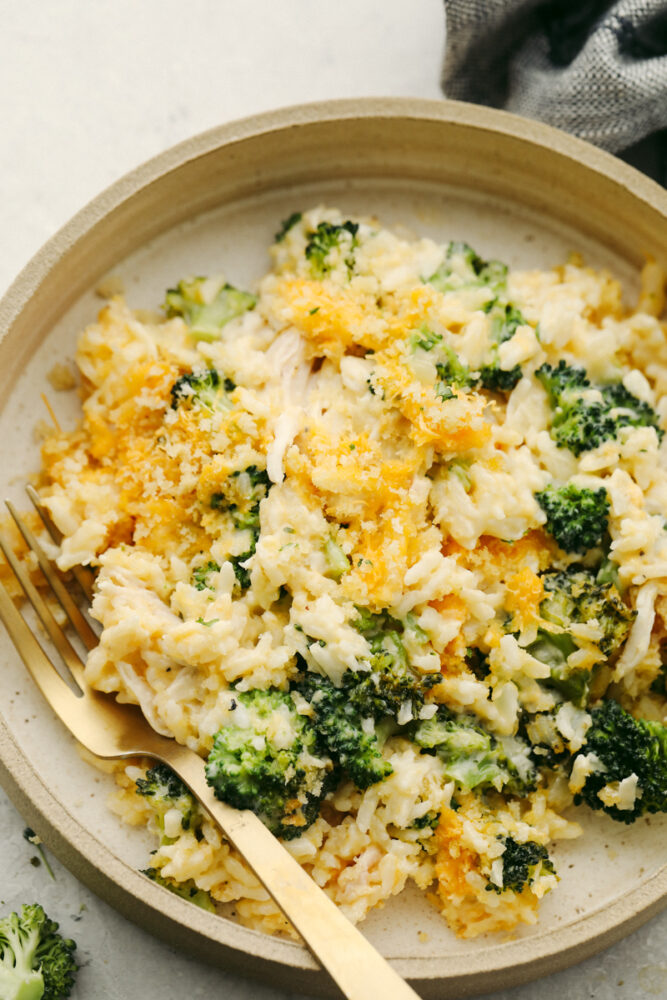
A zoomed in picture of broccoli and rice chicken casserole.

How to Store Leftovers

This broccoli and rice chicken casserole is just as good (if not better!) the next day! Here is how you can store it and reheat it for later!

  • Refrigerator: Once your casserole has cooled then store it in an airtight container and place it in your fridge. It will last for 3-4 days!
  • Reheat: To reheat your leftovers, place individual servings on plates and microwave them on high for 1- 2 minutes or until heated through.
Chicken broccoli and rice
Print

Broccoli and Rice Chicken Casserole

Broccoli and rice chicken casserole is a delicious, easy, family-friendly dish! It is creamy and filled with flavors that perfectly complement each other! You will love it! 
Course Dinner, Main Course
Cuisine American
Keyword chicken broccoli and rice casserole
Prep Time 10 minutes
Cook Time 25 minutes
Total Time 35 minutes
Servings 6 people
Calories 564kcal
Author Alyssa Rivers

Ingredients

  • 3 Tablespoons butter
  • 1 small onion chopped
  • 4 cups fresh broccoli florets
  • 2 cups rice cooked
  • 1 can cream of chicken soup OR homemade cream of chicken soup
  • 1/2 cup sour cream
  • 1 cup milk
  • 1/2 teaspoon salt
  • 1/4 teaspoon pepper
  • 1/2 teaspoon garlic powder
  • 2 cups cooked chicken (rotisserie chicken works great)

Topping:

  • 1/2 cup Panko
  • 2 Tablespoons parmesan
  • 3 Tablespoons butter melted

Instructions

  • Preheat oven to 350 degrees. In a medium-sized saucepan add the butter and onion and sauté over medium-high heat until almost tender. Add in the broccoli and sauté until they start to soften about 3-4 minutes.
  • In a large bowl combine the broccoli and onion, rice, cream of chicken soup, sour cream, milk, salt, pepper, garlic powder, and chicken.
  • Spread evenly into a 9×13 inch casserole dish.

Topping:

  • Combine the Panko, parmesan, and butter. Sprinkle on top of casserole and bake for 20-25 minutes or until golden brown on top and heated through.

Nutrition

Calories: 564kcal | Carbohydrates: 64g | Protein: 22g | Fat: 24g | Saturated Fat: 12g | Polyunsaturated Fat: 2g | Monounsaturated Fat: 7g | Trans Fat: 1g | Cholesterol: 84mg | Sodium: 805mg | Potassium: 511mg | Fiber: 3g | Sugar: 5g | Vitamin A: 1038IU | Vitamin C: 55mg | Calcium: 161mg | Iron: 2mg


from The Recipe Critic https://ift.tt/3FwATxW
https://ift.tt/3oM8z4w

शनिवार, 9 अक्तूबर 2021

Apple Fries

Lightly battered and tender, apple fries are going to become your new favorite treat! A generous coating of cinnamon sugar and homemade caramel dip makes them even more irresistible!

I love anything in fry form. Whether it’s zucchini, sweet potato, or french toast, being bite-sized and dippable makes all the difference!

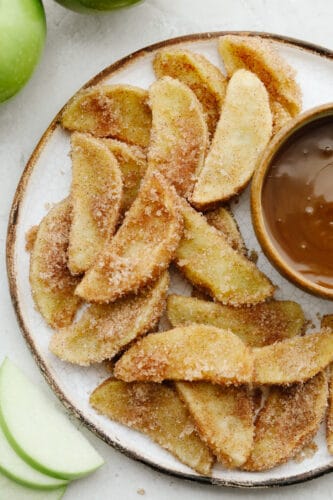
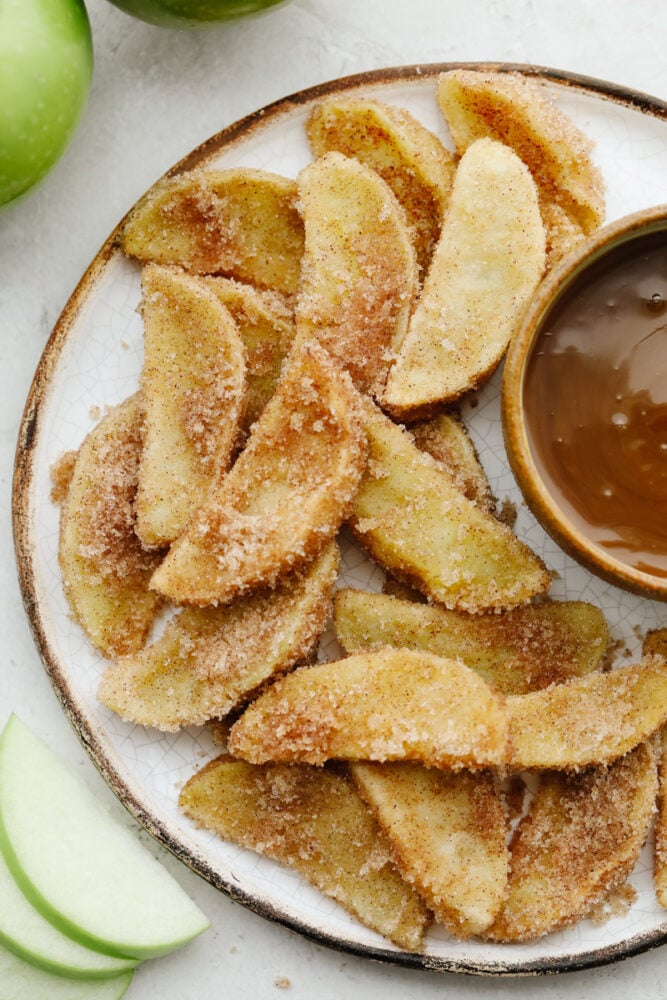
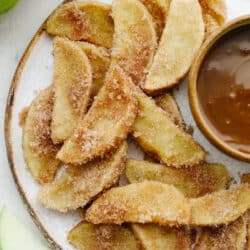
A plate of apple fries with caramel dip.

Easy Apple Fries With Caramel Sauce

This is the ultimate treat for all of you apple lovers out there! It takes 5 ingredients. That’s all! Chances are, you’ve got them in your kitchen right now, too! Apple fries are warm and tart with a slight coating of batter on them. This makes each bite soft, juicy, and tender with a bit of crispiness! The cinnamon-sugar topping gives them the perfect fall flavor. Then, all you need is your favorite sweet dip! In this recipe, I pair my apple fries with homemade caramel sauce, but feel free to get creative! Cheesecake dip is a classic. Marshmallow and chocolate peanut butter dips are amazing, too! Mix and match them all for your own personal fondue night!

Apple fries whip up in just a few minutes. This makes them the perfect after-school snack! My kids are just as obsessed with apples as I am, so these always get gobbled up. They also work great in school lunches; it’s a bite-sized dessert great for taking on the go! It’s time to get your favorite apples and make a batch. This is the tasty fall treat you won’t want to pass up!

Cinnamon Apple Fries Ingredients

Simplicity is key here! Only a few ingredients are needed for this cinnamony snack. The end result is irresistibly warm, soft, and juicy. You won’t be able to get enough! All measurements can be found in the recipe card at the end of the post.

  • Oil: Used for frying our apples in. I suggest using either canola or vegetable oil here!
  • Granny Smith Apples: I recommend using Granny Smith apples for your apple fries. Since we add cinnamon sugar, it’s best to use apples that are more on the tart side.
  • Cornstarch: Used to coat the outsides of your apples. Cornstarch gives them a crispier texture!
  • Sugar: Granulated sugar is mixed with cinnamon for the perfect sweet coating!
  • Cinnamon: For that fall flavor we all love!
  • Caramel Sauce: (Optional) Caramel and apple is such a classic pairing. I like to make my caramel sauce from scratch! You can find my recipe here. And if you’re not feeling caramel, S’mores dip is a chocolatey alternative!

How to Make Apple Fries

Apple fries are so quick and easy, you’ll want to make them again and again. It only takes a few minutes of frying and tossing in cinnamon sugar! Whether your kids are wanting a snack, or you want apple pie without the hassle, apple fries are the solution!

  1. Prepare Oil: To begin, in a medium-sized skillet, add vegetable oil about 1 inch up the pan and heat over medium-high heat.
  2. Slice Apples: Next, slice your apples into ¼ inch slices.
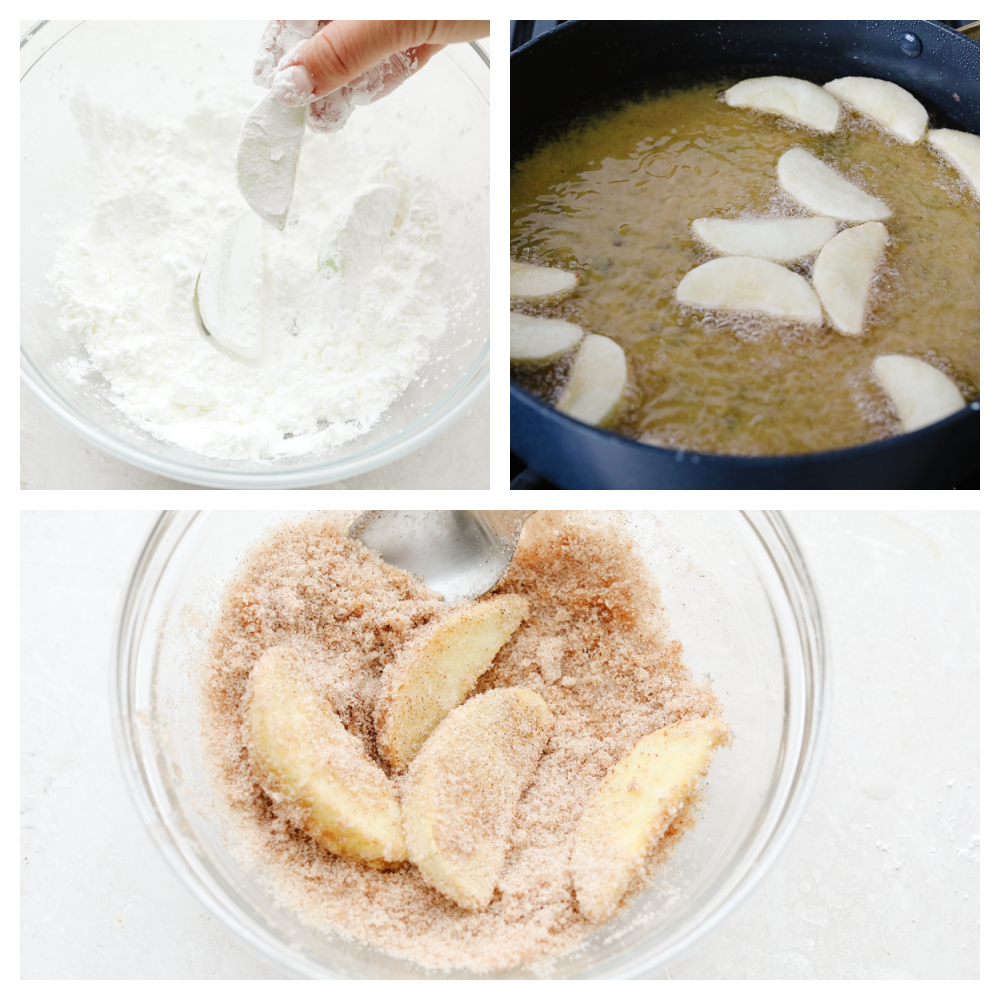
  3. Batter and Fry: Dip the apple slices into corn starch and add them to the hot oil. Then, fry for 1-2 minutes until they start to soften. With a slotted spoon, carefully remove them and place on a paper towel lined plate.
  4. Coat in Cinnamon Sugar: Next, combine the sugar and cinnamon and roll the apple in to coat. Serve with caramel sauce for dipping.
Process shots of frying apples and coating in cinnamon sugar.

Tips for Making the Best Apple Fries

You can tweak the flavor of your fries by changing your apple and the spices they’re tossed in. Here are my suggestions for making the best apple fries possible! You’ll love how they turn out.

  • Apple Type: I love a good Granny Smith for baked goods, but these can be too sour for some people! Jonagold and honeycrisp are tasty substitutes.
  • Graham Cracker Crust: For a crispier texture and added flavor, you can add ground graham crackers to your cornstarch mix.
  • Adding Spices: Let’s be honest. We’re all obsessed with pumpkin spice right now. If you want your apples to have a little more fall flair, add some homemade pumpkin spice to your cinnamon sugar mix! This is my favorite blend of cinnamon, allspice, ginger, and nutmeg!
  • Peel On or Off: This is totally up to you! It will slightly alter the texture. If you want a softer, more tender apple fry, remove the peel first! If you’re okay with a little extra texture, leave the peel on. This is my preferred way of serving them.

Storing Leftover Apple Fries

Apple fries are best fresh, but can still be enjoyed a few days after with proper storage! Trust me, your family will love having these around!

  • In the Refrigerator: Store in an airtight container for 2-3 days.
  • In the Freezer: Let your apple fries cool down completely before freezing. Place them in a freezer bag or airtight container and store for 3-6 months. Thaw overnight in the fridge before serving.
  • Reheating: I like to add a drizzle of oil in a saucepan, add leftover apple fries, and warm over medium heat.
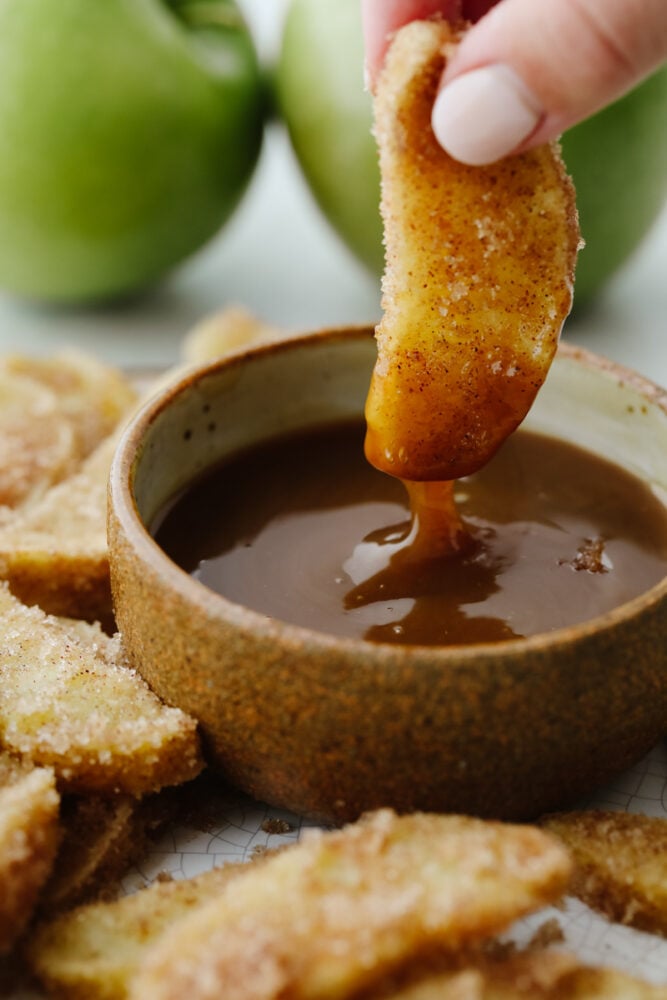
Dipping apple fry in caramel sauce.
Print

Apple Fries

Lightly battered and tender, apple fries are going to become your new favorite treat! A generous coating of cinnamon sugar and homemade caramel dip make them even more irresistible!
Course Dessert
Cuisine American
Keyword apple fries, fried apples
Prep Time 10 minutes
Cook Time 5 minutes
Total Time 15 minutes
Servings 4 people
Calories 300kcal
Author Alyssa Rivers

Ingredients

  • oil for frying
  • 3 Granny Smith Apples peeled
  • 1/4 cup cornstarch
  • 1 cup sugar
  • 1 Tablespoon Cinnamon
  • caramel sauce for dipping optional

Instructions

  • In a medium-sized skillet add vegetable oil about 1 inch up from the pan and heat over medium-high heat.
  • Slice the apples into ¼ inch slices.
  • Dip the apple slices into corn starch and add them to the hot oil. Fry for 1-2 minutes until they start to soften. Carefully remove them with a slotted spoon and place them on a paper towel-lined plate.
  • Combine the sugar and cinnamon and roll the apple into the coat. Serve with caramel sauce for dipping.

Nutrition

Calories: 300kcal | Carbohydrates: 78g | Protein: 1g | Fat: 1g | Saturated Fat: 1g | Polyunsaturated Fat: 1g | Monounsaturated Fat: 1g | Sodium: 3mg | Potassium: 156mg | Fiber: 4g | Sugar: 64g | Vitamin A: 80IU | Vitamin C: 6mg | Calcium: 29mg | Iron: 1mg


from The Recipe Critic https://ift.tt/2YDjcMq
https://ift.tt/3lsObn7

Quick and Easy Air Fryer Meatballs

Air fryer meatballs are tender, juicy, and delicious! They are SOO good and this will be a recipe that your family will want you to make again and again!

If you love meatballs as much as I do then these ones that you make in the air fryer will become your new favorite! In fact, some of my favorite foods are cooked in the air fryer! Try out these Air Fryer Chicken Nuggets, Air Fryer Fried Green Tomatoes, and these amazing Air Fryer Zucchini Pizza Bites!

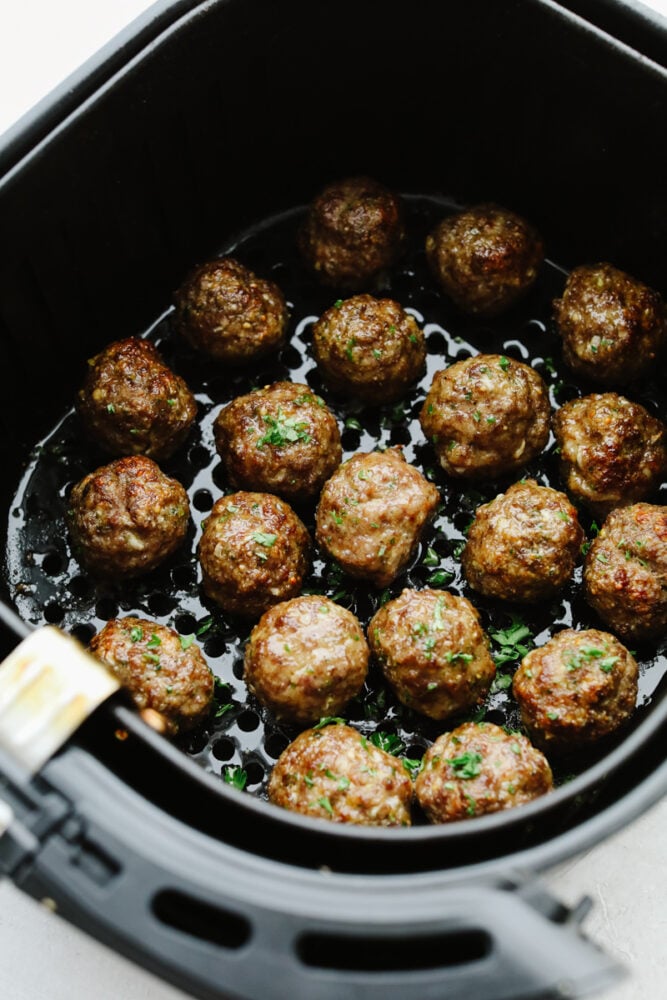
Meatballs in an air fryer.

Air Fryer Meatballs are the BEST!

If you haven’t tried cooking with an air fryer, you need to start with this recipe! It’s so easy and these meatballs turn out perfectly tender, juicy and the taste is to die for! Plus, they only take a few minutes to make! These air fryer meatballs are SOO good on their own but add them to some Stick of Butter Baked Rice or some delicious baked potatoes and a salad and you have yourself a delicious meal!

These make a fantastic entree but don’t forget that they can make a super yummy appetizer as well! Put them on a plate and stick a toothpick in each one and your guests will love them! I love how easy cooking with the air fryer is. You mix everything up and then it cooks so fast! And if you have any leftovers, you can use them to make a delicious meatball sandwich for lunch the next day. Go ahead and give these air fryer meatballs a try! They are so versatile, you will love them!

What’s in Air Fryer Meatballs?

Made up of common ingredients that you have in your kitchen, these air fryer meatballs are a breeze to make! See the recipe card below for a list of exact ingredient measurements!

  • Ground beef: I like to get lean ground beef for this recipe!
  • Onion: Dice up your onion into small, similar sized pieces so that they cook evenly.
  • Garlic cloves: I used fresh garlic cloves in this recipe but if you only have minced garlic in your fridge, you can use that! ½ tsp equals about 1 clove of garlic.
  • Parmesan cheese: Freshly grated parmesan cheese will mix up better into the meatballs.
  • Italian breadcrumbs: Italian breadcrumbs have the perfect blend of seasonings that really add to the delicious taste of these meatballs!
  • Parsley: You can use fresh or dry parsley!
  • Salt and pepper: When you add these to the meatballs, they will really enhance the taste of all of the other flavors!
  • Egg: I like to make sure that my eggs are at room temperature when I use them in recipes. This helps them to blend better!
  • Milk: You can use 1% or 2% milk for this recipe!

Let’s Cook Some Meatballs!

If you have 15-20 minutes, then you have time to make these air fryer meatballs! They only take a few minutes to put together, that’s another reason why they are so great!

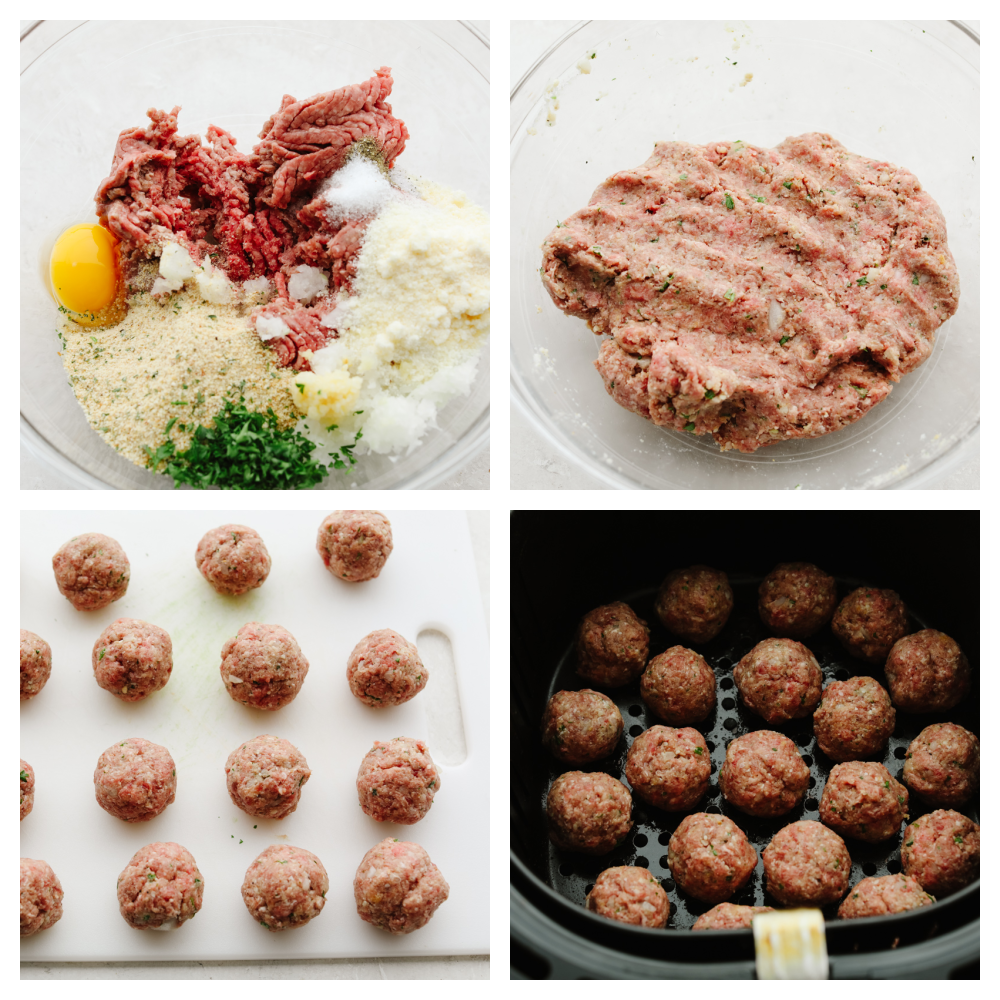
  1. Combine all ingredients: In a medium sized bowl combine the ground beef, onion, garlic, parmesan cheese, breadcrumbs, parsley, salt, pepper, egg and milk.
  2. Form into balls: Shape into 2 inch sized meatballs. Place in the basket of your air fryer in an even layer.
  3. Cook: Cook at 400 degrees for 10-12 minutes or until cooked throughout.
4 pictures showing steps on how to make meatballs.

Air Fryer Tips

Whether you have cooked with an air fryer a lot or never have, these are helpful tips for everyone! If you use these while cooking up these air fryer meatballs, they will help you make them turn out just right!

  • Preheat your air fryer: A lot of people don’t know that you should do this with an air fryer! If you turn your airfryer to 400 degrees as you are mixing up your meatballs, then it will be hot by the time that you put them in it! This helps your food cook more evenly and takes less time!
  • Don’t stack or overlap your food: Make sure that when you place your meatballs into the air fryer that they are in one layer. Don’t stack them or else some of the meatballs will come out undercooked and others will be burned. The key to air frying food is to do it in smaller batches and in one layer!
  • Don’t use a cooking spray: Using cooking sprays (like Pam) are not good for air fryers. They cause them to chip! If you want to spray it so that your food doesn’t stick then invest in a good quality oil mister!
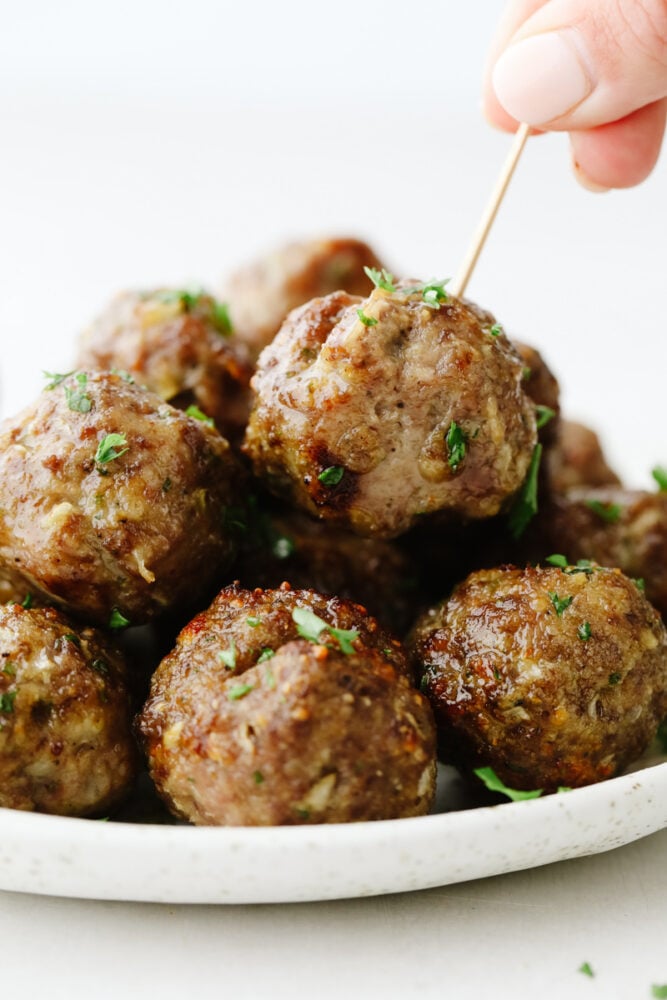
A stack of meatballs with someone putting a toothpick in one of them.

Storing Leftovers

These air fryer meatballs make amazing leftovers! Add them to some rice, make a meatball sandwich or just heat them up and eat them plain! In fact, try dipping them into some Homemade Marinara! Go ahead and double the recipe and freeze some for dinner later!

  • Refrigerator: Once your air fryer meatballs have cooled, take them out and place them in an airtight container. They will last in your fridge for up to 4 days!
  • Freezer: Coll your meatballs and place them on a baking sheet in your freezer for 1-2 hours until frozen. Then, take them out and put them in a ziplock bag that is labeled with the date. You can store them in your freezer for up to 3 months!
  • Reheat: You can reheat these straight from the fridge or freezer. If they are frozen, then cook them in the air fryer at 375 degrees fro 10-12 minutes or until cooked through. If you are taking them from the fridge, Cook them at 375 for 8-10 minutes!
Print

Quick and Easy Air Fryer Meatballs

Air fryer meatballs are tender, juicy, and delicious! They are SOO good and this will be a recipe that your family will want you to make again and again!
Course Appetizer, Dinner, Main Course
Cuisine American
Keyword air fryer meatballs, meatballs
Prep Time 10 minutes
Cook Time 12 minutes
Total Time 22 minutes
Servings 4 people
Calories 284kcal
Author Alyssa Rivers

Ingredients

  • 1 pound lean ground beef
  • 1/2 small onion diced
  • 3 cloves garlic minced
  • 1/4 cup grated parmesan cheese
  • 1/2 cup Italian breadcrumbs
  • 2 Tablespoons parsley chopped
  • 1/2 teaspoon salt
  • 1/4 teaspoon pepper
  • 1 large egg
  • 1/2 cup milk

Instructions

  • In a medium sized bowl combine the ground beef, onion, garlic, parmesan cheese, breadcrumbs, parsley, salt, pepper, egg and milk.
  • Shape into 2-inch sized meatballs. Place in the basket of your air fryer in an even layer.
  • Cook at 400 degrees for 10-12 minutes or until cooked throughout.

Nutrition

Calories: 284kcal | Carbohydrates: 14g | Protein: 32g | Fat: 11g | Saturated Fat: 5g | Polyunsaturated Fat: 1g | Monounsaturated Fat: 4g | Trans Fat: 1g | Cholesterol: 126mg | Sodium: 694mg | Potassium: 527mg | Fiber: 1g | Sugar: 3g | Vitamin A: 369IU | Vitamin C: 4mg | Calcium: 158mg | Iron: 4mg


from The Recipe Critic https://ift.tt/2YvFiQH
https://ift.tt/3v35gHq