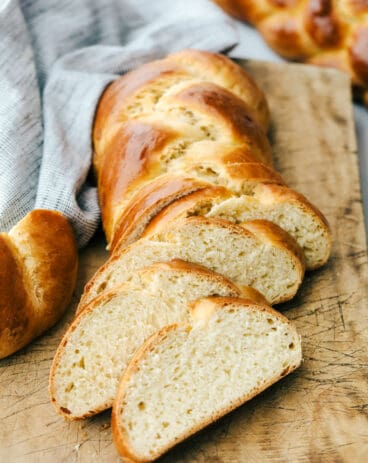
English Muffins are soft pillowy round morsels of absolute heaven. This is such an easy recipe you will be making them on a weekly basis!
We love making bread, there’s nothing like homemade loaves that fill the house with the best aroma! Whether you are making Parker House Rolls, Naan, or Texas Rolls, your family is going to love it!

Incredible English Muffins
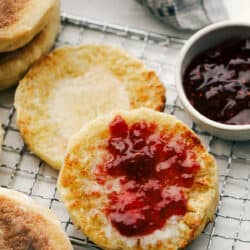
English muffins are the best! They have these incredible nooks and crannies that are perfect for holding your favorite toppings. The pockets are definitely the best part. Toasted to perfection then smothered in butter, it makes for the best addition to your breakfast, or snack routine. These are so simple and easy you are going to wonder why you haven’t tried them before. And trust me y/’our family is going to think you are a superhero for making English muffins at home!
English muffins are not muffins at all, but bread. And they are the basis for many of the best meals around. Including Eggs Benedict and Easy English Muffin Pizzas, among other things. Top English muffins with jam, avocado, and eggs, through in some bacon or sausage and cheese for the best English muffin breakfast sandwiches. English muffins make great sandwiches and even burger buns. However you eat them, just make them!
Ingredients for Homemade English Muffins
You will be surprised by how simple these English muffins truly are. Your loved ones will be impressed, and you may never buy english muffins again.
- Instant Yeast: Instant yeast is different from Active Yeast, they will both work but you will have to treat the active yeast a bit differently.
- Warm Water: This is to help the yeast grow, not too hot and not too cold.
- Milk: Gives richness to the dough.
- Sugar: This feeds the yeast and helps it bloom.
- Butter: Melt the butter to help it mix up better.
- Eggs: Have your eggs at room temperature.
- Salt: Salt creates the flavor and balance for your bread.
- Flour: All-purpose flour or bread flour will both work.
Let’s Make English Muffins
These will come together quickly in bread terms. The hardest part is waiting for them to cool enough to eat.
- Bloom the yeast: Mix together warm water and yeast. Set aside until frothy, about 10 minutes.
- Dissolve The Sugar: Heat milk in the microwave for about 1 minute. Add sugar and stir to dissolve.
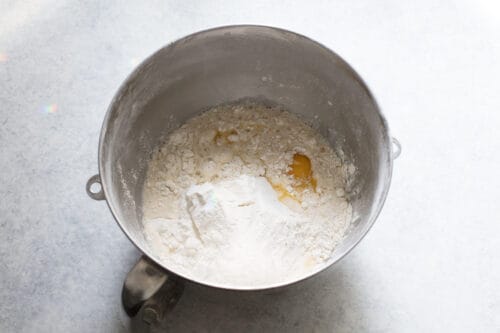
- Add: In the mixing bowl of a stand mixer, add salt, flour, yeast mixture, milk mixture, melted butter, and eggs. Using the paddle attachment mix on medium-high speed for 5 minutes or so, until a smooth dough has formed. The dough is a soft one and will be sticky, but it does not need any more flour.
- Prepping the dough for rising: Dust your fingers with flour to prevent the dough from sticking to them and dump the dough on a very lightly floured surface. Gently form dough into a ball and place in an oiled bowl. Cover with plastic wrap and set in a warm place. Allow to rise for 1-2 hours, until doubled in size.
- Cornmeal dusting: Once the dough has doubled in size, remove onto a surface that is lightly dusted with flour and cornmeal or semolina flour. Add a light dusting of flour and cornmeal on top of the dough.
- Cutting the Dough: Roll the dough to about ½ inch thickness. Using a biscuit cutter, cut into circles. The scrap dough can be very gently kneaded back together and more circles cut. Cover with a cloth and allow to rise for 30 more minutes.
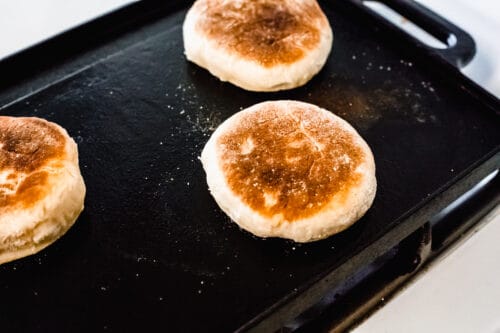
- Bake: Preheat your oiled griddle to low heat. Cook muffins for 7-10 minutes on each side, until golden brown.
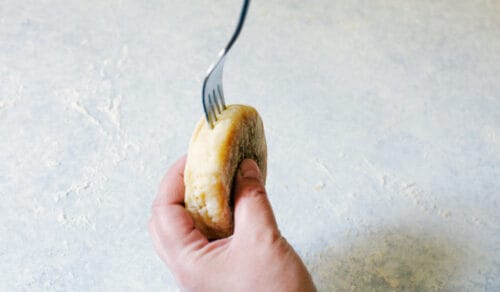
- Poke the Holes: Once removed from the heat, use a fork to poke around the center of the muffin to make it easy to split in two.
- Cool: Allow to cool completely. Serve toasted with butter, jam, or honey and enjoy!

The Best English Muffin Tips
Soft and tender inside, and golden outside, the perfect english muffin is definitely within reach.
- Water for Yeast: The hardest part about yeast is getting it to bloom, or rise. To do this you need the water to be at optimal temperature. The temperature should be between 95 and 115 degrees. You do not want it 120 or higher, the yeast will begin to die off because it will be too hot.
- Active vs Instant Yeast: Active dry yeast needs to be dissolved in water before using, while instant yeast can be mixed right into dry ingredients.
- Dough: Do not worry if the dough is sticky, it should be. Resist the temptation to add more flour.
- Milk: You can substitute buttermilk for the milk to give it a bit of tang, similar to the ones from the store.
- Eggs: Eggs should be at room temperature before adding to your dough. Set them out about an hour before needing.
- Underbaked on the inside, but done on the outside: This can be a problem if your griddle cooks hot. One of the worst things is to have a doughy underbaked English muffin. To remedy this, bake the English muffins on a cookie sheet in a 350-degree oven for 10-12 minutes.

How To Store English Muffins
English muffins are great for quick breakfasts and when you need a side of bread in a pinch.
- Store: Keep the English muffins in a tightly sealed container or bag for up to a week. The more airtight the better. I save old bread bags to store them in.
- Freeze: Double bag these English muffins and keep them in the freezer for up to 3 months. Thaw on the counter when ready to use.
More Bread Recipes To Love

English Muffins
Ingredients
- 1 packet instant yeast
- 1 cup warm water
- 1 cup milk
- 2 tbsp sugar
- ¼ cup butter melted
- 2 large eggs
- 1 teaspoon salt
- 5 cups flour
Instructions
-
Mix together warm water and yeast. Set aside until frothy, about 10 minutes.
-
Heat milk in microwave for about 1 minute. Add sugar and stir to dissolve.
-
In the mixing bowl of a stand mixer, add salt, flour, yeast mixture, milk mixture, melted butter, and eggs. Using the paddle attachment mix on medium high speed for 5 minutes or so, until a smooth dough has formed. The dough is a soft one and will be sticky, but it does not need any more flour.
-
Dust your fingers with flour to prevent the dough from sticking to them and dump dough on a very lightly floured surface. Gently form dough into a ball and place in an oiled bowl. Cover with plastic wrap and set in a warm place. Allow to rise for 1-2 hours, until doubled in size.

-
Once the dough has doubled in size, remove onto a surface that is lightly dusted with flour and cornmeal or semolina flour. Add a light dusting of flour and cornmeal on top of the dough.
-
Roll the dough to about ½ inch thickness. Using a biscuit cutter, cut into circles. The scrap dough can be very gently kneaded back together and more circles cut. Cover with a cloth and allow to rise for 30 more minutes.

-
Preheat your oiled griddle to low heat. Cook muffins for 7-10 minutes on each side, until golden brown.
-
Once removed from the heat, use a fork to poke around the center of the muffin to make it easy to split in two.
-
Allow to cool completely. Serve toasted with butter, jam, or honey and enjoy!
Nutrition
from The Recipe Critic https://ift.tt/3eB4hWR
https://ift.tt/3nqzgsH