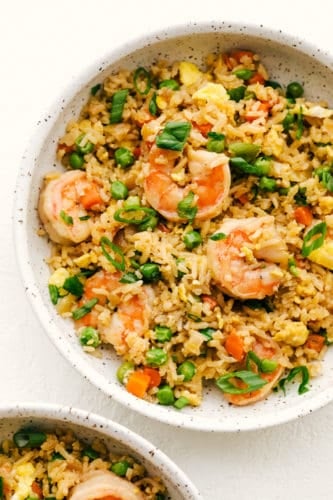
Shrimp Fried Rice is better than any restaurant that you have had! Made with fresh shrimp, peas, carrots, egg, rice and topped with green onions, you will never have takeout again!
Fried rice is a staple in our house, and there are so many ways you can make it amazing. Try Original, Bacon or even Cauliflower fried rice!

Easy Shrimp Fried Rice
After I perfected the better than takeout fried rice… (seriously it is so much better than takeout!) I knew that a shrimp version had to make the debut. The hubby loves shrimp and I have to admit it is starting to grow on me. But when you add it to some fried rice I am in love with it! There is nothing better than rice, peas, carrots, eggs, with shrimp hidden inside!
There are a few secrets to getting that restaurant quality taste. My sister in law who is Chinese made us the most amazing fried rice for a family dinner. She suggests that day old chilled rice is the best. If you have to make the rice that day, it is still delicious! And the secret flavor is the sesame oil. And boy oh boy this rice is good. This is great eaten as a side or by itself. You are going to love the tender shrimp hidden inside. This will become an instant family favorite that will make you have better than takeout meal right at home!
Ingredients for Homemade Shrimp Fried Rice
Super easy and insanely delicious, these ingredients meld together in the most perfect way.
- Shrimp: Peeled and deveined, can use fresh or frozen that’s been thawed.
- Vegetable Oil: For sautéing.
- Sesame oil: The secret to incredible flavor.
- Cooked Rice: Use cold day old rice if you have it.
- Onion: I used a small white onion for good flavor.
- Frozen Peas and Carrots: These should be thawed.
- Soy Sauce: Use more or less to taste. Low sodium is ok to use.
- Eggs: Lightly beat your eggs.
- Green Onion: These are optional, but in my opinion should not be skipped.
Let’s Make Amazing Shrimp Fried Rice!
You will not want to take out again after you taste this shrimp fried rice. It is fast easy and cheaper!
- Prep: Preheat a large skillet or wok to medium heat. Add vegetable oil and sesame oil
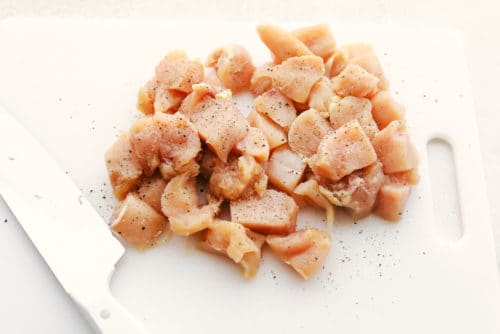
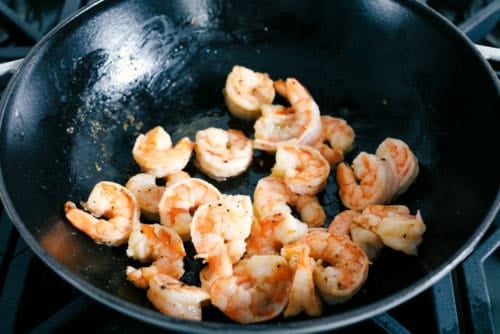
- Sauté: Add the shrimp to the skillet and salt and pepper. Cook the shrimp for 2-3 minutes or until no longer pink. Remove with a slotted spoon and set aside.
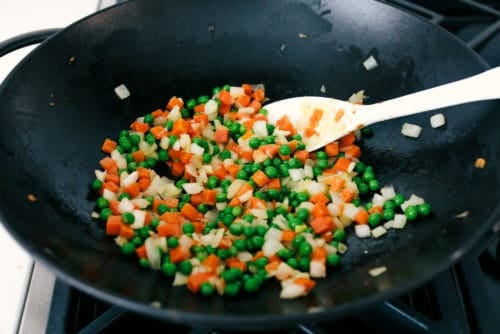
- Vegetables: Add the white onion, peas and carrots and fry until tender.
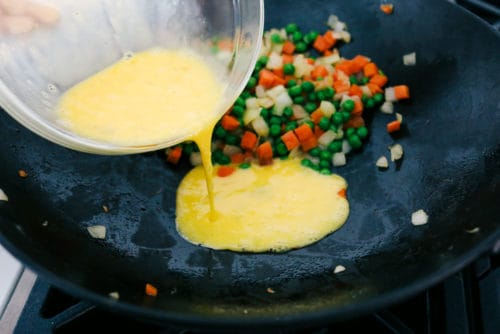
- Egg: Slide the onion, peas and carrots to the side and pour the beaten eggs onto the other side. Using a spatula, scramble the eggs, once cooked mix the eggs with the vegetable mix.
- Rice: Add the rice and shrimp to the veggie and egg mixture.
- Finish: Pour the soy sauce and another Tablespoon of sesame oil on top. Stir and fry the rice and vegetable mixture until heated through and combined. Add chopped green onions if desired.
The Recipe Critic Pro Tip
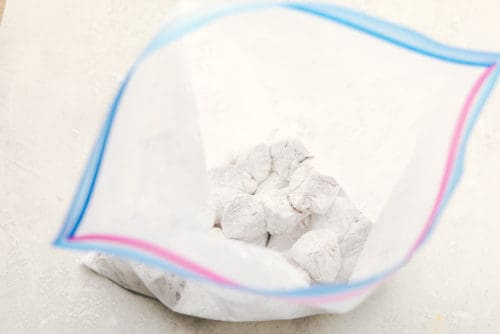
Cold rice is a Must! If it is a day old cold rice even better. You want the rice cold so it’ll fry when it hits the pan. Using freshly cooked, or even lukewarm rice it will go soggy and clump together. If you need to cook your rice the same day, never fear you can get the same results. Take your cooked rice and spread it out on a sheet pan in thin layer. Cover with plastic wrap. Place in the fridge for up to 30 minutes or freezer for 15, you do not want it frozen, just cold. Trust me on this one.

Tips for the Best Fried Rice with Shrimp
There are a few things that really truly need to be done so this tastes absolutely amazing.
- Use some Butter: For impeccable flavor use some butter with your oil or even sub out the oil for butter. It adds so much flavor and goodness.
- Use High Heat: This will keep the rice from steaming and fry it well.
- Sesame Oil: This is a Must have for the best authentic fried rice flavor. Keep in mind it’s a finishing oil, not a frying oil You need to add it at the end and off the heat.
- Use Fresh Shrimp: Using precooked shrimp can make your shrimp rubbery when you warm it up.
Variations and Storing Chinese Fried Rice
This recipe for shrimp fried rice is a classic, but you add, delete and vary ingredients to make it your own.
- Vegetables: For a heavy on the vegetable shrimp fried rice, add diced peppers or sautéed mushrooms, and zucchini. You can also use broccoli, cauliflower. Cabbage, green beans or sugar snap peas.
- Rice: Substitute brown rice or quinoa for the white rice if you desire. You can even make this with cauliflower rice.
- Protein: Add bacon, ham, chicken or tofu to up the protein.
- Storage: This shrimp fried rice will keep nicely in an airtight container for up to 3 days in the fridge. Warm up in a skillet or wok to get that fried texture back.

More Better Than Take Out From Home!
There are lots of reasons why you should want to have a few good restaurant worthy recipes in your back pocket. First of all they will always taste better than take out, they are cheaper than take out, and you can control the ingredients and flavors just the way you want them. I have many tried and true restaurant worthy recipes on the blog, but here are just a few favorites to try.
- Copycat Texas Roadhouse Rolls and Cinnamon Honey Butter
- Super Easy Mongolian Beef (Taste Just Like P.F. Changs)
- Creamy Chicken Gnocchi Soup (Olive Garden Copycat)
- The Best Avocado Egg Rolls (Cheesecake Factory Copycat)
- Better Than Take Cashew Chicken

Better than Takeout Shrimp Fried Rice
Ingredients
- 1 pound large shrimp peeled and deveined
- 1 Tablespoon vegetable oil
- 2 Tablespoon sesame oil divided
- 3 cups cooked rice *
- 1 small white onion chopped
- 1 cup frozen peas and carrots thawed
- 2-3 Tablespoons soy sauce more or less to taste
- 3 eggs lightly beaten
- 2 Tablespoon chopped green onions optional
Instructions
-
Preheat a large skillet or wok to medium heat. Add vegetable oil, 1 Tablespoon sesame oil and shrimp to the skillet and salt and pepper. Cook the shrimp for 2-3 minutes or until no longer pink. Remove with a slotted spoon and set aside.
-
Add white onion and peas and carrots and fry until tender. Slide the onion, peas and carrots to the side, and pour the beaten eggs onto the other side.
-
Using a spatula, scramble the eggs. Once cooked, mix the eggs with the vegetable mix.
-
Add the rice and shrimp to the veggie and egg mixture. Pour the soy sauce and 1 Tablespoons sesame oil on top. Stir and fry the rice and veggie mixture until heated through and combined. Add chopped green onions if desired.

-
*Use day old cold cooked rice for best results. If you don't have precooked rice, it is just fine to cook the rice the same day.
Notes
Nutrition
from The Recipe Critic https://ift.tt/2L25lqT
https://ift.tt/3uBEPI1