2021 at 06:30AM The Recipe Critic लेबलों वाले संदेश दिखाए जा रहे हैं. सभी संदेश दिखाएं

शनिवार, 11 दिसंबर 2021

Eggnog Cheesecake

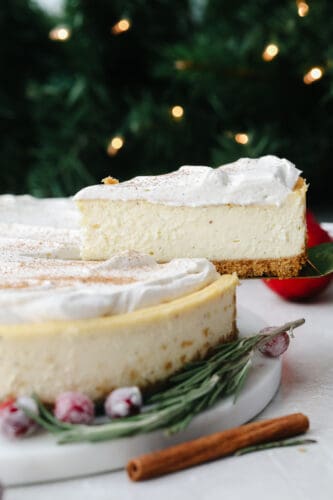
This eggnog cheesecake is SOO GOOD. It’s creamy and melts in your mouth! That classic eggnog taste makes it the best dessert for the holiday season!

I can’t get enough of cheesecake! Some of my favorites are Peppermint, Pecan Pie, and this delicious Churro Cheesecake! They are all so different but so, so good!

A slice of cheesecake with a fork cutting into it.

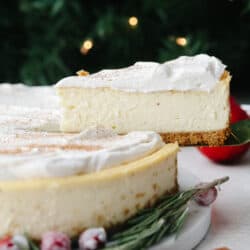
Classic Eggnog Cheesecake

Well, putting two of my favorite things together in one (like this eggnog cheesecake!) really turned out amazing! This dessert could not be more perfect for the holiday season! In fact, it’s so good that I would bake it at least once now so you can see how good it is. Because you will definitely want to bake it again later! It has the perfect amount of eggnog flavoring. It’s not too strong but you can definitely taste it.

Eggnog is already so creamy that it complements the texture of a cheesecake so well! And not only does it taste amazing but it looks gorgeous! These sugared cranberries make the perfect topping for it! Don’t be intimidated by baking a cheesecake. I have added so many tips and tricks to this post that will help yours turn out just right! Go ahead and give it a try, you will be so glad that you did!

Ingredients for Eggnog Cheesecake

These ingredients are fairly simple! I especially love the eggnog combined with the nutmeg… It’s so festive! See the recipe card at the bottom of the post for exact measurements.

  • Graham crackers: You will crush these up to make graham cracker crumbs!
  • Sugar: This sweetens the crust up a bit.
  • Ground Nutmeg: I love the flavor that nutmeg brings. It reminds me of the holiday season!
  • Butter: I melted the butter to mix the crust all together.
  • Salt: Just a pinch will work!

Cheesecake

  • Cream Cheese: Set your cream cheese out about 30 minutes before you start baking. When you soften it to room temperature then it mixes up so smoothly!
  • Eggnog: You can use store bought eggnog or you can make this Homemade Eggnog! It’s soo good.
  • Granulated sugar: This adds some sweetness to balance out the tangy cream cheese.
  • Eggs: I used large eggs that were at room temperature.
  • Ground nutmeg: This will pull in that same flavoring from the crust. They go so well together!
  • Vanilla: This adds a little flavoring to the sweetness.
  • Rum Extract: This is totally optional so you can leave it out if you want!

Whipped Cream Topping

  • Heavy Whipping Cream: This is what you will mix up to make that fluffy topping which completes this eggnog cheesecake.
  • Eggnog: You can use store bought eggnog or you can make this Homemade Eggnog!
  • Ground Nutmeg: Adds a tiny bit of earthy flavor to the whipped cream.
  • Powdered sugar: This dissolves the easiest so it will help make the whipped cream smooth.

Let’s Bake a Cheesecake!

If you’ve never made a cheesecake then you should definitely try this eggnog cheesecake! Master it just in time for the holidays and everyone will be so impressed!

Crust

  1. Preheat oven and mix ingredients: Preheat the oven to 325. In a medium bowl mix graham cracker crumbs, sugar, nutmeg, salt and melted butter together. This should resemble damp sand.
  2. Form into pan: Pour your crumb mixture into a 9 inch springform pan and press evenly into the pan. You can use the bottom of a flat glass or a flat measuring cup to really press it in well and get a nice, even crust.
  3. Bake and cool: Bake for 10 minutes. Let cool completely

Cheesecake Filling

  1. Beat cream cheese: Add the softened cream cheese to the mixing bowl of a stand mixer and beat with a paddle at medium/high speed for about 1 minute. Scrape down the sides and bottom of the bowl and beat for a few seconds more.
  2. Combine with sugar and eggnog: Add the sugar to the cream cheese and mix at medium-low speed until just combined. Scrape the bowl again and slowly add the eggnog until it is combined and the batter is smooth.
  3. Add eggs and beat: Add eggs and beat on low speed until combined, about 30 seconds-1 minute. Scrape the bowl again.
  4. Mix in the rest of the ingredients: Add the nutmeg, vanilla and rum extract. Beat until just combined. At this point the batter should be smooth and fairly runny.
  5. Wrap springfoam pan with foil: Using 18 inch heavy duty aluminum foil, wrap the outside of your springform pan with 3-4 sheets of foil.
  6. Add cheesecake batter to pan: Place the wrapped pan in a deep roasting pan. You can alternatively use a baking sheet, so long as the sides are about 2 inches deep. Add the cheesecake batter to the springform pan.
  7. Add water to baking sheet (a water bath): Using very hot water, add water to the baking sheet until there is about 1 ½ inch of water around the springform pan. On a rack in the lower 3rd of the oven, carefully move your pan into the oven.

Baking Cheesecake

  1. Bake: Bake for 1-1 ½ hours. After about an hour of baking, check the cheesecake’s consistency. A slight jiggle of the pan (while still in the oven) should tell you if it’s ready or needs more time. The cheesecake should be jiggly, but not liquid. If it seems very liquid still, give it 15 more minutes and check it again.
  2. Turn off oven and leave it IN THE OVEN while it cools: Once the cheesecake is firm, yet jiggly, turn the oven off but leave the eggnog cheesecake in the oven for another hour or so, until the oven has cooled down. Resist the temptation to open the oven during this time! The purpose of this step is to allow the cheesecake to cool slowly as the oven cools. Doing this will prevent it from cracking, as one of the biggest reasons cheesecakes crack is the drastic temperature change going from the hot oven into the much cooler kitchen.
  3. Chill in fridge: Once the oven and the cheesecake are cooled, remove from the oven and carefully remove the foil lining the pan. Chill in the fridge for at least 6 hours.
  4. Release springform with knife, top and serve: Before serving, run a knife around the edge of the pan to ensure an easy release when the springform is removed. Top with the whipped cream topping and enjoy!

Whipped Cream

  1. Mix ingredients: sing a stand mixer with the whisk attachment or a hand mixer, whip the heavy cream, eggnog, nutmeg and powdered sugar together until medium still peaks form.
  2. Add whipped cream and garnish: Spread the whipped cream over the top of the cheesecake and dust lightly with ground nutmeg.
6 steps showing how to mix cheesecake batter and add it to a pan in a water bath.

How to Prevent Cheesecake from Cracking

Whenever you see a professional cheesecake, it is smooth with no cracks! Here is how you can get your eggnog cheesecake to do that!

  • Let it cool IN THE OVEN: I can’t stress the importance of this enough! Once the cheesecake is done cooking then you turn the oven off then leave the cheesecake in the oven for another hour. Keep it in there until the oven has completely cooled down.
  • Don’t open the door: Doing this will prevent it from cracking. One of the biggest reasons cheesecakes crack is the drastic temperature change going from the hot oven into the much cooler kitchen.
A zoomed in view of the side of a whole eggnog cheesecake.

Baking Tips

These are good baking tips to remember whenever you are making something in the kitchen! This eggnog cheesecake is so good and you want to follow all of the steps to make sure that it turns out perfectly!

  • Don’t overmix: When you over mix or set your mixer to mix on high then you add more air to your batter! This can cause some cracks in your cheesecake. To prevent this then you should use room temperature ingredients. Then you don’t have to mix so many lumps and you can do it on a lower speed.
  • Don’t use a toothpick: Using a toothpick to check for doneness is not something that you want to to with a cheesecake! It will cause it to crack. If it is firm yet slightly jiggly, then you can turn off the oven and let it cool (in the oven… again, I can’t stress this enough!)
  • Don’t open the oven door: I know that it’s tempting to open the oven door while you are baking your cheesecake. But when you open the door while you are baking, you let a lot of the heat out. This makes it so that your cheesecake will crack. Use the oven light instead of opening the door! 
  • Room temperature ingredients: This can take a bit of thought beforehand but it really helps! Make sure to take all of your refrigerated ingredients out and put them on the counter before you plan on baking. Bringing your ingredients to room temperature really helps them mix nicely together and makes the batter really smooth! 
A slice of cheesecake being taken out.

How to Store Leftovers

If you have leftover eggnog cheesecake then you should place it in an airtight container and put it in your fridge. It can last for about a week!
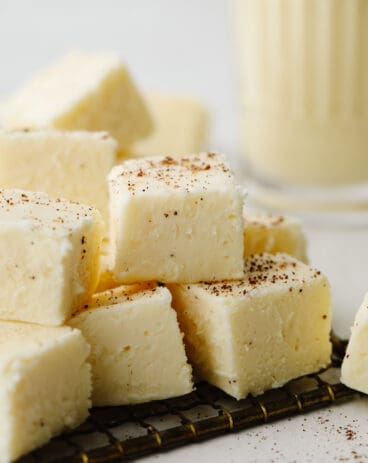
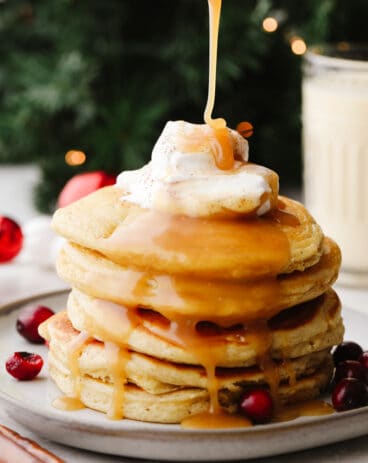
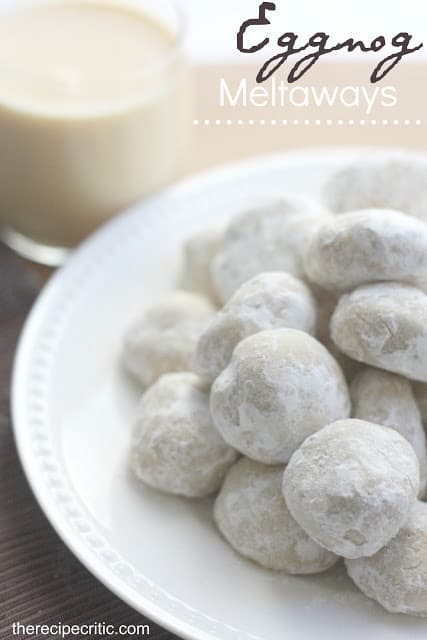
A slice of cheesecake on a plate with sugared cranberries.
Print

Eggnog Cheesecake

This eggnog cheesecake is SOO GOOD. The cheesecake is creamy, melts in your mouth, and is topped on a graham cracker crust. That classic eggnog taste makes it the best dessert for the holiday season!
Course Dessert
Cuisine American
Keyword eggnog cheesecake
Prep Time 35 minutes
Cook Time 1 hour 40 minutes
Chill Time 6 hours
Total Time 8 hours 15 minutes
Servings 12 Slices
Calories 551kcal
Author Alyssa Rivers

Ingredients

Crust

  • 1 ½ cup graham cracker crumbs about 12 crackers
  • ¼ cup sugar
  • ½ Teaspoon Ground Nutmeg
  • ¼ cup butter melted
  • Pinch salt

Cheesecake

  • 2 Pounds Cream Cheese Softened (4 8oz packages)
  • 1 Cup Eggnog
  • 1 Cup Granulated Sugar
  • 5 Large Eggs
  • ¾ Teaspoon Ground Nutmeg
  • 2 Teaspoons Vanilla
  • ½ Teaspoon Rum Extract optional

Whipped Cream Topping

  • 1 Cup Heavy Whipping Cream
  • 3 Tablespoons Eggnog
  • ¼ Teaspoon Ground Nutmeg
  • 1/4 Cup Powdered Sugar

Instructions

Crust

  • Preheat the oven to 325. In a medium bowl mix graham cracker crumbs, sugar, nutmeg, salt,and melted butter together. This should resemble damp sand.
  • Pour your crumb mixture into a 9-inch springform pan and press evenly into the pan. You can use the bottom of a flat glass or a flat measuring cup to really press it in well and get a nice, even crust.
  • Bake for 10 minutes. Let cool completely

Cheesecake Filling

  • Add the softened cream cheese to the mixing bowl of a stand mixer and beat with a paddle at medium/high speed for about 1 minute. Scrape down the sides and bottom of the bowl and beat for a few seconds more.
  • Add the sugar to the cream cheese and mix at medium-low speed until just combined. Scrape the bowl again and slowly add the eggnog until it is combined and the batter is smooth.
  • Add eggs and beat on low speed until combined, about 30 seconds-1 minute. Scrape the bowl again.
  • Add the nutmeg, vanilla, and rum extract. Beat until just combined. At this point, the batter should be smooth and fairly runny.
  • Using 18-inch heavy-duty aluminum foil, wrap the outside of your springform pan with 3-4 sheets of foil.
  • Place the wrapped pan in a deep roasting pan. You can alternatively use a baking sheet, so long as the sides are about 2 inches deep. Add the cheesecake batter to the springform pan.
  • Using very hot water, add water to the baking sheet until there is about 1 ½ inch of water around the springform pan. On a rack in the lower 3rd of the oven, carefully move your pan into the oven.
  • Bake for 1-1 ½ hours. After about an hour of baking, check the cheesecake’s consistency. A slight jiggle of the pan (while still in the oven) should tell you if it’s ready or needs more time. The cheesecake should be jiggly, but not liquid. If it seems very liquid still, give it 15 more minutes and check it again.
  • Once the cheesecake is firm, yet jiggly, turn the oven off but leave the cheesecake in the oven for another hour or so, until the oven has cooled down. Resist the temptation to open the oven during this time! The purpose of this step is to allow the cheesecake to cool slowly as the oven cools. Doing this will prevent it from cracking, as one of the biggest reasons cheesecakes crack is the drastic temperature change going from the hot oven into the much cooler kitchen.
  • Once the oven and the cheesecake are cooled, remove from the oven and carefully remove the foil lining the pan. Chill in the fridge for at least 6 hours.
  • Before serving, run a knife around the edge of the pan to ensure an easy release when the springform is removed. Top with the whipped cream topping and enjoy!

Whipped Cream

  • Using a stand mixer with the whisk attachment or a hand mixer, whip the heavy cream, eggnog, nutmeg, and powdered sugar together until medium still peaks form.
  • Spread the whipped cream over the top of the cheesecake and dust lightly with ground nutmeg.

Nutrition

Serving: 12slices | Calories: 551kcal | Carbohydrates: 37g | Protein: 9g | Fat: 41g | Saturated Fat: 23g | Polyunsaturated Fat: 2g | Monounsaturated Fat: 11g | Trans Fat: 1g | Cholesterol: 213mg | Sodium: 397mg | Potassium: 211mg | Fiber: 1g | Sugar: 30g | Vitamin A: 1589IU | Vitamin C: 1mg | Calcium: 141mg | Iron: 1mg


from The Recipe Critic https://ift.tt/3lXzSqj
https://ift.tt/3DRhZ2M

बुधवार, 8 दिसंबर 2021

Wassail

This traditional English drink is the perfect combination of fruit and spice! Wassail mixes up in a snap and is the perfect holiday crowd-pleaser!

Food is always the highlight of the holidays, but what about the drinks? Christmas punch, pomegranate lemonade, and cranberry apple crush are the best recipes to accompany your dinner with. They’re so refreshing and delicious!

Homemade wassail in a punch bowl garnished with apples, oranges, cranberries, and spice.

Amazing Homemade Wassail Recipe

If you’re looking for a holiday drink recipe that is perfectly sweet and warms your soul, this is it! I love wassail. It’s like the love child of punch and mulled cider. It starts with an apple cider base and then I add in orange and pineapple juice for that perfect fruity zest! Pair these flavors with nutmeg, anise, and cinnamon and you have a winning drink! It’s SOO GOOD! Be sure to make a lot of this because your guests will be coming back for more and more!

And if you’re asking yourself, what exactly is wassail? It’s an old English word originating from ‘waes-hael’ which translates to “to your health.” Historically, people would make a variety of spiced cider to share and enjoy with friends to celebrate the harvest. Fast forward a thousand years and we’re still enjoying this delicious drink today! Make a pot of this at your next holiday party to spread the cheer! It’s so incredibly flavorful and refreshing, you won’t regret it! And if you’re looking for more tasty holiday drinks, try out my homemade eggnog and gingerbread cider!

What Do I Need to Make Wassail?

No fancy ingredients are needed here. Let your spice rack do the heavy lifting! Who knew that a few spices and a blend of fruit juices could create such a hearty, flavorful drink! You’re going to love having it to sip on. Looking for measurements? They can be found in the recipe card at the end of the post!

  • Apple Cider: Apple juice can be used as well, but I prefer using cider for a more complex flavor. Not to mention, its smooth, thick consistency tastes great as a warm drink!
  • Orange Juice: Citrus helps to balance out the flavors in the drink.
  • Pineapple Juice: I like adding pineapple juice for extra fruity flavor!
  • Whole Cloves: Cloves add a warm, sweet spice to your wassail.
  • Cinnamon Sticks: No holiday recipe is complete without a little cinnamon!
  • Star Anise: Anise has a sweet, licorice-y flavor that tastes amazing combined with the other flavors in this drink.
  • Nutmeg: For tasty, nutty warmth!
  • Cranberries: Not only are they beautiful and festive, but cranberries also help to infuse tart flavor into your wassail.
  • Sliced Orange and Apple: Adding some sliced orange and apple pieces is the cherry on top! It adds to the presentation and gives your drink more flavor.

Let’s Make a Christmas Juice!

This holiday drink is the easiest thing to throw together! You can impress your guests with minimal effort. Just make sure you have plenty of time to simmer so the flavors can infuse!

  1. Mix Juice: To begin, in a large pot over medium-low heat, add the apple cider, orange juice, and pineapple juice.
  2. Add in Spices and Garnish: Next, add in the cloves, cinnamon sticks, star anise, nutmeg, cranberries, orange and apple slices.
  3. Simmer and Serve: Let simmer for an hour or all day. Serve hot.
Process shots of preparing drink.

Tips and Tricks for Making Christmas Wassail

You’re going to love this traditional holiday drink! Here are a few of my favorite tips on making it even better. It’s so good, you may even want it year-round!

  • Using High Quality Juices: For best results, use apple cider, orange, and pineapple juice that is not from concentrate! The fresher these juices are, the better your wassail will be!
  • Adding Froth: One way to up the coziness of this drink is by adding a sweet egg froth! I know it may sound weird, but imagine eggnog-level creaminess. To do this, separate egg whites and yolks. Beat your egg whites until you reach stiff peaks. In another bowl, beat your egg yolks until frothy and bubbly, then blend together with egg white mixture. Add very slowly to your wassail, mixing constantly to keep the eggs from scrambling. If done properly, you’ll be left with a creamy, tempered froth on the top of your drink that tastes AMAZING!
  • Make it Boozy: Looking to add a little more cheer? You can make a boozy version of this drink by adding brandy, rum, or hard cider to your wassail. Just make sure you’re not cooking it on too high of heat to keep the alcohol from burning off.
A cup of wassail garnished with cranberries and spice.

Storing Leftover Cider

Since the longer wassail infuses, the better it tastes, it’s perfect for leftovers! It will become more flavorful as it rests in your fridge!

  • In the Refrigerator: Store leftover wassail in a pitcher for up to 5 days.
  • Reheating: When ready to serve, reheat wassail over the stove on medium heat until simmering.
Wassail in a glass cup with a cinnamon stick and apple slices.
Print

Wassail

This traditional English drink is the perfect combination of fruit and spice! Wassail mixes up in a snap and is the perfect holiday crowd-pleaser!
Course Beverage
Cuisine English
Keyword wassail
Prep Time 15 minutes
Cook Time 1 hour
Total Time 1 hour 15 minutes
Servings 8 people
Calories 183kcal
Author Alyssa Rivers

Ingredients

  • 2 quarts apple cider
  • 2 cups orange juice
  • 1 cup pineapple juice
  • 10 whole cloves
  • 5 cinnamon sticks
  • 5 star anise
  • pinch of nutmeg
  • 1/2 cup cranberries
  • 1 orange sliced
  • 1 apple sliced

Instructions

  • In a large pot over medium-low heat add the apple cider, orange juice, and pineapple juice.
  • Add in the cloves, cinnamon sticks, star anise, nutmeg, cranberries, orange, and apple slices.
  • Let simmer for an hour or all day. Serve hot.

Nutrition

Calories: 183kcal | Carbohydrates: 45g | Protein: 1g | Fat: 1g | Saturated Fat: 1g | Polyunsaturated Fat: 1g | Monounsaturated Fat: 1g | Trans Fat: 1g | Sodium: 12mg | Potassium: 482mg | Fiber: 3g | Sugar: 35g | Vitamin A: 190IU | Vitamin C: 47mg | Calcium: 66mg | Iron: 1mg


from The Recipe Critic https://ift.tt/3rIdiWj
https://ift.tt/3lHVS8o

मंगलवार, 7 दिसंबर 2021

No Bake Haystack Cookies (2 Ways!)

Haystack cookies are perfect for the holidays! They are festive, have the perfect crunch, and are so good that you won’t be able to stop at just one!

I love holiday cookies! If you want to try out some more of my favorites then you should make these Italian Christmas Cookies, Linzer Cookies, or these amazing Madeleines!

No bake haystack cookies with sprinkles.

What Are Haystack Cookies?

Ok, I know that the holiday season is about more than food but can we all agree that holiday desserts are the best part? I mean there are SO many to try like this Cinnamon Roll Wreath, these Grinch Cookies, this amazing Christmas Star Bread, or these darling Christmas Cornflake Wreaths. Not only do holiday treats look so festive but they taste amazing as well! And I think that these haystack cookies belong at the top of that list!

Haystack cookies are SO easy to make! My kids love helping me with them! All you need is some chow mein noodles, chocolate (white or milk works the best!), marshmallows, and some festive sprinkles. And voila! You have yourself these beautiful, tasty, and easy-to-make treats! Oh, and did I mention that you should probably double the batch? Because these will fly off your table so fast that you will wish that you had made more!

Ingredients for White Chocolate Haystack Cookies

There are two ways to make these cookies! I like to make them both but if you want, you could just make one! See the recipe card at the bottom of the post for exact measurements.

  • White chocolate chips: These go SO well with the marshmallow flavor!
  • Marshmallows: Use mini marshmallows so that they mix in better.
  • Peanuts: These are totally optional in this recipe!
  • Chow mein noodles: These create such a delicious crunch!
3 pictures showing how to mix marshmallows and white chocolate with chow mein noodles.

How to Make White Chocolate Haystack Cookies

These cookies are so easy! I love a good no-bake option for the holidays. They are quick easy and SO delicious.

  1. Mix and melt: In a large microwave safe bowl add the White Chocolate Chips Microwave stirring after every 30 seconds until melted and smooth. Add in marshmallows and stir and cook for 30 more seconds.
  2. Combine and top with sprinkles: Add in the bag of chow Mein noodles and mix until combined. Scoop out 2 tablespoons of the mixture and place on parchment paper. Top with sprinkles
A zoomed in picture of a white chocolate haystack cookie.

Ingredients for Chocolate Haystack Cookies

I can’t decide which one is better, the white chocolate or these ones! I guess you will have to make them both and decide for yourself!

  • Semisweet chocolate chips: The semi sweet bring in that chocolate flavor!
  • Butterscotch chips: These bring in the BEST taste!
  • Peanut butter: I like to use creamy peanut butter but you can use whatever you have on hand!
  • Chow mein noodles: The perfect added crunch!
2 pictures showing how to mix chocolate and butterscotch with chow mein noodles.

How to Make Chocolate Haystack Cookies

The chocolate version of these cookies is just as delicious and the butterscotch really adds such an amazing taste! They are definitely a MUST TRY this holiday season!

  1. Mix ingredients until smooth: In a large microwave safe bowl add the chocolate chips, butterscotch chips, and peanut butter. Microwave stirring after every 30 seconds until melted and smooth.
  2. Add chow mein noodles and top with sprinkles: Add in the bag of chow Mein noodles and mix until combined. Scoop out 2 tablespoons of the mixture and place on parchment paper. Top With sprinkles
Chocolate haystack cookies on parchment paper on a baking sheet.

Variations

These haystack cookies are great for the holidays but you can easily change them up for any holiday or season! Here are some ideas on how you can do that!

  • Get colored baking chocolate: Get some baking chocolate in different colors and mix things up! Then, you can make it go with a theme or any holiday that you want!
  • Change the sprinkles: You can make the sprinkles different colors! Orange for halloween, pastels for easter and red white and blue for the 4th of July!
  • Add mint chips: Instead of using butterscotch chips, try using mint chips instead! They are so yummy and add in a totally different flavor!
Haystack cookies on a plate.

How to Store Leftovers

These cookies are great to make ahead of time! Once the chocolate has cooled then place these in an airtight container on your counter. They will last 4-5 days!

Print

No Bake Haystack Cookies (2 Ways!)

Haystack cookies are perfect for the holidays! They are festive, have the perfect crunch, and are so good that you won't be able to stop at just one!
Course Dessert
Cuisine American
Keyword haystack cookies
Prep Time 15 minutes
Total Time 15 minutes
Servings 24 haystacks
Calories 719kcal
Author Alyssa Rivers

Ingredients

White Chocolate Haystacks:

  • 4 cups white chocolate chips
  • 1/2 cup marshmallows
  • 1/2 cup peanuts optional
  • 4 cups chow mein noodles

Chocolate Haystacks:

  • 2 cups semisweet chocolates
  • 2 cups butterscotch
  • 1/4 cup peanut butter
  • 4 cups chow mein noodles

Instructions

To make the white chocolate haystacks:

  • In a large microwave-safe bowl add the White Chocolate Chips Microwave stirring after every 30 seconds until melted and smooth. Add in marshmallows and stir and cook for 30 more seconds.
  • Add in the bag of chow Mein noodles and mix until combined. Scoop out 2 tablespoons of the mixture and place on parchment paper. Top with sprinkles

To make the chocolate haystacks:

  • In a large microwave-safe bowl add the chocolate chips, butterscotch chips, and peanut butter. Microwave stirring after every 30 seconds until melted and smooth.
  • Add in the bag of chow Mein noodles and mix until combined. Scoop out 2 tablespoons of the mixture and place on parchment paper. Top With sprinkles

Nutrition

Calories: 719kcal | Carbohydrates: 102g | Protein: 16g | Fat: 28g | Saturated Fat: 16g | Polyunsaturated Fat: 2g | Monounsaturated Fat: 6g | Trans Fat: 1g | Cholesterol: 7mg | Sodium: 561mg | Potassium: 227mg | Fiber: 6g | Sugar: 45g | Vitamin A: 17IU | Vitamin C: 1mg | Calcium: 83mg | Iron: 4mg


from The Recipe Critic https://ift.tt/3DteBe3
https://ift.tt/3Exqr8q