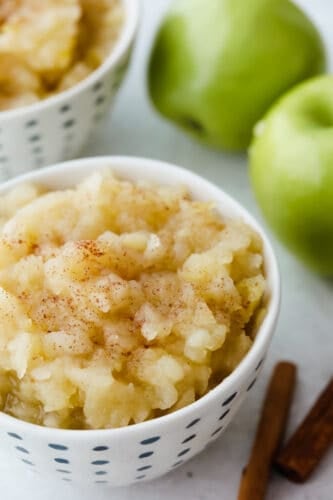
Homemade applesauce is a simple way to incorporate all of the apples that I have in my fridge! PLUS as a bonus, my kids are more inclined to eat something so simple!
Homemade applesauce is so versatile! You can serve it at breakfast, lunch, dinner, and dessert or you can use it as a quick snack or make your own to add to recipes that use it as an ingredient! Try topping this on my granola or on cinnamon almonds! You can also use it as the fresh applesauce needed in my carrot cake!

Why is Homemade Applesauce So Amazing?
I love things that remind me of simpler times and homemade applesauce does just that! Remember when your parents would make your lunch as a kid and inside, there would be some delicious applesauce? Those were the good ol’ days! I love the way that it takes you back to your childhood and is such an inexpensive way to create something new and delicious!
This homemade applesauce recipe is great to have on hand and use as a substitute in baking! Try using it while baking cakes, bread, and even muffins! It gives a different taste and texture to your baking and can be an easy way to switch up your recipes! Also, who knew that applesauce was so great for your digestion? Make some to keep on hand and try it as a mid-day snack. It’s healthier AND it will keep your insides happy!
What You Need For Homemade Applesauce
Quick and easy, homemade applesauce is something that even the most beginner of cooks can make! For all ingredient measurements, see the recipe card at the end of the post!
- Apples: We used Granny Smith apples.
- Water: You can use room temperature water for this recipe.
- Sugar: The sugar is used to balance out any natural tartness from the apples.
- Lemon Juice: You can use this from either a fresh lemon or lemon juice that you already have on hand.
- Cinnamon: Using cinnamon is optional. It’s great to use this when eating the applesauce on its own but if you are using the homemade applesauce as an ingredient in another recipe then leave this out!
How to Make Homemade Applesauce
The taste of this homemade applesauce is subtle but has just enough flavor that you keep on coming back for more! I especially love that it is something that I can make often and use it so much without getting sick of it.
- Peel your apples: After peeling them, chop them into 1-inch pieces. Add them to a large pot with water, sugar, lemon juice, and cinnamon.
- Bring to a boil: After you’ve brought them to a boil, then reduce the heat to medium-low and simmer for 25-30 minutes.
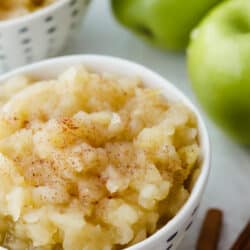
- Mash the apples: Once your apples are tender then mash to desired consistency.
- NOTE: For a thinner applesauce use an immersion blender, food processor, or blender.

Quick Tips for the Perfect Homemade Applesauce
Applesauce is a staple in our house! Here are some quick tips for making your applesauce just right. These will help make your homemade applesauce last longer and retain its delicious flavor!
- Choosing your apples: You can use any kind of apples to make your applesauce. The good news is that they don’t need to be super crisp because you are going to be mashing them up anyways!
- Cutting the apples: Make sure that when you chop up the apples that you chop them into evenly sized pieces. This helps them cook evenly so that they are all cooked through at the same time!
- Adding the sugar: Sometimes your apples are sweet and some are more tart. You can add or take away the amount of sugar to get the sweetness level to just where you would like it!

Storing Homemade Applesauce
- In the Refrigerator: Keep in a sealed container for a week to 10 days in the fridge.
- In the Freezer: You can place applesauce in freezer bags, or sealed plastic storage containers. You can also pour some in ice cube trays if you are using smaller amounts for baby food or baking! Homemade applesauce can last in your freezer for about 6-8 months.
- Thawing Frozen Applesauce: To thaw frozen applesauce, remove the container from the refrigerator and place it in the fridge for several hours or overnight. The water may separate from the apple but once thawed, give it a good mix and that will help in returning it to its original texture.

More Apple Recipes to Love

Desserts
Caramel Apple Pie
Salads
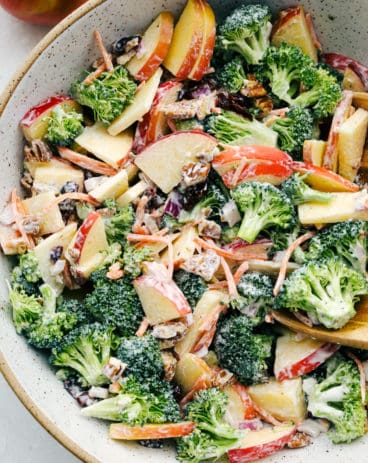
Broccoli Apple Salad
Breakfast
Homemade Apple Fritters

Dressings, Sauces, and Dips
Apple Butter
Homemade Applesauce
Ingredients
- 10-12 apples we used Granny Smith
- 3/4 cup water
- 1/4 cup sugar
- Juice from half a lemon
- 1 teaspoon cinnamon optional
Instructions
Notes
Nutrition
from The Recipe Critic https://ift.tt/2WLduGV
https://ift.tt/3CaCAiC