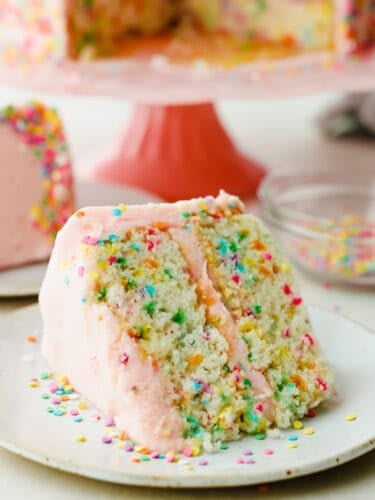
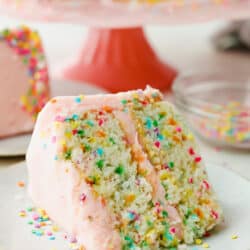
This light and fluffy homemade funfetti cake are perfect for every celebration! A white cake bursting with rainbow sprinkles is so delicious and will have everyone asking for a second slice.
You cannot host a celebration without a cake! If you want to try out some more tried and true cake favorites, then start with this Cinnabon cake, this amazing butter pecan cake, or this family favorite pineapple upside-down cake!

Funfetti Cake
It literally doesn’t get more fun, colorful, or delicious than this funfetti cake! Every party needs some funfetti treats! I know that you have all used the funfetti cake box at the store but you need to throw them out. This cake is so good that you will never make this from a box again! Plus, it’s simple and easy to make and looks like a million bucks when you are done. So stick with the homemade!
Cake is a go-to for any celebration, but my kids love this one. I mean, what kid doesn’t love sprinkles on and in their cake? This funfetti cake stands out far and above any other recipe because of its taste, but I do have one little secret that you need to know… The secret to making this cake and having it transport you back to your childhood days is the clear imitation vanilla. Do not skip this step! It brings a delightful flavor, and it is the ingredient that sets this cake apart!
Ingredients in Funfetti Cake
Once you read through this ingredients list and realize how simple it is to make this at home, you will never go back! See the recipe card at the bottom of the post for exact measurements.
- Cake Flour: This is the key to getting the cake texture just right.
- Granulated sugar: You’ve got to sweeten up the batter with some sugar!
- Baking powder: This acts as a leavener and keeps the cake fluffy.
- Baking soda: The baking soda adds in tenderness to the texture.
- Salt: The salt will enhance the flavors of all of the other ingredients.
- Buttermilk: You can buyt buttermilk from the store or you can make your own using this Buttermilk recipe!
- Milk: 1% or 2% milk works fine! Use whatever you have on hand.
- Clear Vanilla: The secret ingredient that will make this recipe taste
- Vegetable Oil: This adds moisture to the cake.
- Egg Whites: These help the cake taste rich, soft and moist!
- Sprinkles: Use jimmies or quin sprinkles so that they don’t bleed into the batter.
Homemade Cake Recipe
This funfetti cake recipe only takes about 30 minutes to put together, and the rest of the time is spent baking in the oven! Try it out, and you will never go back to a box cake mix again!
- Preheat oven and grease pans: Preheat the oven to 350°. Grease two 8-inch round cake pans and set aside.
- Whisk: In the bowl of a stand mixer whisk together the flour, sugar, baking powder, baking soda and salt..
- Add wet ingredients: Add the buttermilk, milk, vanilla, and oil to the bowl. Use the paddle attachment to mix on medium low until just barely fully combined. Using a rubber spatula, scrape down the sides and bottom of the bowl.
- Whip egg whites and fold in with sprinkles: In a medium bowl whip the egg whites until medium stiff peaks form. Gently fold the egg whites into the cake batter until just a few streaks of egg whites remain. Add the sprinkles and fold into the batter until no streaks of egg whites remain and the sprinkles are evenly distributed.
- Bake: Separate the batter evenly into the two prepared cake pans. Bake for 30-35 minutes, until a toothpick comes out clean from the center or the center of the cake springs back when gently pressed.
- Cool: Let the cakes cool in the pan for 5 minutes before inverting upside down on a cooling rack. This will help the tops of the cakes flatten so they are easier to frost.
- Make Ahead (Optional): This step is optional but I like to make my cake rounds a day ahead so I can wrap them in plastic wrap and chill them in the fridge overnight. Frosting cold cakes is much easier than frosting freshly baked cakes. You can also store them in the freezer and frost them while frozen.
Buttercream
- Beat butter: In the bowl of a stand mixer, use the paddle attachment to beat the butter until smooth and creamy.
- Mix with the rest of the ingredients: Add in the powdered sugar, salt and vanilla. Mix on low until the powdered sugar is sufficiently absorbed by the butter and wont make a mess when the speed is increased. Increase the speed to medium high and beat for 2 minutes. Scrape down the sides and bottom of the bowl and add the milk. Mix on medium until smooth.
- Tint: You may tint the frosting your chosen color or leave it white for your funfetti cake.

Don’t Have Cake Flour? Make Your Own!
Don’t worry if you don’t have any cake four on hand for this funfetti cake! You can easily make your own in less than 5 minutes with only two ingredients: cornstarch and all-purpose flour.
- To make 1 cup of cake flour: Take your all purpose flour and measure out 1 cup. Remove 2 tablespoons of the flour and place the rest of the flour in a bowl. Add 2 table spoons of cornstarch to the flour in your bowl. Whisk together and use as a substitute for 1 cup of cake flour. Repeat until you have the amount that your recipe calls for.

Funfetti Cake Tips
When choosing sprinkles for funfetti cake choose only sprinkles that are jimmies or quins. These sprinkles are much less likely to bleed in your batter. Do not use nonpareils (the little round rainbow sprinkles) because those will bleed and streak your batter.

Can You Make this Cake Ahead of Time?
Yes! I actually like to make the funfetti cake ahead of time and frost it later. I like to make my cake rounds a day early so I can wrap them in plastic wrap and chill them in the fridge overnight. Frosting cold cakes are much easier than frosting freshly baked cakes. You can also store them in the freezer and frost them while frozen.

More Funfetti Recipes to Try

Desserts
Funfetti Popcorn (Bunny Bait)
Desserts
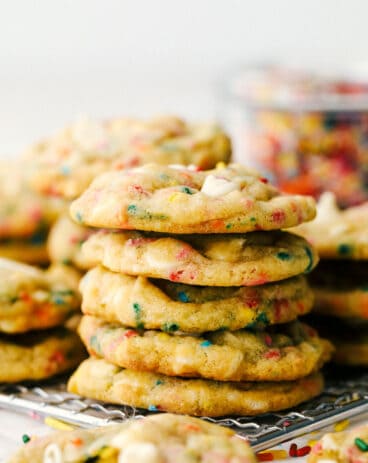
Funfetti Cheesecake Pudding Cookies
Desserts
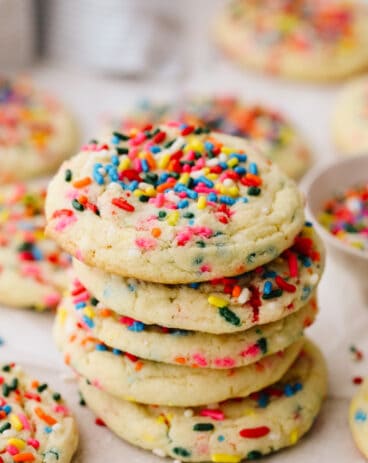
Sprinkle Cookies
Desserts
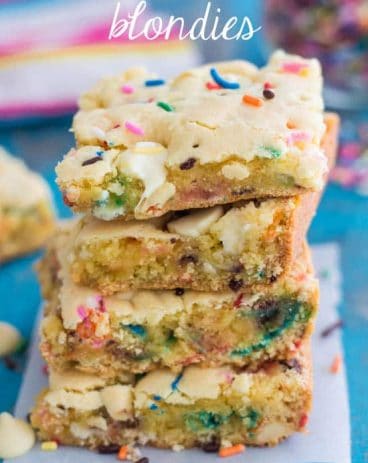
Funfetti Cake Batter Blondies
Funfetti Cake
Ingredients
Cake
- 2 ¼ Cups Cake Flour
- 1 ½ Cups Granulated Sugar
- 1 Tablespoon Baking Powder
- ½ Teaspoon Baking Soda
- ½ Teaspoon Salt
- 1 Cup Buttermilk
- ¼ Cup Milk
- 1 Tablespoon Clear Vanilla
- ½ Cup Vegetable Oil
- 4 Egg Whites
- ½ Cup Sprinkles
Buttercream
- 2 Cups Unsalted Butter softened
- 2 Lbs Powdered Sugar about 8 cups
- 1 Dash Salt
- 1 Tablespoon Vanilla Extract
- 2 Tablespoons Milk
Instructions
Cake
-
Preheat the oven to 350°. Grease two 8-inch round cake pans and set aside.
-
In the bowl of a stand mixer whisk together the flour, sugar, baking powder, baking soda and salt..
-
Add the buttermilk, milk, vanilla, and oil to the bowl. Use the paddle attachment to mix on medium low until just barely fully combined. Using a rubber spatula, scrape down the sides and bottom of the bowl.
-
In a medium bowl whip the egg whites until medium stiff peaks form. Gently fold the egg whites into the cake batter until just a few streaks of egg whites remain. Add the sprinkles and fold into the batter until no streaks of egg whites remain and the sprinkles are evenly distributed.
-
Separate the batter evenly into the two prepared cake pans. Bake for 30-35 minutes, until a toothpick comes out clean from the center or the center of the cake springs back when gently pressed.
-
Let the cakes cool in the pan for 5 minutes before inverting upside down on a cooling rack. This will help the tops of the cakes flatten so they are easier to frost.
-
This step is optional but I like to make my cake rounds a day ahead so I can wrap them in plastic wrap and chill them in the fridge overnight. Frosting cold cakes is much easier than frosting freshly baked cakes. You can also store them in the freezer and frost them while frozen.
Buttercream
-
In the bowl of a stand mixer, use the paddle attachment to beat the butter until smooth and creamy.
-
Add in the powdered sugar, salt and vanilla. Mix on low until the powdered sugar is sufficiently absorbed by the butter and wont make a mess when the speed is increased. Increase the speed to medium high and beat for 2 minutes. Scrape down the sides and bottom of the bowl and add the milk. Mix on medium until smooth.
-
You may tint the frosting your chosen color or leave it white.
from The Recipe Critic https://ift.tt/3IkBpPS
https://ift.tt/3tKyGeL


