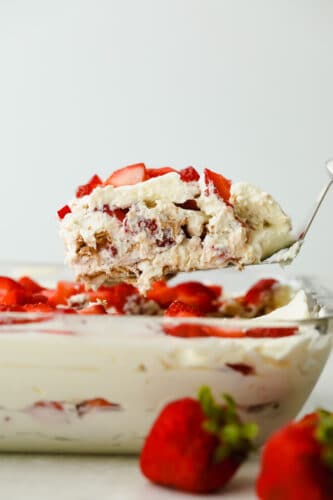
Strawberry Icebox Cake is the cool, creamy, and moist no-bake dessert of your dreams. Add a pop of juicy strawberry and you will never want to make cake another way!
Strawberries are the perfect summer fruit. Take advantage of them being in season and try out my cake, cinnamon rolls, and peanut butter pie all infused with delicious strawberry!

Easy Strawberry Icebox Cake Recipe
I’m a sucker for cold cakes in the summer. Tres leches, ice cream cakes, you name it! This strawberry icebox cake, though, takes the cake. Literally. It is so rich and decadent but also cool and refreshing for hot summer days. Add a touch of ripe, juicy strawberry and you have the ultimate summer dessert on your hands.
Icebox Cake first originated in the 1930s to advertise the production of iceboxes. The recipe has now become an irresistible treat consisting of layer upon layer of graham crackers and light, fluffy cream. This strawberry icebox cake is great for a crowd because it whips up in minutes and you can make it in bulk! I know you will love this quick and delicious recipe as much as I do!
No-Bake Strawberry Icebox Cake Ingredients
Gone are the days that you have to worry if your cake will turn out moist or not. These super simple ingredients ensure a perfectly soft, indulgent treat every time. All ingredients and measurements for this strawberry icebox cake are listed below in the recipe card.
- Heavy Cream: You will need this for your whipped cream base.
- Powdered Sugar: For sweetness and a smooth texture.
- Instant Vanilla Pudding Powder: Adds flavor and gives your cream a light, mousse-like texture.
- Vanilla Extract: For flavor. Pure vanilla extract works best.
- Strawberries: Fresh, diced.
- Graham Crackers: Adds texture and flavor.
Making Traditional Icebox Cake with Strawberries
Putting strawberry icebox cake together is super simple, and an activity the whole family can join in on! My kids love to help add layers and see the cake come to life.
- Create Cream Filling: Using a mixer with the whisk attachment, whip the heavy cream, powdered sugar, pudding powder, and vanilla extract together on high until you have stiff peaks.
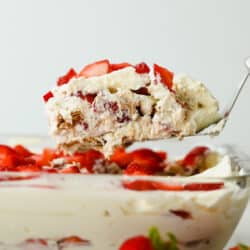
- Layer Cream, Graham Crackers, and Strawberries: In the bottom of a 9×13 pan, spread a thin layer of whipped cream over the bottom. Add a layer of graham crackers followed by about ½ cup of strawberries, enough that there is an even layer. Top with ⅓ of the remaining whipped cream.
- Repeat: Add layers two more times—graham crackers, whipped cream, and strawberries. You may add additional strawberries sliced as desired on top to make it look just to your liking.
- Chill: Cover with plastic wrap and chill for 4 hours, or overnight. Serve cold.

The Best Icebox Cake Tips
Upgrade and customize your Icebox Cake with these easy tips! Add strawberries for the ultimate flavor and summertime dessert! This strawberry icebox cake will impress and feed a crowd.
- Let Your Cake Rest: Allow at least 3 hours for your cake to rest in the fridge to allow cookie layers to absorb moisture and become softer.
- Creating Your Cream Base: Whipped cream and any whisks or mixer attachments should be cold before using. This helps your whipped cream to thicken properly.
- Strawberries: Ripe strawberries will be bright red all the way around with no hints of white or green- this can mean that the fruit is not ripe yet. Strawberries do not continue to ripen after being picked, so what you see is what you get.
- Adding Other Fruits: You can add other layers of fruit to your icebox cake such as bananas, blueberries, raspberries, or even lemon curd for amazing variety!
- Adding Chocolate: Add cocoa powder into your whipped cream mixture for a delicious chocolate variation.
- Cookies: You can swap out graham crackers for layers of Oreos or wafers.
Storing Your Old Fashioned Icebox Cake
- In the Refrigerator: Covered with plastic wrap, your icebox cake will keep in the fridge for up to 4 days.
- In the Freezer: Your icebox cake will keep for up to a month in the freezer when covered with aluminum foil. Thaw for a few hours in the fridge before serving.

More Summer No-Bake Desserts
Desserts
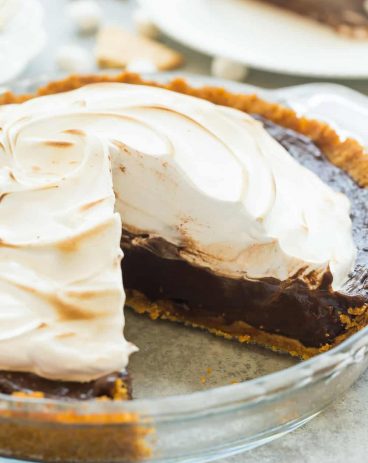
No Bake S’mores Pie
Desserts
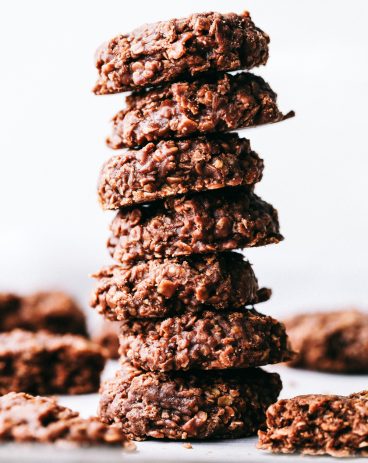
The Very Best No Bake Cookies
Desserts
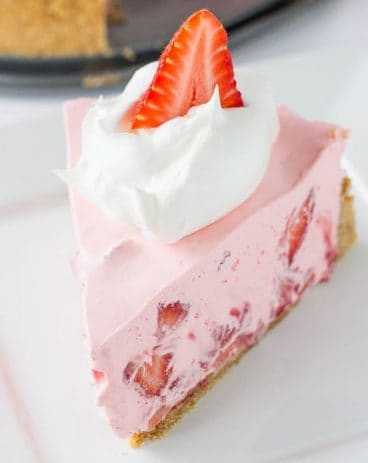
No-Bake Strawberry and Cream Pie
Strawberry Icebox Cake
Ingredients
- 3 Cups heavy cream
- 1/3 cup powdered sugar
- 3 Tablespoons instant vanilla pudding powder
- 1 teaspoon vanilla extract
- 1.5-2 pounds fresh strawberries diced
- 1.5 sleeves graham crackers more as needed
Instructions
-
In the bottom of a 9×13 pan, spread a thin layer of whipped cream over the bottom. Add a layer of graham crackers followed by about ½ cup of strawberries, enough that there is an even layer. Top with ⅓ of the remaining whipped cream.
-
Repeat the layers two more times—graham crackers, whipped cream, and strawberries. You may add additional strawberries sliced as desired on top to make it look just to your liking.
-
Cover with plastic wrap and chill for 4 hours, or overnight. Serve cold.
Nutrition
from The Recipe Critic https://ift.tt/3y689r2
https://ift.tt/2UElp7R