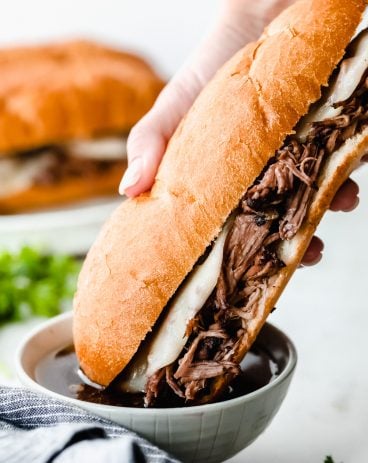
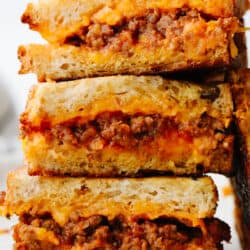
If you think a sloppy Joe grilled cheese sounds good, then just wait until you taste it! Tender, juicy, and filled with flavor inside cheesy, crisped bread. Well, it doesn’t get much better than that!
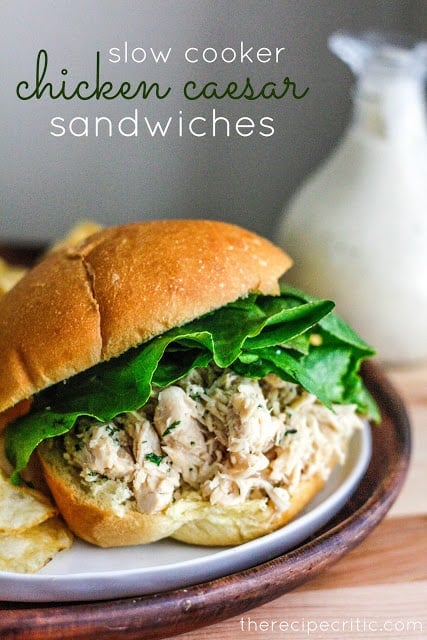
This mash-up of flavors is just about the best thing ever! I love a good hot sandwich and this one does not disappoint! If you love sandwiches as I do then go ahead and try this Meatloaf Sandwich, Grilled Cheese, and this yummy Corned Beef Sandwich!

Sloppy Joe Grilled Cheese
A good mash-up of recipes might just be one of my favorite things! And combining a grilled cheese with a sloppy Joe is just plain genius. The flavors of the two complement each other so well! Plus, it really just takes a plain grilled cheese to the next level. It’s a win-win and is so easy to make! My family goes crazy over this meal because it’s simple, fast and we can even eat it on the go if we need to. Which is so helpful on those crazy busy nights!
This recipe only takes a few minutes to make and you can do it entirely on your stovetop! There is a lot of flavor in the sloppy Joe mix that I just love. It has a kick without having too much heat. It’s sweetened with brown sugar and this helps to keep the flavor calm while taking on a bold taste. It’s so yummy and then you add in the crispy outside bread and it’s a whole other level of delicious!
Ingredients in a Sloppy Joe Grilled Cheese
Filled with yummy spices and cheese, this sloppy Joe grilled cheese is delicious! You will never want to eat a sloppy Joe without cheese again! See the recipe card below for a list of exact measurements.
- Olive oil: I use regular olive oil but if you only have vegetable oil on hand, you could use that too!
- Onion: Chop your onion up in fine pieces.
- Ground beef: I always like to go with lean ground beef to keep the fat content down.
- Garlic cloves: If you don’t have fresh cloves and only have minced garlic in your fridge, you could use that too! ½ tsp equals about 1 clove of garlic.
- Ketchup: This helps with the tangy taste.
- Brown sugar: The sugar calms down any heat that this takes on and gives it a deep, sweet flavor.
- Chili powder: There isn’t too much of this so the dish isn’t too spicy!
- Paprika: I absolutely love the subtle flavor that paprika brings to a dish.
- Worchestershire sauce: This sauce brings in a delicious flavor!
- Salt and pepper: Use these as much or little as you would like!
- Butter: It doesn’t take a lot of butter and this helps it not to stick.
- Mayonaise: If you haven’t cooked a grilled cheese with mayonnaise yet then you are in for a treat. It’s the BEST secret ingredient!
- French bread: You can use any bread that you have on hand but bakery french bread is my personal favorite!
- Cheddar cheese: This will stick it all together! The melted cheese combined with the meat is SOO good!!

How to Make a Sloppy Joe Grilled Cheese
This meal is easy and delicious! It only takes a few minutes to make and it is so filling. Your family will go crazy over it!
- Sauté meat: In a medium sized skillet add the olive oil and onion over medium high heat. Sauté until almost tender and add the ground beef and cook and crumble until no longer pink.
- Mix in spices and simmer: Add the garlic, ketchup, brown sugar, chili powder, paprika, Worcestershire sauce salt and pepper. Let simmer for 2-3 minutes.
- Assemble the grilled cheese: Combine the butter and mayonnaise and spread on the outside of the bread. Lay the bread butter side down in a medium sized skillet. Sprinkle cheese on top of the bread. Put about ¼ cup meat mixture on top of cheese, sprinkle cheese on top of the meat and then top with the other slice of bread.
- Cook and flip: Cook for about 2-3 minutes over medium high heat, flip to the other side and continue to cook until golden brown and heated throughout

Cooking Tips
We all know how to grill up an easy sandwich but if you really want it to turn out just right, follow these cooking tips! Your bread will be crispy and the cheese will be melted to perfection!
- How to avoid soggy bread: If you are having trouble getting that bread to crisp up just right, put it in the toaster first! Or toast both sides a bit in the pan before adding the cheese and meat. This dries the bread out and makes sure that it doesn’t end up soggy once you add all of the meat and cheese!
- If your sandwich is falling apart: Sometimes, when you cook a hot sandwich and go to eat it, half of it falls apart! To avoid this, you need to make sure that it’s coated with enough fat. In this case, that fat is the mayo and butter! Make sure that both sides are entirely coated with the mayo and butter. This will help your sandwich stay together and toast more evenly.
- How to avoid burning the bread: The tricky part about making the perfect hot sandwich is knowing when its ready to be flipped and cooked on the other side. For this sloppy Joe grilled cheese sandwich, each side should be golden brown by the time it’s ready to eat. To avoid burning it, turn down your heat. Cooking it slower and longer will get just the right crisp on the bread!

How to Store Leftovers
If you have some meat leftover, you can totally store this and eat some leftovers the next day! It makes a great lunch and is super easy to heat back up!
- Refrigerator: Once your meat has cooled, place it in an airtight container and put it in your refrigerator. It can last for 2-4 days in your fridge!
- Reheat: You can just reheat your meat in the microwave for 1-2 minutes or until heated through. Then, follow the recipe card for the instructions on how to make your sandwich. Everyone will be jealous of your delicious leftovers!

More Hot Sandwiches to Try


Sloppy Joe Grilled Cheese
Ingredients
- 1 Tablespoon olive oil
- 1 small onion chopped
- 1 pound ground beef
- 3 cloves garlic minced
- 1 cup ketchup
- 2 Tablespoons brown sugar
- 1 teaspoon chili powder
- ½ teaspoon paprika
- 1 Tablespoon worchestershire sauce
- salt and pepper
- 2 Tablespoon butter
- 2 Tablespoons mayonaise
- 6 slices favorite bread I used bakery French bread
- 2 cups shredded cheddar cheese
Instructions
-
In a medium-sized skillet add the olive oil and onion over medium-high heat. Sauté until almost tender and add the ground beef and cook and crumble until no longer pink.
-
Add the garlic, ketchup, brown sugar, chili powder, paprika, Worcestershire sauce salt, and pepper. Let simmer for 2-3 minutes.
Making the grilled cheese:
-
To assemble the grilled cheese: Combine the butter and mayonnaise and spread on the outside of the bread. Lay the bread butter side down in a medium-sized skillet. Sprinkle cheese on top of the bread. Put about ¼ cup meat mixture on top of the cheese, sprinkle cheese on top of the meat and then top with the other slice of bread.
-
Cook for about 2-3 minutes over medium-high heat, flip to the other side and continue to cook until golden brown and heated throughout.
Nutrition
from The Recipe Critic https://ift.tt/2X3eBCj
https://ift.tt/3oVPLA2