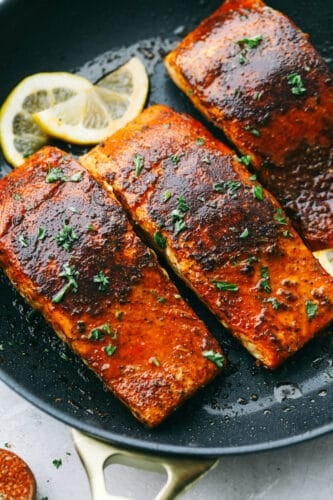
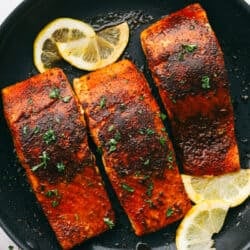
Easy and Amazing Blackened Salmon is a foolproof way to cook restaurant-worthy salmon at home! The salmon is tender and flakey and packed with flavor that is going to wow your taste buds!
Salmon is an easy and healthy dinner choice that is super easy to customize and cook. Try these tried and true recipes like Air Fryer Salmon, Croquettes, and Salmon Foil Packets.

Blackened Salmon
When you want a dinner that is chock-full of flavor but is super easy and quick, this recipe is it! Fresh, tender, juicy salmon is smothered with spices that are then seared into the meat for a taste that is a total crowd pleaser! This is one of those meals that everyone is going to think that you slaved over, but it could not be any easier. One of the best things about the dish is that you can customize the spice level on your blackened seasoning, make it milder or turn up the heat, it’s all up to you.
Salmon is a healthy choice for dinner. It’s full of healthy fats, B-Vitamins, and protein. Eating salmon on a regular basis can improve brain function, help manage weight, fight inflammation, and reduce the risk of heart disease. The fact that it is also so versatile and delicious is a bonus. Salmon does not have a fishy flavor, so it is easy to add a variety of flavors to enhance it. Try Brown Butter Lemon, Parmesan Garlic Herb, or Honey Garlic Dijon Salmon to see what I mean! And of course this blackened salmon is insanely delicious, you have to try them all!
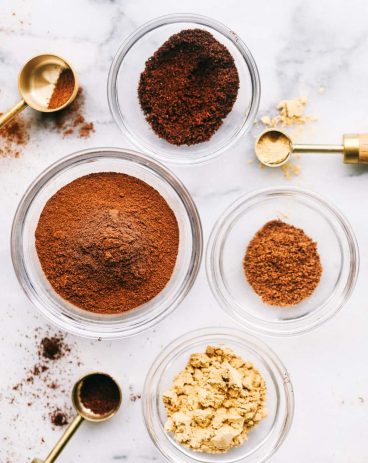
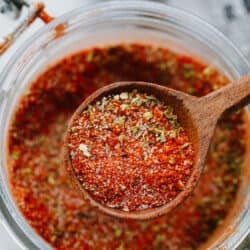
Ingredients For Easy Blackened Salmon
With only three ingredients this could not be more simple. It is perfect for a busy weekday or a lazy weekend. The bold blackened spice is the perfect blend for the salmon.
- Salmon: Look for bright vibrant salmon fillets for the fresh flavor.
- Olive Oil: Olive oil is one of the best complementary oils for salmon as it won’t influence the flavor.
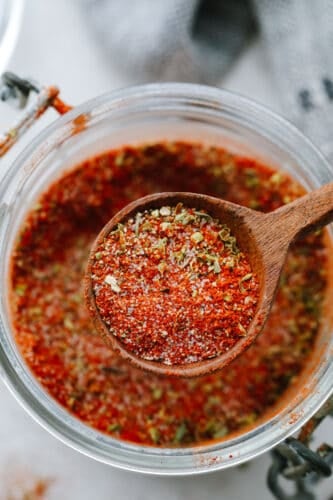
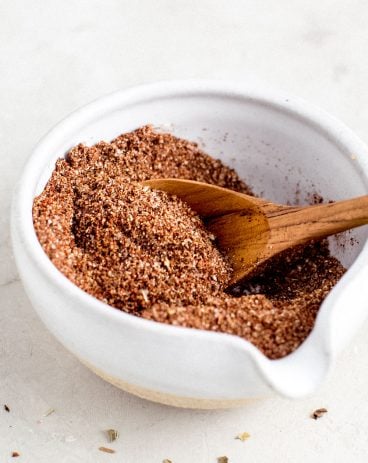
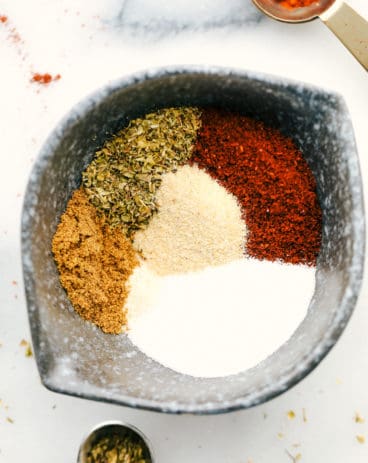
- Blackened Seasoning: You can use a premade seasoning if you want but the best flavor will come from homemade. It’s super easy and you can customize it. Get the recipe here.
How to Make Bold Flavored Salmon
The most important thing to remember about salmon is that you do not want to overcook it. Watch it carefully because it can go from not done to overdone in minutes. This is truly a divine dish!
- Prep the Salmon: Preheat a medium sized non stick skillet to medium high heat. Rub the salmon with olive oil. Rub about 1 teaspoon of blackened seasoning on the salmon.
- Cook: Place the salmon skin side up and cook for about 3-4 minutes. Carefully flip and cook for an additional 3-4 minutes or until the salmon is opaque and flakes easily.

Tips For The Best Blackened Salmon
Don’t fret, blackened does not mean burnt, it’s actually a cooking technique. The blackening occurs when the oil and the herbs hit the heat and create a super flavorful toasted crust on the salmon. It’s amazing how tender and juicy it will still be on the inside.
- Covering: There are two things that have to happen to create the unique flavor of anything blackened. The first is that you want to completely coat the fish, chicken or whatever you are using. This will make sure the intense flavor is in every bite and it will be less likely to stick to the pan.
- Fat: The second important thing is you need the oil or if you choose, butter to adhere the spices to the meat as well help it create that one -of-a-kind flavor and crust.
- Keep the Salmon Cold: Before you are ready to cook, make sure your salmon is good and cold. This will help the oil, or butter and herbs stick to the salmon better.
- Use a HOT Skillet: I prefer to use a cast iron skillet for it’s even distribution of heat, any good heavy bottomed pan will work. Having it be extra hot will ensure the salmon blackens evenly and doesn’t stick.
- Don’t Move it: Once you place the salmon in the skillet, do not move it for the first few minutes. This will ensure the spices stay on the salmon and that it doesn’t stick to the pan.

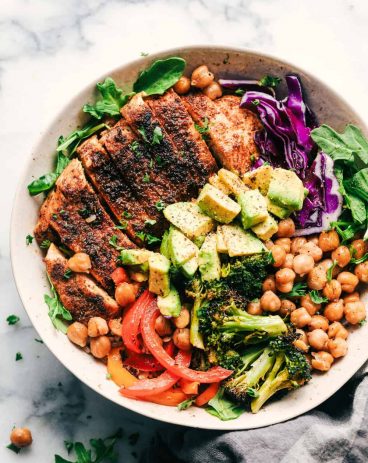
What to Serve with Blackened Salmon
Salmon is a rich fish, that can seem heavy to some, so keeping the side dishes lighter help balance this heavenly meal. Think salads, pasta or rice and vegetables. All of these are great options with this luscious dinner. Round it out with a light but delectable dessert for a weekday meal that will help everyone get to the weekend.

Salads
Summer Corn Salad

Salads
Wedge Salad
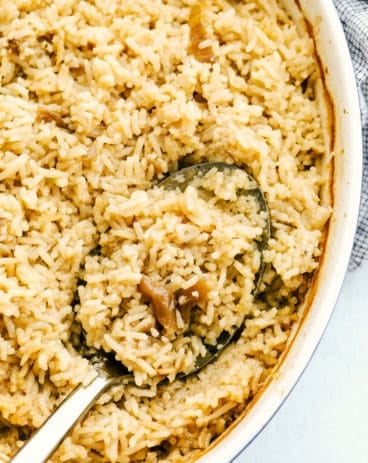
Side Dishes
Stick of Butter Baked Rice
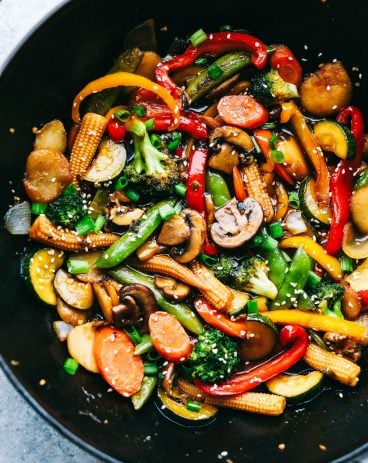
Dinner
Easiest Vegetable Stir Fry
Storing Leftover Salmon
Truly this is best the day it is made, but it will keep for up to a day in the fridge. The hardest part is not drying it out when you reheat it. Use a skillet over medium-low heat and cook just till it’s warmed through. Leftovers will go awesome tossed with pasta, rice, salads, or even a taco.

More Bold Flavored Recipes


Blackened Salmon
Ingredients
- 1 pound salmon
- 1 Tablespoon Olive Oil
- Recipe for Blackened Seasoning
Instructions
-
Preheat a medium-sized nonstick skillet to medium-high heat. Rub the salmon with olive oil. Rub about 1 teaspoon of blackened seasoning on the salmon.
-
Place the salmon skin side up and cook for about 3-4 minutes. Carefully flip and cook for an additional 3-4 minutes or until the salmon is opaque and flakes easily.
Nutrition
from The Recipe Critic https://ift.tt/3DLMesZ
https://ift.tt/3yIPP7o