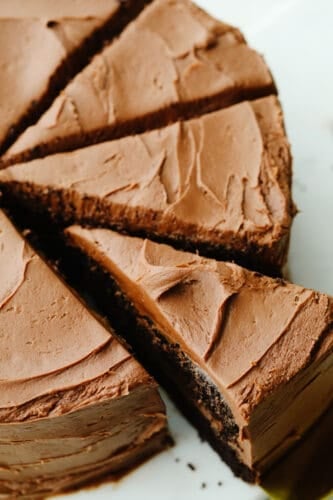
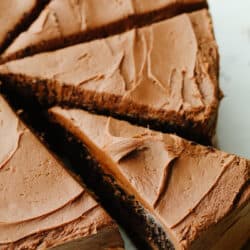
Chocolate cake is a classic, must-have recipe for every occasion! It is moist and delectable and the chocolate flavor is absolutely incredible!
The recipe is a MUST try. You will never have to go searching for a chocolate cake recipe again because this one is PERFECT! If you are a chocolate lover like me then you should for sure try these Chocolate Cupcakes, Chocolate Lasagna, and this delicious Chocolate Hummus!

Delicious, Layered Cake!
Chocolate cake is absolutely divine in my book. I have a high standard for chocolate cake because there are SO many recipes out there to compare but… This one definitely ranks at the top! As a total lover of all chocolate desserts, I am picky! I always look for a cake that is moist, doesn’t come apart when frosting, and of course, tastes absolutely perfect! This chocolate cake is a fantastic combination of sweet and chocolatey without being so overwhelming that you can only eat one bite! Actually, with this cake, it’s the opposite! You may not be able to stop even after one whole slice!
Not only does this cake taste amazing but it is absolutely gorgeous to look at! The layers make this cake look so classic! The frosting swirled on the cake is perfectly light and sweet. Everyone loves a good chocolate cake so it can be made for any event, big or small! This makes it an easy go-to dessert! My kids request this at birthdays year-round and it’s a staple at any family party! Once you try this recipe, you will never go looking for a chocolate cake recipe again!
Ingredients in the Perfect Chocolate Cake
Even though you are making this cake from scratch (throw those cake mixes away!), It is not hard and the ingredients are all stuff that you have heard of before! See the recipe card below for a list of exact measurements!
- Vegetable oil: You can use butter but it will change the texture! So I recommend vegetable oil if you can!
- Warm coffee: This enhances the chocolate flavor (does not make it taste like coffee though!) But if you would rather, buttermilk or warm water works too!
- Eggs: This will bind the batter together!
- Vanilla: Gives a flavor to the sweetness!
- Flour: This creates a base to mix all of the ingredients together!
- Sugar: This balances out the cocoa powder making the overall taste sweet!
- Unsweetened cocoa powder: Make sure you do NOT use Dutch process
- Baking soda: This makes the cake rise and become fluffy!
- Salt: Enchances all of the ingredient flavors!
Chocolate Frosting Ingredients
- Cream cheese: I always like to let my cream cheese sit out to get softened. This makes it easier to mix in!
- Butter: Use unsalted, softened butter
- Vanilla extract: This adds flavor!
- Salt: Salt enhances flavors and balances the sweetness.
- Powdered sugar: Using this instead of granulated sugar makes the frosting smooth! It dissolves very easily creating the best texture!
- Unsweetened cocoa powder: This is what gives your frosting a chocolate look and taste.
How to Make Homemade Chocolate Cake
This will take a little bit more time than a box cake but trust me, it will pay off! There is something about this cake that tastes so good, that you won’t mind a few extra steps in the process to get there!
- Prep oven and pans: Preheat the oven to 325°. Spray two 8 inch round cake pans with cooking spray. Add parchment rounds to the bottom of the pans and spray the parchment with cooking spray. Dust the inside of the pans with flour and tap out the excess. Set aside.
- Whisk wet ingredients: In a large bowl whisk together the vegetable oil, warm coffee, eggs, and vanilla until combined.
- Mix dry ingredients and combine: In a medium bowl sift together the flour, sugar, unsweetened cocoa powder, baking soda and salt. Add the dry ingredients to the wet ingredients and gently whisk together until fully combined.
- Bake and cool: Fill the two pans evenly and bake for 30-35 minutes, until the center of the cake springs back lightly when pressed on, or a toothpick comes out clean. Allow the cake to cool for 10 minutes in the pan before inverting the pan on a cooling rack to finish cooling.
- Wrap and chill: Once completely cooled, wrap the cakes in two layers of plastic wrap and place in the fridge for at least 12 hours. You may put the wrapped cakes in the freezer instead of the fridge, this will result in a much more chilled cake and will be easier to work with if you plan on decorating your cake with more detail. Prepare the frosting while the cake is chilling.
- Frost: When you are ready to frost your cakes, remove them from the fridge or freezer and take off the plastic wrap. Place the bottom layer upside down on the plate, cake stand or cake board. Spread an even, thick layer of frosting over the top of the cake. Be sure to frost just over the edge of the cake so there is no gap in your frosting. Place the second cake upside down on top of the first and make sure it’s even all around with the bottom layer. Smooth out the frosting on the sides with a knife or an offset spatula. Spread a thick layer of frosting over the sides and the top and smooth. Use a piping bag to pipe the borders and details. Chill until ready to serve.
Chocolate Cream Cheese Frosting
- Mix and incorporate: In the bowl of a mixer use the paddle attachment to beat the cream cheese and unsalted butter together until smooth. Scrape down the bowl and beat again for about 10 seconds to make sure everything is completely incorporated.
- Add the rest of ingredients: Add the vanilla, salt, and powdered sugar. Mix on low until the powdered sugar is moistened enough for you to increase the speed to medium high without making a mess. Beat until incorporated.
- Mix slowly until it’s a lighter color: Scrape down the bowl again and add the cocoa powder. Mix on low until mostly combined and then increase the speed to medium high and beat for 1-2 minutes until the color lightens and the frosting is nice and fluffy.

Tips For Baking the Best Chocolate Cake
Chocolate cake is a classic dessert that can be used for so many occasions, from birthday parties to holidays or even just when the craving hits! Use these tips to make easy chocolate from scratch and you’ll never want to go back to a box mix!
- Vegetable oil: Using vegetable oil instead of butter in this recipe will keep the cake very moist. If you would like to substitute the oil for butter you totally can! Just know that it will change the texture.
- Use room temperature ingredients: Having all of your wet ingredients at room temperature takes a little foresight, but will yield a much smoother batter. The ingredients will blend better and result in a lighter, fluffier cake.
- Coffee: When using coffee in this cake, don’t worry, there won’t be any coffee flavor! The coffee enhances the flavor of the chocolate and makes for a deeper, richer flavor. If you don’t want to use it then you can substitute it for buttermilk or even hot water!
- Choose the right cocoa powder: Make sure to use regular cocoa powder in order to activate the baking soda in the recipe. If you use Dutch process cocoa powder instead, the cake won’t rise! That’s because Dutch process cocoa powder has been alkalized and won’t have the proper reaction with the baking soda.
- Fully chilled: It is much easier to frost chilled cakes than warm or room temperature cakes. The cake will be more firm and have less crumbs when chilled! Protect the cooled cakes with at least two layers of plastic wrap and then either refrigerate or freeze the cake layers for at least 12 hours before frosting.

Variations to Try
The best part about chocolate cake is that you can switch it up SO easily and make it totally new each time! Here are a few ideas for you to try!
- Frosting: An easy way to change this cake up is to change the frosting. If double chocolate is too much then you can leave out the cocoa powder in the frosting.
- Add toppings: If you want to change up the look OR the taste, try adding some different things to the outside of the cake! I love strawberrys, crushed nuts, andes mints or any kind of fun sprinkles or m&m’s for a casual party!
- Mix-ins: You can not only add things on top but you could add things to the batter too. I love walnuts but you could add in chocolate chips (of any flavor!) or bits of candy bars or cookies to switch things up!

How Do I Store Chocolate Cake?
Chocolate cake is great for making ahead of time and storing in the fridge or even in the freezer for when you need it! Follow these tips for leftovers or make it ahead of time for all of your celebrations!
Refrigerator: Unfrosted cake layers can be stored in the fridge for up to a week. Be sure to wrap each layer separately in at least two layers of plastic wrap. Frosted chocolate cake can be stored in the fridge in an airtight container for up to 7 days.
Freezer: Unfrosted chocolate cake layers can be stored in the freezer for up to 3 months. Just like in the fridge, layers should be wrapped separately in at least two layers of plastic wrap as well as a layer of aluminum foil on top. Once my layers are completely frozen, I like to transfer them into a large freezer ziplock bag to help keep out freezer burn. The layers can be frosted frozen or you can let them thaw in the fridge before frosting!

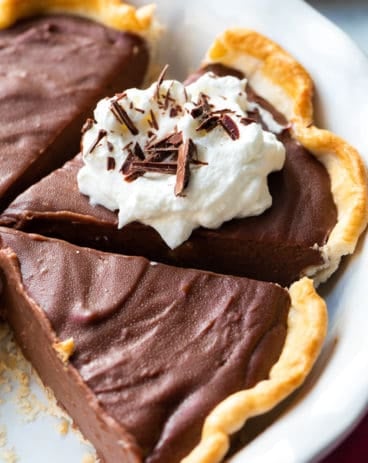
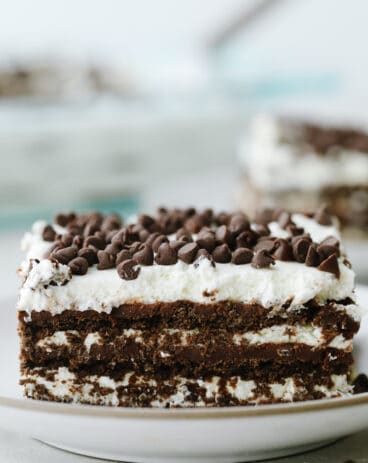
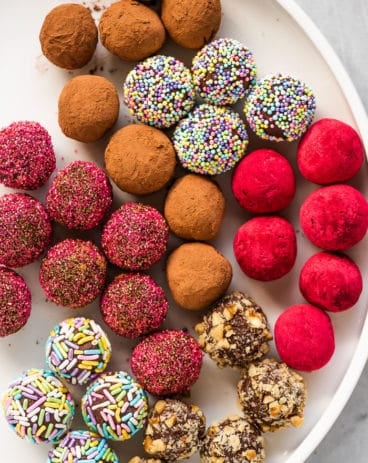
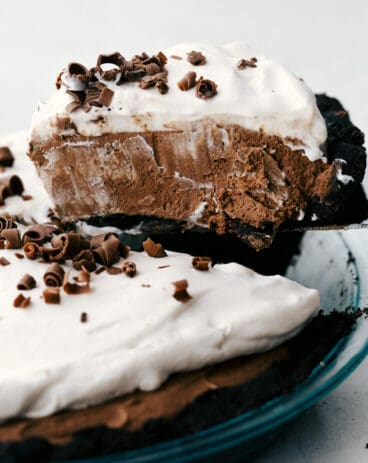
More Chocolate Desserts to Try
Desserts
Chocolate Pie
Desserts
Chocolate Icebox Cake
Desserts
Chocolate Truffles
Desserts
No-Bake Chocolate Pie
Chocolate Cake
Ingredients
- ¾ cup vegetable oil
- 1 1/4 cup warm coffee
- 2 large eggs
- 2 1/4 teaspoons vanilla
- 2 cups all purpose flour
- 1 1/2 cup granulated sugar
- ¾ Cup unsweetened cocoa powder not Dutch process
- 2 Teaspoons baking soda
- 1 teaspoon salt
Chocolate Cream Cheese Frosting
- 8 Ounces Cream Cheese softened
- ½ Cup unsalted Butter softened
- 1/2 teaspoon vanilla extract
- ½ Teaspoon Salt
- 4 Cups powdered sugar
- ½ Cup Unsweetened Cocoa Powder
Instructions
-
Preheat the oven to 325°. Spray two 8 inch round cake pans with cooking spray. Add parchment rounds to the bottom of the pans and spray the parchment with cooking spray. Dust the inside of the pans with flour and tap out the excess. Set aside.
-
In a large bowl whisk together the vegetable oil, warm coffee, eggs, and vanilla until combined.
-
In a medium bowl sift together the flour, sugar, unsweetened cocoa powder, baking soda, and salt. Add the dry ingredients to the wet ingredients and gently whisk together until fully combined.
-
Fill the two pans evenly and bake for 30-35 minutes, until the center of the cake springs back lightly when pressed on, or a toothpick comes out clean. Allow the cake to cool for 10 minutes in the pan before inverting the pan on a cooling rack to finish cooling.
-
Once completely cooled, wrap the cakes in two layers of plastic wrap and place them in the fridge for at least 12 hours. You may put the wrapped cakes in the freezer instead of the fridge, this will result in a much more chilled cake and will be easier to work with if you plan on decorating your cake with more detail. Prepare the frosting while the cake is chilling.
-
When you are ready to frost your cakes, remove them from the fridge or freezer and take off the plastic wrap. Place the bottom layer upside down on the plate, cake stand, or cake board. Spread an even, thick layer of frosting over the top of the cake. Be sure to frost just over the edge of the cake so there is no gap in your frosting. Place the second cake upside down on top of the first and make sure it’s even all around with the bottom layer. Smooth out the frosting on the sides with a knife or an offset spatula. Spread a thick layer of frosting over the sides and the top and smooth. Use a piping bag to pipe the borders and details. Chill until ready to serve.
Chocolate Cream Cheese Frosting
-
In the bowl of a mixer use the paddle attachment to beat the cream cheese and unsalted butter together until smooth. Scrape down the bowl and beat again for about 10 seconds to make sure everything is completely incorporated.
-
Add the vanilla, salt, and powdered sugar. Mix on low until the powdered sugar is moistened enough for you to increase the speed to medium-high without making a mess. Beat until incorporated.
-
Scrape down the bowl again and add the cocoa powder. Mix on low until mostly combined and then increase the speed to medium-high and beat for 1-2 minutes until the color lightens and the frosting is nice and fluffy.
Notes
Nutrition
from The Recipe Critic https://ift.tt/3nuE8PA
https://ift.tt/3nBMKnT