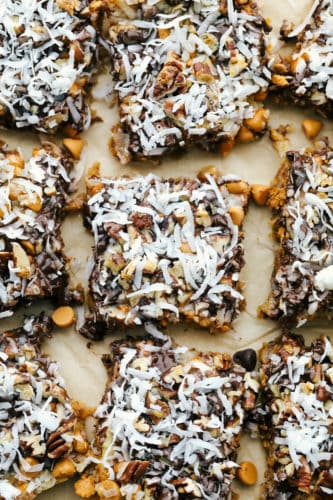
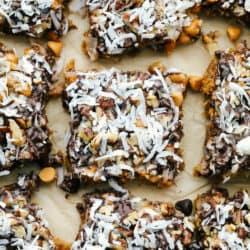
7 Layer Magic Bars are loaded with layers of rich flavors from coconut, pecans, butterscotch, and chocolate. You will be amazed how easy it is to create a bar this delicious where every single bite is ooey gooey perfection!
If you love layers of rich flavors, also try my Skor Toffee Chip Bars and S’mores Bars. These satisfying and easy to make bars are irresistible!

7 Layer Magic Bars
These incredibly delicious bars are just what the name says, magic. They definitely disappear! They will fly off the cooling rack and become a family favorite instantly. Super easy to make and impossible to mess up, these are a huge hit and are an easy make ahead dessert.
The contrast of textures in each 7 layer bite is perfect. The pecans and the graham cracker crust add great crunch, while the coconut, butterscotch and chocolate chips are melty and soft. Coconut, chocolate and butterscotch is a new favorite flavor combo of mine because the richness of each bite is unbelievable. These magic bars are a must try dessert this summer!
What’s In 7 Layer Magic Bars?
Each layer of the 7 layer bar is jam packed with flavor and incredible texture. It is amazing how well these ingredients come together to make the perfectly balanced, rich, and crave-worthy bar.
- Graham crackers: Crush graham crackers in a bag with a rolling pin or with a food processor to create the perfect bottom layer.
- Butter: Melted butter will hold the crust together.
- Shredded coconut: Adds tropical and nutty sweetness.
- Butterscotch chips: Adds in hints of rich butter and brown sugar.
- Semi-sweet chocolate chips: This bittersweet chocolate is the perfect balance to the other sweeter flavors.
- Chopped nuts: I used pecans for a nutty and buttery flavor and crunch.
- Sweetened condensed milk: Pour this creamy and thick sugar over the top of the layered bars.
How to Make Magic Bars:
It is easier than you think to bake these magic bars! Simply layer your ingredients in your pan starting with your graham cracker crust. Then sit back and enjoy the sweet smell of a fresh homemade dessert in the oven.
- Prep: First preheat oven to 350 degrees. Then, line a 9×13 inch pan with aluminum foil or parchment.
- Make graham cracker crust: In a small bowl combine graham crackers and butter. Once combined, press firmly into the bottom of your prepared pan.
- Layer remaining ingredients: Layer with coconut, butterscotch chips, semi sweet chips, and chopped nuts. Then, pour the sweetened condensed milk evenly over the top.
- Bake: Place bars in preheated oven and bake for 25-30 minutes or until golden brown. Let bars cool before serving.

Variations of Cookie Bars:
Thank goodness for recipes like this one that are easy to assemble and made with well-known ingredients. Since this recipe is so simple, you have freedom to make it your own. Here are a few ideas to take this versatile recipe and adapt it to fit your family.
- Pecans: Leave nuts out of the bars completely and you will still have a delicious allergy friendly dessert bar everyone will rave about. Or, if you don’t prefer pecans, try walnuts or almonds.
- Graham cracker crust: Trade the tried and true graham cracker out for pretzels, chocolate graham crackers or even a different crumbly cookie. For example a Nilla wafer or chessman cookie.
- Chips: Instead of butterscotch and semi-sweet chocolate, consider peanut butter chips, white chocolate chips or milk chocolate chips.
- Toppings: Add on a drizzle of chocolate or caramel syrup to the top of the bars.
- Additional layers: Insert dried fruit, marshmallows or small candies like Reese’s Pieces for even more depth of flavor!
Storing your Magic Bars:
Making these favorite bars ahead of time is simple and easy. Let the bars cool completely before storing them in an airtight container. They will remain good at room temperature for several days, but will last up to 5 days if refrigerated. If making these in bulk, you can freeze them for up to 3 months!

More Dessert Bar Recipes:
- No Bake Butterscotch Bars
- To Die For S’Mores Bars
- Snickerdoodle Bars
- Cherry Pie Bars
- Best Ever Pecan Pie Bars
7 Layer Magic Bars
Ingredients
- 1 1/2 cups graham crackers crushed
- 1/2 cup butter melted
- 1 cup shredded coconut
- 1 cup butterscotch chips
- 1 cup semi sweet chocolate chips
- 1 cup chopped nuts I used pecans
- 1 14 ounce can sweetened condensed milk
Instructions
-
Preheat oven to 350 degrees. Line a 9x13 inch pan with aluminum foil or parchment. In a small bowl combine graham crackers and butter. Press firmly into the bottom of your prepared pan.
-
Layer with coconut, butterscotch chips, semi sweet chips, and chopped nuts. Pour the sweetened condensed milk evenly over the top.
-
Bake for 25-30 minutes or until golden brown. Let bars cool before serving.
Nutrition
from The Recipe Critic https://ift.tt/2VVgBZF
https://ift.tt/2ZN5jaW