बुधवार, 7 अक्तूबर 2020

Korean Beef Bulgogi

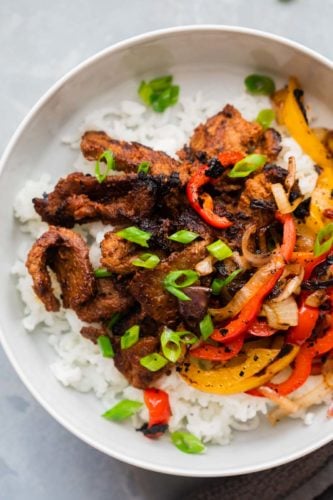
Korean Beef Bulgogi served over rice in a bowl with grilled onions and bell peppers

Korean Beef Bulgogi is easier than you think and doesn’t need any fancy ingredients. It’s a quick dinner that’s ready in 45 minutes with only 10 minutes of actual prep and cook time.

We have a lot of beef recipes that make for fantastic dinner options. Check out Thai Basil Beef, Slow Cooker Korean Beef, One Pot Beef Stroganoff, Instant Pot Beef Stew, Garlic Herb Butter Tenderloin.
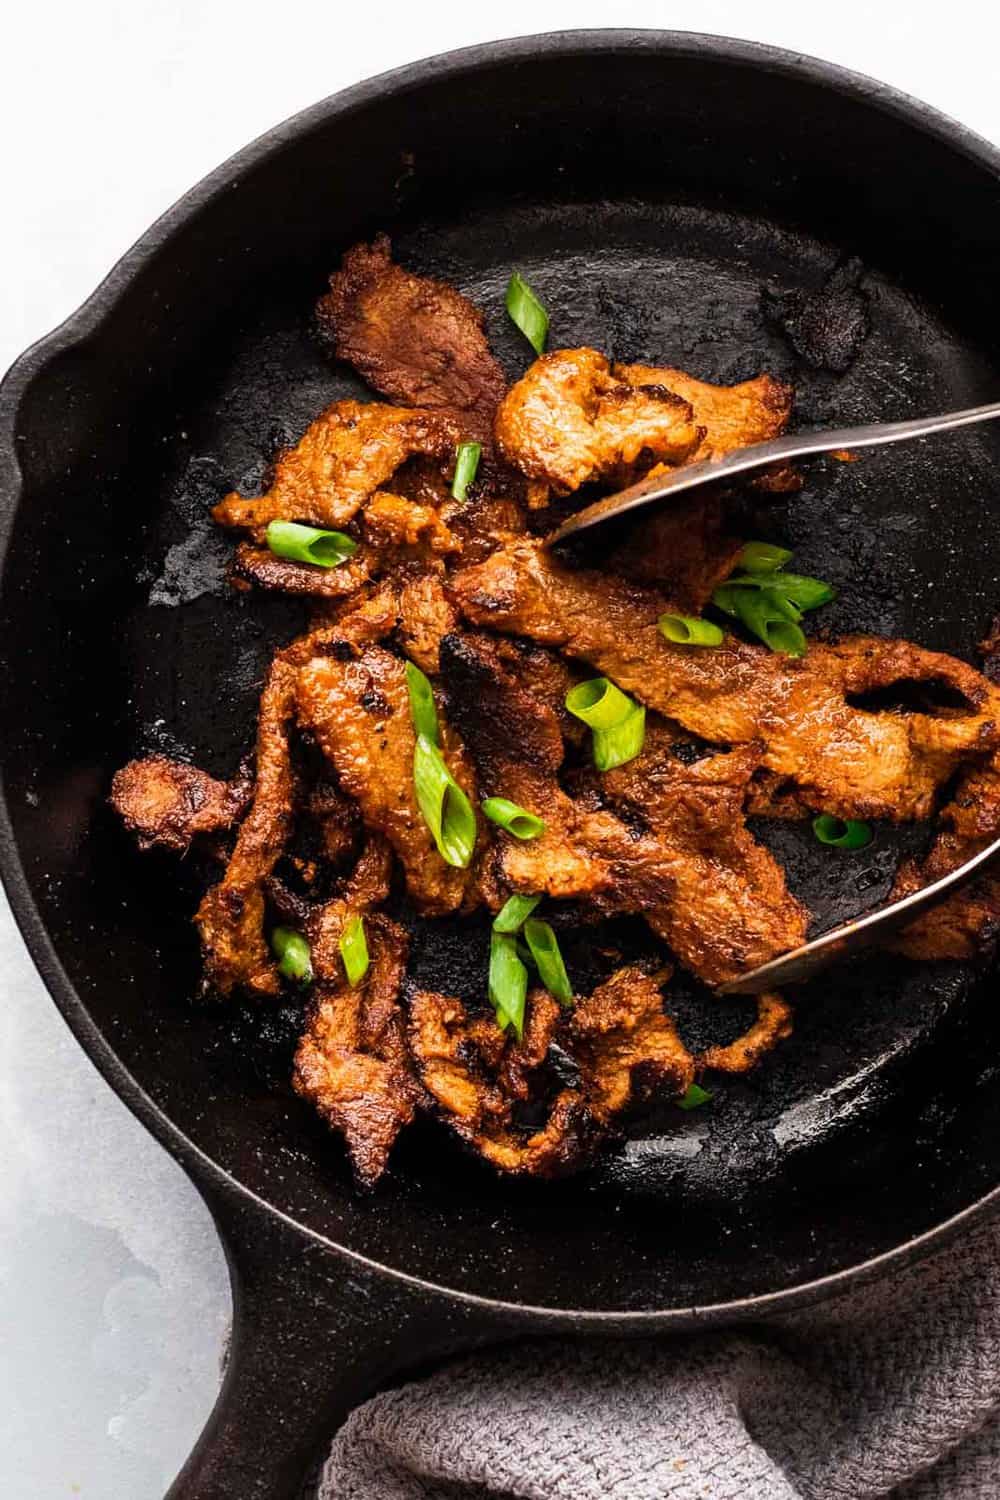
Korean Beef Bulgogi on a grill pan

Korean Beef Bulgogi

If you are looking to switch things up for dinner with a recipe that’s easier than it sounds, this Korean Beef Bulgogi is it. We first had bulgogi at our neighbourhood Korean restaurant and have always been in love with it. It’s made with both beef and pork and I love the beef version. It’s a part of the amazing Korean BBQ and if you are ever lucky enough to attend one, the smell of sizzling Korean Beef Bulgogi is irresistible.

When I wanted to make this at home, I expected a long, complicated recipe with tons of ingredients that are hard to find. Because well, the flavours are so complex. But honestly it needs about ten ingredients and I always have them in my pantry, especially if you love cooking Asian food.

Bulgogi Marinade

It starts with the marinade. A lot of recipes ask you to marinade overnight but if you are using beef, 30 minutes is enough in my opinion which is what makes this so easy in my book. All the ingredients for the marinade are blended in a food processor. We are using Pear (it’s a great meat tenderiser and also adds flavour and sweetness), Onions, Ginger, Garlic, Dark Soy Sauce, Toasted Sesame Oil, Gochujang or Sriracha, Salt and Sugar. Gochujang is the only ingredient that’s available at speciality Korean stores, but you can easily substitute it with sriracha or even chilli flakes.

Cooking Korean Beef Bulgogi

You can either cook this on a grill or on the stove. The slices of beef are really thin so this takes only 2-3 minutes to cook. Make sure your grill or skillet is super hot and you have everything ready.

If cooking this on a skillet, I recommend using a Cast Iron skillet. Heat it well till it’s almost smoking, add a little oil and add a few slices at a time, making sure not to crowd the pan or the beef will start steaming and you won’t get that lovely caramelization and smoky flavor that we are looking for.
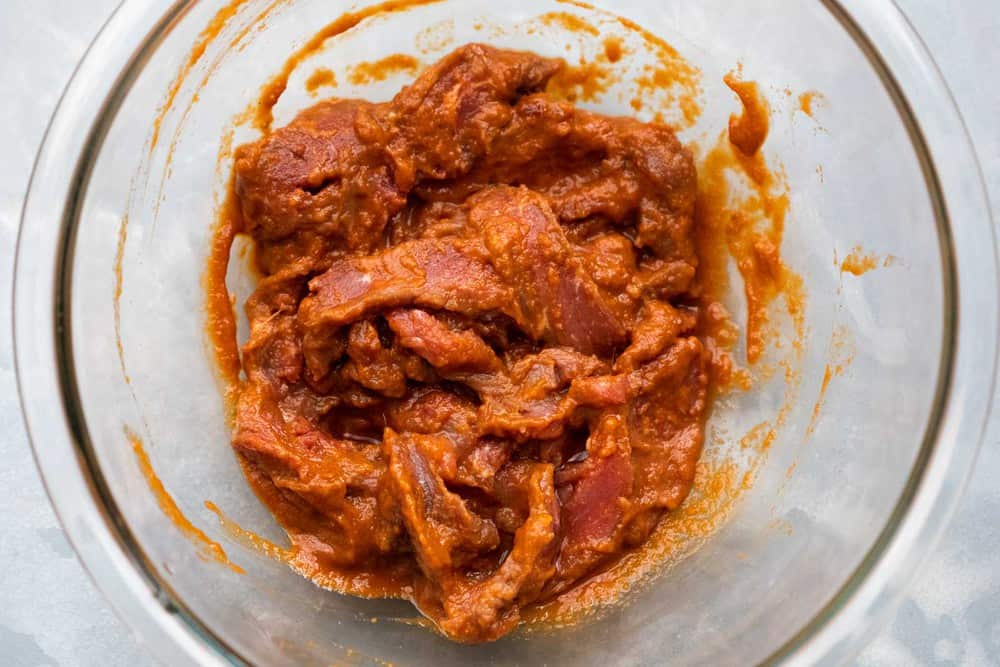
Marinated beef bulgogi in a bowl

Best Cut of Meat

I recommend using a good cut of meat for this recipe because the beef is cooked really quickly and sliced thinly. A cut with good marbling is what we need here. I prefer using Rib Eye which is a tad expensive but it’s so worth it. Its juicy, has marbling and is suitable for fast cooking on high heat.

While cutting meat for beef bulgogi, wrap the ribeye in cling film and freeze it for an hour. This helps firm up the meat and makes it easy to slice. Then slice it thinly against the grain. Toss these slices in the marinade and let this sit covered for 30 minutes.

Serving Suggestions

We love serving Korean Beef Bulgogi over steamed rice or sticky rice. Add any of these to your bowl to add more colour and flavour:

  • Grilled onions and bell peppers
  • Kimchi
  • Poached or Fried Egg
  • Red cabbage, cucumbers for some crunch
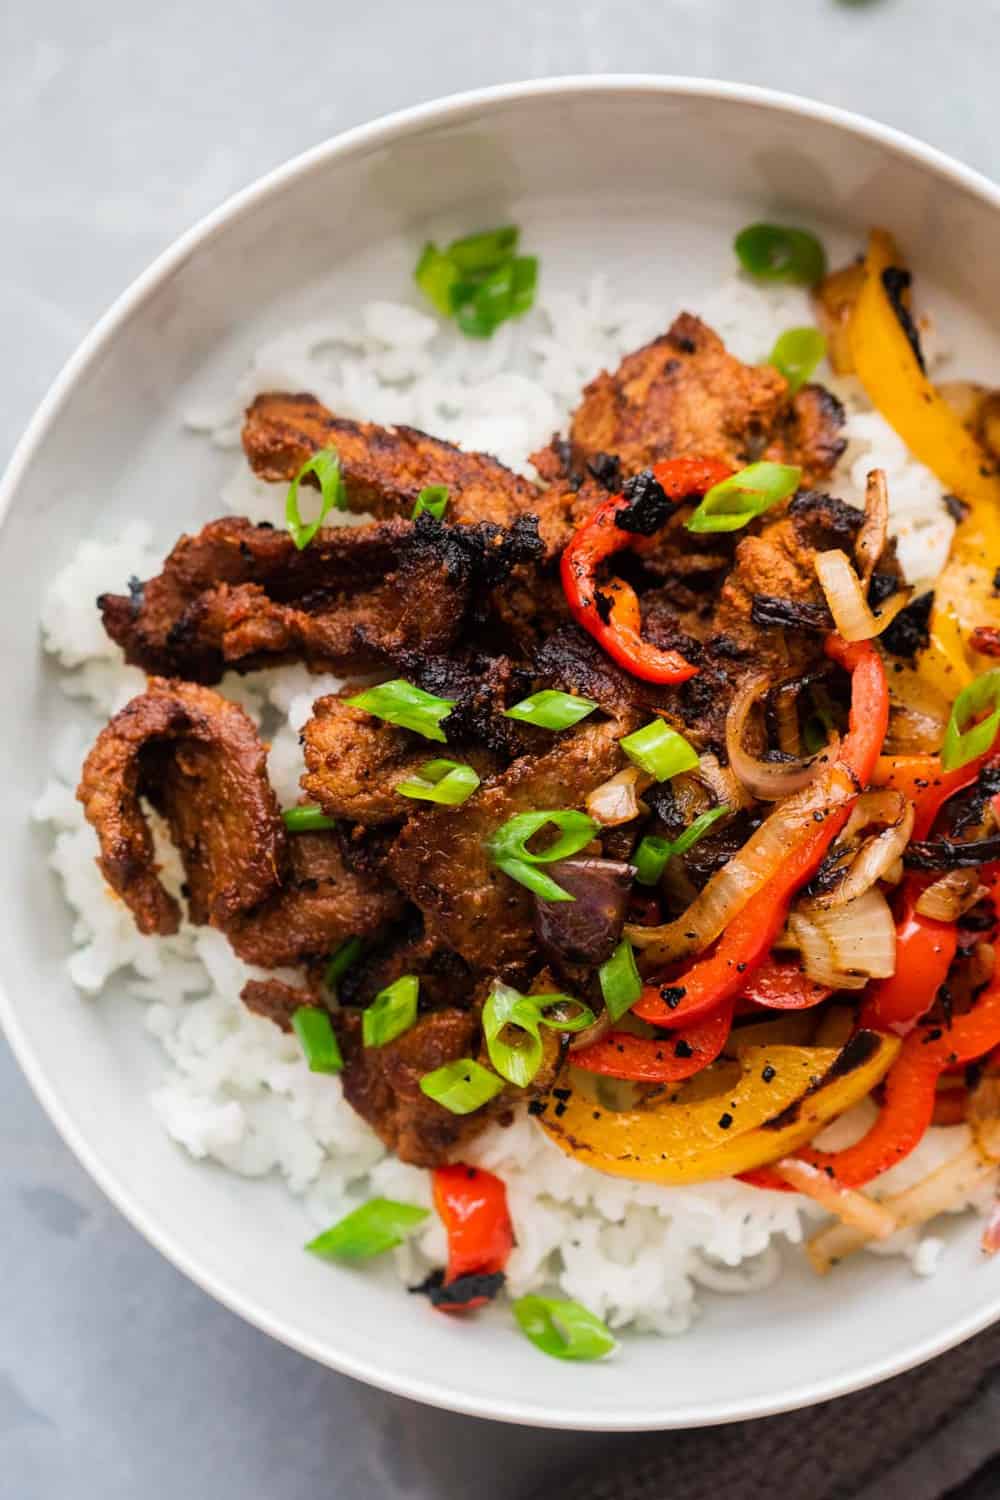
Korean Beef Bulgogi served over rice in a bowl with grilled onions and bell peppers

More Korean Recipes

Korean Beef Bulgogi served over rice in a bowl with grilled onions and bell peppers
Print

Korean Beef Bulgogi

A quick, easy recipe that's got some incredible flavours. This Korean Beef Bulgogi is smoky, juicy and just what weeknight dinners should be made of.
Course Dinner, Main Course
Cuisine Korean
Keyword korean beef bulgogi
Prep Time 5 minutes
Cook Time 10 minutes
Total Time 15 minutes
Servings 4 people
Calories 613kcal

Ingredients

  • 2 pounds Ribeye or top sirloin sliced into 2mm thick slices
  • 2-3 tablespoons Oil

Marinade

  • 1/2 Onion peeled
  • 1/2 Pear peeled
  • 5 tablespoons Dark Soy Sauce
  • 2 teaspoons toasted Sesame Oil
  • 2 tablespoons Brown Sugar
  • 5 Garlic Cloves
  • 1 inch piece Ginger
  • 2 tablespoons Sriracha
  • 1/2 teaspoon Salt
  • 1/2 teaspoon ground Black Pepper

Instructions

  • Blend all the ingredients under marinade till smooth.
  • Marinate the sliced rib eye in the blended mixture for 30 minutes.
  • Heat a large cast iron skillet till smoking. Add two teaspoons oil. Add a portion of beef and spread it out quickly, making sure not to overcrowd the pan. Cook for a minute on each side. The high heat will ensure the beef gets charred. Remove on a plate. Repeat till all the beef is cooked. Let it rest for five minutes.
  • Serve with rice and your choice of veggies and a poached egg

Nutrition

Calories: 613kcal | Carbohydrates: 13g | Protein: 49g | Fat: 41g | Saturated Fat: 15g | Cholesterol: 138mg | Sodium: 1840mg | Potassium: 726mg | Fiber: 1g | Sugar: 9g | Vitamin A: 34IU | Vitamin C: 8mg | Calcium: 35mg | Iron: 5mg


from The Recipe Critic https://ift.tt/2GFFCTU
https://ift.tt/34wRrUK

मंगलवार, 6 अक्तूबर 2020

Zupas Wisconsin Cauliflower Soup

This delicious Zupas Wisconsin Cauliflower soup is warm, creamy, cheesy and oh so luscious! Save yourself the hassle of going out and make this hearty soup at home.

Making amazing soups at home is the best! Try Creamy Chicken Gnocchi, Award Winning Cheese Burger Soup, and this Slow Cooker Chicken Tortellini Soup.
Creamy, savory cheesy, Zupas Copycat Cauliflower Soup!

Zupas Wisconsin Cauliflower Soup

Me and the hubby usually go on our dates in the afternoons. The boys are both in school and we just have the baby at home with us. And by dates I mean  going to Costco and Cafe Zupas. But we love spending time together and our favorite place to grab some lunch is at Zupas. If you live anywhere near a Zupas then I am sure you have been to one and know of its amazingness! From their amazing paninis, to the salads, to the soup, you can’t go wrong. It is incredible!

Last year my hubby ordered this Wisconsin Cauliflower Soup. He gave me one bite and I was hooked! This probably isn’t a soup that I would have ordered. Now I order it every single time. My hubby has been wanting to make it at home for some time now. He was so excited that I finally made it. Tasted just like Zupas. It was amazing. I love when you can hide a veggie in a soup and the kids still love it! Creamy and delicious and topped with my favorite toppings.

Wisconsin Cauliflower Ingredients

Simple ingredients that when mixed together create a delectable dish. A delicious and creamy cauliflower soup that tastes identical to Zupas!

  • Butter: Adds richness and flavor
  • Onion: Chop the onions well so they sauté faster.
  • Flour: This will help to thicken the soup.
  • Half and Half: Half and half gives you all the creaminess with half the fat
  • Water: Helps to thin the soup to the proper consistency, can use less or more depending on your preference.
  • Chicken Broth: You can substitute vegetable or beef broth here, although I’m a fan of the chicken for this soup.
  • Cauliflower: Depending on the size of your heads, you may need more than one head to get your 2 pounds
  • Sharp Cheddar Cheese: Shred your own cheese to avoid the coating on pre shredded cheeses that can prevent melting.
  • Pepper Jack Cheese:  I love the little kick the pepper jack adds
  • Salt: The cheese may make it plenty salty already, so taste it before adding.
  • Dijon Mustard: Don’t leave this out, you’ll love the little zing it adds to the flavor

Making Zupas Wisconsin Cauliflower Soup

This comes together pretty easily! Pair it with a crusty loaf and a garden green salad, and you’re set.

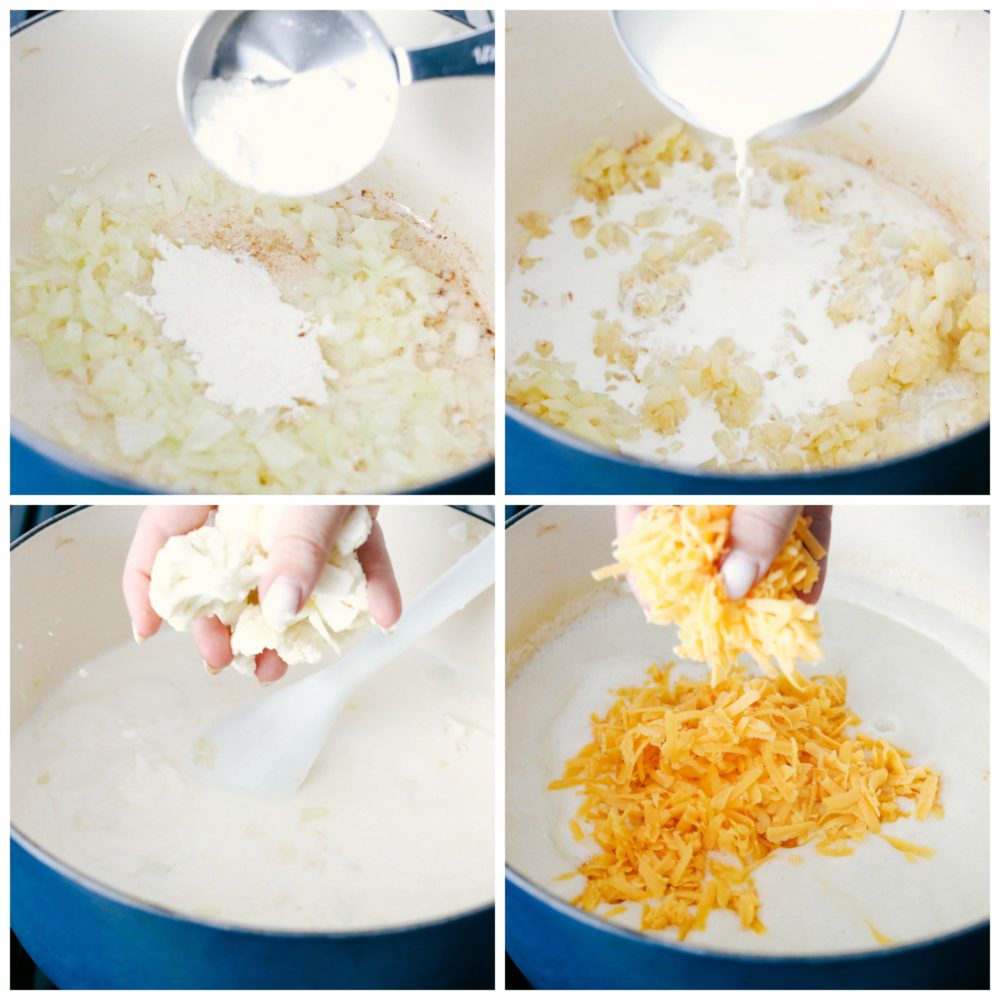
  1. Melt: In a large pot melt the butter and cook the chopped onion until translucent and golden brown. Wisk in the flour. Gradually pour in the half and half, water and broth stirring constantly to remove any flour lumps.
  2. Cook: Add the chopped cauliflower and bring to a boil. Reduce to medium low and cook till cauliflower is tender about 15 min.
  3. Blend: In a blender or using an immersion blender, blend the soup till smooth. Return to the pot
  4. Cheese: Turn the soup up to medium.  Add in the Dijon mustard and cheese stirring till melted. Serve with optional toppings.

Making creamy, savory cheesy, Zupas Copycat Cauliflower Soup!

Tips for Great Wisconsin Soup

You can eat in the comfort in your own home, surrounded by friends and family, curled up in a blanket, or in your favorite pair of lounge pants!

  • Cauliflower: If you can’t find fresh cauliflower you can use frozen. Steam the cauliflower in the microwave according to the package directions and add to the broth. You won’t need to simmer it, just stir it in and then blend it.
  • Texture: Depending on how you like your soup you can leave it a little bit chunky or blend it till super smooth. You can even add in diced potatoes that have been cooked for a little bit more heartiness.
  • Cheese: You experiment with the cheeses, although it’ll give you a bit of a different flavor. Try parmesan or asiago instead of the pepper jack. Sharp white cheddar is also a great cheese to use.
  • Toppings: Top your soup with even more cheese, bacon crumbles, croutons, and green onions.

Creamy, savory cheesy, Zupas Copycat Cauliflower Soup!

Storing Cauliflower Soup

You can eat in the comfort in your own home, surrounded by friends and family, curled up in a blanket, or in your favorite pair of lounge pants!

  • Freezer-Because of the heavy dairy in the soup, it won’t freeze well. It’ll separate when you thaw it and won’t be as creamy or nice.
  • Fridge-This will however keep extremely well in the fridge for up to 5 days. Warm up on the stove top over medium low heat stirring often to avoid curdling.

Creamy, savory cheesy, Zupas Copycat Cauliflower Soup!


More Scrumptious Cauliflower Recipes

Cauliflower is such a tasty way to eat your vegetables!


Print

Zupas Wisconsin Cauliflower Soup

This delicious Zupas Wisconsin Cauliflower soup is warm, creamy, cheesy and oh so luscious! Save yourself the hassle of going out and make this hearty soup at home. 
Course Dinner, Main Course, Soup
Cuisine American
Keyword cauliflower soup, wisconsin cauliflower soup, zupas wisconsin cauliflower soup
Prep Time 10 minutes
Cook Time 20 minutes
Total Time 30 minutes
Servings 6 Servings
Calories 372kcal
Author Alyssa Rivers

Ingredients

  • 3 Tablespoon butter
  • 1 medium onion chopped
  • 1/4 Cup flour
  • 2 Cup half and half
  • 1 1/2 cup water
  • 1 14 1/2 ounce can chicken broth
  • 2 pounds cauliflower chopped into 1 inch pieces
  • 1 1/2 Cup sharp cheddar cheese shredded
  • 1/2 Cup pepper jack cheese shredded
  • 1/2 teaspoon salt
  • 1 teaspoon dijon mustard

Optional Toppings:

  • Green Onions
  • Bacon Bits
  • Additional Cheese

Instructions

  • In a large pot, melt 3 Tablespoons butter and cook the chopped onion until translucent and golden brown. Whisk in the flour. Gradually stir in half and half, water and chicken broth.
  • Add the chopped cauliflower and heat to boiling. Reduce heat to medium low and allow the cauliflower to cook until tender about 15 minutes.
  • In a blender or immersion blender with the center of the top removed to allow steam to escape, blend the soup in batches until smooth. Return to the pot.
  • Heat soup to medium heat and add in dijon mustard and cheese and stir until melted. Serve with optional toppings.

Notes

Updated on October 6, 2020
Originally Posted on October 24, 2014

Nutrition

Calories: 372kcal | Carbohydrates: 17g | Protein: 16g | Fat: 28g | Saturated Fat: 17g | Cholesterol: 83mg | Sodium: 830mg | Potassium: 678mg | Fiber: 3g | Sugar: 4g | Vitamin A: 816IU | Vitamin C: 80mg | Calcium: 404mg | Iron: 1mg


from The Recipe Critic https://ift.tt/3iE8ngW
https://ift.tt/3nlqSuj

Slow Cooker Cheesy Bacon Ranch Potatoes

Perfectly tender and packed with flavor Cheesy Bacon Ranch Potatoes. All of the flavors combined with cheese and bacon to create these perfectly tender and delicious potatoes.

Potatoes are a favorite year round side dish! Try these Parmesan Garlic Roasted Potatoes, Crispy Potatoes with Pesto and Parmesan or Parmesan Garlic Potato Foil Packets for more delicious ways to enjoy potatoes.

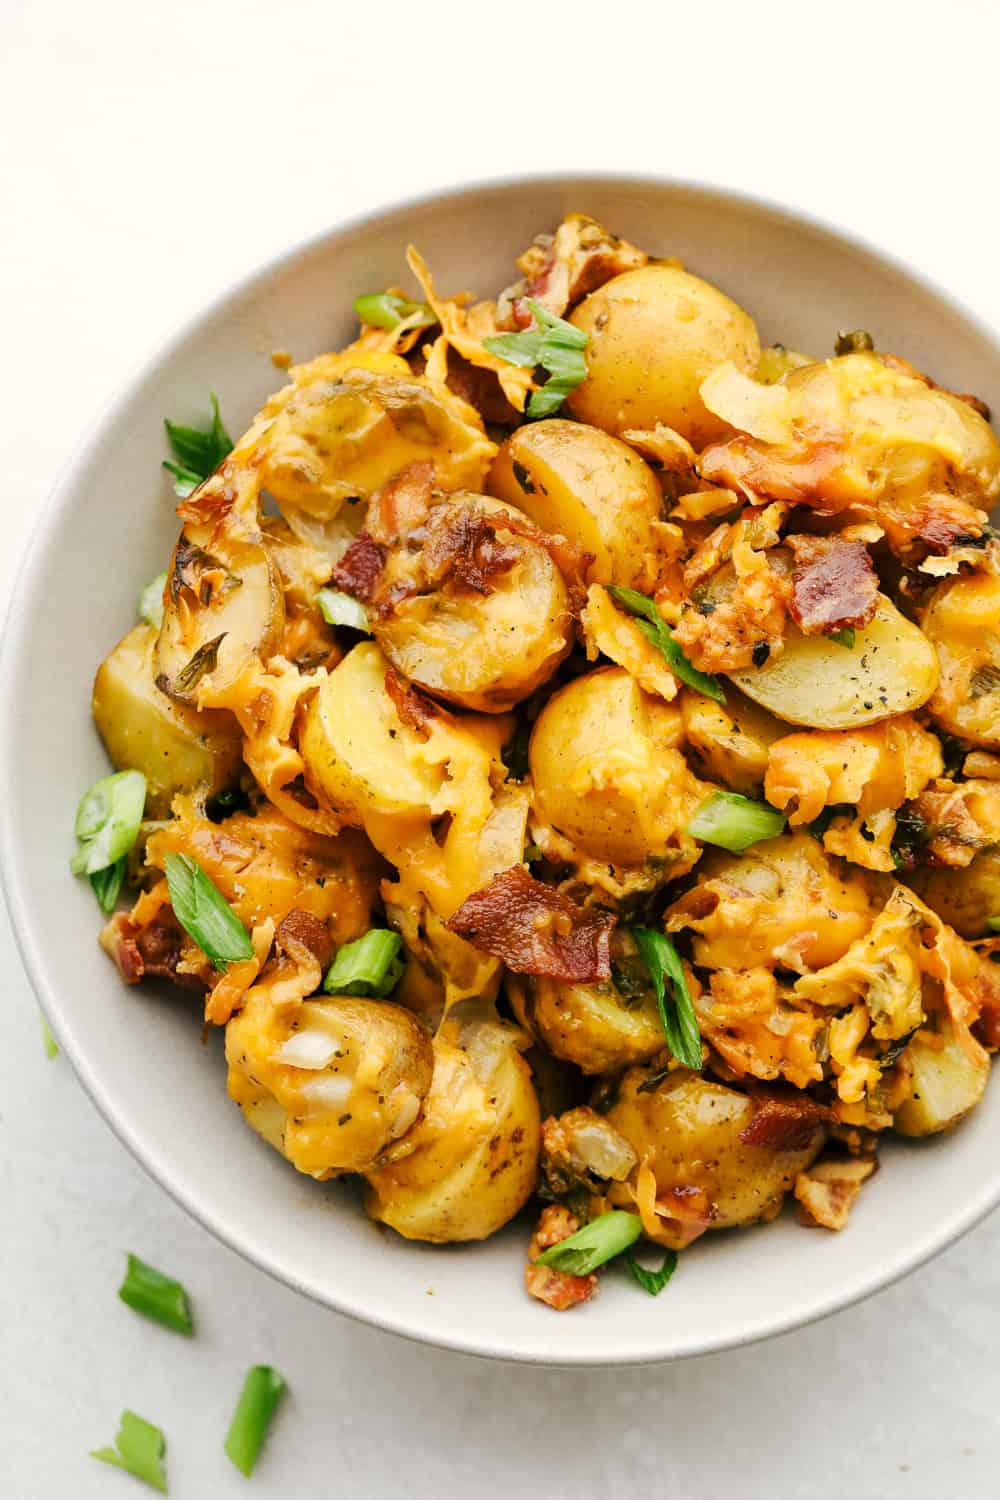
Slow cooker cheesy potatoes in a white bowl.

Cheesy Bacon Ranch Potatoes

This was my first time cooking potatoes in a slow cooker. They reminded me of tin foil dinner potatoes. Perfectly tender and packed with flavor. I can’t even describe how amazing these turned out! A delicious side for any meal! Easy clean up and tender delicious potatoes that are packed with flavor.

All of the flavors combined with cheese and bacon to create these delicious potatoes. While cooking in the slow cooker, they create the best aroma in your house all day. And when it is time for dinner, you just scoop them up and they really make the perfect side!

Cheesy Potato Ingredients

These cheesy bacon ranch potatoes are always a hit. Slow cooked all day to be the most delicious and flavorful potatoes that you will want to have as side to every meal!

  • Potatoes: Red or yellow small potatoes work the best.
  • Onion: Thinly sliced to cook quickly.
  • Bacon: The more the better but I do recommend around 1 pound of bacon.
  • Cheddar Cheese: Shredded and ready to add over top of the raw potatoes.
  • Dry Ranch Seasoning Packet: A simple packet is perfect for sprinkling over top.
  • Butter: Melt the butter to get a crispy outside with a buttery flavor.
  • Green Onions: Garnish over top when ready to serve.

How to Make Slow Cooker Potatoes

Let the slow cooker do the work! Make this into a complete meal with Creamy Garlic Steak Bites with Mushrooms or Juicy Grilled Garlic Turkey Burgers.

  1. Sauté Bacon: Cook the bacon until it is just done but not too crisp. I lined a cookie sheet with foil and baked it at 350 degrees for 16 minutes while I was prepping everything.
  2. Prepare Slow Cooker: Line your slow cooker with aluminum foil. Leave enough to over hang so that you can wrap the potatoes on the top once in the slow cooker.
  3. Layer Potatoes: Spray the inside of the foil with cooking spray and layer half of the potatoes along the bottom. Next layer with half of the bacon, green onions, onion, ranch packet and top with cheese. Repeat the layers and top with cheese reserving 1/2 cup.
  4. Cook on Low: Cover the potatoes with remaining foil. This helps them to steam and cook perfectly. Cook on low for 4-6 hours in your slow cooker. Once finished, top with remaining 1/2 cup cheese and let melt on the top.

Photos of the process of making slow cooker cheesy bacon ranch potatoes.

Tips to Making the Best Slow Cooker Ranch Potatoes

These potatoes are spot on and so simple to make! It is a quick and easy side dish that takes little effort for big flavor.

  • Bacon: Cook the bacon in a skillet on medium-high heat before adding them into the slow cooker. This will give them a crispy and tender flavor. Add in butter or oil for more flavoring.
  • Foil: It is best to use foil in and around the slow cooker. This will help for easy clean up but also for cooking the potatoes evenly.
  • Spray: Make sure to spray the foil before layering the bacon ranch potatoes and cheese. This will prevent the cheese from sticking to the edges.
  • Cutting: When cutting and slicing the potatoes, onions and bacon, cut them evenly and the same size to ensure they all cook at the same level.

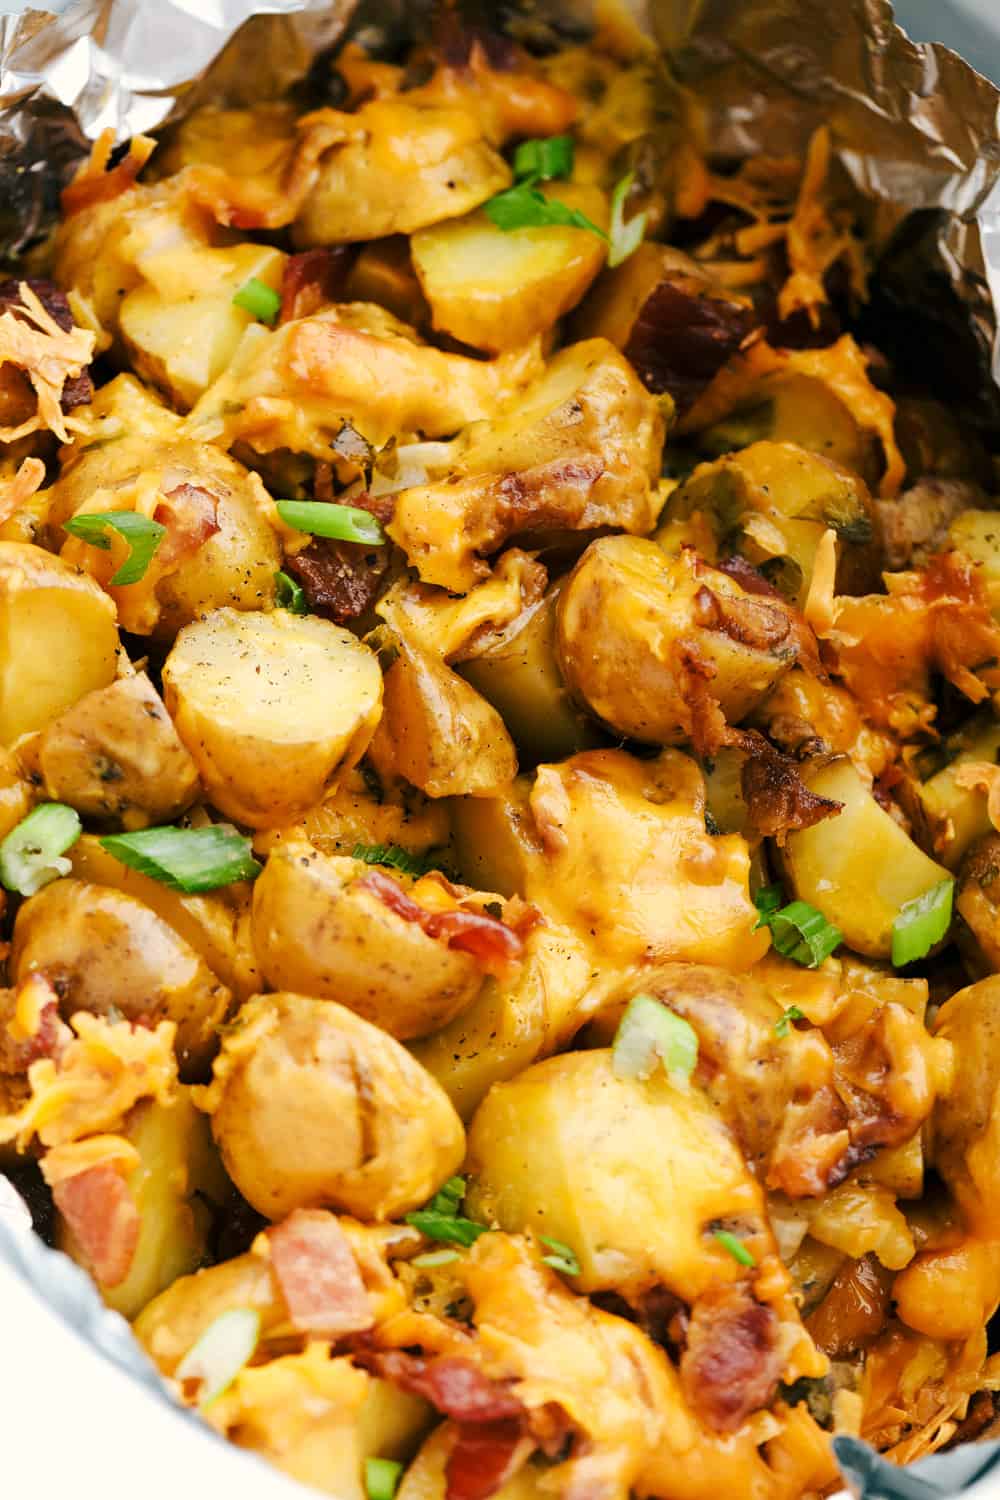
Up close photo of the cheesy ranch bacon potatoes in a slow cooker with foil.


More Quick and Easy Potato Recipes

Print

Slow Cooker Cheesy Bacon Ranch Potatoes

A delicious side for any meal! Easy clean up and tender delicious potatoes that are packed with flavor!
Course Side Dish
Cuisine American
Keyword cheesy bacon ranch potatoes, cheesy potatoes
Prep Time 20 minutes
Cook Time 4 hours
Total Time 4 hours 20 minutes
Servings 8 Servings
Calories 305kcal
Author Alyssa Rivers

Ingredients

  • 4 Medium sized potatoes or 6-8 small red or yellow potatoes
  • 1 large onion thinly sliced
  • 1/2 pound bacon 1 pound makes it that much better
  • 2 1/2 cups shredded cheddar cheese
  • 1 package dry ranch seasoning packet
  • 2 Tablespoon butter melted
  • 1/2 cup sliced green onions

Instructions

  • Cook the bacon until it is just done but not too crisp. I lined a cookie sheet with foil and baked it at 350 degrees for 16 minutes while I was prepping everything.
  • Line your slow cooker with aluminum foil. Leave enough to over hang so that you can wrap the potatoes on the top once in the slow cooker.
  • Spray the inside of the foil with cooking spray and layer half of the potatoes along the bottom. Next layer with half of the bacon, green onions, onion, ranch packet and top with cheese. Repeat the layers and top with cheese reserving 1/2 cup. Pour melted butter over top.
  • Cover the potatoes with remaining foil. This helps them to steam and cook perfectly. Cook on low for 4-6 hours in your slow cooker. Once finished, top with remaining 1/2 cup cheese and let melt on the top.
  • Garnish with fresh green onions if desired.

Notes

Updated on October 5, 2020
Originally Posted on September 3, 2013

Nutrition

Calories: 305kcal | Carbohydrates: 5g | Protein: 13g | Fat: 26g | Saturated Fat: 13g | Cholesterol: 63mg | Sodium: 696mg | Potassium: 135mg | Fiber: 1g | Sugar: 1g | Vitamin A: 514IU | Vitamin C: 3mg | Calcium: 265mg | Iron: 1mg


from The Recipe Critic https://ift.tt/2NKy2G1
https://ift.tt/3nnX0xd

सोमवार, 5 अक्तूबर 2020

Easy Pork Schnitzel Recipe

pork schnitzels on a plate with lemon wedges

Pork Schnitzels are breaded and fried to perfection for an easy and delicious meal the whole family will love. Total cozy comfort food!

If you love German recipes, check out this Awesome German Chocolate Cake or the Best Ever German Oven Pancake.

pork schnitzels on a plate with lemon wedges

Pork Schnitzel Recipe

Hi! It’s Natasha from Salt & Lavender bringing you a recipe that I grew up with. Schnitzels were a treat in my house, and whenever I make them now, it takes me right back to my childhood dinner table. Schnitzels (typically made with pork or veal) are breaded and fried to crispy deliciousness, and they’re a staple in eastern/central European cuisine (like Germany and the Czech Republic). They’re easy to make, and this blog post is full of tips so you will soon be enjoying them too!

Pork Schnitzel Ingredients

  • Boneless pork chops: pounded thin so they’re tender & cook fast
  • Salt & pepper: for flavor
  • Flour: part 1 of the dredging mixture to help the egg stick
  • Eggs: part 2 of the dredging mixture to help the breadcrumbs adhere
  • Breadcrumbs:  part 3 of the dredging mixture (I prefer panko for extra crunch, but you can use regular breadcrumbs if you want)
  • Olive oil: for frying (or try another neutral tasting oil with a high smoke point e.g. vegetable oil)
  • Butter: adds extra flavor and browning when you fry them
  • Lemon wedges: for serving

What Cut of Meat to Use for Pork Schnitzels?

Use boneless pork steaks or chops (sometimes they’re called “boneless loin chops”). You could even use veal if you prefer!

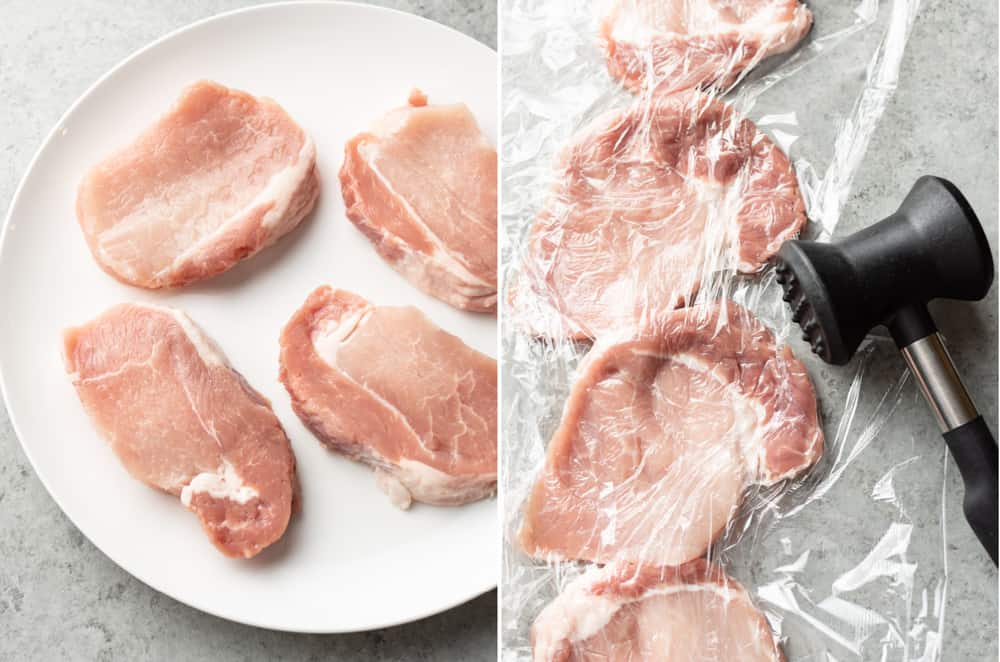
collage (pork chops on a plate and pork chops being pounded between two layers of cling wrap with a meat mallet)

How to Make Pork Schnitzels

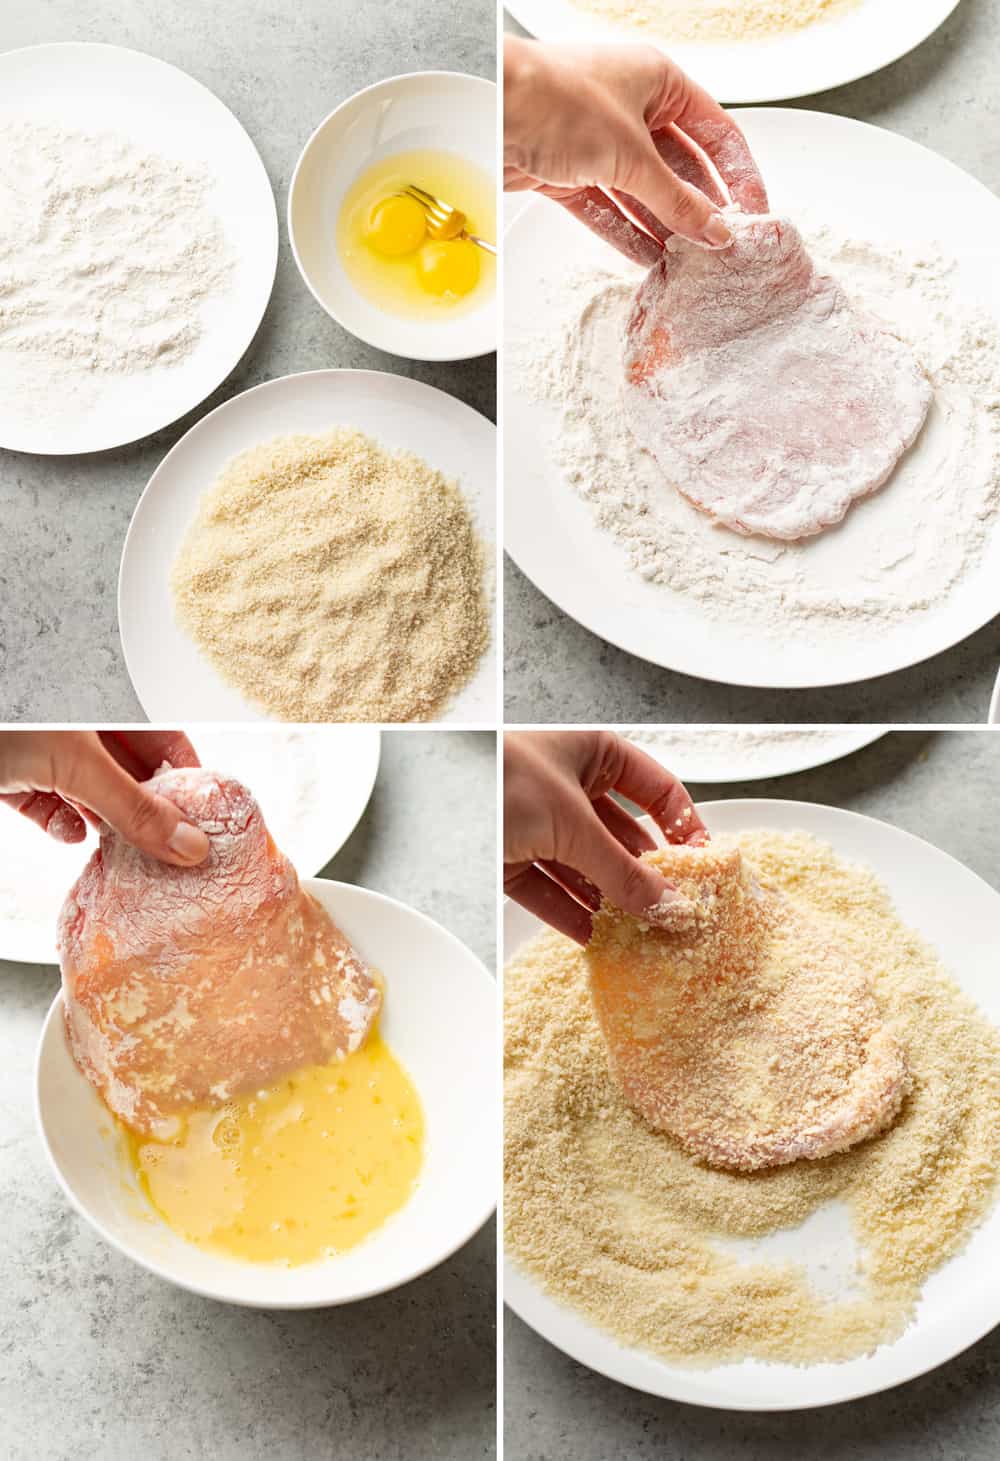
  1. Get the dredging station ready: Prepare 3 shallow bowls (or a bowl for the egg and one plate each for the flour and panko).
  2. Pound the pork thin: Place the pork chops between two sheets of plastic wrap and pound them until they’re 1/4″ thick (or even thinner) using the flat side of a meat mallet. Season them generously with salt & pepper.
  3. Prepare the skillet for frying: Add 2 tablespoons of olive oil and 1 tablespoon of butter to a large skillet. The pan should be well coated, so add more oil if needed. Let the pan heat up for a few minutes over medium-high heat. You will be doing two batches, so for the second batch add at least one more tablespoon of olive oil to the pan and the remaining tablespoon of butter.
  4. Dredge the pork: Coat the pork chops in flour, followed by the egg (let excess drip off), and finally the panko breadcrumbs (you may need to gently pat it down to make them stick).
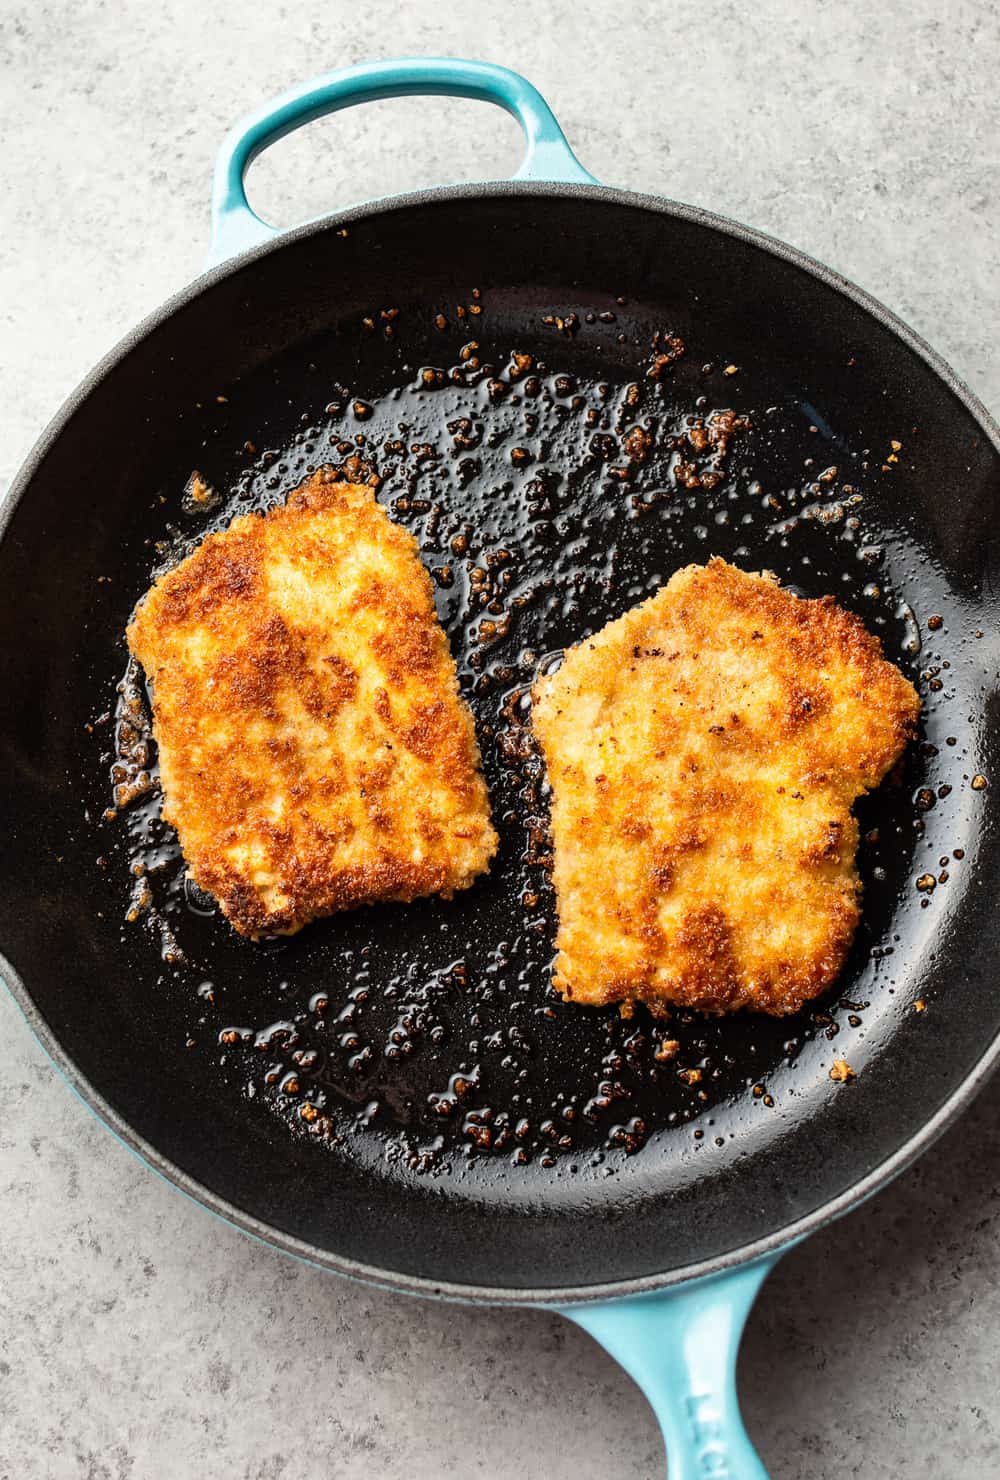
  5. Time to fry! Fry two schnitzels at a time for about 3 minutes/side. Easily flip them using cooking tongs. If the pan starts to smoke, turn the heat down a bit. Repeat with the next batch (add remaining oil and butter).
  6. Serve & enjoy. Schnitzels are best enjoyed with lemon wedges.

pork schnitzel process collage (dredging bowls with flour, egg, and panko breadcrumbs), then one photo for each step of dredging process

Tips for the Best Pork Schnitzels

  • Pound the pork as thin as you can. It tends to shrink back up a bit, and when you fry it, it also contracts.
  • Use tongs to easily flip the pork while you’re frying it.
  • Use the largest skillet you own and fry the pork in batches. You don’t want to crowd the pan or the breading may come off and it won’t be as crispy.
  • Ensure the skillet gets nice and hot. I let it heat up for a few minutes prior to adding the schnitzels to the pan. If the skillet gets too hot (starts to smoke or the breading starts to burn), feel free to turn the heat down a bit as needed.
  • You can definitely play with the flavorings of the schnitzels. This is a simple, classic recipe, but you can definitely change it up a bit by adding some garlic powder, paprika, or dried herbs (try Italian seasoning) to the flour or breadcrumbs.
  • Don’t omit the butter or the lemon wedges! These two ingredients really up the flavor in this otherwise simple recipe.

pork schnitzels frying in a skillet

What to Serve with Pork Schnitzels?

In Germany, it’s typical to serve them with potato salad or spätzle. You could serve them with anything from pasta to mashed potatoes or rice, though.

pork schnitzels on a plate with lemon wedges and one schnitzel cut into showing a bite on a fork

More Tasty Pork Recipes to Try

pork schnitzels on a plate with lemon wedges
Print

Easy Pork Schnitzel Recipe

Pork Schnitzels are breaded and fried to perfection for an easy and delicious meal the whole family will love.
Course Dinner, Main Course
Cuisine German
Keyword Pork Schnitzel Recipe, Pork Schnitzels
Prep Time 15 minutes
Cook Time 20 minutes
Total Time 35 minutes
Servings 4 Pork Chops
Calories 475kcal
Author Natasha Bull

Ingredients

  • 4 boneless pork chops
  • Salt & pepper (to taste)
  • 1/4 cup flour
  • 2 eggs (beaten with a fork)
  • 1 cup panko breadcrumbs
  • 3 tablespoons olive oil (divided)
  • 2 tablespoons butter (divided)
  • Lemon wedges (for serving)

Instructions

  • Prepare 3 shallow bowls (or a bowl for the egg and one plate each for the flour and panko).
  • Place the pork chops between two sheets of plastic wrap and pound them until they're 1/4" thick (or even thinner) using the flat side of a meat mallet. Season them generously with salt & pepper.
  • Add 2 tablespoons of olive oil and 1 tablespoon of butter to a large skillet. The pan should be well coated, so add more oil if needed. Let the pan heat up for a few minutes over medium-high heat. You will be doing two batches, so for the second batch add at least one more tablespoon of olive oil to the pan and the remaining tablespoon of butter.
  • Coat the pork chops in flour, followed by the egg (let excess drip off), and finally the panko breadcrumbs (you may need to gently pat it down to make them stick).
  • Fry two schnitzels at a time for about 3 minutes/side. Easily flip them using cooking tongs. If the pan starts to smoke, turn the heat down a bit. Repeat with the next batch (add remaining oil and butter).
  • Serve immediately with lemon wedges.

Notes

  • You can easily make more than 4 schnitzels! Simply add more flour/egg/breadcrumbs as needed and do multiple batches in the skillet (add more oil and 1 tbsp butter for each batch).

Nutrition

Calories: 475kcal | Carbohydrates: 19g | Protein: 35g | Fat: 28g | Saturated Fat: 9g | Cholesterol: 187mg | Sodium: 256mg | Potassium: 584mg | Fiber: 1g | Sugar: 1g | Vitamin A: 294IU | Vitamin C: 10mg | Calcium: 54mg | Iron: 2mg


from The Recipe Critic https://ift.tt/33tN2m5
https://ift.tt/33wigJr