रविवार, 24 जनवरी 2021

Air Fryer Avocado Egg Rolls (Cheesecake Factory Copycat!)

Whether it is for a party or for your own private dinner, Avocado Egg Rolls in an air fryer are the appetizer to make. Crispy and golden on the outside, creamy and decadent on the inside, you have to try these!

Copycat recipes are some of the best recipes out there! They are usually just as good as the restaurants but way cheaper like making this Queso, Roadhouse Rolls and Gnocchi Soup.
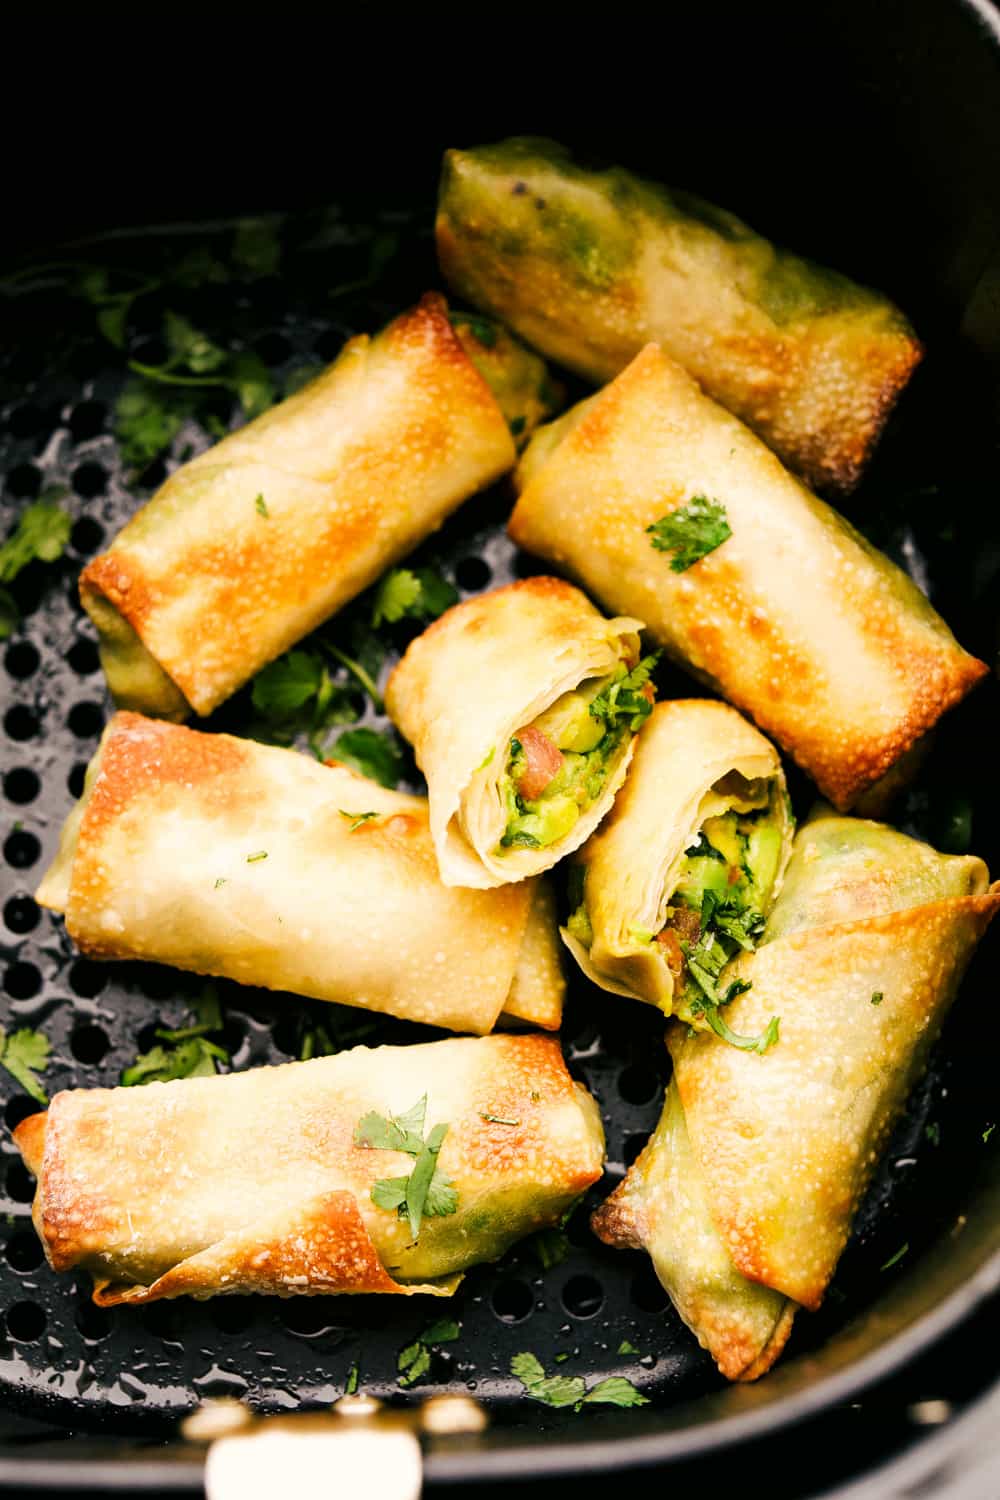
Crispy air fryer avocado egg rolls in the air fryer.

Air Fryer Avocado Egg Rolls Recipe

This air fryer recipe is going to become a fast favorite. Similar to my air fryer egg roll recipe, cooking them in the air fryer will change the way you make an egg roll. Whether it’s southwest chicken or philly cheesesteak egg rolls, air frying makes them just divine. Without all the extra oil and mess you can have insanely crispy outsides and glorious creamy tender insides. Air frying avocado egg rolls is just genius!

This egg roll recipe has all the goodness of the Cheesecake Factory’s Avocado Egg Rolls but half the fat and is so much cheaper. You won’t have to go drive to the restaurant, wait in line, or pay an Uber eats to get these addicting avocado egg rolls. Whip up a batch for your next party or just when you get that craving. Either way these air fryer avocado egg rolls are going to be crazy good!

Amazing Avocado Egg Roll Ingredients

These ingredients resemble an incredible guacamole, without the jalapeno. Use fresh cilantro and tomatoes for the best flavor. Picking avocados can be tricky. I’ll give you all the tips and tricks below.

  • Avocados: You’ll need three large avocados.
  • Red Onion: Adds a hit of heat, but not too much.
  • Roma tomatoes: Deseed and dice.
  • Cilantro:  Fresh chopped.
  • Garlic Powder: Adds flavor without bulk.
  • Lime: 1 medium lime juiced.
  • Salt and Pepper: Add to taste.
  • Egg Roll Wrappers: You can find these in the produce section usually of your local grocery store.
  • Olive Oil Spray: To help crisp the egg rolls.

Homemade Egg Rolls in the Air Fryer

Super easy to throw together, you are going to want to make these all the time. You will have to muster some self control so you don’t eat all the filling before you wrap it up. I wouldn’t blame you if you did though.

  1. Mash: In a medium bowl add the avocado and mash to desired consistency.
  2. Add: Add the onion, tomato, cilantro, garlic powder, lime juice and salt and pepper to taste.
  3. To Make the Egg Rolls: Place the avocado mixture in the center of each wrapper. Using your finger, rub the edges with water. Bring the bottom edge of he wrapper and roll it tightly over the filling. Fold in the sides and continue to roll up the wrapper and press to seal. Repeat until you have used all of the wrappers.
  4. Bake: Spray the basket of the air fryer with olive oil spray. Place ethe egg rolls in the basket and lightly spray the tops of the egg rolls with the olive oil spray. Cook at 400 degrees for 6 minutes.
  5. Flip: Then flip the egg rolls and cook for an additional 6 minutes.
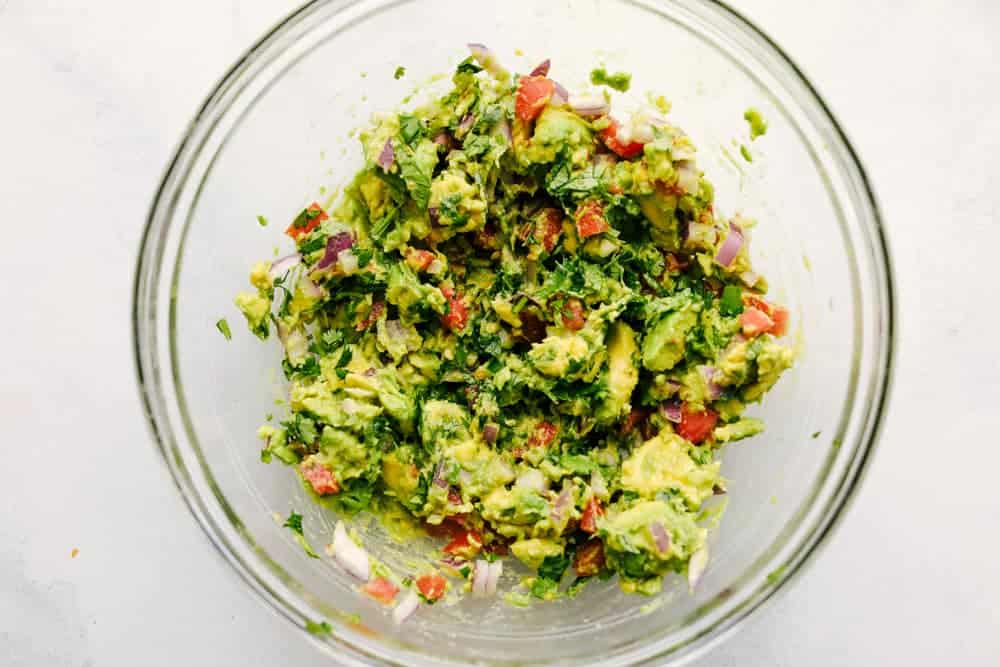
Creamy avocado egg roll filling.

The Best Avocado Egg Roll Tips

Egg rolls can seem intimidating at first. Tightly wrapped and stuffed with delicious fillings, and then fried to perfection, they can seem overwhelming for sure. But cooking them in the air fryer takes all the work out of frying them, and rolling the egg rolls are as easy as rolling a burrito. In fact, it’s exactly the same.

  • Wrappers:  Be sure to cover the wrappers you’re not using with a damp paper towel so they don’t dry out.
  • Can I use Spring Roll Wrappers? Absolutely, although the texture and crispiness will differ. Because the spring roll wrapper is thinner they will be crispier. Follow directions on package for best results.
  • Other Substitution for Egg Roll wrappers: If you can’t find egg roll wrappers or you just don’t want to go to the store, try phyllo dough. Roll thin and cut into squares and fill, being sure to seal the edges.
  • Know Your Air Fryer: Every air fryer cooks a little differently. Adjust your temperature and timings to fit your air fryer. If this is the first time cooking these avocado egg rolls, check them a bit earlier to make sure you’re not over cooking them.
  • Don’t overcrowd your air fryer: The number one rule in air frying is to not over crowd it. The food needs to be spaced apart so that the heated air can circulate and cook your food evenly, and get everything nice and crispy.
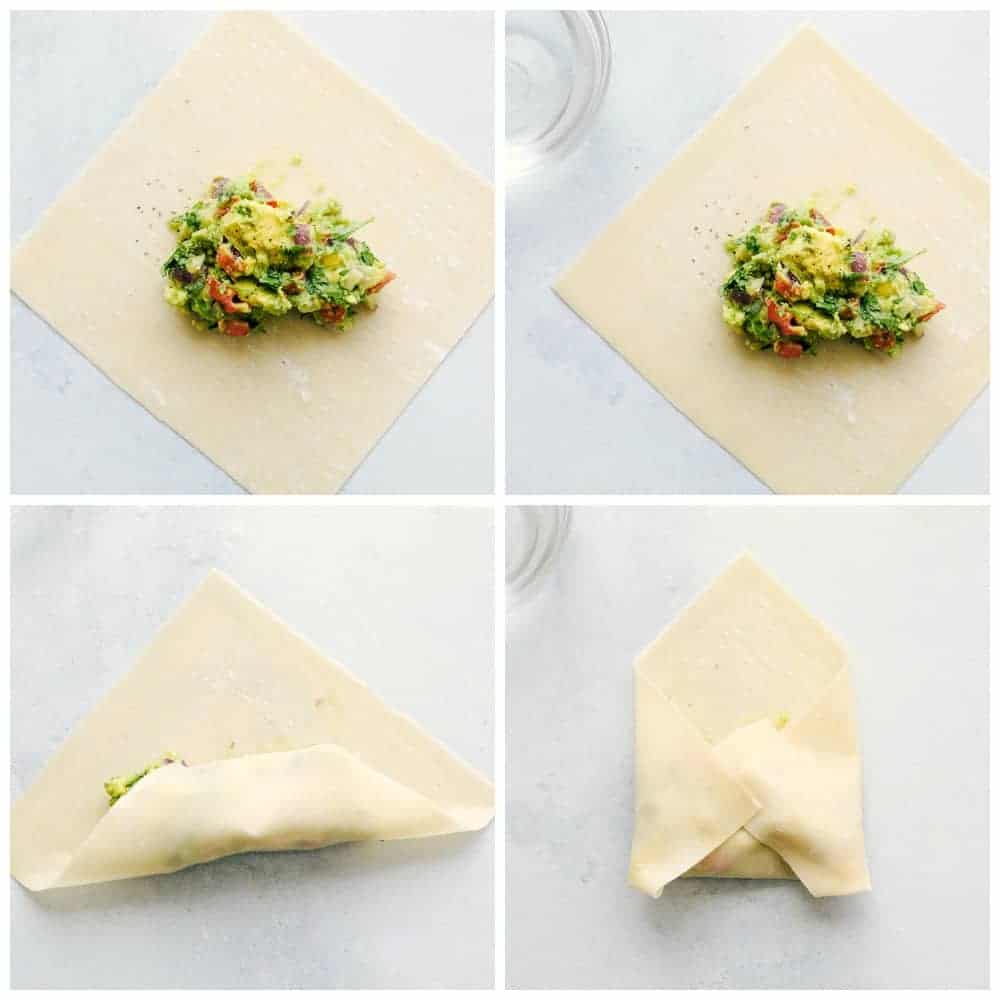
Process of folding egg rolls.

All About Avocados

With all their healthy benefits and various ways to use them, avocados are the fruit to buy these days. From avocado chickenshrimp burrito bowls to smoothies, they add creaminess and flavor. But they can be intimidating to buy. It’s like playing russian roulette. You never know if you’re going to pick a good one or not. And you never know if it’ll ripen in time for when you need it. It can truly be stressful. Here are some tips that can make it a bit more relaxed.

  • How to pick Avocados: Even if you know the best places to go to get avocados there are a few tricks to know to help you get that perfect avocado for these egg rolls.
  • Don’t rely on color alone: Most often ripe avocados will be dark green almost black in color. But I’ve had dark almost black avocados not be ripe, so don’t rely on this alone.
  • Do the gentle pressure test: Test for ripeness near the top of the avocado near the stem. Press down gently, about the same amount of pressure you would a computer mouse. If it gives slightly it’s ripe. Leaving an indent means it’s over ripe. If you can’t press down on it at all, it’s not ready.
  • Don’t worry about the Texture:  Some avocados have lots of bumps and some are smooth. That all depends on the variety of avocado you’re purchasing. The key is to avoid ones with dark spots or mushy brown spots.
  • Need to ripen your avocado? We’ve all been there, we bought an avocado thinking it would ripen in time and it hasn’t yet. To help ripen an avocado place in a brown paper bag with an apple or a banana. Check it daily as it will ripen quickly.
  • It’s ripe and you don’t need it yet. When avocados ripen before you’re ready for them place them in the fridge to slow the ripening process.
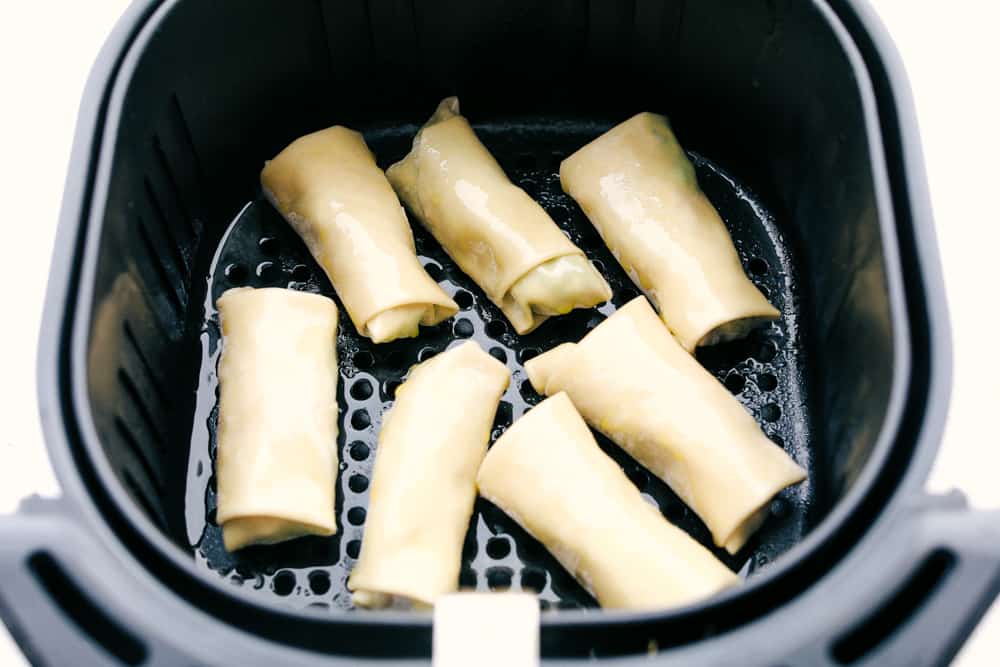
Air fryer basket filled with avocado egg rolls for frying.

Dipping Avocado Egg Rolls

Our family loves to dip things. Children often love to dip everything. These avocado egg rolls are so creamy and tender on the inside you may not need or want a sauce. But you like to dip your egg rolls here are a few ideas.

  • Ranch Dressing
  • Cilantro Jalapeno Ranch: Add chopped cilantro and jalapeno to the above ranch dressing recipe.
  • Salsa: Try this homemade salsa, or use your favorite kind.
  • Sour Cream: Try mixing the sour cream with the salsa for a twist.
  • Spicy Chipotle Ranch: Add chipotle peppers in adobo to the ranch dressing.
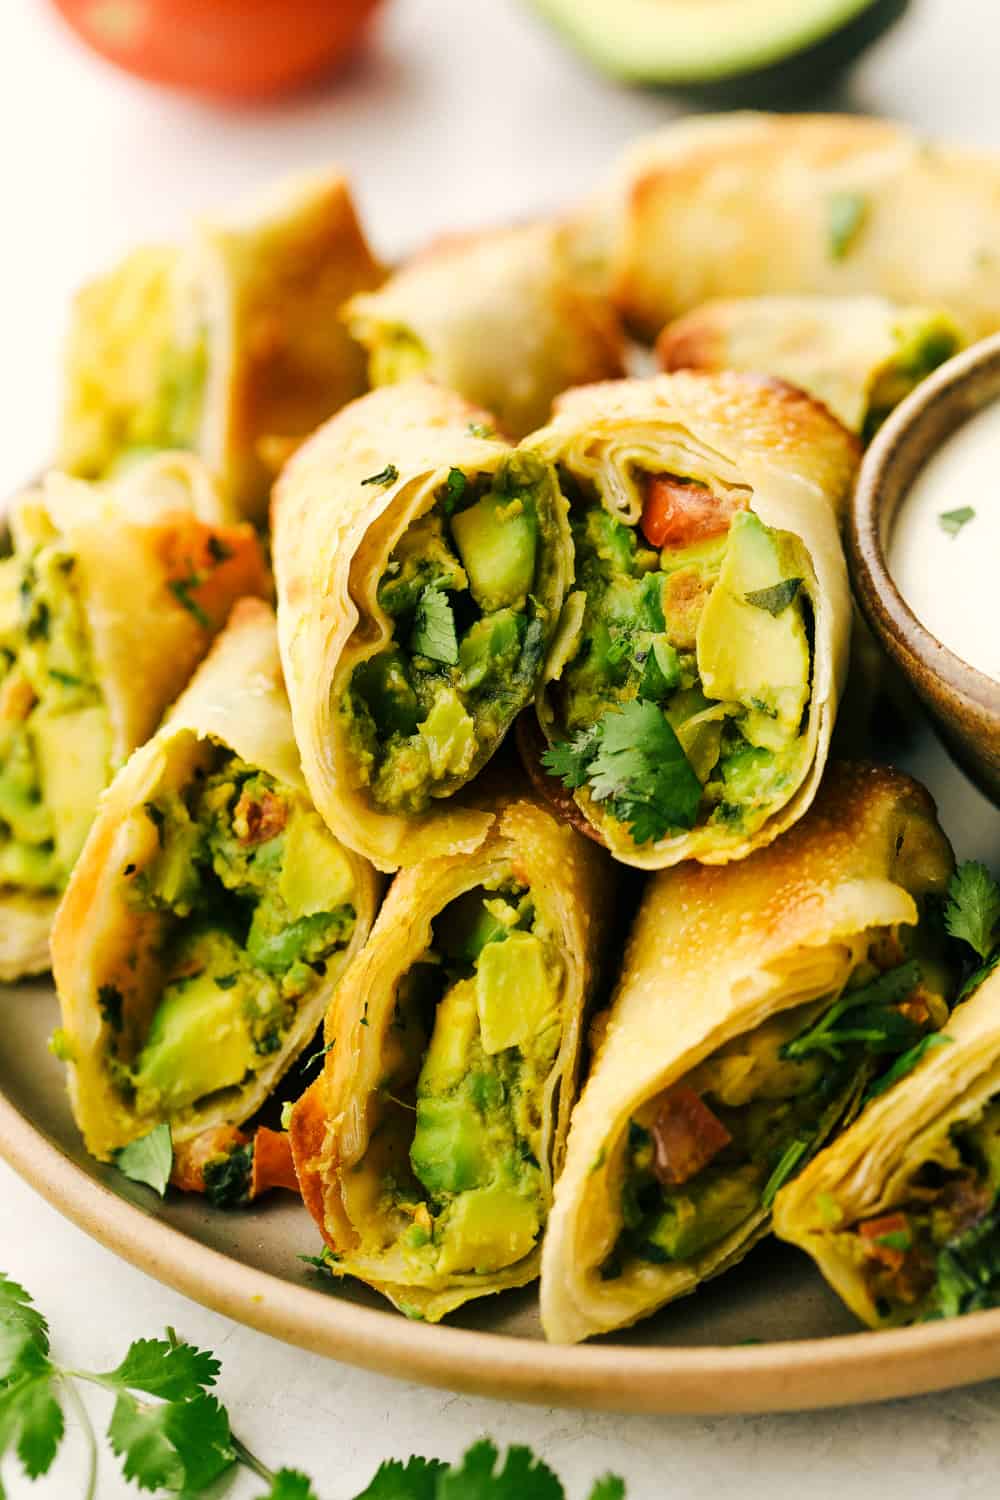
Avocado egg rolls split and layered on a plate.


More Amazing Appetizer Recipes

Appetizers like these egg rolls can steal the show and become the main event. This is probably why so many times people order their dinners from the appetizer menu at restaurants. With these favorites you might just make your next dinner from only appetizers!

Print

Air Fryer Avocado Egg Rolls

Whether it is for a party or for your own private dinner, Avocado Egg Rolls in an air fryer are the appetizers to make. Crispy and golden on the outside, creamy and decadent on the inside. You have to try these!
Course Appetizer, Dinner, Main Course, Side Dish
Cuisine American, Asian American, Chinese
Keyword air fryer egg rolls
Prep Time 10 minutes
Cook Time 12 minutes
Total Time 22 minutes
Servings 8 Egg Rolls
Author Alyssa Rivers

Ingredients

  • 3 avocados diced
  • 1/4 cup red onion diced
  • 1 Roma tomato diced
  • 3 tbsp chopped fresh cilantro leaves
  • 1 teaspoon garlic powder
  • Juice of 1 lime
  • salt and pepper to taste
  • 8 egg roll wrappers
  • olive oil spray

Instructions

  • In a medium bowl, add the avocado and mash to desired consistency. Add the onion, tomato, cilantro, garlic powder, lime juice and salt and pepper to taste.

To make the egg rolls:

  • Place the avocado mixture in the center of each wrapper. Using your finger, rub the edges with water. Bring the bottom edge of the wrapper and roll it tightly over the filling. Fold in the sides and continue to roll up the wrapper and press to seal. Repeat until you have used all of the wrappers.
  • Spray the basket of the air fryer with olive oil spray. Place the egg rolls in the basket and lightly spray the tops of the egg rolls with the olive oil spray. Cook at 400 degrees for 6 minutes. Then flip the egg rolls and cook for an additional 6 minutes.


from The Recipe Critic https://ift.tt/3c8m5Js
https://ift.tt/39f8377
Skillet Italian Sausage and Peppers

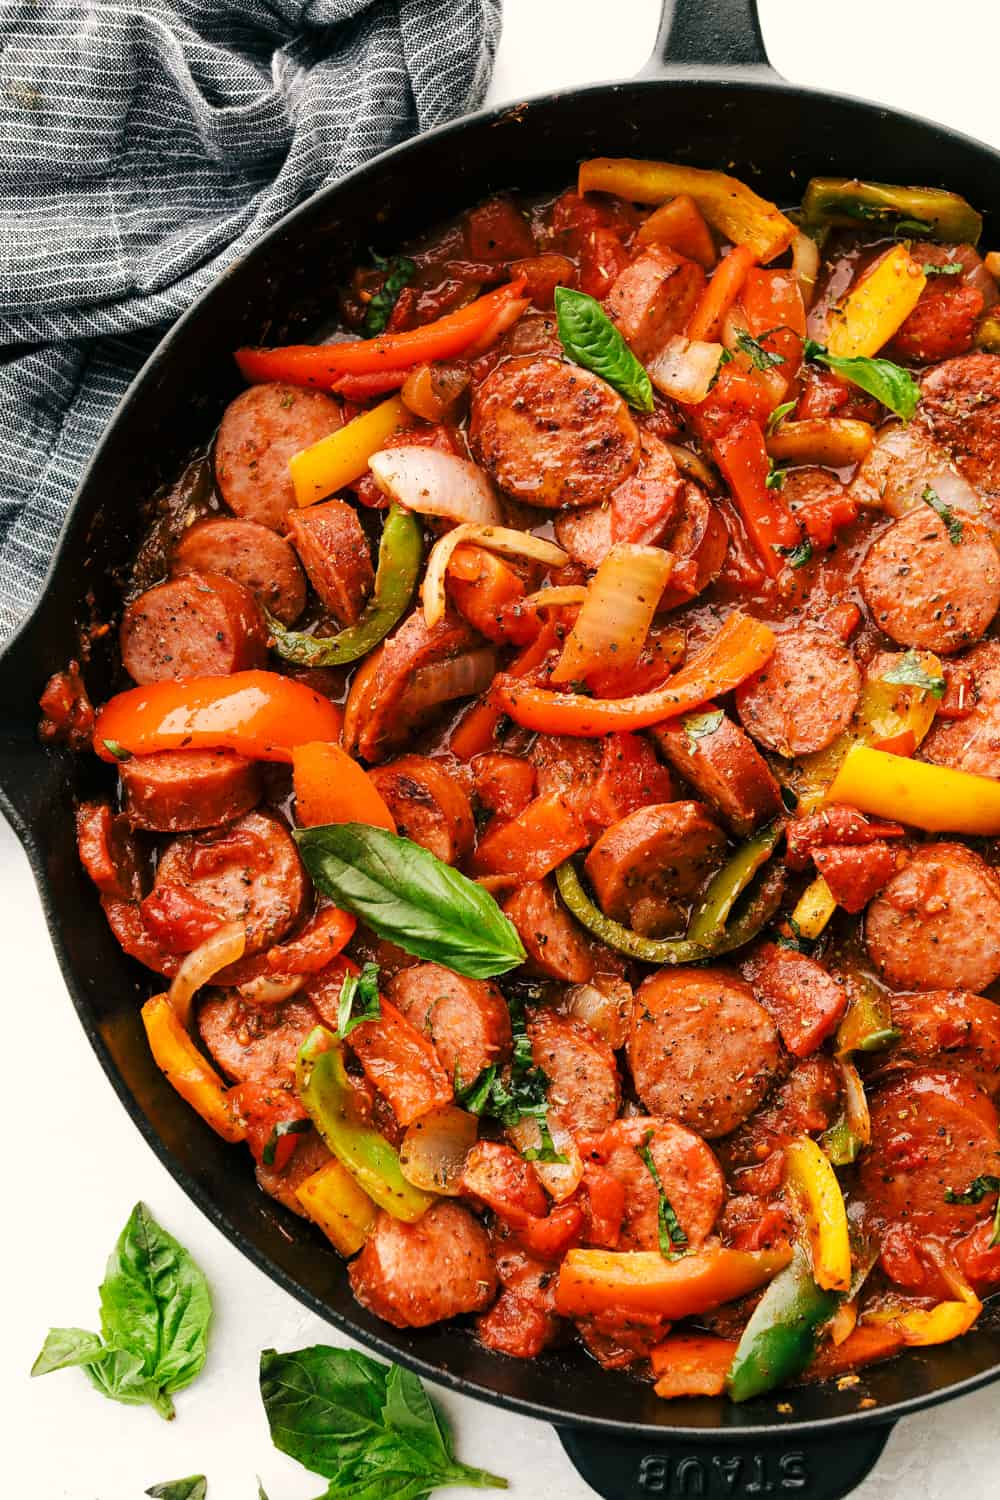
Quick and easy, this Italian Sausage and Peppers in a skillet is a MUST try! And cooking it all in one pan makes clean up a breeze!

One pan dinners are some of the best dinners!  Quick and effortless they will become some of your favorites recipes on busy nights like this Pork Chops, Sheet Pan Chicken and Amazing Scallops.

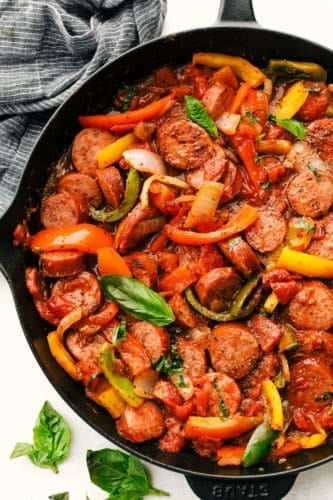
Skillet Italian sausage with peppers in a cast iron pan.

Amazing Italian Sausage and Peppers

This skillet Italian sausage and peppers is savory and a meal the whole family will love. It’s one of those dishes that’s appealing to both the nose with its incredible smell, and the eyes with all of its color.  When dinner looks amazing, you know it’s going to taste amazing too! The sausage and peppers gives it so much flavor and texture, it’s as fun to eat as it is to make.

Speaking of making, this recipe is perfect for busy weekdays or even lazy weekends. Italian sausage and peppers can be on your table ready to eat in 30 min or less. I love dinners like that. Serve it with a salad and breadsticks and you have a great dinner for any day of the week. Skillet Sausage and Peppers is a comfort dish, its homey, rich, and filling. It’s a dinner everyone will come rushing too and ask for again and again.

Along with this recipe try some of these winners the next time you need something delicious and easy.

Ingredients for Skillet Sausage and Peppers

I like to use a variety of pepper for this skillet recipe to give it color and flavor. Use what you have on hand or mix it up. You can use a sweet or regular onion for this recipe, whichever you prefer.

  • Italian Sausage: 4-5 links sliced
  • Olive Oil: For sautéing.
  • Peppers: You’ll need 3 peppers
  • Onion: Slice the onion for sautéing.
  • Italian Seasoning: Combination powerhouse of flavor.
  • Diced Tomatoes: One cannot drained.
  • Tomato Sauce: Eight ounce can is all you need.
  • Salt and Pepper: To taste.

How to Make Easy Sausage and Peppers

One and done! Dinner dishes are a breeze with this one skillet dish. You can use different kinds of sausages, I list a few down below. Make sure to cook link sausages to 160 degrees to ensure doneness. As long as they reach that temperature, even if they’re a bit pink in the middle, they’re done. Simmering it along with the vegetables will also cook the sausage a bit more if you’re not sure.

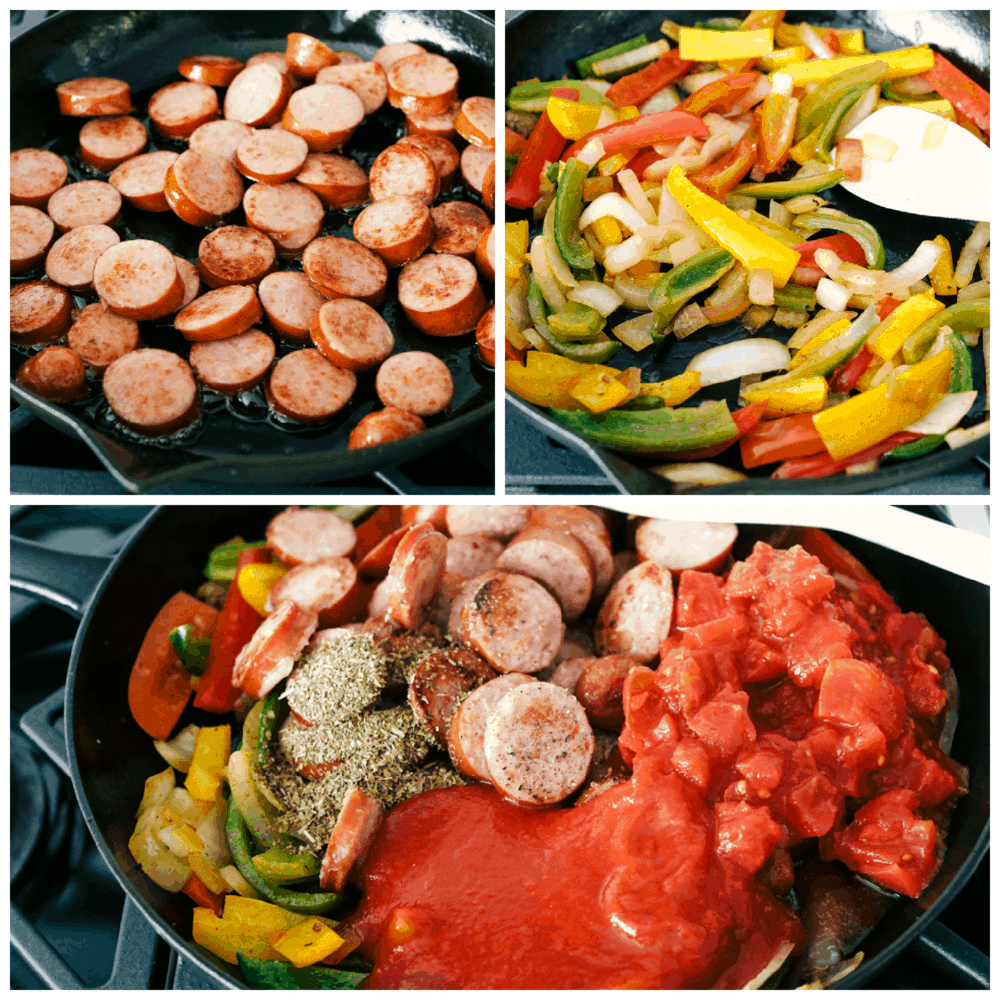
  1. Cook Sausage: In a large skillet over medium high heat add the sausage. Cook for 4-5 minutes and remove and set aside on a plate.
  2. Vegetables:  Add the olive oil to the skillet with the bell peppers and onion. Sauté until tender.
  3. Combine:  Add sausage back to the skillet. Add in Italian seasoning, tomatoes, tomato sauce and salt and pepper.
  4. Cook:  Let simmer until heated through.

Cooking the sausage and the peppers and onions, then adding in the tomatoes in the skillet.

How to Serve The Best Italian Sausage

This dish is divine on it’s own, but you can serve it in several different ways. It’s very customizable. Here are few ideas for serving this skillet sausage recipe.

  • Serve over Rice, cauliflower rice, or quinoa for a scrumptious main dish.
  • Toss the Italian sausage and peppers with your choice of pasta. Penne, rotini and shell pastas are favorites in our household. Even ravioli or tortellini would go great here.
  • Toast hoagie buns and fill them with the sausage and peppers. Top with your choice of cheese and broil to melt the cheese for an insanely delicious sandwich.
  • Mix in roasted potatoes, sweet potatoes, roasted zucchini, butternut squash, or mushrooms for more vegetables, and sprinkle parmesan cheese on top.
  • Serve alongside eggs for a tasty course.

Tips and More!

There are so many ways to make this skillet Italian sausage and peppers dish, that it’s very forgiving. There are just a few things to keep in mind to make sure your skillet dinner outstanding.

  • Sausage:  You can use whatever kind of sausage you desire. Chicken sausage, turkey sausage, kielbasa and even ground sausage all work. Using precooked sausage speeds up the cooking process. You can slice the sausage before heating, allowing more of it to brown and crisp. If you use uncooked sausage be sure to cook it till the internal temperature registers 160 degrees. Let the sausage rest while you sauté the vegetables before slicing the sausage into bite sized pieces, and adding it back to the pan. This will allow the sausage to redistribute the moisture, keeping it nice and juicy.
  • If you like it Spicy: If you like your dishes a bit on the spicy side use a spicy Italian sausage or you can also add red pepper flakes to the sauce, before it simmers.
  • Peppers and Onions: Be sure to cut your onions and peppers into the same sized pieces for even cooking. Sauté until they just start to become tender. They will finish tenderizing while it simmers. This way the peppers and onions don’t become too soft, but maintain a crisp tender texture.
  • The skillet to use: I love cooking in a cast iron skillet. It distributes the heat evenly throughout the bottom of the pan and up into the sides. It’s naturally non stick and super durable. But that being said, any large heavy skillet will work for sausage and peppers.
  • Storing Leftovers: Leftovers are almost even better the next day, so I recommend if you can, to have some. Keep leftovers in a tightly sealed container for 4-5 days in the refrigerator. Sausage and peppers also freezes extremely well and will keep for up to 3-4 months. Let thaw in the fridge and microwave to reheat.

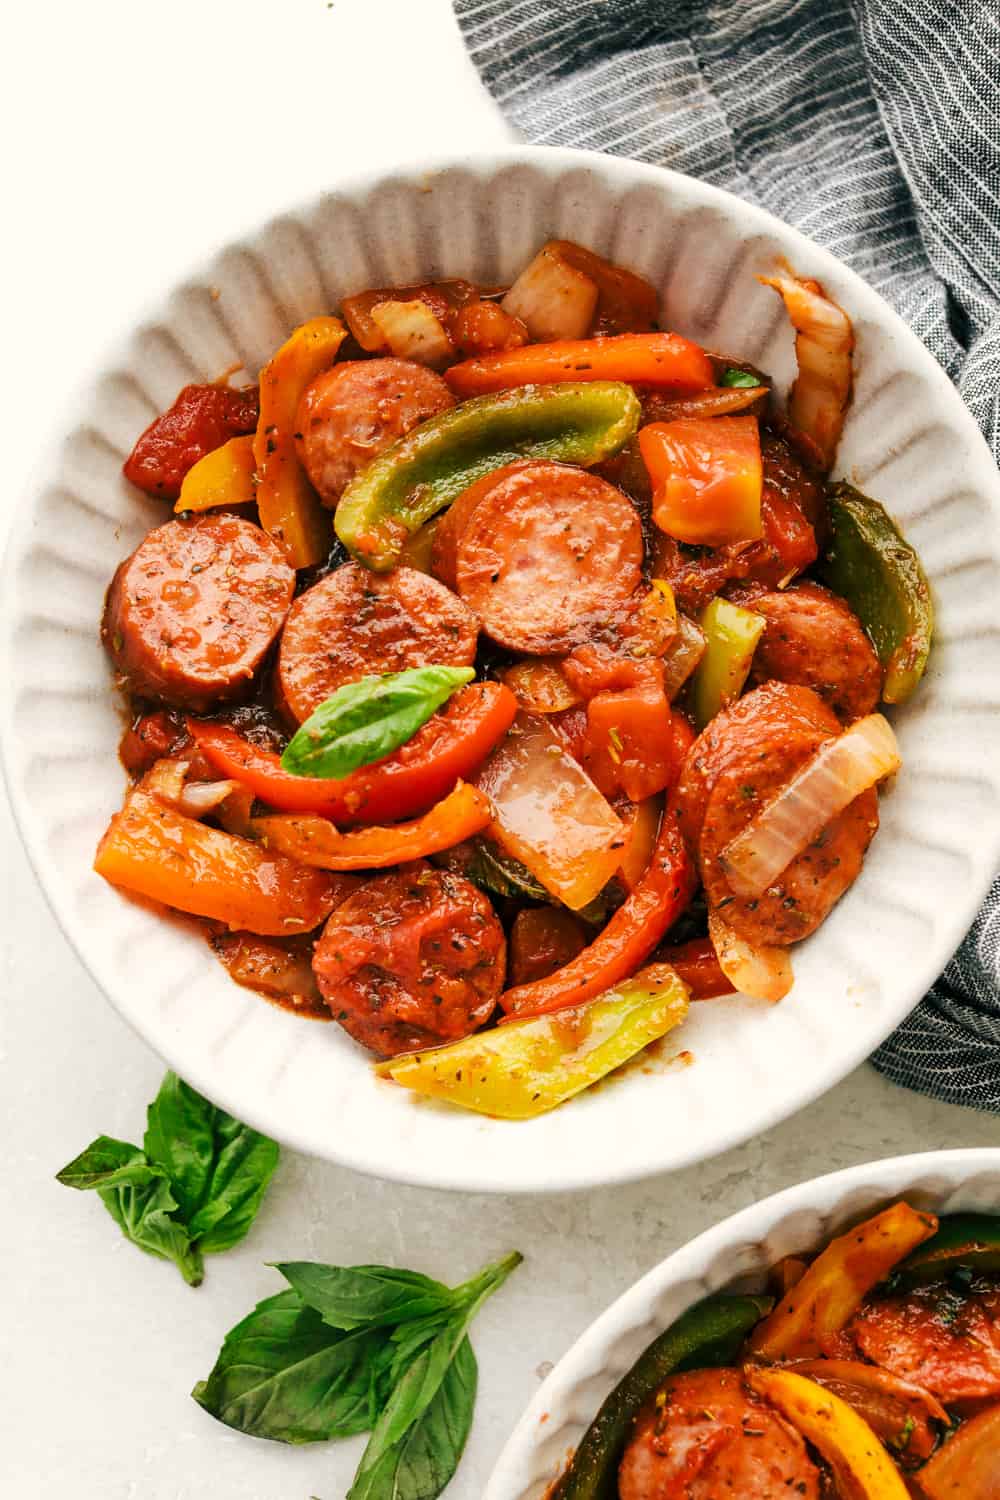
Skillet Italian sausage and peppers in a white bowl.

More Sausage Recipes to Savor

Sausage adds so much flavor and richness to dishes. I love using it. It can be spicy or not. It’s a great addition to breakfasts, or dinners. The flavors and textures are just so good! And you can even find healthy-ish sausage now, so no one has to miss out on these fan favorites.

Print

Italian Sausage and Peppers

Quick and easy, this Italian Sausage and Peppers in a skillet is a MUST try! And cooking it all in one pan makes clean up a breeze!
Course Dinner, Main Course
Cuisine American, Italian, Italian American
Keyword italian sausage and peppers
Prep Time 10 minutes
Cook Time 20 minutes
Total Time 30 minutes
Servings 4 People
Author Alyssa Rivers

Ingredients

  • 1 package of Italian sausage sliced, or 4-5 links
  • 1 Tablespoon olive oil
  • 3 bell peppers sliced (I used orange, green and red)
  • 1 small onion sliced
  • 1 Tablespoon Italian Seasoning
  • 1 15 ounce can of diced tomatoes, undrained
  • 1 8 ounce can of tomato sauce
  • salt and pepper

Instructions

  • In a large skillet over medium high heat add the sausage. Cook for 4-5 minutes and remove and set aside on a plate. Add the olive oil to the skillet with the bell peppers and onion. Sauté until tender. Add sausage back to the skillet.
  • Add in italian seasoning, tomatoes, tomato sauce and salt and pepper. Let simmer until heated through. Serve with hoagies or over pasta if desired.


from The Recipe Critic https://ift.tt/2Mg9fhw
https://ift.tt/3c5yiP3

शनिवार, 23 जनवरी 2021

Easy Homemade Air Fryer Pop Tarts (2 ways!)

Make your kids excited to get out of bed with these Homemade Air Fryer Pop Tarts! These pop tarts have a crisp flakey crust with a tender sweet filling, and topped with frosting.

Breakfast is the most important meal of the day and definitely a favorite meal in our family. These air fryer pop tarts will pair awesomely with a Breakfast Casserole or Eggs and Bacon.

Homemade Air Fryer strawberry and brown sugar pop tarts.

Easy Air Fryer Pop Tarts

These air fryer pop tarts are a handheld treat the whole family will go crazy for. They are super easy to make and kids can even help. Using premade pie dough speeds up the process even more. Growing up pop tarts were always a special treat. Now they are even more amazing when you make them homemade and in your air fryer.

Air Frying crisps these pop tarts to pastry perfection. They are just about as easy and quick as opening a box from the store but these homemade pop tarts taste so much better! With ooey gooey sweet fillings, crisp flakey crusts and a touch of frosting, you will never buy them again.

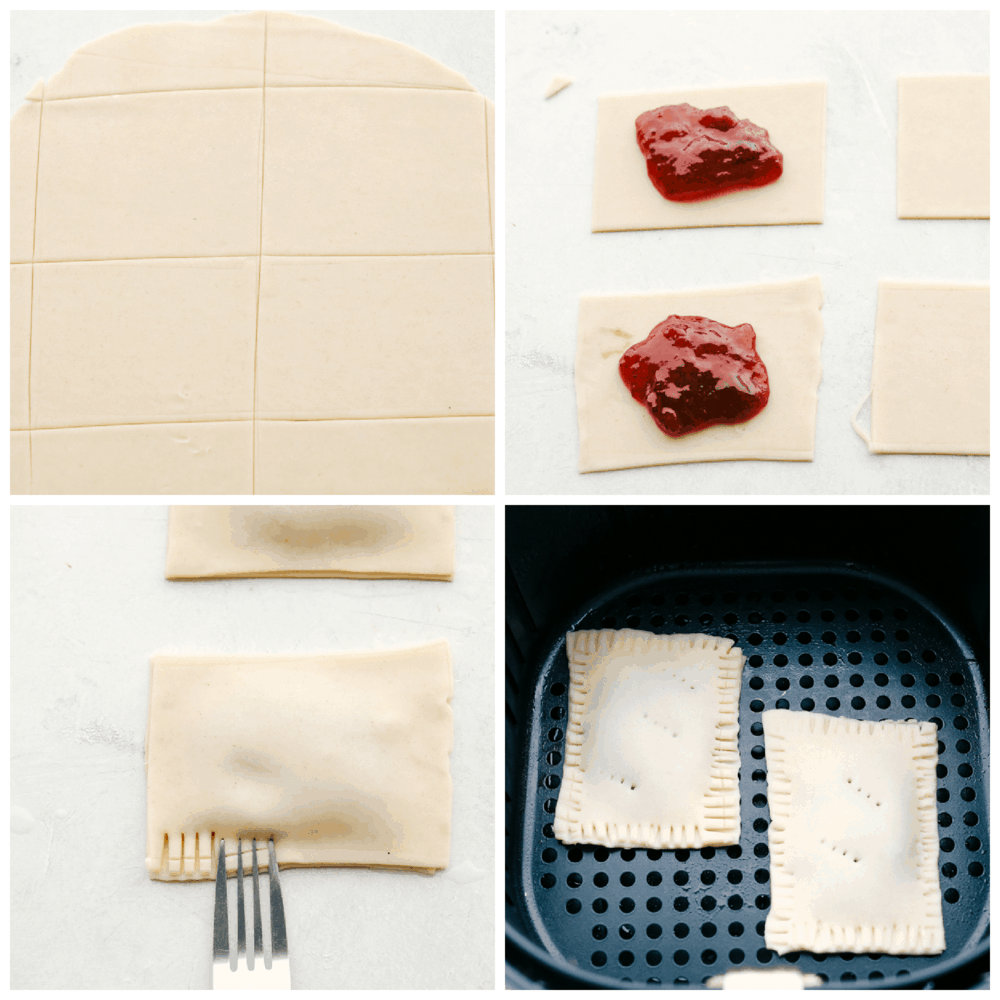
Using pie dough and strawberry filling to make pop tarts in the air fryer.

Ingredients Needed For Pop Tarts at Home

Here are all the ingredients you will need for both types of air fryer pop tarts. Both use ingredients you probably already have at home or can easily find at your local grocery store. These air fryer pop tarts are so easy, you will be making them all the time so you might want to keep the items you need on hand.

  • Refrigerated Pie Crusts: Use your favorite kind or make your own with this homemade pie crust.
  • Strawberry Jam: I like low sugar jams but my favorite is this easy homemade jam.

Icing Ingredients

  • Powdered Sugar: The base of any good frosting. Sift it for easy mixing.
  • Milk: Add more or less depending on the thickness you desire.
  • Sprinkles: Optional, but your kids will love the way they look and they’ll have fun sprinkling it on.

Brown Sugar Cinnamon Pop Tart

  • Brown Sugar: For a  bit more of a molasses flavor try using dark brown sugar.
  • Cinnamon: A little bit goes a long way.
  • Flour: Helps bind the filling all together.
  • Butter: Adds flavor and binding.

Cinnamon Icing Ingredients 

  • Powdered Sugar: Sift the powdered sugar to reduce lumps.
  • Milk: Add more or less for desired consistency.
  • Cinnamon: Add more or less depending on desired flavor.

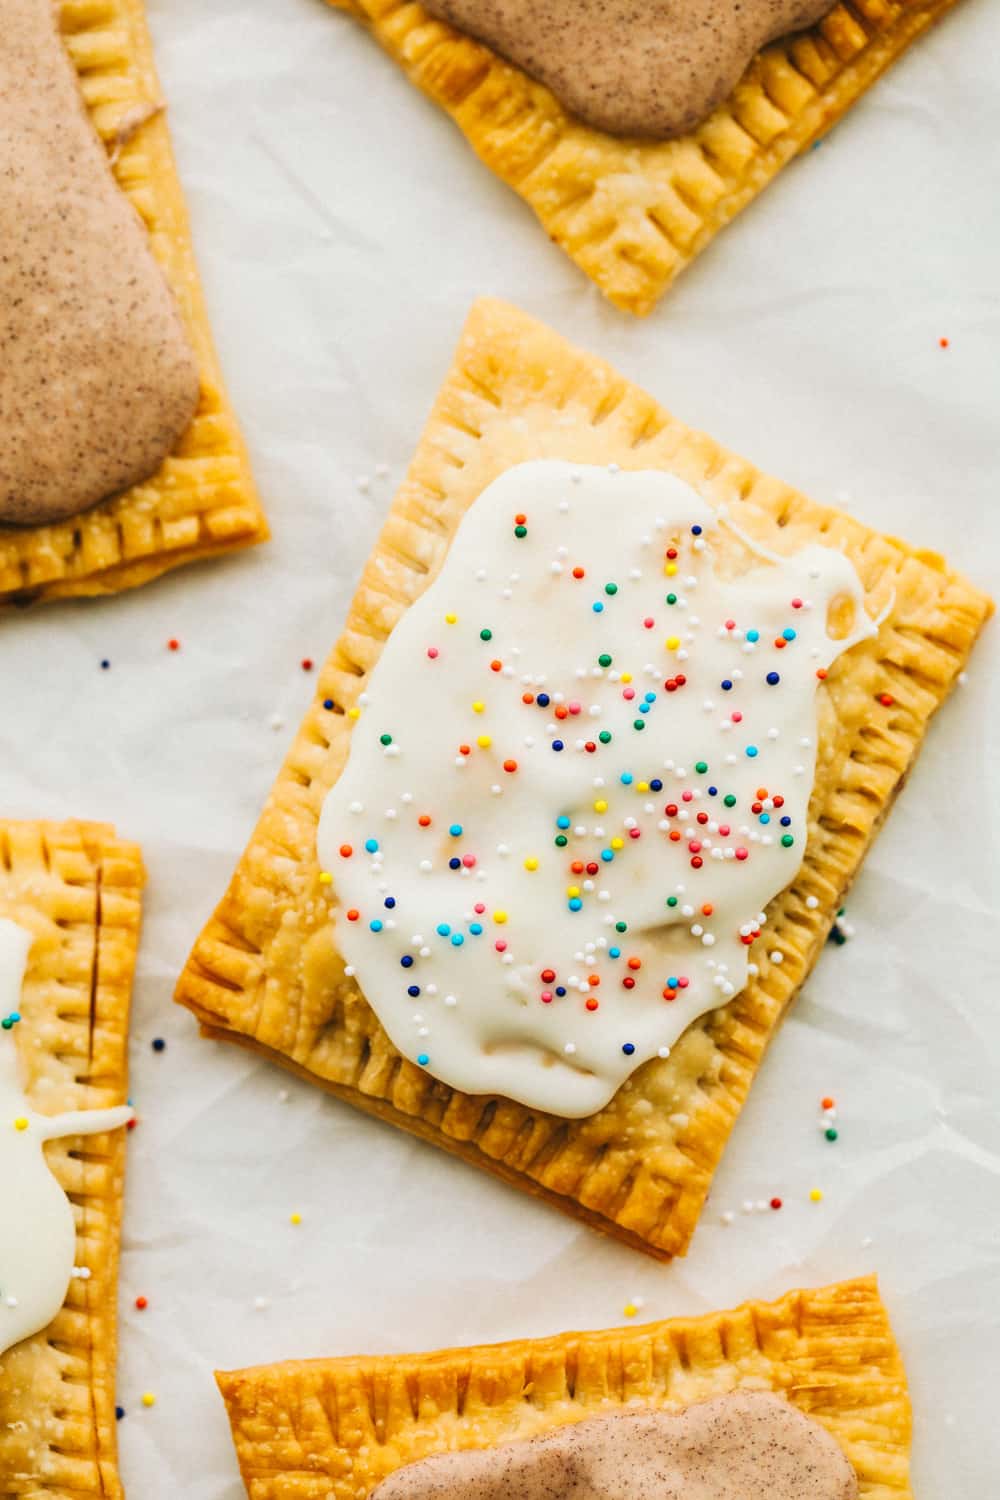
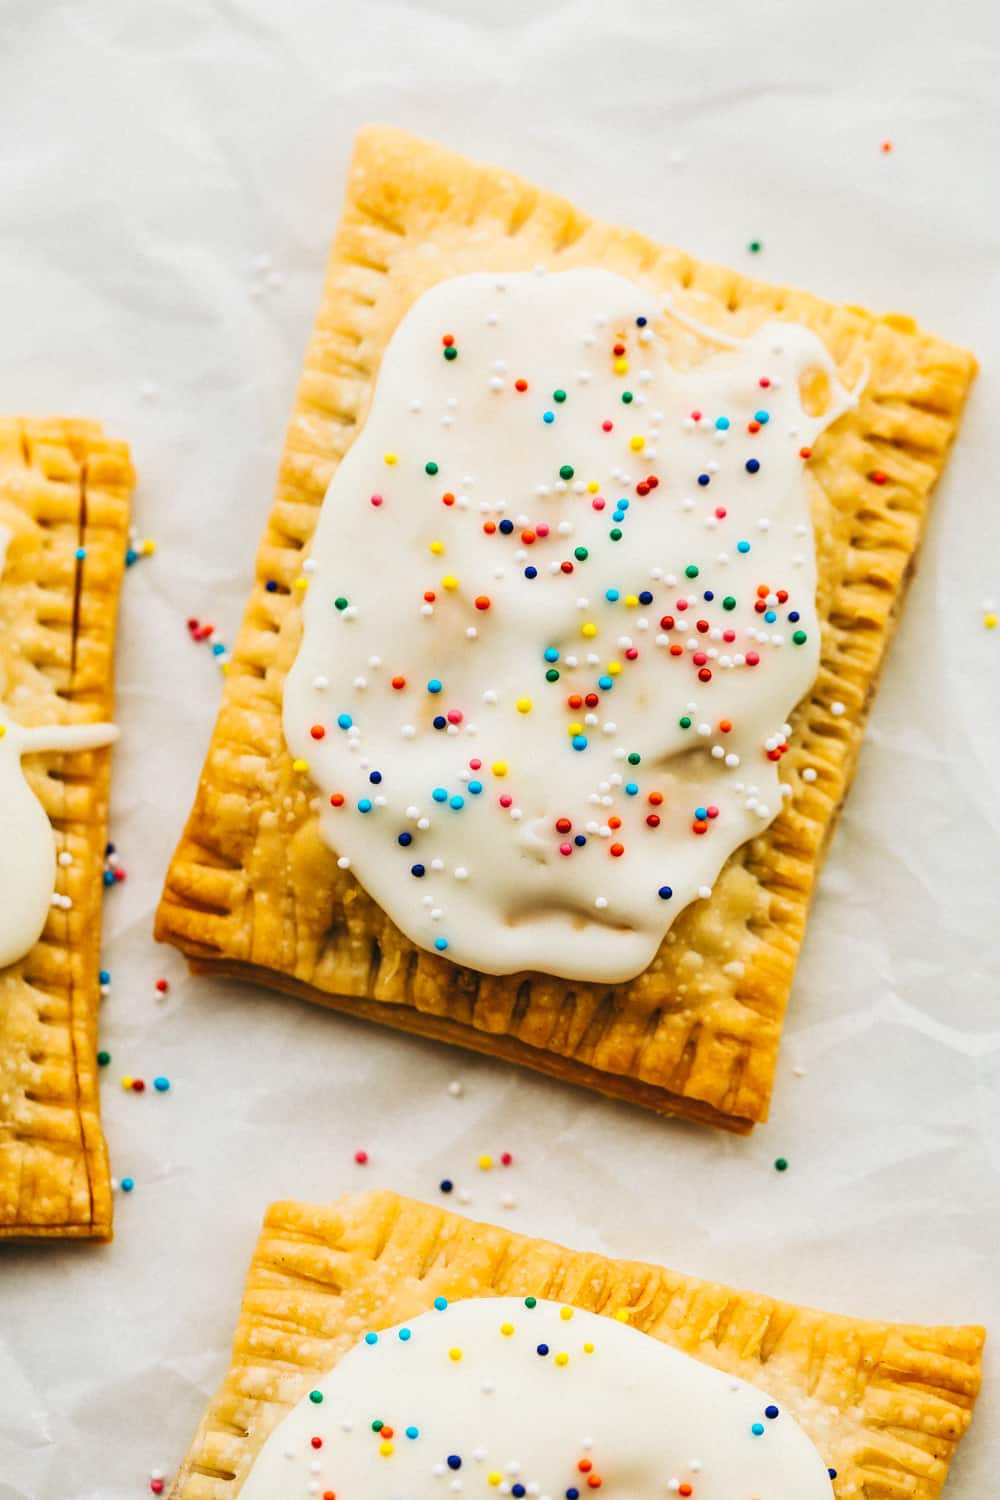
Strawberry homemade pop tart with frosting and sprinkles.

Making Strawberry Air Fryer Pop Tarts

Sweet and tart strawberry jam is a favorite when it comes to pop tarts. It is like eating a strawberry pie for breakfast. Add the frosting and these air fryer pop tarts are insanely delicious.

  1. Dough: Roll out the refrigerated pie crusts to about 1/4 inch thick. Cut the dough into four even rectangles. Place 2 Tablespoons of strawberry jam on one side of the rectangle leaving 1/2 inch to the edge. Use your finger with some water and go along the edges of the dough.
  2. Cover: Add the second rectangle on top and seal the edges with a fork. Poke two holes in the top of the dough.
  3. Bake: Place in the basket of an air fryer and cook at 360 degrees for 8-10 minutes or until golden brown. Remove and let cool completely.
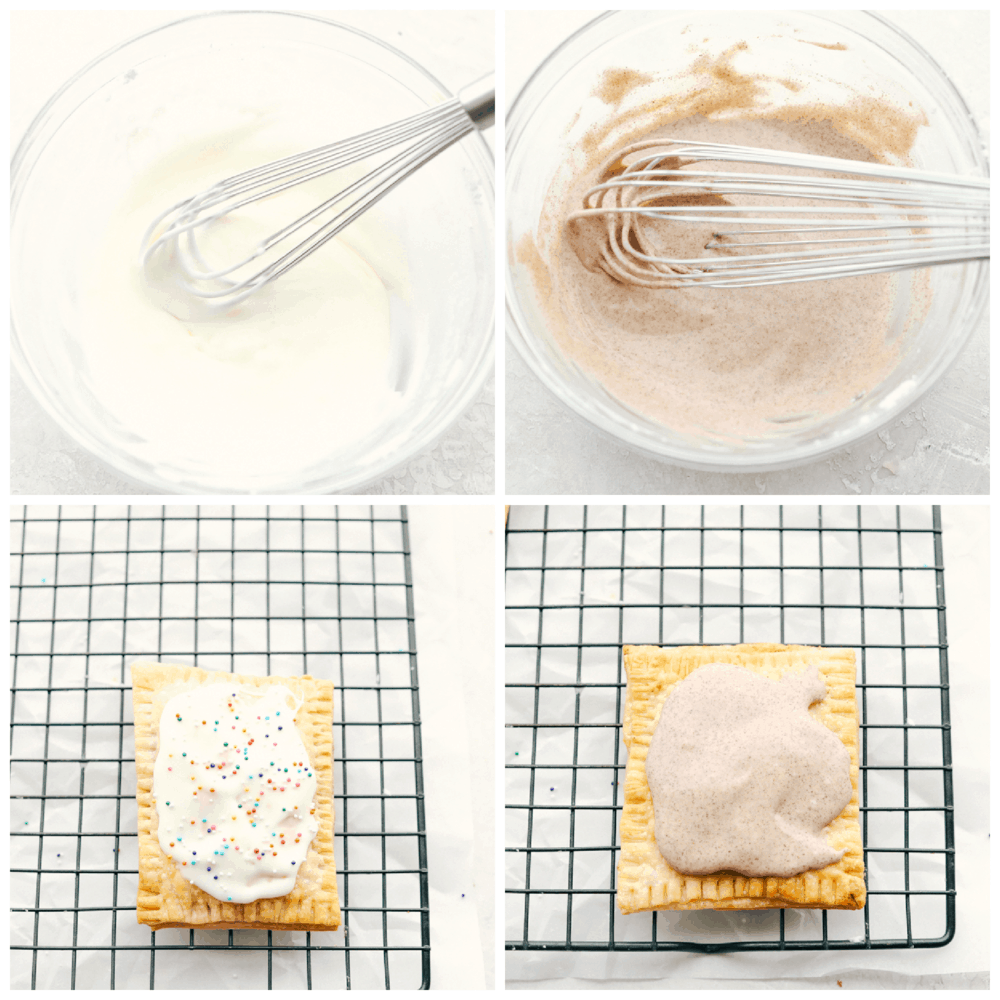
  4. Icing: Combine the powdered Sugar and milk until you get the desired consistency. Spread on top of cooled pop tart.

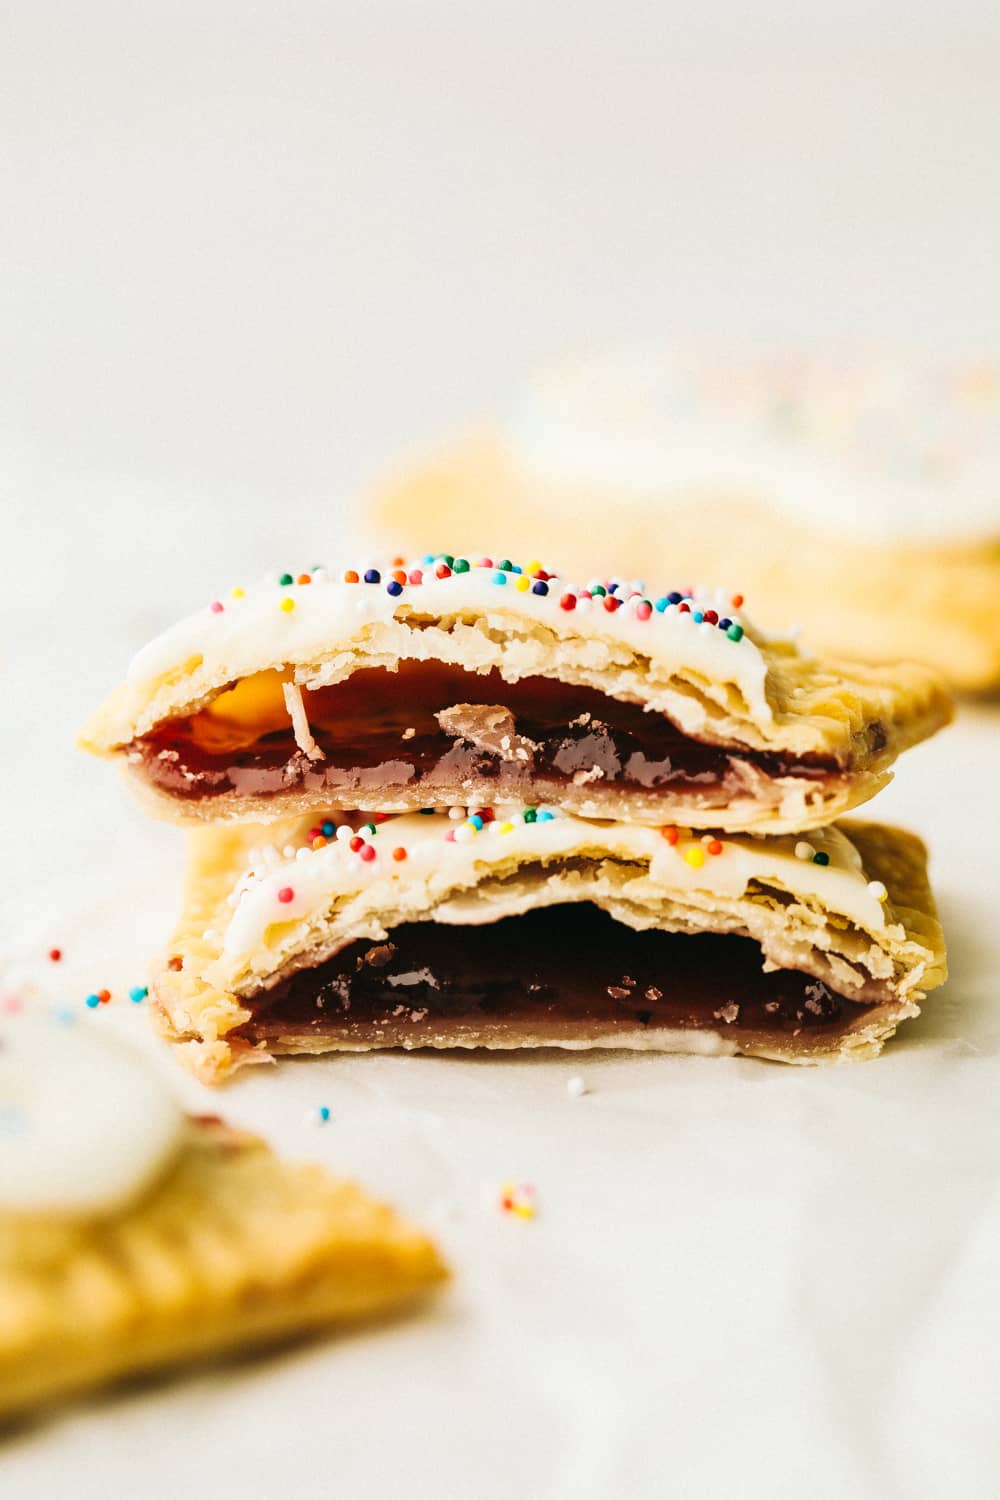
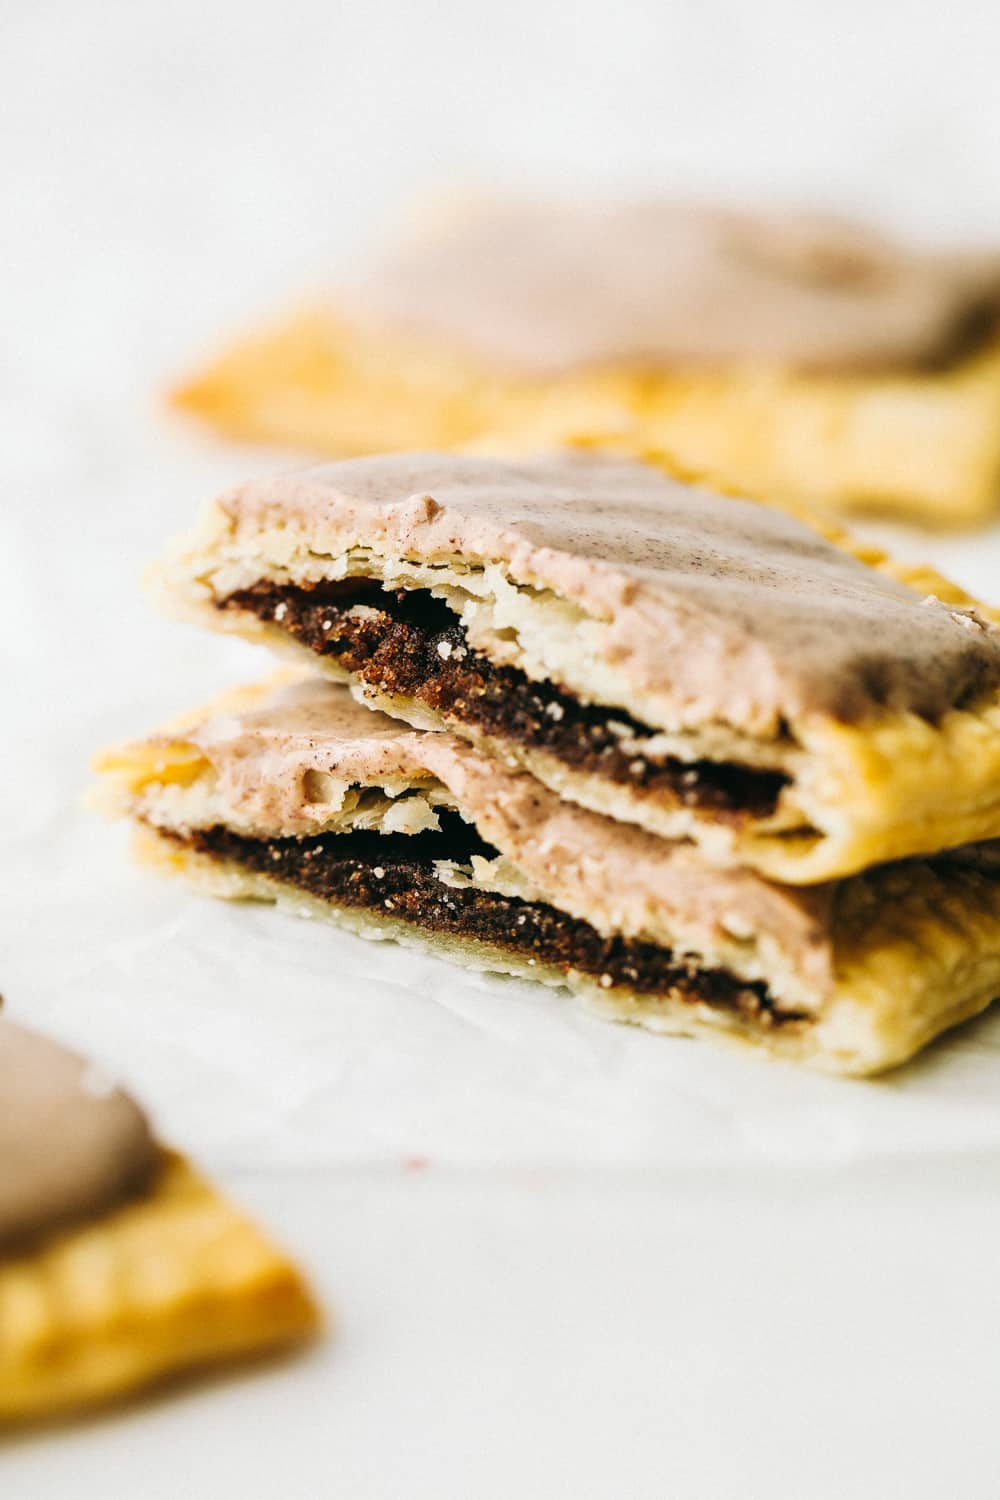
Flakey tender homemade air fryer pop tarts.

Let’s Make Brown Sugar Pop Tarts!

The brown sugar and cinnamon combination in these air fryer pop tarts is so good! It’s like cinnamon roll filling in a hand held pop tart. It’s basically a cinnamon roll in a pop tart.  You are going to love it. And your going to love how fast it is!

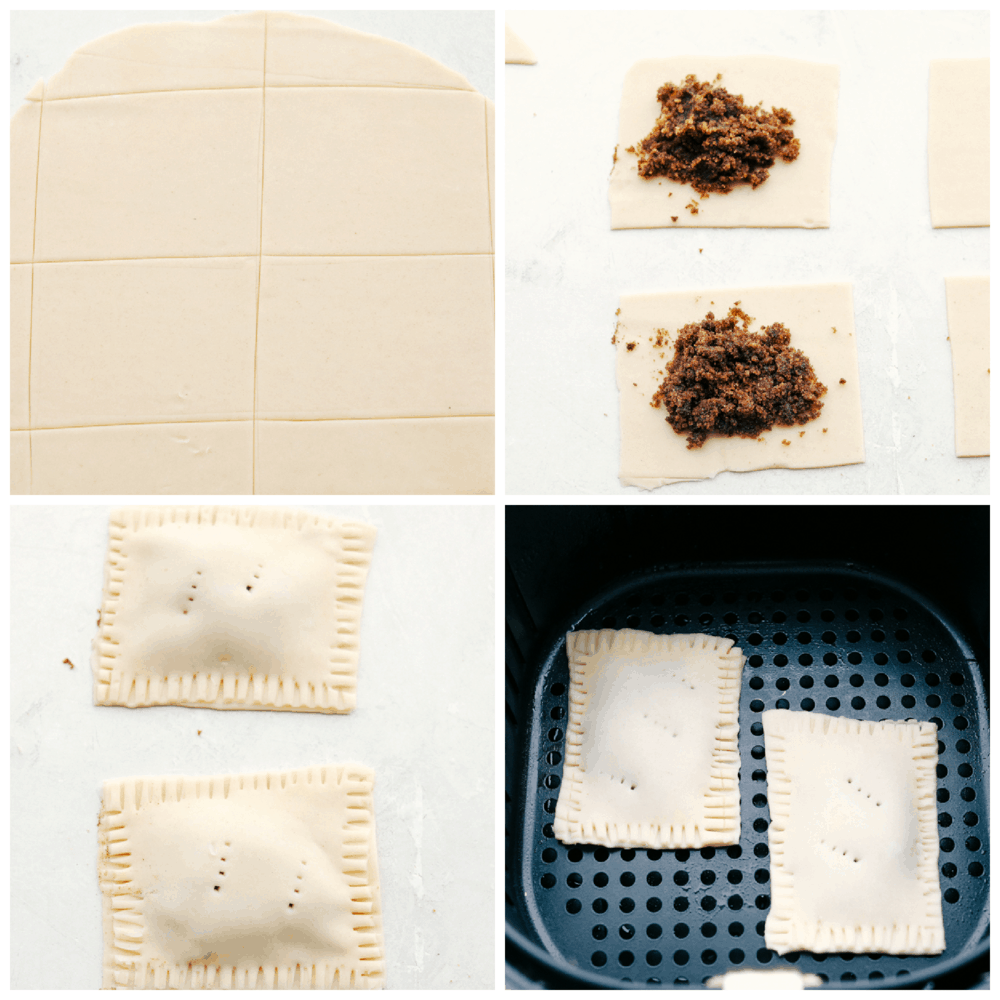
  1. Filling: In a small bowl combine the brown sugar, cinnamon, flour and melted butter. Put two tablespoons on one side of the rectangle. Use your finger with some water and go along the edges of the dough.
  2. Top: Add the second rectangle on top and seal the edges with a fork. Poke two holes in the top of the dough.
  3. Bake: Place in the basket of an air fryer and cook at 360 degrees for 8-10 minutes or until golden brown. Remove and let cool completely.
  4. Icing: Combine the powdered sugar, milk and cinnamon until you get your desired consistency. Spread on top of cooled pop tart.

Pie dough, brown sugar filling and ready to bake air fryer pop tarts.

Tips For The Best Air Fryer Pop Tarts

Making pop tarts in the air fryer makes them so easy. It may not be as fast as your toaster, but these are so much better you won’t mind the extra time.

  • Know Your Air Fryer:  As with all appliances, no two air fryers are exactly alike. It’s important to know how your air fryer cooks. Feel free to adjust the temperature and time as you see fit. This is a starting point. Keep an eye on the first batch you make to see how your air fryer bakes these incredible pop tarts.
  • Poke the Dough:  Be sure to poke holes in the dough before you air fry the pop tarts. This allows the steam to escape from inside and keeps the dough from bubbling up, which allows the crust to cook more evenly.
  • Don’t overcrowd the air fryer: Be sure to allow space between your pop tarts so the circulating air can cook the pop tarts evenly. If you need to, cook them in batches.
  • Leave an Edge: You’ll want to make sure you leave an edge so that you can seal your pop tarts properly. You don’t want the filling oozing out all over the air fryer.
  • Storing Leftovers: Keep leftovers in the fridge in a sealed container for up to 5 days. Freeze for up to 4 months. To reheat, thaw the frozen air fryer pop tarts. Place in the air fryer at 360 degrees for 3 minutes.

Frosted brown sugar pop tarts made in the air fryer.

Variations for Homemade Pop Tarts

If you grew up on pop tarts, or buy them regularly, then you know there are so many different flavors. The fun thing about making your own is you can experiment with your favorite flavors or create your own.

  • Fruit:  Any kind of jam or jelly works wonderfully in these pop tarts. Think apricot, peach, raspberry, blueberry, blackberry, or marion berry.
  • Pie Fillings: Pie fillings also make great fillings. Lemon, cherry and apple are favorites.
  • Chocolate:  Get your chocolate fix first thing in the morning by using Nutella or another chocolate spread. Make a chocolate frosting for the top.
  • Nut Butters: Any type of nut butter you enjoy will give you a good dose of protein. Add chopped bananas or chocolate chips to it for added flavor.
  • S’mores: Place marshmallows and chocolate chips in the center and top the icing with crushed graham crackers for a campfire twist to your pop tart.

Making the frosting for homemade air fryer pop tarts.

More Breakfast Recipes to Make Your Mornings!

Breakfast is such a wonderful meal, it’s often quick, easy and always delicious. It’s pretty customary to have breakfast for dinner even at our house. Breakfast is often like a comfort food. These recipes will help the day start off right!

Print

Air Fryer Pop Tarts

Make your kids excited to get out of bed with these Homemade Air Fryer Pop Tarts! These pop tarts have a crisp flakey crust with a tender sweet filling, and topped with frosting, of course!
Course Breakfast
Cuisine American
Keyword air fryer pop tarts, homemade pop tarts, pop tarts
Prep Time 10 minutes
Cook Time 10 minutes
Total Time 20 minutes
Servings 4 Pop Tarts
Calories 794kcal
Author Alyssa Rivers

Ingredients

  • 1 package refrigerated pie crusts
  • strawberry jam

Icing:

  • 1/2 cup powdered sugar
  • 2-3 tablespoons milk
  • sprinkles: optional

Brown Sugar Cinnamon Pop Tart:

    Filling:

    • 1/2 cup brown sugar
    • 2 teaspoons cinnamon
    • 1 tablespoon flour
    • 2 tablespoons melted butter

    Cinnamon Icing:

    • 1/2 cup powdered sugar
    • 2-3 tablespoons milk
    • 1 teaspoon cinnamon

    Instructions

    • Roll out the refrigerated pie crusts to about 1/4 inch thick. Cut the dough into four even rectangles. Place 2 Tablespoons of strawberry jam on one side of the rectangle leaving 1/2 inch to the edge. Use your finger with some water and go along the edges of the dough.
    • Add the second rectangle on top and seal the edges with a fork. Poke two holes in the top of the dough.
    • Place in the basket of an air fryer and cook at 360 degrees for 8-10 minutes or until golden brown. Remove and let cool completely.

    To make the icing:

    • Combine the powdered sugar and milk until you get the desired consistency. Spread on top of cooled pop tart.

    To make the Brown Sugar Cinnamon sugar pop tart

    • For the filling: In a small bowl combine the brown sugar, cinnamon, flour, and melted butter. Put two tablespoons on one side of the rectangle. Use your finger with some water and go along the edges of the dough.
    • Add the second rectangle on top and seal the edges with a fork. Poke two holes in the top of the dough.
    • Place in the basket of an air fryer and cook at 360 degrees for 8-10 minutes or until golden brown. Remove and let cool completely.

    To make the cinnamon icing:

    • Combine the powdered sugar, milk, and cinnamon until you get your desired consistency. Spread on top of cooled pop tart.

    Nutrition

    Calories: 794kcal | Carbohydrates: 114g | Protein: 8g | Fat: 35g | Saturated Fat: 13g | Cholesterol: 17mg | Sodium: 515mg | Potassium: 163mg | Fiber: 4g | Sugar: 57g | Vitamin A: 175IU | Calcium: 76mg | Iron: 3mg


    from The Recipe Critic https://ift.tt/2Mkcm7P
    https://ift.tt/3ojKAWJ

    Perfect and Crispy Air Fryer Chicken Legs (Drumsticks)

    These Air Fryer Chicken Legs is every kids’ dream come true. Everyone always wants to eat the legs, especially the kiddos. With this recipe there will still be fighting over who gets the last drumstick!

    These crispy chicken legs will be perfect served with Beans, Corn Casserole, Brussel Sprouts or Potatoes. An ideal meal for any occasion!

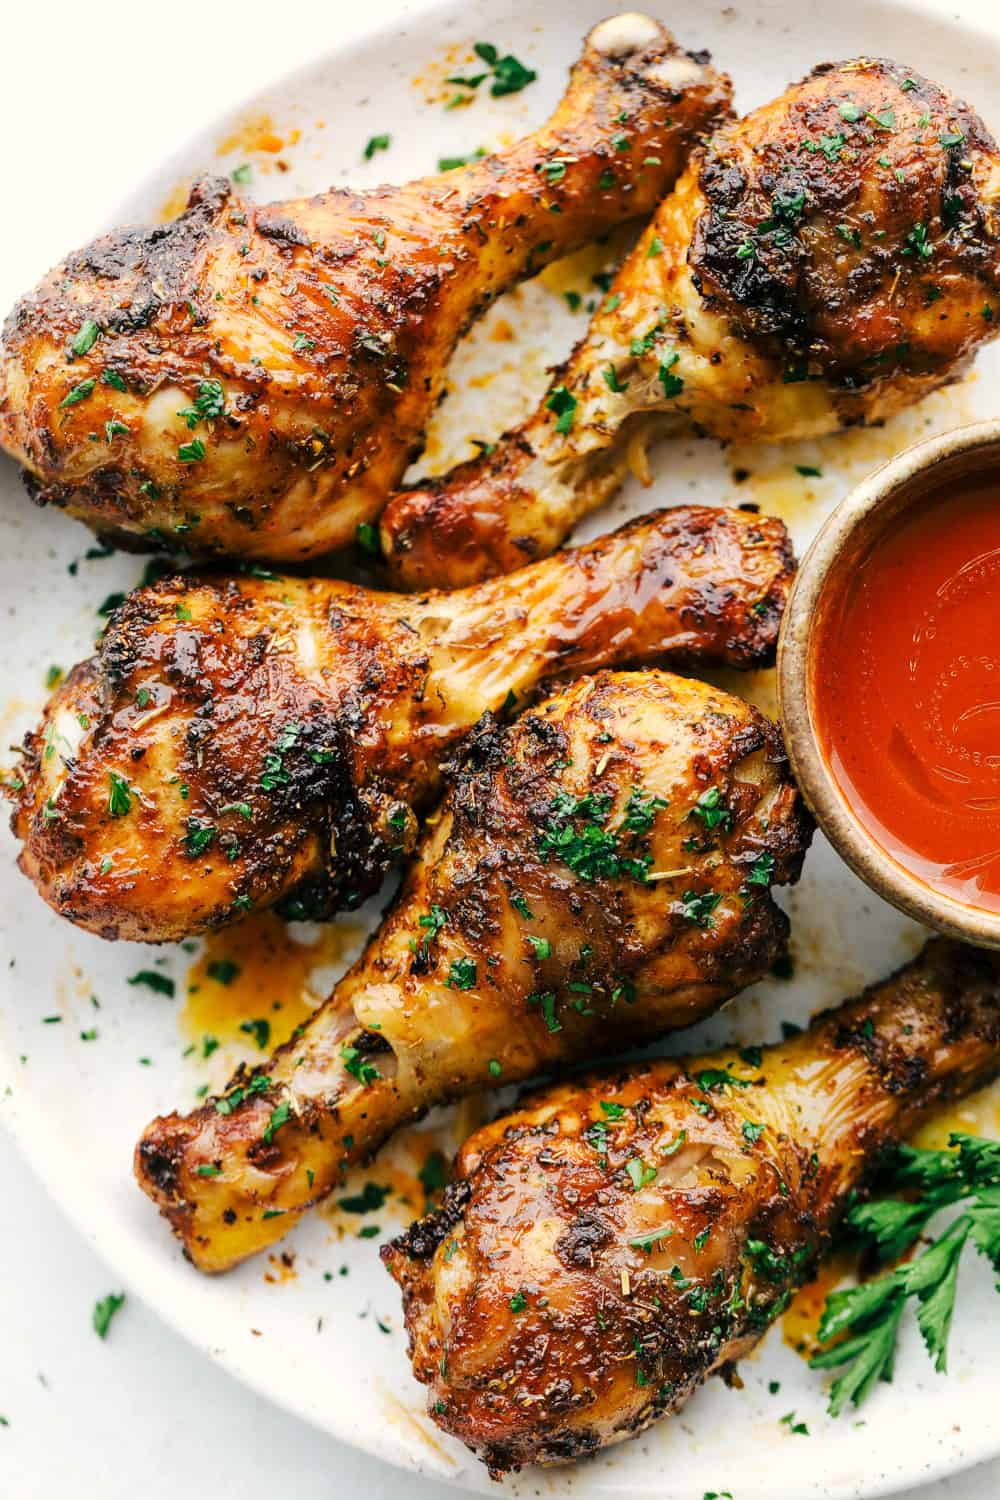
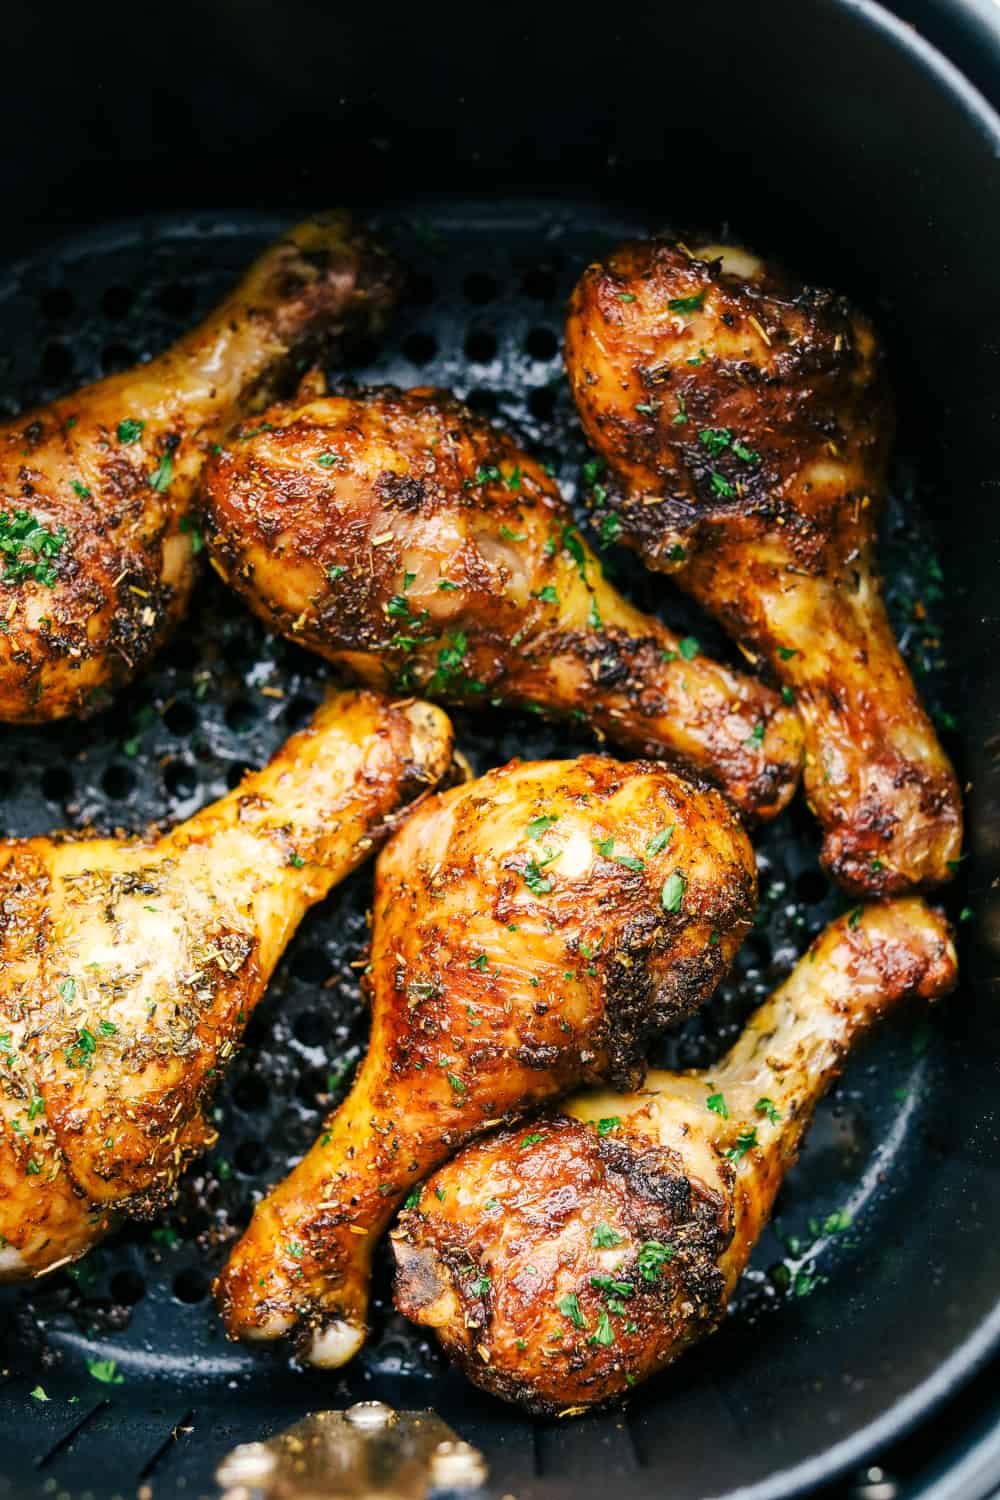
    Crispy, seasoned, delicious air fryer chicken legs.

    Air Fryer Drumsticks

    These air fryer chicken legs are so amazing! You don’t have to freeze outside to grill them, or make a huge mess in the kitchen pan cooking them. Air Frying is changing the cooking world! Air frying chicken legs are the best because it is all contained in the air fryer, that sits on your countertop. This frees up your oven to make the Potato Wedges or the Funeral Potatoes to go with the legs.

    The circulating air creates succulent crispy outsides and tender juicy meat inside. The seasoning is savory with a hint of sweet. It is SO good! Everyone loves chicken legs, they are easy to hold on to and eat. They give you an excuse to eat with your fingers too! These chicken legs have become my kids’ favorite dinner. They can eat with their hands and love the tender, juicy chicken taste. This air fryer recipe is so outstanding, you will have to plan to make extras!  Try them tonight!

    What You Need For Air Fryer Chicken Legs

    Look for Chicken Legs in the meat section of your grocery store. You can usually find packs of just chicken drumsticks near the other chicken parts.

    • Chicken Legs: You will want the skin on these. It creates that crispy outside shell that everyone loves.
    • Paprika: Adds flavor and color to the drumsticks.
    • Italian Seasoning: A perfect blend of seasoning to go right on top.
    • Brown Sugar: Adds a little bit of caramelization and sweetness to each leg.
    • Salt and Pepper: Add to taste!
    • Olive Oil: This helps the seasoning stick to the chicken and gives it a nice crisp skin once air fried.

    How To Make Chicken Legs in the Air Fryer

    This couldn’t get easier! Toss it all together and then hands off. No need to babysit the grill or pan. Just flip Cook the legs once and you will have dinner on the table in no time.

    1. Prep the Chicken: Pat dry the chicken legs with some paper towel. Place then in a medium sized bowl.
    2. Spice it up: In a smaller bowl combine the paprika, Italian seasoning, brown sugar, salt and pepper.
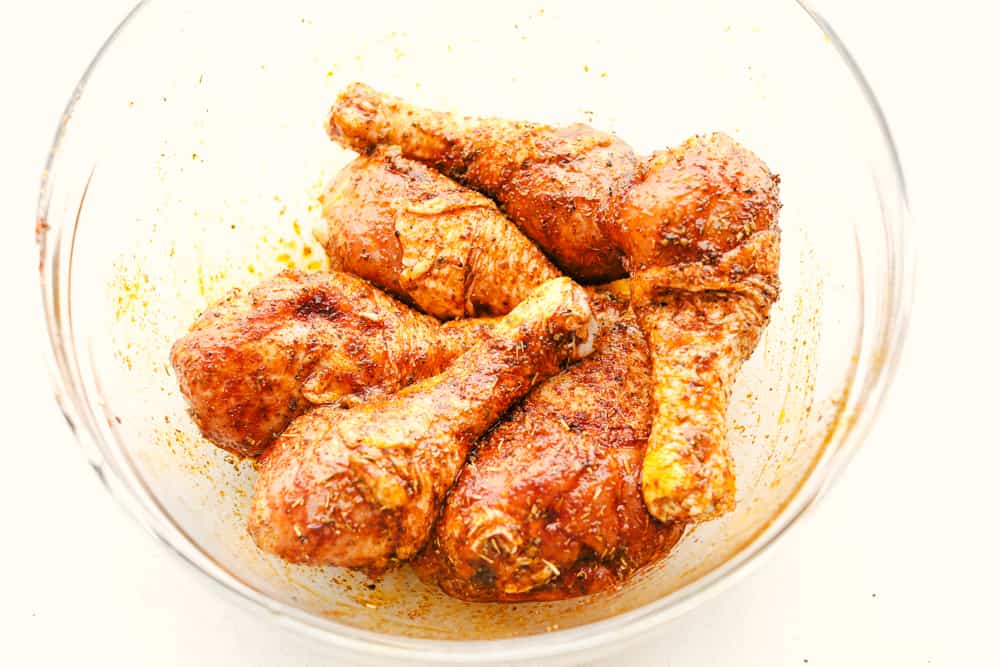
    3. Combine it: Add the olive oil to the bowl of chicken and then sprinkle with the seasonings, tossing until fully coated.
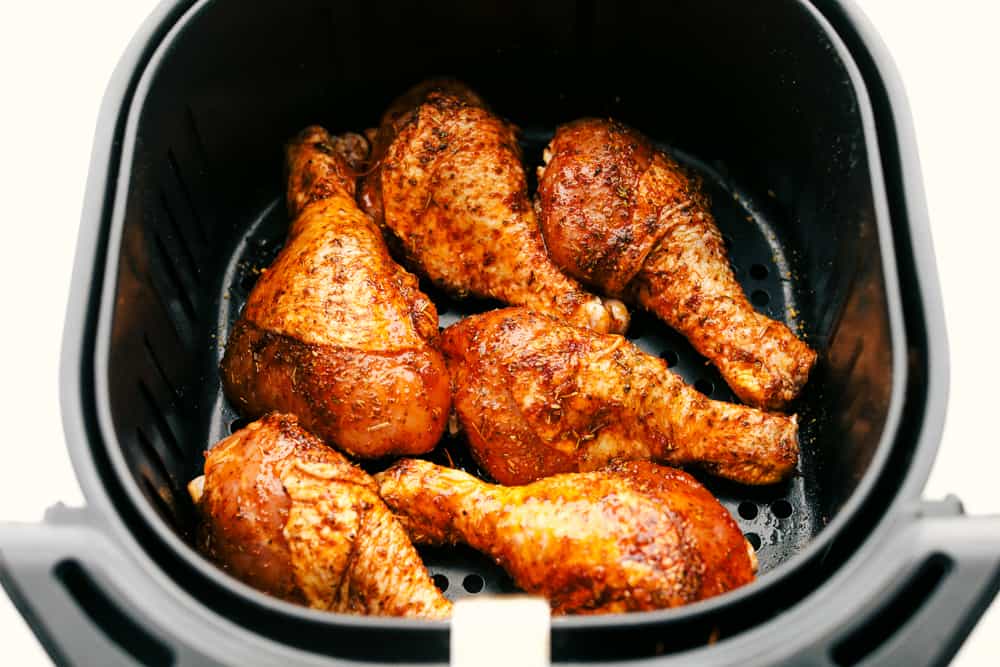
    4. Bake it: Place the chicken legs skin side down in the basket of the air fryer. Cook at 380 degrees for 10 minutes. Flip after 10 minutes and continue to cook for 7-8 more minutes until no longer pink and the internal temperature is 165 degrees Fahrenheit.

    Seasoning chicken legs for the air fryer.

    Why You Need Air Fryer Chicken Drumsticks in Your Life!

    Just in case your really wondering if you should make these or not, I’m here to tell you, you do!

    • Less Mess: Air Frying drumsticks in the air fryer keeps the mess contained instead of all over your grill or stove top. Love it!
    • Fast and Easy: Cook your drumsticks in half the time and get superb results.
    • Even Cooking: The circulating air in the fryer cooks the legs evenly without over charring the outside. It’s just first-rate!
    • Healthier: With little to know oil needed, it’s a healthier way to get your protein. Especially if you are  trying keto or a low carb diet. It’s a healthy way to get that “fried” taste and texture without the oil.
    • Cheap: The last time I checked chicken legs were one of the cheapest meats you could buy, talk about eating gourmet on a budget!
    • Fun: Ok, I’ve mentioned this before but seriously air fryer chicken drumsticks are one of the most fun things to eat. So dig in!

    Chicken legs ready to cook in the air fryer basket.

    Tips for Air Fryer Drumsticks

    You will want to make sure these are unbelievable but since you are air frying, that will be easy!

    • Know Your Air Fryer: Temperatures and timings can vary depending on your air fryer. How many chicken drumsticks you can fit will also make a difference. Be sure to check and monitor your chicken legs so you don’t overcook or undercook them. Adjust accordingly.
    • Check the Temperature: You will need to check the internal temperature to make sure these air fryer chicken legs are safe to eat. Insert a thermometer in the thickest, fleshiest part of the drumstick, making sure it’s not touching the bone. The temperature should read 165 degrees.
    • Let it Rest: It’s always a good idea to let meat rest before cutting into it. It allows the meat to reabsorb and redistribute the moisture within the meat and allows meat fibers to become more tender.

    Variations for Chicken Drumsticks

    The wonderful part about this air fryer recipe is that it is so customizable. Use different spices, sauces and make these chicken legs your own special legs. Just like these Air Fryer Chicken Wings, they will be just as awesome!

    • Rubs: There are so many different spices you can use for these air fryer legs. Besides taco and ranch seasoning there are a whole bunch of varieties you can mix up. Chili powder, smoked paprika, garlic powder, onion powder, basil, oregano, rosemary, thyme, ground mustard and celery seed just give you a few ideas.
    • Sauces: The air fryer chicken legs don’t need a sauce, but sometimes you just want a sauce. If you want to add a sauce to the chicken while it cooks like BBQ Sauce, wait to add it to the chicken till the last 2-3 minutes of cooking. Slather the chicken legs in BBQ sauce then finish cooking. Other sauces you’ll want to reserve for dipping. For instance Ranch dressing, Hot sauce, Cheese Sauce, YUM YUM Sauce, a honey mustard or your favorite Asian sauce all will work with these air fryer chicken legs.
    • Store: These will keep for 4-5 days in the fridge and up to 3-4 months in the freezer. To reheat the chicken legs, let them thaw in the fridge and reheat in the microwave or for a few minutes in the air fryer.

    Perfectly cooked chicken legs made in the air fryer.

    Let’s Make More Chicken!

    Chicken is one of the best proteins out there. It is convenient, cheap and extremely customizable. It is a healthy protein when you’re trying to clean up the diet a bit and it’s one of those foods that kids always seem to like. With its mild flavor, juicy tender texture, chicken is an ideal choice for any meal. Try making one of these incredible recipes today.

    Print

    Air Fryer Chicken Legs

    These Air Fryer Chicken Legs is every kids' dream come true. Everyone always wants to eat the legs, especially the kiddos. With this recipe there will still be fighting over who gets the last drumstick!
    Course Dinner, Main Course
    Cuisine American
    Keyword air fryer chicken, air fryer chicken legs, chicken legs
    Prep Time 5 minutes
    Cook Time 20 minutes
    Total Time 25 minutes
    Servings 4 Chicken Legs
    Calories 346kcal
    Author Alyssa Rivers

    Ingredients

    • 4-6 Chicken Legs
    • 2 teaspoons paprika
    • 1 teaspoons Italian Seasoning
    • 1 teaspoon brown sugar
    • 1/2 teaspoon salt
    • 1/2 teaspoon pepper
    • 2 Tablespoons olive oil

    Instructions

    • Pat the chicken legs with a paper towel to dry. Add them to a medium sized bowl.
    • In a small bowl combine paprika, Italian seasoning, brown sugar, and salt and pepper. Add the olive oil to the bowl of chicken and sprinkle with the seasonings and toss until fully coated.
    • Place the chicken legs skin side down in the basket of the air fryer. Cook at 380 degrees for 10 minutes. Flip after 10 minutes and continue to cook for 7-8 more minutes until no longer pink and the internal temperature is 165 degrees.

    Nutrition

    Calories: 346kcal | Carbohydrates: 2g | Protein: 21g | Fat: 28g | Saturated Fat: 7g | Cholesterol: 120mg | Sodium: 400mg | Potassium: 284mg | Fiber: 1g | Sugar: 1g | Vitamin A: 611IU | Vitamin C: 1mg | Calcium: 20mg | Iron: 1mg


    from The Recipe Critic https://ift.tt/39ZXaVA
    https://ift.tt/3sK9KkJ