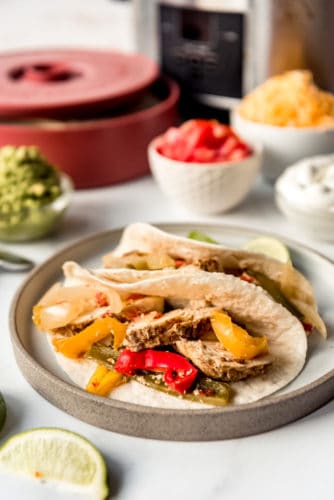
Tender and juicy, this Slow Cooker Italian Beef is mouthwateringly amazing! This recipe is fork tender with a tangy zippy broth. You are going to love it!
Beef Bourguignon, Crack Chicken and Jambalaya are all slow cooker favorites that you have to add to your rotations. The slow cook just intensifies the flavors like no other!

Delicious Italian Beef
You may be thinking as you look at this insanely delicious Italian beef that it looks a lot like my Mississippi Pork Roast, but these are truly different. And I’m here to tell you, that you need both in your life. This slow cooker beef is zesty, and infused with intense Italian flavor. This slow cooker Italian beef makes the best sandwiches! But don’t take my word for it, you have to try it!
Slow cooker recipes are the best. I love being able to through this together and then let the slow cooker do all the work. The aroma that fills your house will be incredible. This recipe is so easy, it comes together quickly after searing the beef to a crusty perfection. Just combine the rest of the ingredients and let it cook till it falls apart. The hardest part of this recipe will be having to wait till it’s done.
Ingredients for Italian Beef Sandwiches
Look for roasts in the meat section of your grocery store. Be sure to get a chuck roast. They are the queen of roasts. The dressing mix and seasonings combine with the zippy, and tangy pepperoncini for a must try taste. You and your family will LOVE this slow cooker recipe!
- Chuck Roast: 3-4 pounds.
- Salt and Pepper: To taste, rubbing it all over the roast.
- Oil: Canola or another high smoke oil.
- Beef consommé: Beef broth will work here too.
- Dry Italian Salad Dressing: Intensifies the flavoring.
- Garlic Powder: Everything’s better with garlic.
- Italian Seasoning: The perfect combination of spices for this roast.
- Jar Sliced Pepperoncini: Don’t drain the pepperoncini.
- Butter: Creates a deep richness to the roast.
- Hoagie Rolls: Any type of bun will do.
- Provolone Cheese: Sliced.
How to Cook Italian Beef in a Slow Cooker
Searing the roast is the only hands on part to this Italian beef recipe. Then you dump the rest in the slow cooker and let the magic happen. You can remove the roast to shred it, return it to the juices to absorb even more flavor before serving.
- Roast: Salt and pepper the beef roast.
- Sear: Heat a large skillet over high heat with the canola oil. Add the roast and sear each side for 2-3 minutes until it forms a golden seared crust. Place the roast in a 5 quart slow cooker.
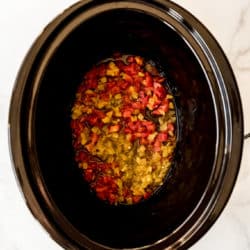
- Combine: Add the beef consommé, Italian seasoning, garlic powder, Italian dressing and pepperoncini to the slow cooker. Top roast with butter slices.
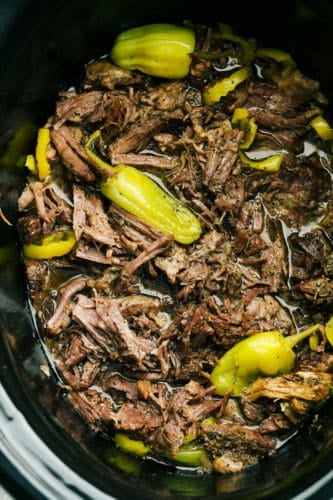
- Cook: Cook on low for 8-10 hours or high for 5-6 hours. Shred the roast with a fork.
- Sandwiches: Serve on hoagies topped with provolone cheese and additional pepperoncini if desired.

Slow Cooker Tips and Variations
Slow cooker recipes are super easy to make. It takes just a little bit of effort to put it all together and then you get to leave it alone for hours! You can go about your day knowing you’re have dinner practically already done. It’s such a satisfying feeling.
- Sear: Searing meat is a must for slow cooking roasts. It caramelizes the natural sugars in the meat and browns the proteins. It creates this awesome brown crust on the surface of the meat amplifying the flavor.
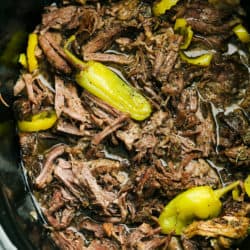
- Shredding: For the best flavor shred the beef and then return the Italian beef to the slow cooker and the savory juice. Let it heat for another 30 minutes to really allow all that flavor seep into the nooks and crannies.
- Drain: Use a slotted spoon to remove the beef from the slow cooker once ready to serve, so it doesn’t make your hoagies soggy.
- Toast: I prefer to toast the hoagie buns for optimal flavor and to help them from getting too soggy. Place on a cookie sheet and broil till desired doneness.
- Cheese: Provolone is a mild flavored wonderful melty cheese that goes perfectly with the Italian beef. But you can use cheddar, mozzarella, colby jack or even pepper jack for a bit of spice.
- Top it: Besides the cheese, feel free to add more pepperoncini, roasted red peppers, or sautéed onions for extra flavor and variety.
- Serve it differently: This slow cooker Italian beef is awesome all by itself, you don’t have to serve it on a bun. Serve it on top of rice or mashed potatoes. Stir it into pastas like mac and cheese or these garlic mushroom noodles.
What Kind of Roast Should I Use
There are many roasts out there to choose from and it can be confusing if you are not familiar with them.
- Kinds of Roasts to use: In this slow cooker recipe you can use top round, bottom round, shoulder or chuck roast. The roast that cooks best, however, is the boneless chuck roast. The marbling helps the meat fibers to break down into that iconic melt in your mouth texture, just like in this Melt in Your Mouth Pot Roast.
- What if my Roast isn’t tender? If you notice your roast isn’t falling apart at the touch of a fork, then it needs more time to cook. Every slow cooker is different and no two roasts are the same size. Your roast could take up to two hours longer to get to that perfect sweet spot. Your Italian beef may only need 30 minutes too. Just check it and be a bit patient. It’ll be worth it I promise.
Storing and Reheating Italian Beef
Slow cookers are still hands down one of the best ways to cook insanely delicious meals. The beautiful thing about slow cooker Italian beef is that it gets better with time. The flavors just keep infusing more and more the longer it sits. It’s so yummy!
- Storing: Make sure to store leftover Italian beef in its juices. You can drain what you don’t need but make sure there is some. Store in a covered container for up to 4-5 days.
- Freezing: Store the beef in some of its juices in a sealable heavy duty freezer bag. Squeeze out any extra air to prevent freezer burn. Keep for up to 3 months.
- Reheat: You can reheat thawed meat in the microwave, stove top or even back in the slow cooker.

More Slow Cooker Sandwich Recipes to Try
Like I’ve said before the slow cooker method of cooking is just one of the best ways to cook. It allows meat to soak up all the flavors and for the meat to break down into melt in your mouth tenderness. Slow cooker sandwiches are juicy, flavorful and fabulous!
- Slow Cooker Carolina Pulled Pork Sliders
- Brown Sugar Balsamic Glazed Pork
- Slow Cooker Chicken Gyros with Tzatziki
- Philly Cheesesteaks in the Slow Cooker
- Melt in Your Mouth French Dips
Slow Cooker Italian Beef
Ingredients
- 3-4 pounds beef chuck roast
- salt and pepper
- 2 tablespoons canola oil
- 2 cups beef consommé or Beef broth
- 1 package dry Italian salad dressing
- 1 teaspoon garlic powder
- 1 Tablespoon italian seasoning
- 12 oz jar sliced pepperoncini drained
- 1/4 cup butter sliced
- 4 hoagie rolls
- 8 slices provolone cheese
Instructions
-
Salt and pepper the beef roast. Heat a large skillet over high heat with the canola oil. Add the roast and sear each side for 2-3 minutes until it forms a golden seared crust. Place the roast in a 5 quart slow cooker.
-
Add the beef consommé, italian seasoning, garlic powder, italian seasoning and pepperoncini to the slow cooker. Top roast with butter slices.
-
Cook on low for 8-10 hours or high for 5-6 hours. Shred the roast with a fork. Serve on hoagies topped with provolone cheese and additional pepperoncinis if desired.
from The Recipe Critic https://ift.tt/3a8OuMG
https://ift.tt/2KPIwId