शुक्रवार, 12 फ़रवरी 2021

Antipasto Skewers

Antipasto Skewers are a super easy and delicious appetizer, perfect for any occasion. Colorful and full of flavor, these are true crowd pleaser!

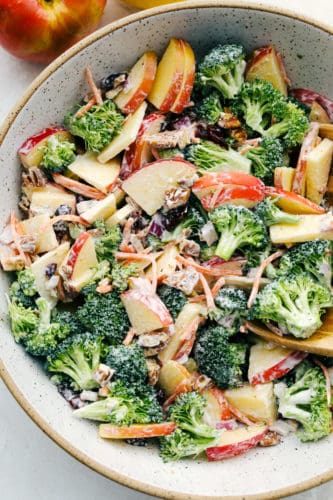
This is a great way to shake up dinner time or an easy way to serve appetizers. Some fan favorites include Caprese skewers, Antipasto Salad and Caprese Salad.

Antipasto skewers with cheese, olives, meats, spinach and cheese on a plate.

Antipasto Appetizer Skewers

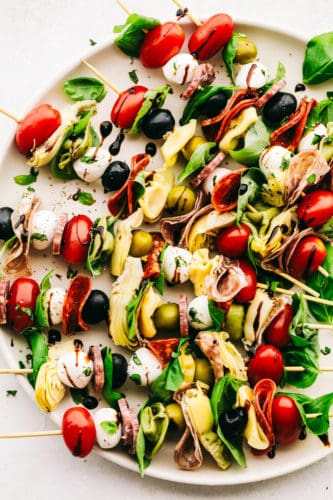
Antipasto is one of my favorite salads. It’s a classic combination of pasta and typical Italian meats, cheese and olives. It’s all sandwiched with tomatoes, basil, artichokes and drizzled with balsamic glaze. The glaze is optional, but it add so much zing and flavor to the skewers, you will love it.

Antipasto skewers are super easy to assemble. You can make them all the same or mix it up. Just make sure you include all the ingredients on all the skewers. No one wants to be left out from this goodness. If you are making for a crowd, you might want to double the recipe. These will go fast. Everyone loves these. Antipasto is usually served as a platter, but taking a few more minutes to pre assemble them into skewers will make you a hero. It’s easy for everyone to eat and enjoy!

Ingredients for Italian Skewers

When it comes to antipasto skewers, there is no definite recipe. These are all suggestions. Include and exclude according to your tastes. Including all of these ingredients however, will make the best antipasto skewers ever! They include all the key components of a great antipasto!

  • Cheese Tortellini: Perfect size and shape for skewers.
  • Kalamata Olives: Be sure to buy already pitted olives.
  • Grape Tomatoes: These are a good size for the skewers and not quite as juicy as cherry tomatoes.
  • Salami: Use your favorite brand of bite sized salami
  • Pepperoni: Use your favorite brand!
  • Marinated  Artichokes: You will find these with the canned vegetables usually.
  • Fresh Mozzarella Balls: Truly these are the best!
  • Fresh Basil Leaves: Adds incredible flavor and color.
  • Balsamic Glaze: Don’t skip! It’s divine.
  • Wooden Skewers: To make your antipasto skewers with.

How to Assemble Antipasto Skewers

There isn’t any rhyme or rhythm to how you assemble your skewers. You’ll just want to include all the ingredients. You can make them all the same or mix it up. It’s up to you!

  1. Cook: Cook the tortellini according to package directions. Rinse in cold water
  2. Assemble: Thread each skewer with each ingredient.
  3. Glaze: Drizzle with balsamic glaze if desired.

Ingredients for antipasto skewers on a cutting board ready to be assembled.

What is Antipasto?

When an antipasto salad, or platter or these skewers hits the table everyone gets excited. With it’s luscious combination of olives, tomatoes, cheese and cured meats it is huge favorite. So what exactly is Antipasto?

  • Antipasto: Antipasto is derived from latin which means “before” and “meal.” So antipasto literally refers to the dish that comes before others. Its origins come from Italy where it was tradition to have antipasto before a formal Italian meal. Typical ingredients of a traditional antipasto include cured meats, olives, pepperoncini, mushrooms, anchovies, artichoke hearts, various cheeses, pickled meats, and vegetables in oil or vinegar. Breads similar to a baguette or thin breadsticks are often served with antipasto platters. They can vary according to regions and are often meant to whet the appetite and be visually stunning as well as delicious.
  • Salad: One of the best ways to serve antipasto nowadays is in the form of a salad. It puts all the goodness of the antipasto board into the ease of a salad you can eat with a fork. It’s a staple at picnics and potlucks because of its cured meats and pickled vegetables it can stay at room temperature a lot longer than some of other potluck favorites such as potato salad. Making them as these appetizer skewers is an easy way to serve this winning combination of foods!

Layering ingredients on skewers for antipasto skewers.

Tips and Variations for Easy Antipasto Skewers

Visually stunning and super appetizing, these antipasto skewers are must make. They will be the hit of the party!

  • Skewers: Wooden skewers are cheap and you don’t have to worry about getting them back. If you are worried about splinters you can soak them before threading the antipasto.
  • Meats:  Any of your favorite cured meats will be perfect in these skewers. I like to use the bite sized salami instead of the large ones. Pepperoni, prosciutto, and bigger cuts can be folded over to be made smaller.
  • Basil: Not everyone is a fan of basil, especially a whole leaf. Substitute some or all of the basil with spinach. It’s mild but still has that vibrant green color.
  • Vegetables: Grape tomatoes add a nice fresh balance to the richness of the cheese and meats. You can use cucumber slices to also help break up the richness if you wish. For extra kick use whole pepperoncini as well.
  • Tortellini:  Try using a tri-colored tortellini to add even more color and pizazz.
  • Olives:  Kalamata olives are a favorite, but feel free to use any combination of olives. Using more than one olive adds more depth to your skewers.
  • Balsamic Glaze: This adds zing and richness to the antipasto skewers, which you will love. I recommend buying your balsamic glaze, it’s easy, tastes amazing and you won’t regret not having to make your own!

Can You Make Antipasto Skewers in Advance?

  • Make Ahead: Antipasto skewers can be made up to a day ahead. Don’t drizzle with the glaze till ready to serve.
  • Store:  Keep skewers in an airtight container in the fridge for up to 3-4 days. You can combine leftovers for a quick salad if you wish.

Up close look at an antipasto skewer layered with ingredients.

More Appealing Appetizers To Try

Appetizers are some of the best foods out there. It’s probably why restaurants offer entire platters of just appetizers for dinner. They’re small mini bites of luscious combinations of foods. It’s a great way to try new foods or indulgent foods in small increments. Having appetizers is a great way to try something new, and be adventurous. So when you need an appetizer for a party or if you just want to create an entire meal from appetizers, reach for these favorite recipes.

Print

Antipasto Skewers

Antipasto Skewers are a super easy and delicious appetizer, perfect for any occasion. Colorful and full of flavor, these are true crowd pleaser!
Course Appetizer, Snack
Cuisine American, Italian, Italian American
Keyword antipasto skewers
Prep Time 10 minutes
Cook Time 10 minutes
Total Time 20 minutes
Servings 8 Skewers
Calories 439kcal
Author Alyssa Rivers

Ingredients

  • 10 ounces cheese tortellini
  • 2 cups kalamata olives
  • 2 cups black olives
  • 2 cups grape tomatoes
  • 24 slices of salami
  • 24 slices pepperoni
  • 1 (15 ounce can) marinated artichokes
  • 1 container small fresh mozzarella balls
  • fresh basil leaves
  • balsamic glaze for drizzling
  • wooden skewers

Instructions

  • Start by cooking the tortellini according to package directions. Rinse in cold water.
  • Thread each skewer with each ingredient. Drizzle with balsamic glaze if desired.

Nutrition

Calories: 439kcal | Carbohydrates: 20g | Protein: 20g | Fat: 31g | Saturated Fat: 10g | Trans Fat: 1g | Cholesterol: 63mg | Sodium: 2099mg | Potassium: 257mg | Fiber: 4g | Sugar: 3g | Vitamin A: 768IU | Vitamin C: 5mg | Calcium: 236mg | Iron: 2mg


from The Recipe Critic https://ift.tt/3d4ca87
https://ift.tt/3acCtah

Broccoli Apple Salad

Broccoli, pecans, cranberries, carrots and apples come together to make an amazing salad with delicious flavors and textures. The creamy dressing on top makes this salad absolutely incredible!

Broccoli is amazing in salads, it adds crunch, nutrition and flavor. Some of the best salads with broccoli in them include Broccoli Cauliflower, Greek Broccoli Pasta and this incredible Bacon Ranch Pasta salad.

Broccoli and apple salad with a tangy dressing in a bowl.

Easy Broccoli Apple Salad

Broccoli in salads is my favorite. I especially love this Broccoli Cashew Salad that is on the blog. But this Broccoli Apple Salad became an instant favorite! As I was eating it, I just couldn’t get enough! I knew this salad would be amazing but I wasn’t expecting it to become a new favorite! SO many delicious new textures and flavors in this salad. The broccoli, carrots, and red onion, was followed by the sweetness of the apples and dried cranberries. The pecans added another yummy flavor and crunch. The creamy dressing on top was THEE best. It completed this fresh and delicious salad perfectly. I know that if you make this salad, it will become an instant favorite as well!

At first you might think that broccoli and apples don’t go together, but they do, trust me. This is truly one of the best salads out there. It’s healthy, full of flavor and the dressing is even light. I traded out some of the mayonnaise for greek yogurt, giving you a boost of calcium, protein and cutting the fat. All without compromising on taste and tang. It’s going to be a new go to salad for sure!

Ingredients for Broccoli and Apple Salad

Full of fresh crunchy ingredients, this salad is truly satisfying and filling. You are going to love all the vegetables and the tangy dressing.

  • Fresh Broccoli Florets: About 2 medium heads
  • Shredded Carrots: You can sometimes find pre shredded carrots in the produce section
  • Red Onion: Adds a bit of spice and tons of flavor.
  • Apples: 2 large apples will work, pick sweet ones not tart or sour. I used Gala
  • Pecans: Coarsely chopped
  • Dried Cranberries: Perfect bit sweetness and tartness

Creamy Dressing Ingredients

  • Light Mayonnaise: Creates the base of the dressing
  • Low Fat Greek Yogurt:  Gives it more creaminess and a nice bit of tang
  • Lemon Juice: Adds a bit of tartness, and helps keep the apples fresh looking
  • Sugar: Balances out the tart with a bit of sweet
  • Salt and Pepper:  Add more or less as desired.

How to Make Broccoli Salad with Apples

Chopping all the ingredients for this insanely delicious broccoli apple salad is the longest part of throwing this together. But it is so worth it. Add the flavors meld so perfectly together, it’s so good!

  1. Combine: In a large bowl combine broccoli, carrots, red onion, apples, pecans, and dried cranberries
  2. To make the dressing: Whisk together mayonnaise, greek yogurt, lemon juice, sugar, salt and pepper.
  3. Add: the dressing to the salad and toss to coat. Chill until ready to serve.

The ingredients to make broccoli apple salad in a bowl ready to combine.

Why This Recipe Needs to be Made Today!

Besides being extremely delicious this broccoli apple salad has so many pros to it, you will truly want to keep this recipe close by.

  • Nutritious: Packed with vegetables and fruit and even nuts, this broccoli salad is an immune boosting, fiber enhancing delicious dish. This salad is high in vitamin C, K and A plus it’s high in fiber. Pecans add protein and a healthy fat. Even though you have mayonnaise in the dressing, it’s such a big salad that the amount you’ll actually ingest is just little. Unless you eat the whole thing, which I wouldn’t blame you. It’s extremely diet friendly.
  • Make Ahead: This broccoli apple salad actually tastes better if it sits for at least an hour. The flavors and the dressing all meld together in the most fantastic way. This non lettuce salad is full of hearty ingredients so this will stand up to being made ahead of time beautifully. It’s a great choice for packing in lunches, taking to potlucks, and having as leftovers. Make it ahead of time and free up time for making other dishes before dinner.
  • Colorful: It’s been said we should eat the rainbow! Well, this broccoli apple salad is definitely a rainbow of colors! It’s as fun to look at as it is too eat! Not only isn’t appealing to the eyes, but to the tastebuds too! It’ll be a salad that gets eaten first at your next picnic
  • Hearty and Satisfying: This salad is packed with nutritious ingredients that will not only taste good, but fill you up. The crunchiness satisfies your desire to chew and the high fiber will fill up your tummy!

Pour the dressing over the salad ingredients.

Tips and Variations for Creamy Broccoli Apple Salad

This salad is delicious as a side dish for beef, fried chicken or even salmon. Or make it a highlight in a light meal served with a refreshing fruit salad and some breadsticks. Yummy!

  • Make it Easy: You can make the prep for this salad even easier by buying pre shredded carrots, and pre cut broccoli florets.
  • Substitute Dried Cranberries: Use raisins, golden raisins, or dried cherries instead of the cranberries if you wish.
  • Nuts: Try using walnuts or cashews instead of pecans. Also try toasting them in a pan on the stovetop till fragrant and slightly browned for added flavor.
  • Cheese: For a twist add blue cheese to the broccoli apple salad which adds incredible flavor.
  • Apples: I used gala apples in this recipe. You want an apple on the sweeter side. Try Fuji or Braeburn as well for excellent results.

How to Store Apple Broccoli Salad

Broccoli Apple Salad keeps great for up to 3 days before it will start to really get soggy. It’ll still be good for another 2-3 days after, but the quality of the vegetables and fruit will decrease rapidly. If you plan to eat it all week long, try dividing the salad in half and only add dressing to the half you are eating up first. It will help keep the sogginess at bay.

Upclose picture of broccoli apple salad with pecans, raisins and dressing.

More Broccoli Loving Recipes To Try

Broccoli is good for you, we all know that! I love it, but not everyone does. Sometimes we have to drown it in amazing cheese sauce or ranch dressing to get our kids or loved ones to eat it. Well, these recipes are tried and true and absolute favorites! So if you’re trying to get more good for you broccoli in your family’s diet, try one or all of these recipes! You won’t regret it!

Print

Broccoli Apple Salad

Broccoli, pecans, cranberries, carrots and apples come together to make an amazing salad with delicious flavors and textures.  The creamy dressing on top makes this salad absolutely incredible!
Course Salad, Side Dish
Cuisine American
Keyword broccoli apple salad, broccoli salad
Prep Time 20 minutes
Total Time 20 minutes
Servings 6 Servings
Calories 215kcal
Author Alyssa Rivers

Ingredients

  • 4 cups fresh broccoli florets (about 2 medium heads)
  • 1/2 cup shredded carrots
  • 1/4 cup diced red onion
  • 2 large apples finely chopped (I used gala apples)
  • 1/2 cup pecans coarsely chopped
  • 1/2 cup dried cranberries

Creamy dressing ingredients:

  • 1/2 cup lite mayonnaise
  • 1/2 cup low fat greek yogurt
  • 2 Tablespoons lemon juice
  • 1 Tablespoon sugar
  • 1/4 teaspoon salt
  • 1/8 teaspoon pepper

Instructions

  • In a large bowl combine broccoli, carrots, red onion, apples, pecans, and dried cranberries.
  • To make the dressing: Whisk together mayonnaise, greek yogurt, lemon juice, sugar, salt and pepper.
  • Add the dressing to the salad and toss to coat. Chill until ready to serve.

Video

Notes

Updated on February 11, 2021
Originally Posted on January 27, 2015

Nutrition

Calories: 215kcal | Carbohydrates: 28g | Protein: 5g | Fat: 11g | Saturated Fat: 1g | Cholesterol: 4mg | Sodium: 272mg | Potassium: 334mg | Fiber: 5g | Sugar: 19g | Vitamin A: 2217IU | Vitamin C: 60mg | Calcium: 63mg | Iron: 1mg

Broccoli apple salad with a tangy dressing in a bowl ready to eat.

Save


from The Recipe Critic https://ift.tt/2LJ1GzX
https://ift.tt/3qemChc

गुरुवार, 11 फ़रवरी 2021

Pink Velvet Cake

This rich decadent Pink Velvet Cake is going to be a quick favorite. It’s absolutely perfect for Valentine’s Day, baby showers or any other special occasions.

Pink velvet is a fun twist to my Red Velvet Cake. I also love these cupcakes and brownies, both with a rich cream cheese frosting for Valentine’s Day.

Pink fluffy velvet cake with white frosting and pink swirls on a plate with a fork.

Pink Velvet Cake Recipe

This Pink Velvet cake is just as fun to eat as it is to make. It’s pretty pink insides are moist and fluffy. It’s light and bouncy and absolutely delicious. The vanilla and almond pair perfectly together creating a unique flavor, it’s scrumptious. The delicate decorations are optional, but they add to the visual appeal of this pink cake. The frosting is so good, it just the right texture, not to dense and not too sweet. You are going to love it!

Pink Velvet is such a fantastic choice to serve for so many different events. Whether it’s a baby shower, gender reveal party, brunch, Valentine’s Day, birthdays or just because, this cake will be a show stopper. Even though it sounds complicated, making this velvet cake is quite easy. It just takes time. Every bit of time it takes will be so worth it. This is going to be one of the BEST cakes ever!

Ingredients for Decadent Pink Velvet Cake

  • Egg Whites: This calls for 4 egg whites, save the yolks to make custards, tarts or carbonara.
  • Granulated Sugar: Adds sweetness
  • Unsalted Butter: Creates richness and a moist crumb.
  • Oil: For extra moisture
  • Pure Vanilla Extract: Flavor enhancer
  • Pure Almond Extract: This is so good in the cake.
  • Red Food Color: Just enough to make it pink.
  • Flour: All purpose flour.
  • Baking Powder: This is the raising agent.
  • Salt: Creates balance in the cake.
  • Milk: Provides the velveteen texture.

Pink Frosting Ingredients

  • Unsalted Butter: Frosting wouldn’t be creamy without the butter.
  • Powdered Sugar: Sift before adding to avoid lumps.
  • Heavy Whipping Cream: Adds richness.
  • Pure Vanilla Extract: Creates the best flavor.
  • Salt: Just a pinch.
  • Red Food Color: optional

Making Dreamy Pink Velvet Cake

  1. Prep:  Preheat the oven to 350 degrees. Grease and line the bottom of two 8″ cake pans with parchment paper. Grease the top of the parchment paper and the side of he cake pans. Sprinkle flour on the side of the cake pan and tap out the excess. Set aside.
  2. Meringue: In the bowl of a stand mixer, add the egg white and half of the sugar. Beat on medium speed until the meringue is formed. It should be shiny white with stiff peaks. Transfer the meringue into a different bowl and set aside.
  3. Cream: In the same stand mixer bowl, without washing, cream the softened butter and sugar together. Then add oil, the extracts and red food color. Beat until incorporated.
  4. Sift: In a medium mixing bowl, sift together flour and baking powder. Stir in the salt, and mix with a whisk to distribute evenly.
  5. Combine: Add the flour mixture to the butter and oil mixture in 3 increments alternating with the milk, starting and ending with the flour. Scrape the bottom and side of the bowl to ensure thorough mixing. Then with a light hand, fold in the meringue.
  6. Divide: Divide the cake batter among the two prepared cake pans. Bake in the middle oven rack for 25-30 minutes until a toothpick inserted in the middle of the cake comes out clean with just a few crumbs attached.
  7. Cool: Remove from the oven and allow to cool to the touch, remove cakes from the pans and allow to cool completely on a wire rack.

Folding i n the meringue with the cake batter.

Make the Frosting

  1. Mix: Add all ingredients except the food color to a stand mixer bowl. Stir to incorporate all the ingredients, then increase the mixer speed gradually to high and beat until the frosting is white and fluffy.
  2. Optional: Use red food color to dye part of the frosting pink for the decorations if desired. See steps below.

Assemble the Cake

  1. Layer: Place the first layer of cake on a cake stand or plate, add 1 cup of frosting on top and level out with an offset spatula. Place the second layer of cake on top and add another cup of frosting on top, level it out. Add another cup of frosting to the side of the cake.
  2. Dye: At the this point dye the remaining frosting with a few drops of red food color to get a light pink color to use for the decoration. Fill a pastry bag fitted with your favorite decorating tip and pipe decoration on top of the cake.  Add swirls to cover the base of the cake.
  3. Serve: Serve right away or refrigerate until ready to serve. Allow the cake to come to room temperature about 30 minutes before serving if refrigerated.

Pink and white frosting ready to frost.

What’s the Difference Between Red and Pink Velvet Cakes

There is actually quite a bit that’s different between these two cakes besides being a different shade of red. That being said, both are insanely delicious and fun to make and eat!

  • Red Velvet: This divine cakes original color comes from a chemical reaction that occurs when the cocoa, buttermilk and vinegar combine. It creates a deep brownish red. Today’s red velvet cakes have added coloring to increase the intensity of the red color. The cocoa, vinegar and buttermilk are a unique combination that gives it incredible flavor and texture, thus it’s unique name as well.  Cream cheese frosting is a staple for red velvet and combines with it superbly.
  • Pink Velvet: Despite its name, pink velvet cake doesn’t share much with red velvet. The meringue creates it’s light fluffy velvet texture. It does not have cocoa but instead has a winning combination of vanilla and almond flavorings. The creamy sweet frosting, is not cream cheese but a lighter creamy frosting that doesn’t overpower the delicate flavors of the cake.

Pink velvet cake with white frosting and pink flowers.

Tips and Variations for Pink Cake

No one wants to go through all the effort of making a cake and it coming out all wrong. Follow these tips and variations for perfect cake every time.

  • Frosting: Use just enough red food color to tint the batter a light pink. Increase if you want a more neon pink. If you don’t want to decorate the cake with pink frosting, you can just use white frosting. Or if you don’t want to decorate the cake at all, just use the remaining frosting on the side and top of the cake for a thicker layer of frosting.
  • Decorations: Feel free to use different decorations as you desire. Top with sprinkles, candies, or other toppings as you desire.
  • Room Temperature: For easier mixing and better combining of ingredients make sure your eggs and other ingredients are at room temperature.
  • Measure properly:  Many times a cake can come out wrong if you “eyeball” the ingredients. Be sure to measure carefully.
  • Cool Completely:  Don’t even think about cutting or frosting your cake until they are completely cool. If needed you can stick the cakes in the fridge before frosting. This helps the crumb tighten up.
  • Don’t Over or Under Cook:  Be sure your cake still has a few crumbs sticking to the toothpick, but make sure it’s not gooey. Check it often and carefully, you don’t a dry cake or one that falls.
  • Don’t Over Mix: Be Careful to not over-mix your cake batter, especially when folding in the meringue .
  • Store: Frosted cake will keep in the fridge for up to 1 week when covered tightly. You can freeze cake that’s tightly wrapped for up to 3 months.

The inside of the pink velvet cake with white frosting and pink frosting flowers.

More Cake Recipes to Indulge in

A famous queen once said “Let them eat cake!” I think that’s reason enough to eat cake as much as possible. It can be rich and dense or light and fluffy. It can take all day to make or in just an hour. Cake comes in just about every flavor imaginable and it’s perfect for every occasion. And I mean any occasion, whether it’s a celebration of grand proportion or the fact you made it through the day. I think all of it’s a great reason to eat cake!

Print

Pink Velvet Cake

This rich decadent Pink Velvet Cake is going to be a quick favorite.It's absolutely perfect for Valentine's Day, baby showers or any other special occasions.
Course Cake, Dessert
Cuisine American
Keyword pink cake, pink velvet cake, velvet cake
Prep Time 40 minutes
Cook Time 30 minutes
Total Time 1 hour 10 minutes
Servings 12 Slices
Calories 713kcal
Author Alyssa Rivers

Ingredients

Pink cake

  • 4 large egg whites
  • 1 ⅓ cup granulated sugar divided
  • 4 ounces unsalted butter room temperature
  • ½ cup oil
  • 1 teaspoon pure vanilla extract
  • ½ teaspoon pure almond extract
  • 10 - 12 drops of liquid red food color
  • 2 cup all-purpose flour
  • 2 teaspoon baking powder
  • ½ teaspoon salt
  • cup milk room temperature

Frosting

  • 16 ounces unsalted butter
  • 2 cup powdered sugar
  • ½ cup heavy whipping cream
  • 2 teaspoon pure vanilla extract
  • A big pinch of salt
  • A few drop of red food color optional

Instructions

  • Make the cake
  • Preheat the oven to 350°F.
  • Grease and line the bottom of two 8” cake pans with parchment paper, grease the top of the parchment paper and the side of the cake pans. Sprinkle flour on the side of the cake pan and tap out the excess. Set aside.
  • In the bowl of a stand mixer, add the egg white and half of the sugar. Beat on medium speed until the meringue is formed. It should be shiny white with stiff peaks. Transfer the meringue into a different bowl and set aside.
  • In the same stand mixer bowl, without washing, cream the softened butter and sugar together. Then add oil, the extracts and red food color. Beat until incorporated.
  • In a medium mixing bowl, sift together flour and baking powder. Stir in the salt, and mix with a whisk to distribute evenly.
  • Add the flour mixture to the butter and oil mixture in 3 increments alternating with the milk, starting and ending with the flour. Scrape the bottom and side of the bowl to ensure thorough mixing. Then with a light hand, fold in the meringue.
  • Divide the cake batter among the two prepared cake pans. Bake in the middle oven rack for 25-30 minutes until a toothpick inserted in the middle of the cake comes out clean with just a few crumbs attached.
  • Remove from the oven and allow to cool to the touch, remove cakes from the pans and allow to cool completely on a wire rack.

Make the frosting

  • Add all ingredients except the food color to a stand mixer bowl. Stir to incorporate all of the ingredients, then increase the mixer speed gradually to high and beat until the frosting is white and fluffy.
  • Optional: use red food color to dye part of the frosting pink for the decorations if desired. See steps below.
  • Assemble the cake
  • Place the first layer of cake on a cake stand or plate, add 1 cup of frosting on top and level out with an offset spatula. Place the second layer of cake on top and add another cup of frosting on top, level it out. Add another cup of frosting to the side of the cake.
  • At this point, dye the remaining frosting with a few drops of red food color to get a light pink color to use for the decoration. Fill a pastry bag fitted with your favorite decorating tip and pipe decoration on top of the cake. Add swirls to cover the base of the cake.
  • Serve right away or refrigerate until ready to serve. Allow the cake to come to room temperature about 30 minutes before serving if refrigerated.

Notes

Use just enough red food color to tint the batter a light pink. Increase if you want a more neon pink.
If you don’t want to decorate the cake with pink frosting, you can just use white frosting. Or if you don’t want to decorate the cake at all, just use the remaining frosting on the side and top of the cake for a thicker layer of frosting.

Nutrition

Calories: 713kcal | Carbohydrates: 60g | Protein: 4g | Fat: 52g | Saturated Fat: 28g | Trans Fat: 2g | Cholesterol: 117mg | Sodium: 132mg | Potassium: 147mg | Fiber: 1g | Sugar: 43g | Vitamin A: 1348IU | Vitamin C: 1mg | Calcium: 66mg | Iron: 1mg


from The Recipe Critic https://ift.tt/2Z5oPjd
https://ift.tt/372N9GP