रविवार, 14 फ़रवरी 2021

Split Pea Soup

Split Pea Soup with ham is the perfect comfort food for any occasion. Full of vegetables, flavored with ham and cooked to perfection, you and your family are going to LOVE this soup.

Soups are one of the most comforting food, especially on chilly nights! Try Broccoli Cheese, Zuppa Toscana or my Winning Cheeseburger soup when you want to come home to something warm and delicious.

Homemade Split pea soup with ham in a bowl.

Split Pea Soup with Ham Bone

Split Pea Soup flavored with ham is just like the one you grew up on. Full of vegetables and tender split peas this soup is easy to make and even better to eat. It is  hearty and soul warming. Split pea soup is one of those feel good soups that’s also good for you. Don’t let the color of this incredibly delicious soup throw you. Its vibrant color just means it tastes good and is healthy too. The aroma is unbelievable and the flavor will keep you coming back bowl after bowl.

Split pea soup is one my go to favorites after I’ve cooked a ham and have leftovers. It’s the perfect way to use the hambone and not let it go to waste. It gives the pea soup just enough of that salty smoky flavor that makes this soup irresistible. The ham also gives it an extra punch of protein and will help satisfy your hunger.  Another plus to this recipe is the fact that split peas are so cheap. So if you use leftover ham, it’s quite a low cost hearty dish. Serve it with a side of rolls and a nice green salad and you’ve got a meal that’s sure to delight!

Ingredients For Pea Soup

Hearty and wholesome, this soup is chock full of good for you ingredients. Herbs and spices give that extra umph and flavor. If you don’t have a leftover ham bone you can use, ask the butcher for one at your local grocery store. You can also leave out the ham bone and just add ham. It won’t be quite as flavorful but still amazing.

  • Butter: For sautéing the vegetables.
  • Onion: A classic ingredient for most soups.
  • Carrots: Dice into bite sized pieces.
  • Celery: Add incredible flavor to the stock.
  • Garlic: Gives the split pea soup a nice flavor.
  • Dried Split Peas: These can be found with other dried beans at your local store.
  • Chicken Broth: Flavor and the base of the soup.
  • Ham bone: If you don’t have one on hand, see if you can get one from your local butcher.
  • Salt and pepper: Add more or less to taste.
  • Fresh Thyme: Fresh gives a nice light flavor. You can use dry, just use ½ teaspoon.
  • Chopped Ham: This is optional, but you’re going to love the extra flavor it gives.

How to Make Split Pea Soup

Like most soups this Split pea soup is pretty hands off once you sauté the vegetables. The longer you can let it simmer the more the flavors will meld together. Whip this up with plenty of time to make some biscuits to go with it.

  1. Sauté: In a large pot over medium high heat ad the butter and let it melt. Add the onion, carrots, celery and garlic. Sauté until tender
  2. Add: Pour in the split peas and chicken broth. Next carefully place in the hambone.
  3. Simmer:  Bring to a boil and simmer uncovered for 60-90 minutes stirring occasionally. Cook until the peas split and soup has thickened.
  4. Shred: Remove the hambone and shred the ham. Add it back to the soup. Add salt and pepper and thyme. Garnish with additional ham if needed.
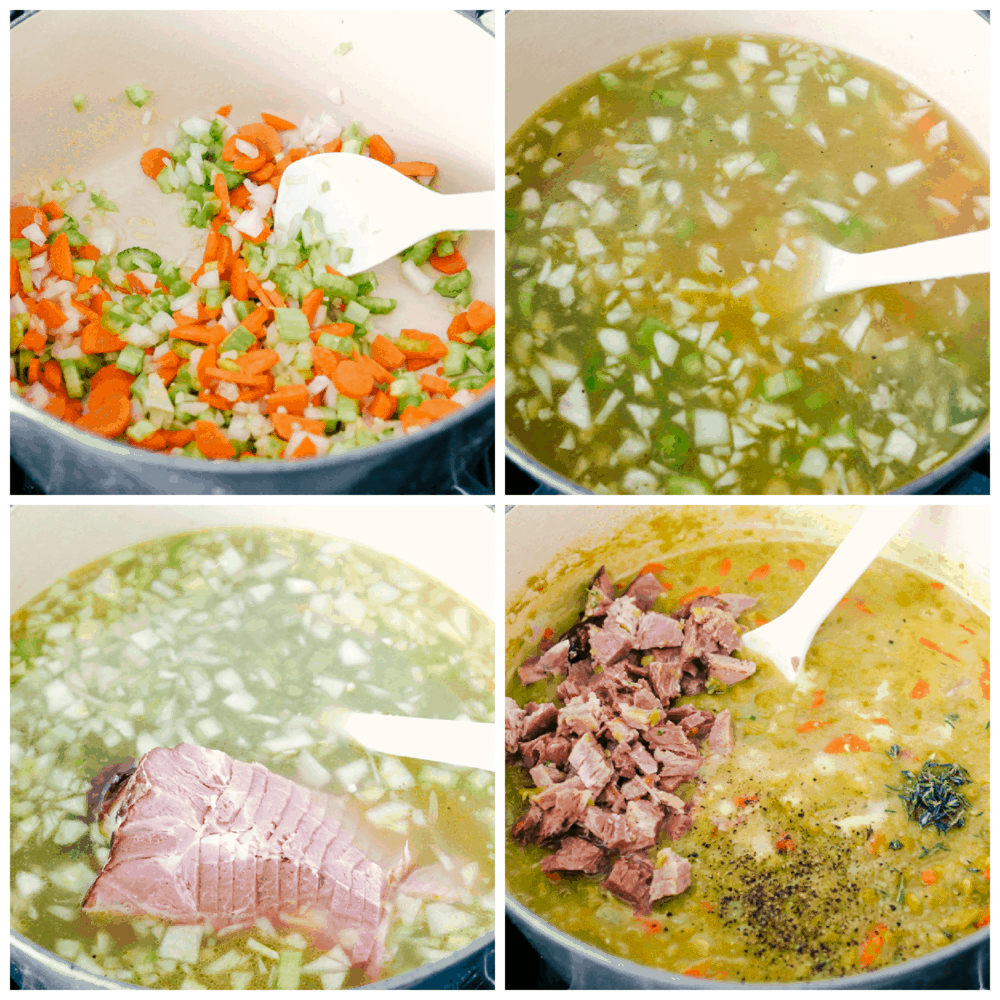
Sauteing vegetables, cooking the ham bone and stirring in ham for spit pea soup.

What are Split Peas?

  • What are they? Split peas are field peas that are dried, peeled and split in half for easy cooking. They come in both green and yellow varieties, which can be fun to add both to the soup. The yellow ones tend to be more mild in flavor and the green split peas are sweeter. That’s why they pair so perfectly with the salty ham. As they cook they will thicken and create a wonderful creamy texture, perfect for soup.
  • Do you need to Soak Them? Split peas are small so they don’t need to be soaked. The long cooking time for the soup is more than enough to give these split peas the soft texture you want.  Just give the split peas a nice rinse before adding them to the soup. Since you don’t have to soak the peas, it saves you time in the beginning. The long cooking time also allows the flavors to meld beautifully together and they will cook down and thicken to a perfect texture.
  • Are they Nutritious? Split peas are definitely good for you. They are low in fat, high in fiber and protein, and are a great source of vitamins and minerals including magnesium.

Tips and Variations for Pea Soup

  • Add Vegetables: This is a hearty soup already, but you can even more depth to it by adding in a few red or yellow potatoes with the diced carrots.
  • Thicken: When cooking the peas should break down and thicken on their own, if you feel you want it thicker, simmer uncovered for the last 20-30 minutes. Do note that the soup will thicken as it rests and cools. You might actually need to thin it out with water the next day.
  • No Ham Bone: If you don’t have a ham bone don’t worry. You can still get that great flavor from thick chunks of sliced ham. Throw them in with the stock and allow it to simmer along with the rest.  Add bacon at the end for garnish and even more flavor if you desire.

Storing Leftover Soup

If you have any leftovers, which are always better the next day, they can be kept in the refrigerator for up to 4 days. Keep it tightly sealed, and remember it will thicken as it sits. Add broth or water to thin it as needed. Reheat on the stove top on medium low or microwave individual portions.

Can I Freeze It?

Yes, this soup will freeze well! First let the soup completely cool and place in airtight containers or freezer safe ziplock bags. This will keep in the freezer for up 3 months. Thaw overnight in the fridge and reheat the next day.
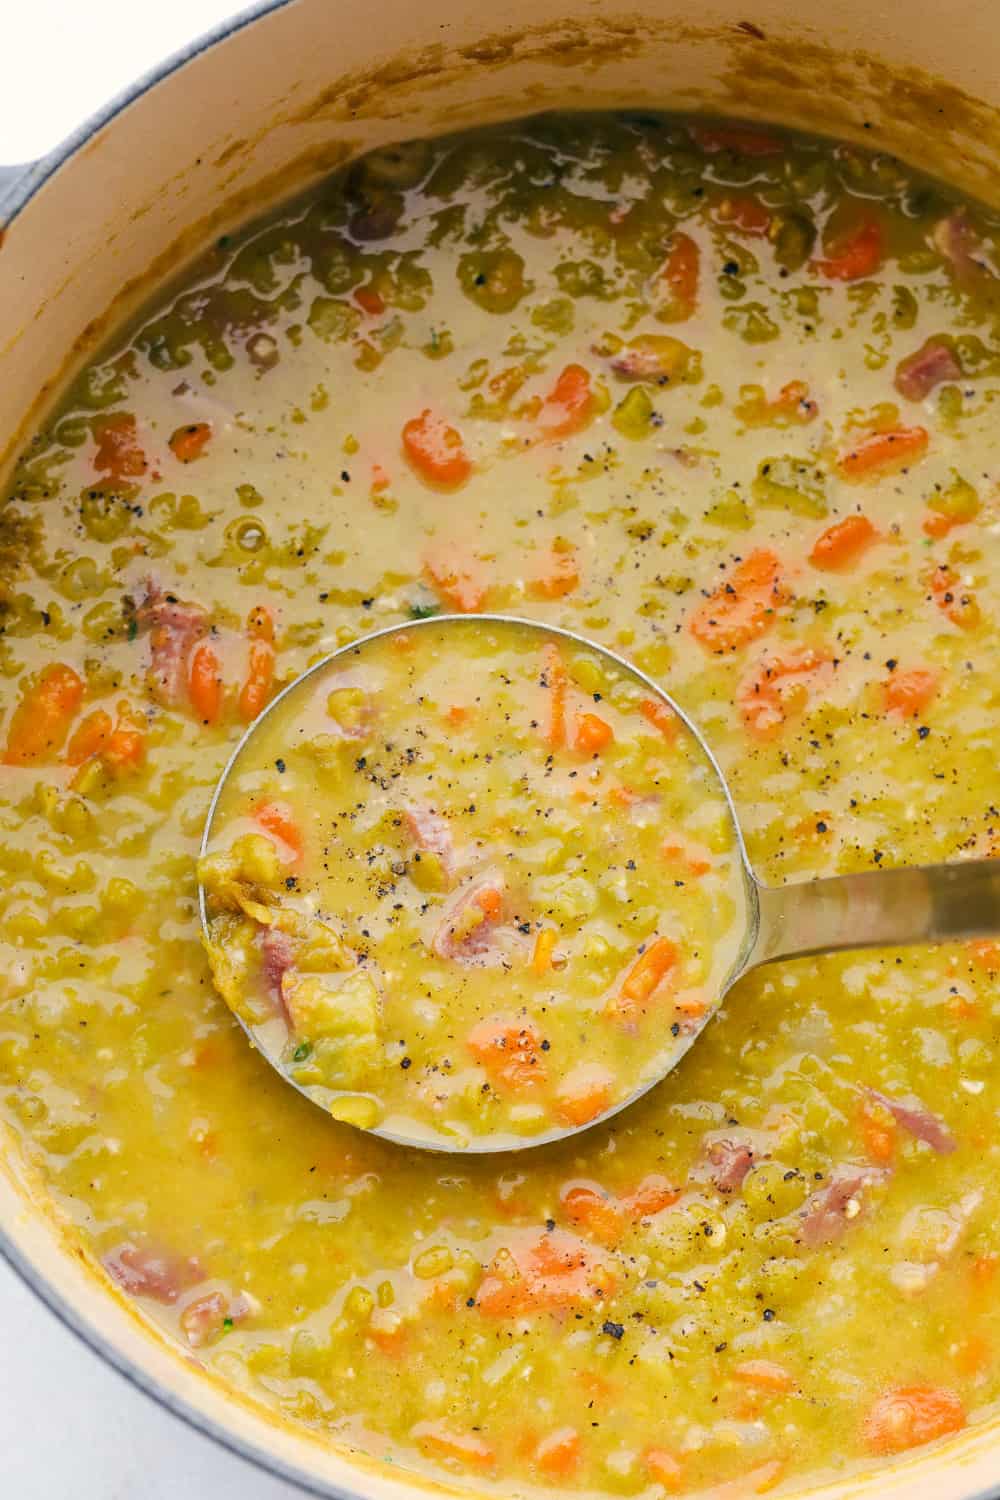
Ladling split pea soup out of stock pot.

More Soups to Love!

Soup is so good and such an easy way to make dinner. They can be super healthy, super comforting, and always super yummy! There’s nothing quite like a nice warm bowl of goodness to cheer you up on a chilly night after a hard day. Soups are relatively easy too. You can throw everything in a pot and let it simmer away till you’re ready to eat. Soup is easy to change and adapt as well. If you don’t have a certain ingredient it can usually be substituted for another, depending on what it is. Soup is just so delicious, try some of these tried and true scrumptious soups tonight!

Print

Split Pea Soup

Split Pea Soup with ham is the perfect comfort food for any occasion. Full of vegetables, flavored with ham and cooked to perfection, you and your family are going to LOVE this soup.
Course Dinner, main dish, Side Dish, Soup
Cuisine American
Keyword pea soup, split pea soup, split pea soup recipe
Prep Time 20 minutes
Cook Time 1 hour 30 minutes
Total Time 1 hour 50 minutes
Servings 8 People
Calories 259kcal
Author Alyssa Rivers

Ingredients

  • 2 Tablespoons butter
  • 1 small onion chopped
  • 3 large carrots diced
  • 3 celery stalks diced
  • 3 cloves garlic minced
  • 1 pound dried split peas
  • 6 cups chicken broth more if needed
  • 1 ½ - 2 pound ham bone
  • 1/2 teaspoon salt
  • 1/4 teaspoon pepper
  • 1 teaspoon fresh thyme
  • 1 cup chopped ham for garnish

Instructions

  • In a large pot over medium high heat add the butter and let it melt. Add the onion, carrots, celery, and garlic. Sauté until tender.
  • Add in the split peas and chicken broth. Add in the ham bone. Bring to a boil and simmer uncovered for 60-90 minutes stirring occasionally. Cook until the peas split and the soup has thickened.
  • Remove the ham bone and shred the ham. Add it back to the soup. Add salt, pepper, and thyme. Garnish with additional ham if needed.

Nutrition

Calories: 259kcal | Carbohydrates: 39g | Protein: 18g | Fat: 4g | Saturated Fat: 2g | Trans Fat: 1g | Cholesterol: 15mg | Sodium: 1030mg | Potassium: 808mg | Fiber: 15g | Sugar: 6g | Vitamin A: 4705IU | Vitamin C: 16mg | Calcium: 58mg | Iron: 3mg


from The Recipe Critic https://ift.tt/3pi0XU8
https://ift.tt/3piwJjJ
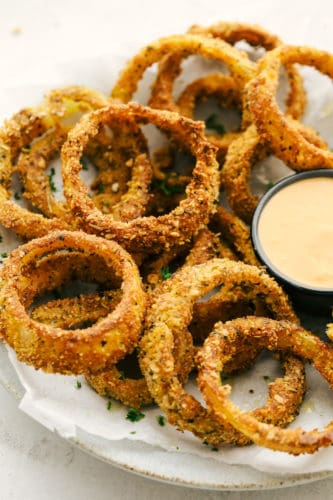
Crispy Air Fryer Onion Rings

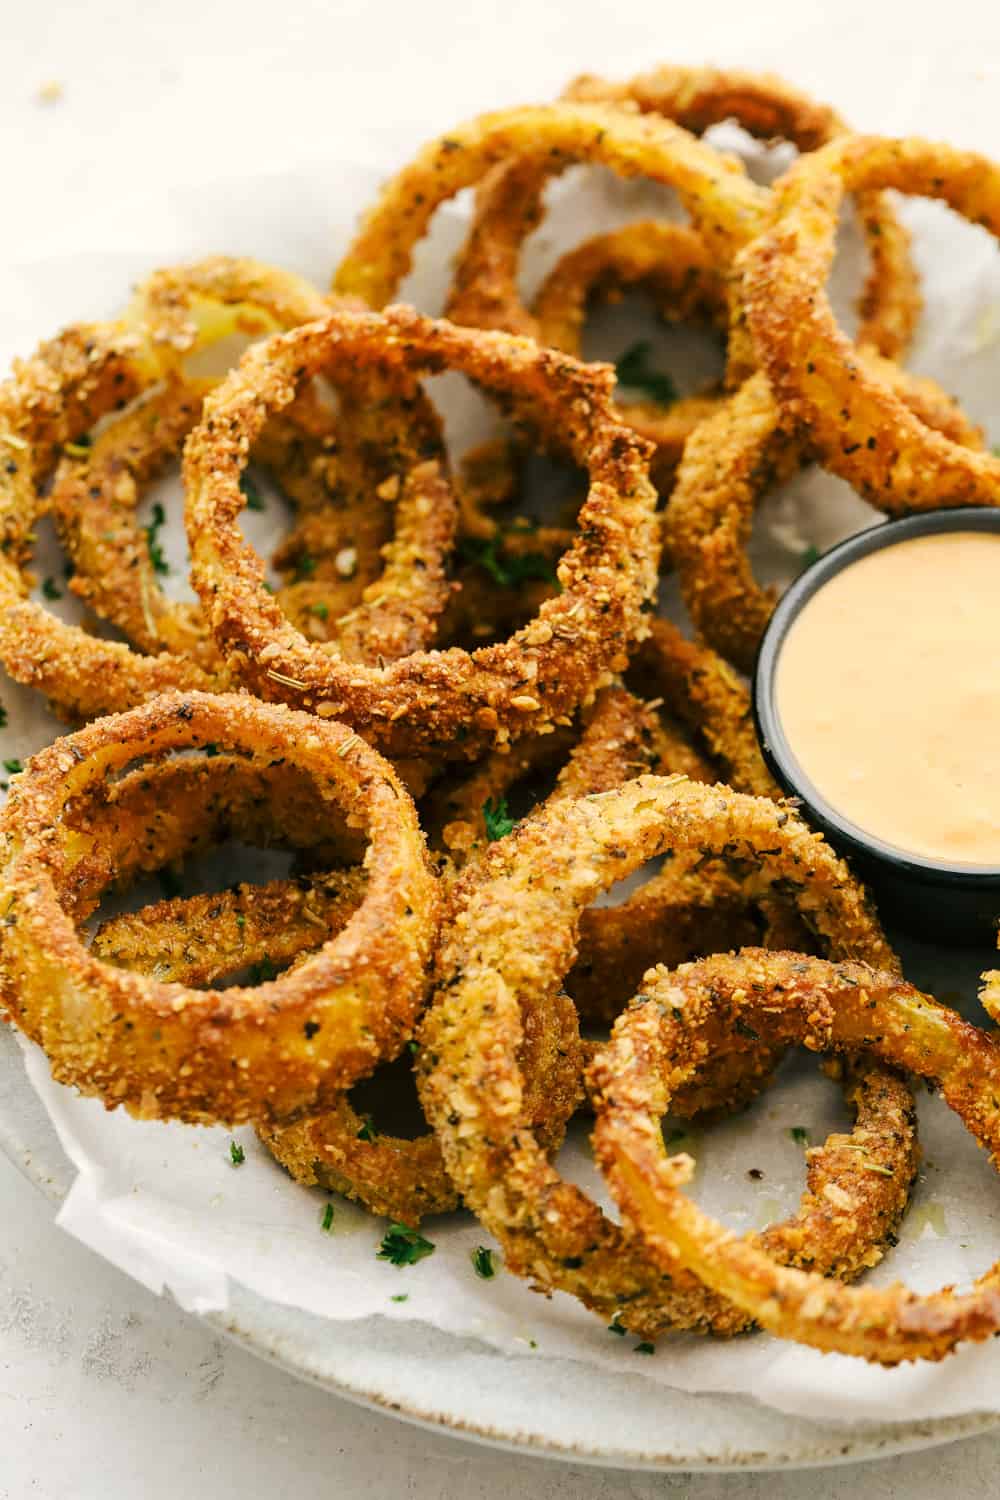
Crispy Air Fryer Onion Rings are going to be your new go to favorite. Golden, crunchy and cooked to perfection, these onion rings are so addicting!

Onion rings make the perfect side dish to your favorite meals. Pair them with Chicken, Grilled Cheese, or Burger.

Air Fryer Onion rings with sauce on a plate.

Homemade Onion Rings

Along with french fries, and tater tots, onion rings are hands down one of my favorite things to get at restaurants. They are always so crispy, the onions are tender and they are so full of flavor. Now you can get the same, if not better, onion rings right in your own home. These air fryer rings are perfectly seasoned and crisp up impeccably, while the onion becomes super tender. Your family is going to love these.

Air frying these onion rings also makes them a healthier option than deep fat frying. That is definitely a win win! You can have your “fried” food and eat it too! You may want to make a double batch, because these are going to disappear about as fast as you can make them. So it’s probably a good thing these are so easy and the air fryer makes cooking them super fast. If you are making multiple batches, serve them as they come out or keep them warm in the oven. They are best hot!

Ingredients for Onion Rings

These ingredients are easy to find and probably in your pantry right now! Air fryer onion rings are packed with flavor that is going to wow!

  • Flour: All purpose flour or unbleached work well.
  • Baking Powder: Creates a light crispy batter.
  • Eggs: To help the batter adhere to the onions.
  • Panko: An ideal coating for air frying.
  • Parmesan: Use finely grated parmesan for best results.
  • Paprika: Adds color and flavor.
  • Garlic Powder: Adds a nice kick of flavor.
  • Olive Oil Spray:  Use to coat the onion rings for great crunch!

Makeing Onion Rings in the Air Fryer

Similar to my Crispy Onion Rings that can be baked or fried, these are super easy. It doesn’t take much to make  restaurant worthy onion rings right in the comfort of your own home.

  1. Cut: Slice the onions ¼ inch thickness into rings.
  2. Flour Mixture: In a small bowl add the flour and baking powder.
  3. Egg mixture: In another bowl add the eggs and whisk.
  4. Breading:  And in the last shallow dish add Panko, parmesan cheese, paprika and garlic powder.
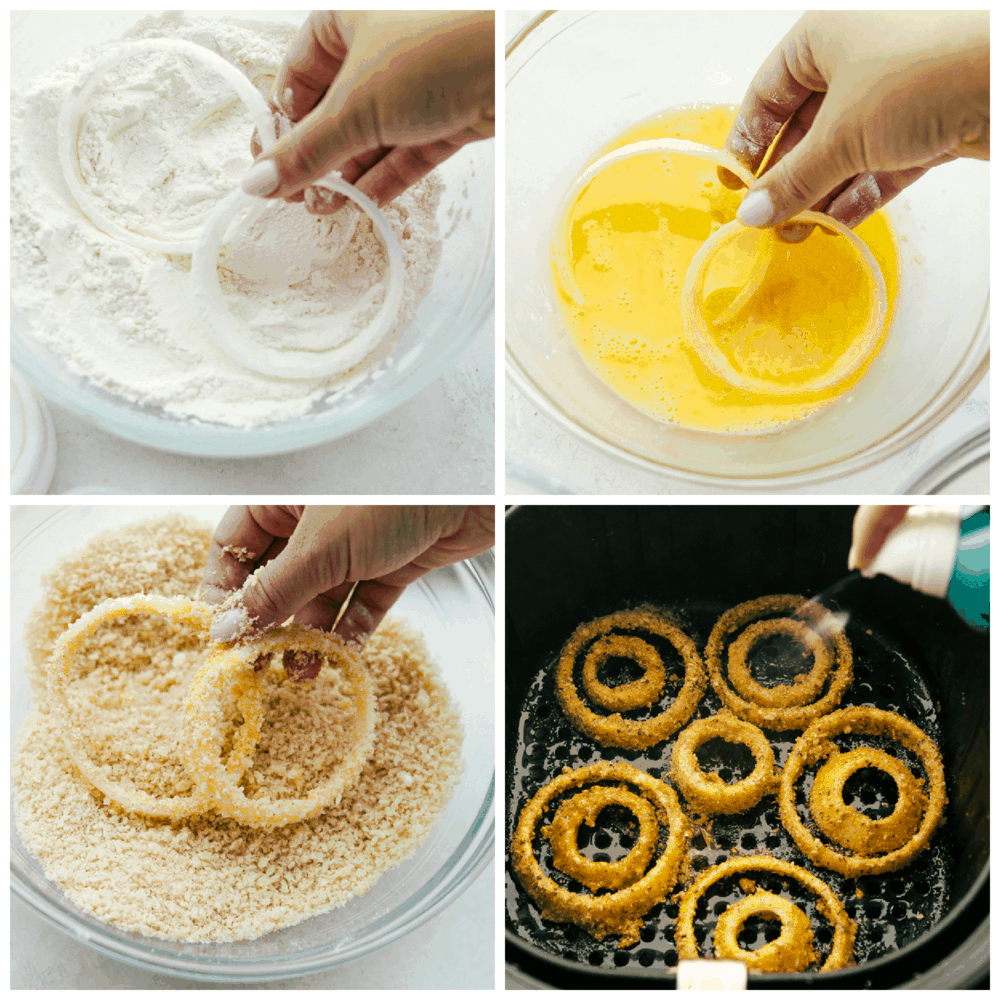
  5. Dunk: Dip one onion ring in the flour, then the egg, and lastly in the Panko mixture. Repeat with all of the onion rings.
  6. Air Fry: Add the onion rings to the air fryer basket and put in a single layer. Spray the onion rings with the olive oil spray. Cook at 360 degrees for 8-10 minutes or until golden brown.

Dipping the onion rings in the flour, egg mixture and coating and then air frying.

How to Make Crispy Onion Rings

When it comes to making the perfect batter for onion rings, there may be a few questions that come to mind.  Here is my advice on making the BEST onion rings you have ever had.  Follow these tips to master the art of a crispy onion ring your family will go crazy over!

  • Best Onions to Use: I like the sweet onions best, vidalia are one of the best. Yellow or white onions will work too, but keep in mind that white onions have a sharper bite to them than a yellow or sweet onion.
  • How to get the best onion flavor: When biting into an onion ring, you want to get a sweet and bright onion flavor.  To achieve this unique flavor, you will need to start by soaking the onion slices in cold water.  Allow them to chill in the water for at least 10 minutes.  Dry them off completely before beginning to batter them.
  • How to keep batter from falling off onion rings: In order to keep that tasty and crispy breading on your onion you will want to use cold batter.  Also, make sure you shake off any excess flour before dipping the onion in the egg mixture.  You need thin layers as you go.
  • How to cut the onion: Cut the stem end off and remove the peel. Then trim off the root end. Now cut a thin slice off the end of the onion to keep the onion from rolling while you slice it.  Finally, place the onion flat side down and cut crosswise into thick slices for the perfect onion rings.
  • How to get extra crispy onion rings: For an extra crispy coating, double dip the onion rings in the egg and panko mixture. Also, when cooling the onion rings, place them on a wire cooling rack with paper towels below it so that the crispy rings are not laying directly on a pan, it can cause them to steam a bit and get soggy on the bottom.

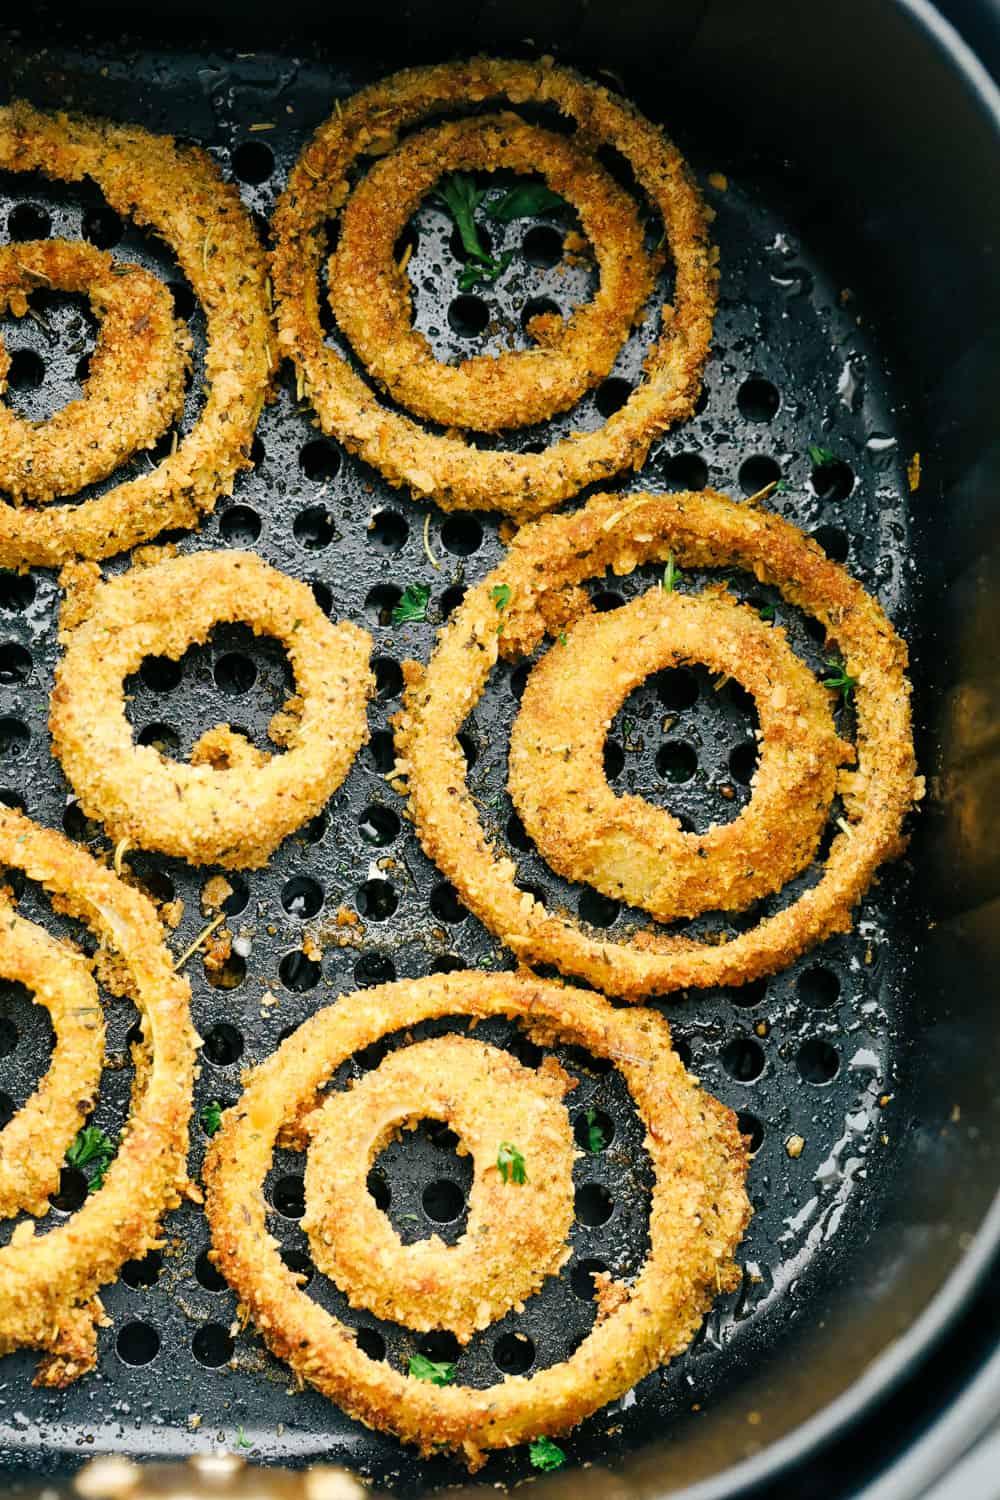
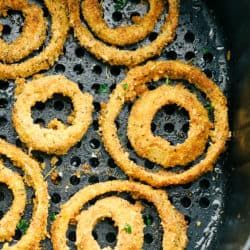
Air fryer onion rings in the air fryer basket.

Tips for the Best Air Fryer Onion Rings

Creating home cooked, restaurant style food at home is always a treat, like this fried rice or fish tacos that taste just like they came from your favorite take out. These air fryer onion rings along with air fryer wings and egg rolls are just that. A taste of take out in the comfort of your own home.

  • Don’t Over Crowd: Don’t stack your onion rings, allow them some space so the air can circulate and really crisp them up all the way around.
  • Know your Air Fryer: Every air fryer is a bit different, just like every oven or crockpot is a bit different. You may need to add more cooking time or shorten it depending on how crispy you want them and how fast your air fryer cooks. Check your first batch a couple of times to nail down the time.
  • Don’t shake or Turn: Unlike some recipes that have you turn or shake your air fryer while cooking is happening, you won’t want to do that with onion rings. It will make all the batter fall off. Another reason why you don’t want to over crowd.
  • Cut them the same thickness: With onions you can’t control the circumference but you can control the thickness. Keep them all the same for even cooking.
  • Oil:  Be sure to spray the onion rings with oil thoroughly, this is what will give the onion rings their crunch. Yes it’s oil, but remember your still not bathing them in it, so it’s still better for you than deep fat frying. Use a high smoke oil, like canola, or avocado oil for best results.
  • Seasonings: These are super versatile. Feel free to add in different spices and seasonings according to your tastes. Add Italian seasoning, chili powder, cumin, smoked paprika or chipotle chili powder for variation.
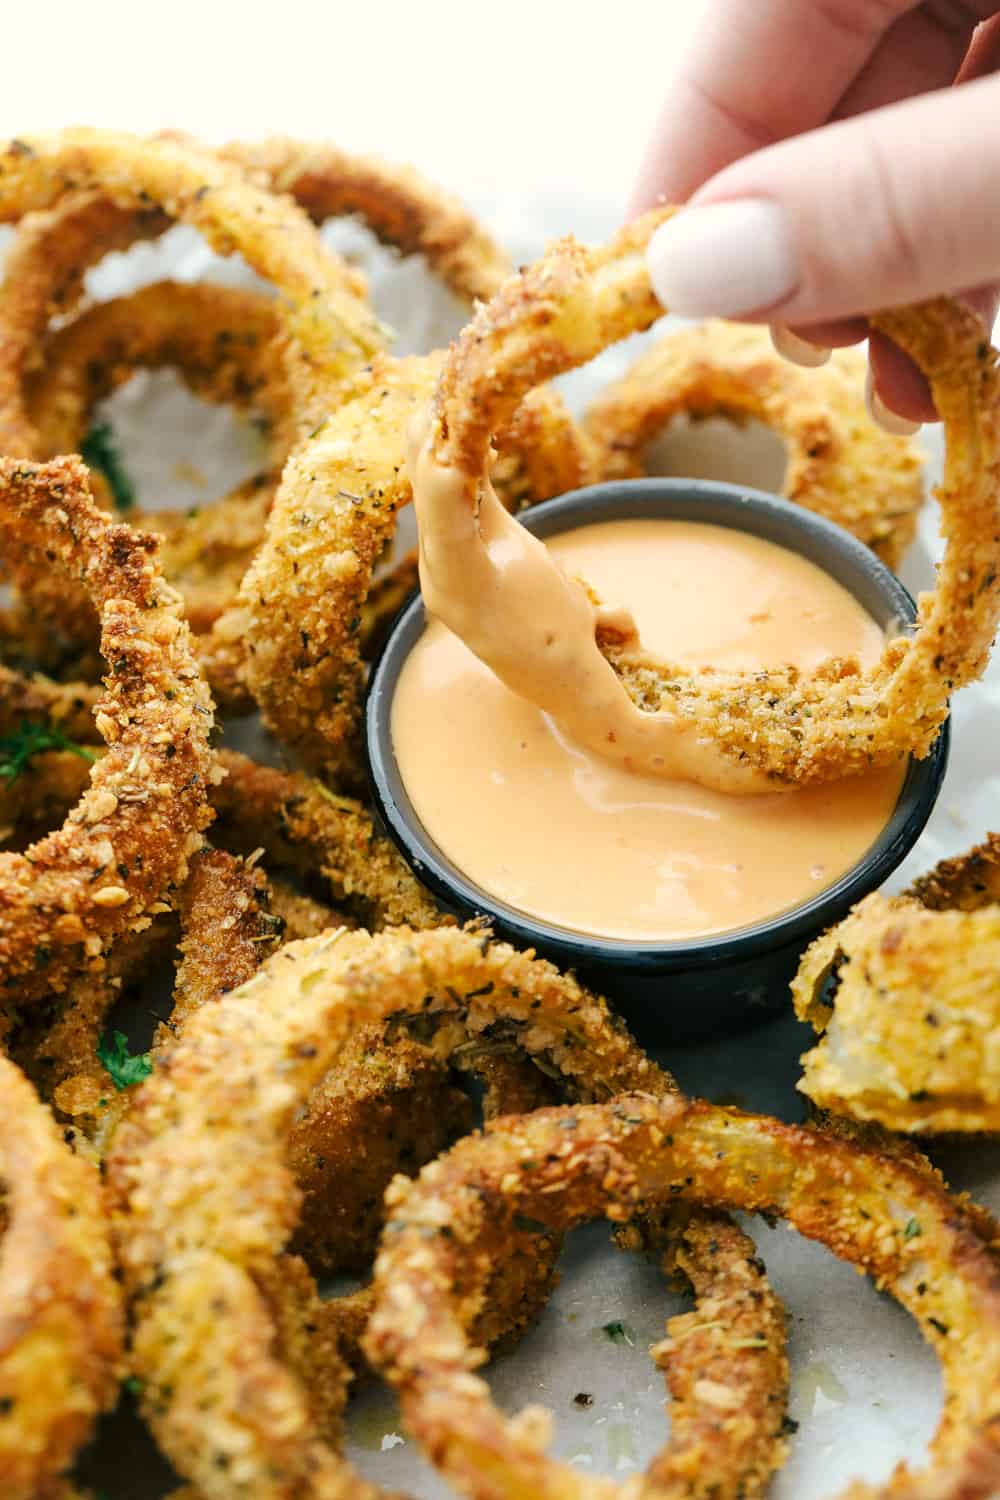
  • Sauces: These onion rings are super good on their own but feel free to dunk them in your favorite sauces. Try my favorite fry sauce, homemade ranch dressing, yum yum sauce or even this incredible cheese sauce for starters.

Dipping onion rings in dipping sauce for eating.

More Incredible Air Fryer Recipes to Try

Air frying is definitely making its mark on the culinary world. There are so many yummy things you can make in the air fryer that taste better and are better for you than any other way. The air fryer has a permanent spot in our kitchen and it’s used all the time. Air frying is easy, fast and oh so good! If you are new to air frying try some of these tried and true recipes that will leave you coming back for more!

Print

Air Fryer Onion Rings

Crispy Air Fryer Onion Rings are going to be your new go to favorite. Golden, crunchy and cooked to perfection, these onion rings are so addicting!
Course Appetizer, Side Dish, Snack
Cuisine American
Keyword air fryer onion rings, crispy onion rings, fried onion rings, onion rings
Prep Time 10 minutes
Cook Time 10 minutes
Total Time 20 minutes
Servings 4 People
Calories 402kcal
Author Alyssa Rivers

Ingredients

  • 2 large onions
  • 1 1/4 cup flour
  • 1 teaspoon baking powder
  • 3 large eggs
  • 2 cups panko
  • 1/2 cup grated parmesan cheese
  • 1 teaspoon paprika
  • 1/2 teaspoon garlic powder
  • olive oil spray

Instructions

  • Slice the onions ¼ inch thickness into rings. In a small bowl add the flour and baking powder. In another bowl add the eggs and whisk. And in the last shallow dish add Panko, parmesan cheese, paprika and garlic powder.
  • Dip one onion ring in the flour, then the egg, and lastly in the Panko mixture. Repeat with all of the onion rings.
  • Add the onion rings to the air fryer basket and put in a single layer. Spray the onion rings with the olive oil spray. Cook at 360 degrees for 8-10 minutes or until golden brown.

Nutrition

Calories: 402kcal | Carbohydrates: 60g | Protein: 19g | Fat: 9g | Saturated Fat: 4g | Trans Fat: 1g | Cholesterol: 151mg | Sodium: 469mg | Potassium: 394mg | Fiber: 4g | Sugar: 5g | Vitamin A: 558IU | Vitamin C: 6mg | Calcium: 282mg | Iron: 4mg


from The Recipe Critic https://ift.tt/3b2i0o6
https://ift.tt/3jQ4E2i

शनिवार, 13 फ़रवरी 2021

Easy and Addicting Ranch Pretzels

For a quick snack make these Ranch Pretzels. These make the best party, movie night, or after school snack!

These amazing pretzels will add more fun to your snack time for sure. Whether it is air fryer pickles, savory pinwheels or ooey gooey chex mix, making your own snacks is yummy and easy!

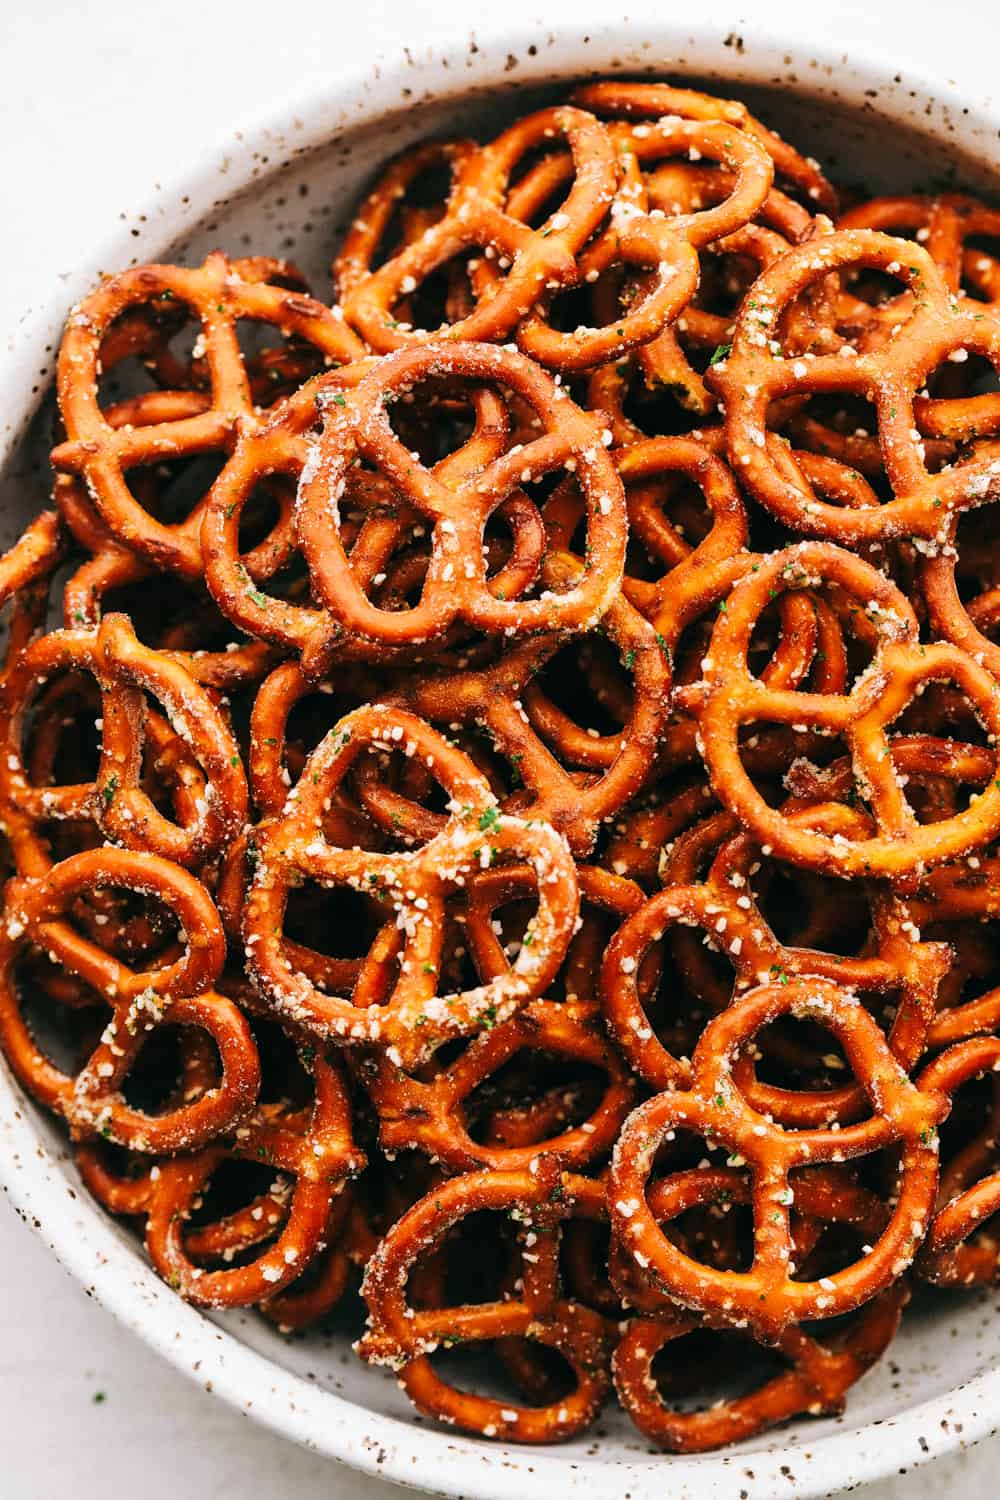
Zesty ranch pretzels in a bowl.

Ranch Pretzel Recipe

These incredible little addicting ranch pretzels are so easy to make and so delicious, you are going to find yourself making these on repeat. They come together in under 5 minutes and an easy go to snack or appetizer. Perfect for the big game, a movie night, potluck, party or just because you want them! Your whole family is going to love these pretzels. Ranch pretzels are ideal for kids, put out a bowl and let them help themselves. No need to worry about micromanaging. Total win for everyone.

I love that the pretzel and flavoring all in one. I don’t have to worry about dipping these pretzels, they are already seasoned perfectly. Use them for snacks on car trips for a nice twist without the mess. Salty and zesty they make the perfect companion to other snacks such as fruit and fluffy marshmallow dip or sweet caramel popcorn! So grab a bag of pretzels and let’s do this!

Ingredients for Ranch Seasoned Pretzels

These ranch pretzels ingredients are probably sitting in your pantry right now. If not, they’re not hard to find. Be sure to buy the powdered ranch dressing mix and not the salad dressing.

  • Pretzels: I used mini pretzels
  • Butter: Melted
  • Ranch Dressing: Buy the packets or make your own, it’s easy!

How to Make Ranch Covered Pretzels

These pretzels come together in no time, which is a good thing because they will go fast. Make a double batch just to be sure you have enough on hand!

  1. Prep: Preheat the oven to 275 degrees.
  2. Mix: In a large bowl add the pretzels, butter, and ranch seasoning and stir until evenly coated.
  3. Bake: Lay on a baking sheet. Bake for 20 minutes.
  4. Cool: Remove from oven and let cool completely. Serve.

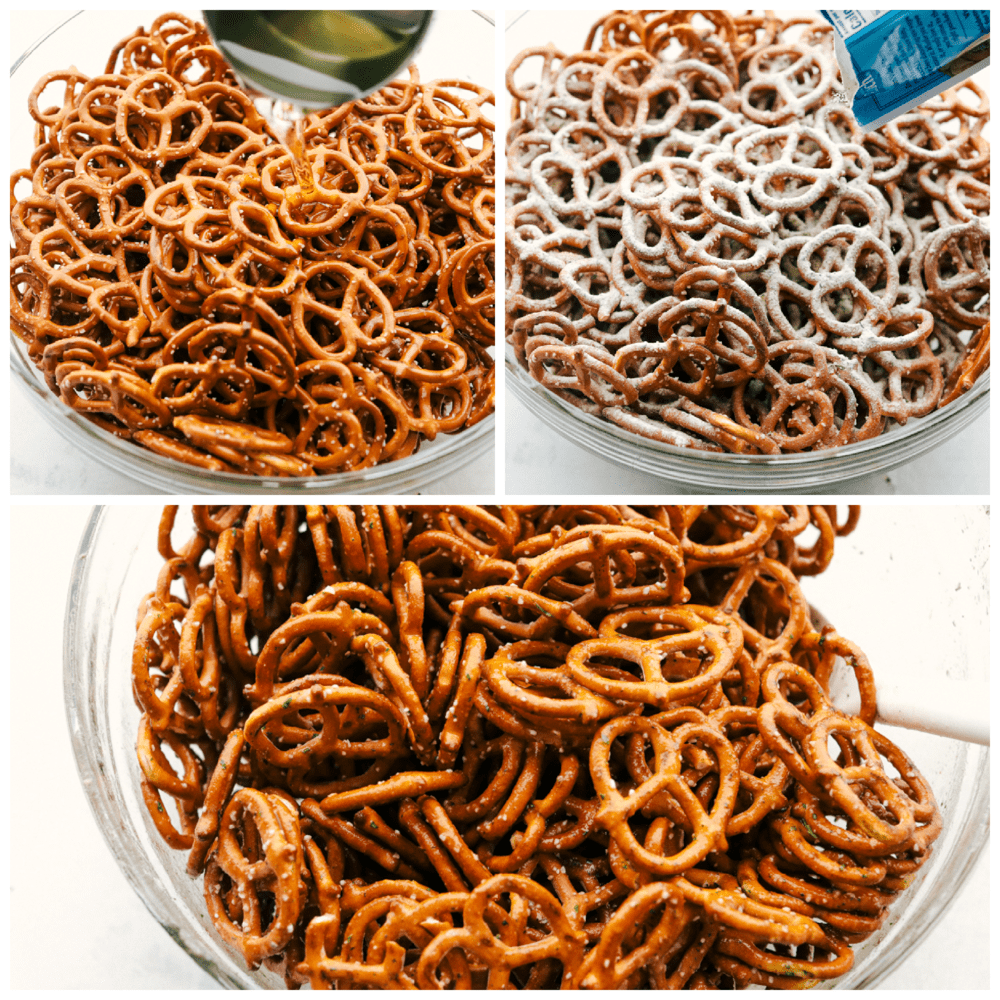
Making ranch pretzels with a bit of butter, ranch dressing powder and stirring.

What Kind of Pretzels Should I use?

Any kind you have on hand will work. I like the texture and flavor of the mini pretzels. But I have seen pretzel sticks, thick cut pretzels, waffle cut and spindle shaped, all used with success. It’s really up to you and what you prefer. Make several batches using all different kinds and find your favorite. I don’t think you’ll regret trying them all.

Tips and Variations of Easy Ranch Pretzels

Did I mention that these are addicting? You truly should make a double batch of these ranch pretzels.

  • Mix together: To season the pretzels a bit more evenly try mixing the ranch seasoning in the butter before pouring it over the pretzels. It will help the pretzels get more evenly coated.
  • Add More: Add more zing to your ranch pretzels by adding 1 teaspoon of garlic powder and 1 teaspoon of dill. Yummy!
  • Butter Substitute:  You can trade out the butter for oil, canola, olive or coconut  all best. However I do have to say the butter gives incredible flavor.
  • Adjust it to your Liking: One of the best things about this recipe is that your can adjust the seasoning to your tastes. If you like more or less seasoning simply add more or less. It’s one of the best things about making your own ranch pretzels vs store bought. You can totally adjust it your tastes.
  • Make your own Ranch:  Ranch seasoning is so easy to make, check out my post on all the tips and tricks and recipe.

Making Ahead and Storing Seasoned Pretzels

  • Make ahead: These ranch pretzels are great to make ahead for when you need them later for a party, road trip or game
  • Store: These will keep up to 2-3 weeks in a tightly sealed container or zip lock plastic bag. Keep in a cool dry place.

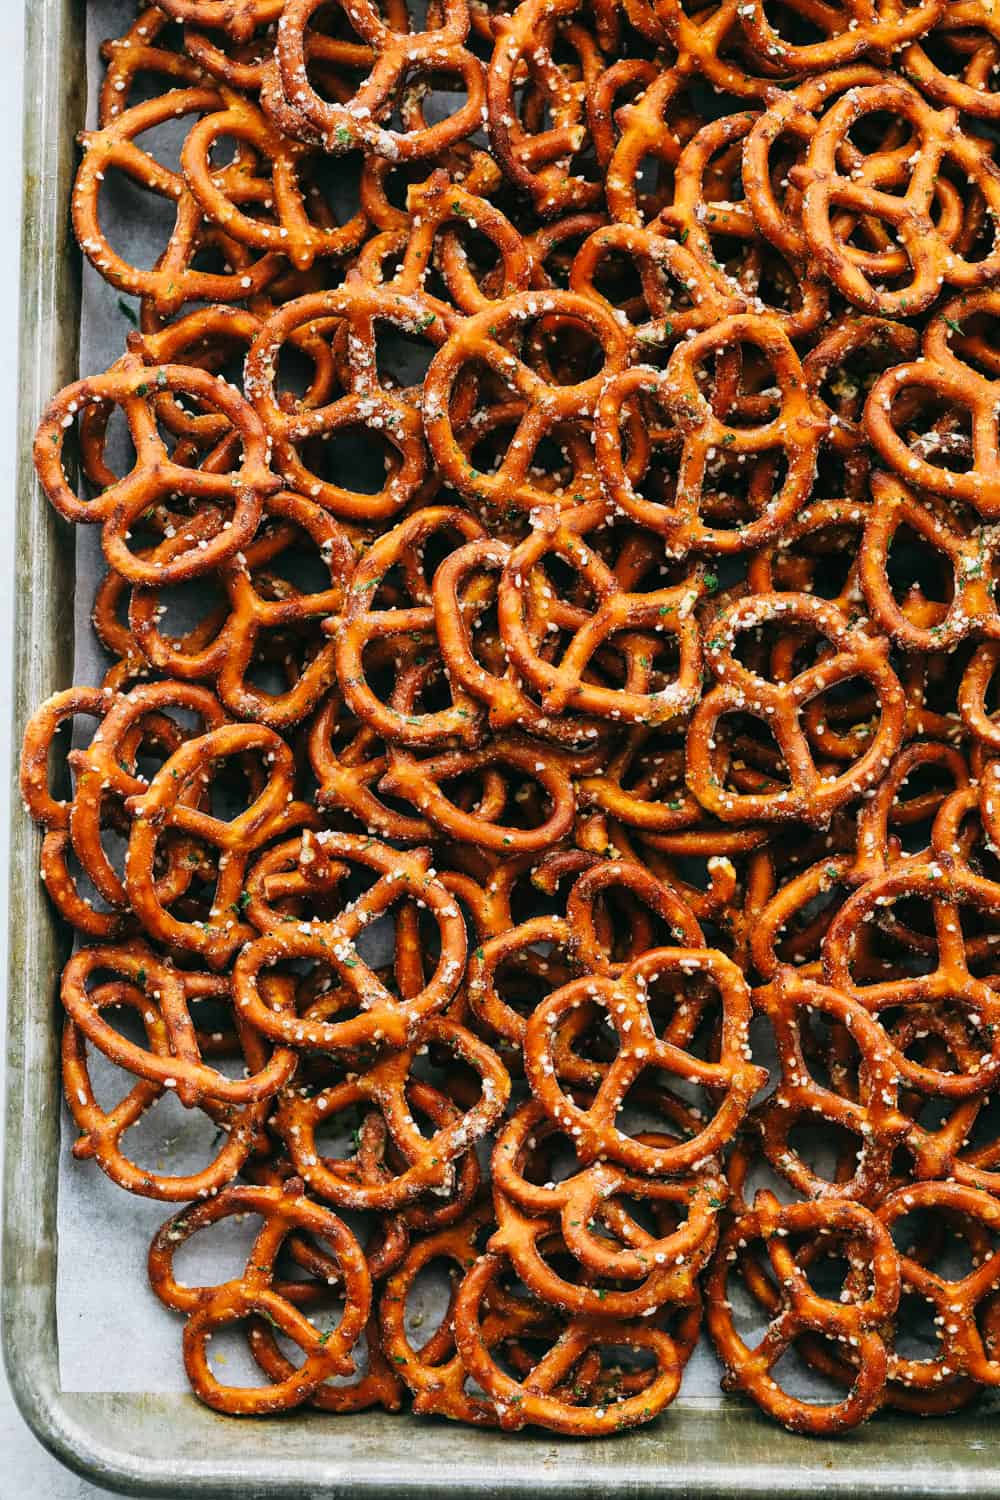
Ranch covered pretzels on a cookie sheet.

More Quick and Easy Pretzel Recipes

Whether it’s the main attraction or a supporting role, pretzels are hands down a favorite in our home. They’re crunchy, savory and have that perfect touch of salt. They add a balance to sweet treats and add depth of flavor to savory dishes. They can stand alone or pair beautifully with so many things. Try any of these pretzel recipes, they are all tried and true!

Print

Ranch Pretzels

For a quick snack make these Ranch Pretzels. These make the best party, movie night, or after school snack!
Course Appetizer, Snack
Cuisine American
Keyword ranch pretzels
Prep Time 5 minutes
Cook Time 20 minutes
Total Time 25 minutes
Servings 12 People
Calories 212kcal
Author Alyssa Rivers

Ingredients

  • 1 pound mini pretzels
  • 1/2 cup butter melted (or vegetable oil)
  • 1 Homemade Ranch Seasoning or Package from the store

Instructions

  • Preheat oven to 275 degrees. In a large bowl add the pretzels, butter, and ranch seasoning and stir until evenly coated.
  • Lay on a baking sheet. Bake for 20 minutes. Remove from oven and let cool completely. Serve.

Nutrition

Calories: 212kcal | Carbohydrates: 30g | Protein: 4g | Fat: 9g | Saturated Fat: 5g | Trans Fat: 1g | Cholesterol: 20mg | Sodium: 552mg | Potassium: 54mg | Fiber: 1g | Sugar: 1g | Vitamin A: 236IU | Calcium: 9mg | Iron: 2mg


from The Recipe Critic https://ift.tt/3jNBfWu
https://ift.tt/3rJuXcU

शुक्रवार, 12 फ़रवरी 2021

Antipasto Skewers

Antipasto Skewers are a super easy and delicious appetizer, perfect for any occasion. Colorful and full of flavor, these are true crowd pleaser!

This is a great way to shake up dinner time or an easy way to serve appetizers. Some fan favorites include Caprese skewers, Antipasto Salad and Caprese Salad.

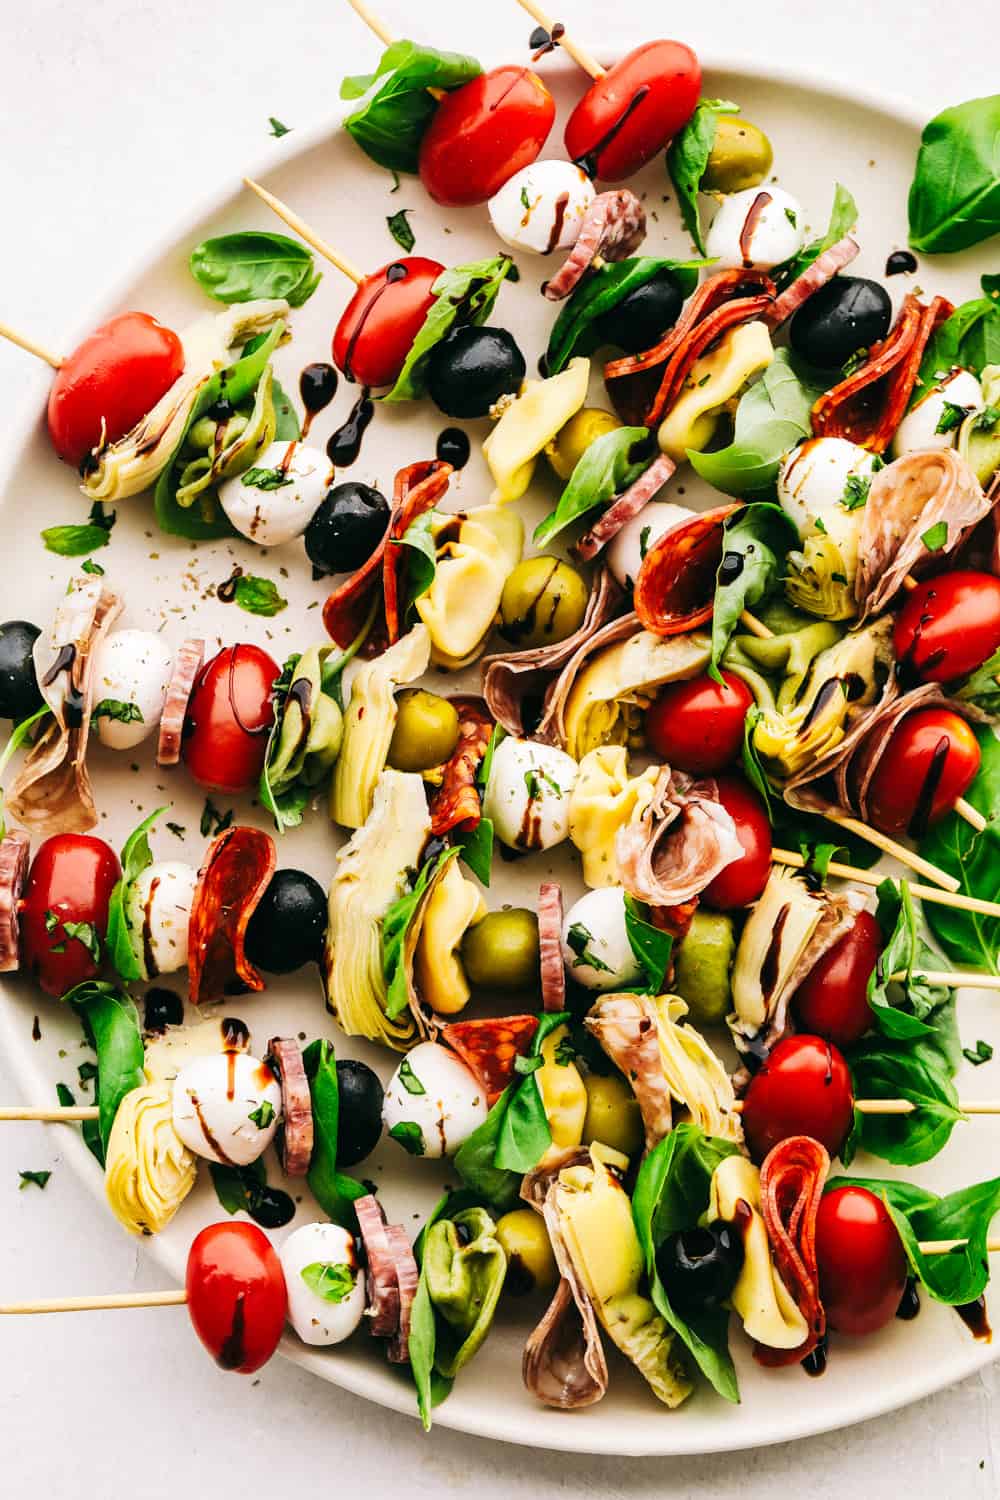
Antipasto skewers with cheese, olives, meats, spinach and cheese on a plate.

Antipasto Appetizer Skewers

Antipasto is one of my favorite salads. It’s a classic combination of pasta and typical Italian meats, cheese and olives. It’s all sandwiched with tomatoes, basil, artichokes and drizzled with balsamic glaze. The glaze is optional, but it add so much zing and flavor to the skewers, you will love it.

Antipasto skewers are super easy to assemble. You can make them all the same or mix it up. Just make sure you include all the ingredients on all the skewers. No one wants to be left out from this goodness. If you are making for a crowd, you might want to double the recipe. These will go fast. Everyone loves these. Antipasto is usually served as a platter, but taking a few more minutes to pre assemble them into skewers will make you a hero. It’s easy for everyone to eat and enjoy!

Ingredients for Italian Skewers

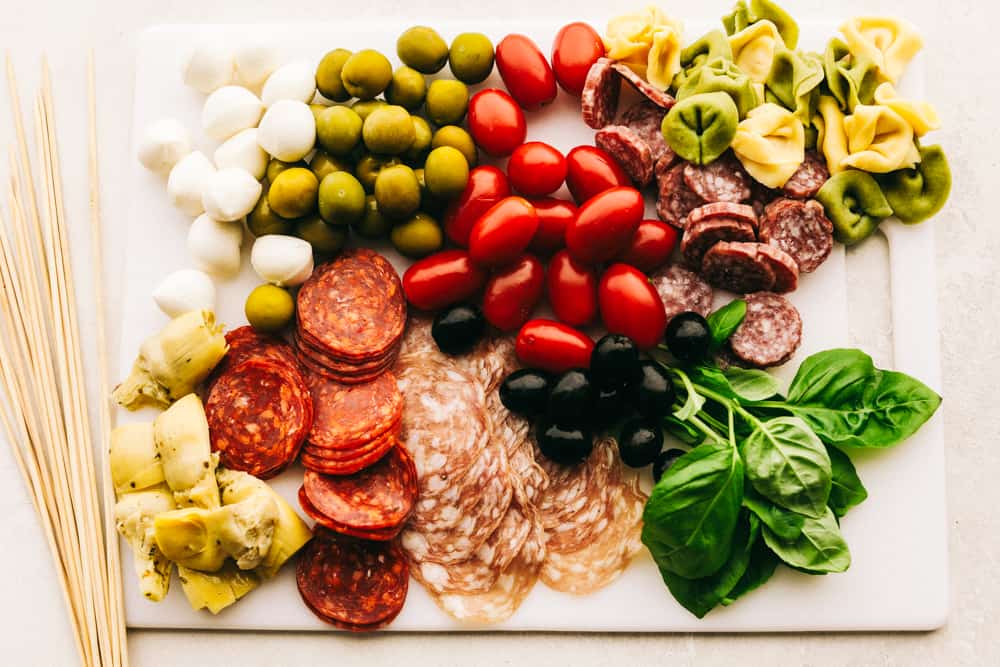
When it comes to antipasto skewers, there is no definite recipe. These are all suggestions. Include and exclude according to your tastes. Including all of these ingredients however, will make the best antipasto skewers ever! They include all the key components of a great antipasto!

  • Cheese Tortellini: Perfect size and shape for skewers.
  • Kalamata Olives: Be sure to buy already pitted olives.
  • Grape Tomatoes: These are a good size for the skewers and not quite as juicy as cherry tomatoes.
  • Salami: Use your favorite brand of bite sized salami
  • Pepperoni: Use your favorite brand!
  • Marinated  Artichokes: You will find these with the canned vegetables usually.
  • Fresh Mozzarella Balls: Truly these are the best!
  • Fresh Basil Leaves: Adds incredible flavor and color.
  • Balsamic Glaze: Don’t skip! It’s divine.
  • Wooden Skewers: To make your antipasto skewers with.

How to Assemble Antipasto Skewers

There isn’t any rhyme or rhythm to how you assemble your skewers. You’ll just want to include all the ingredients. You can make them all the same or mix it up. It’s up to you!

  1. Cook: Cook the tortellini according to package directions. Rinse in cold water
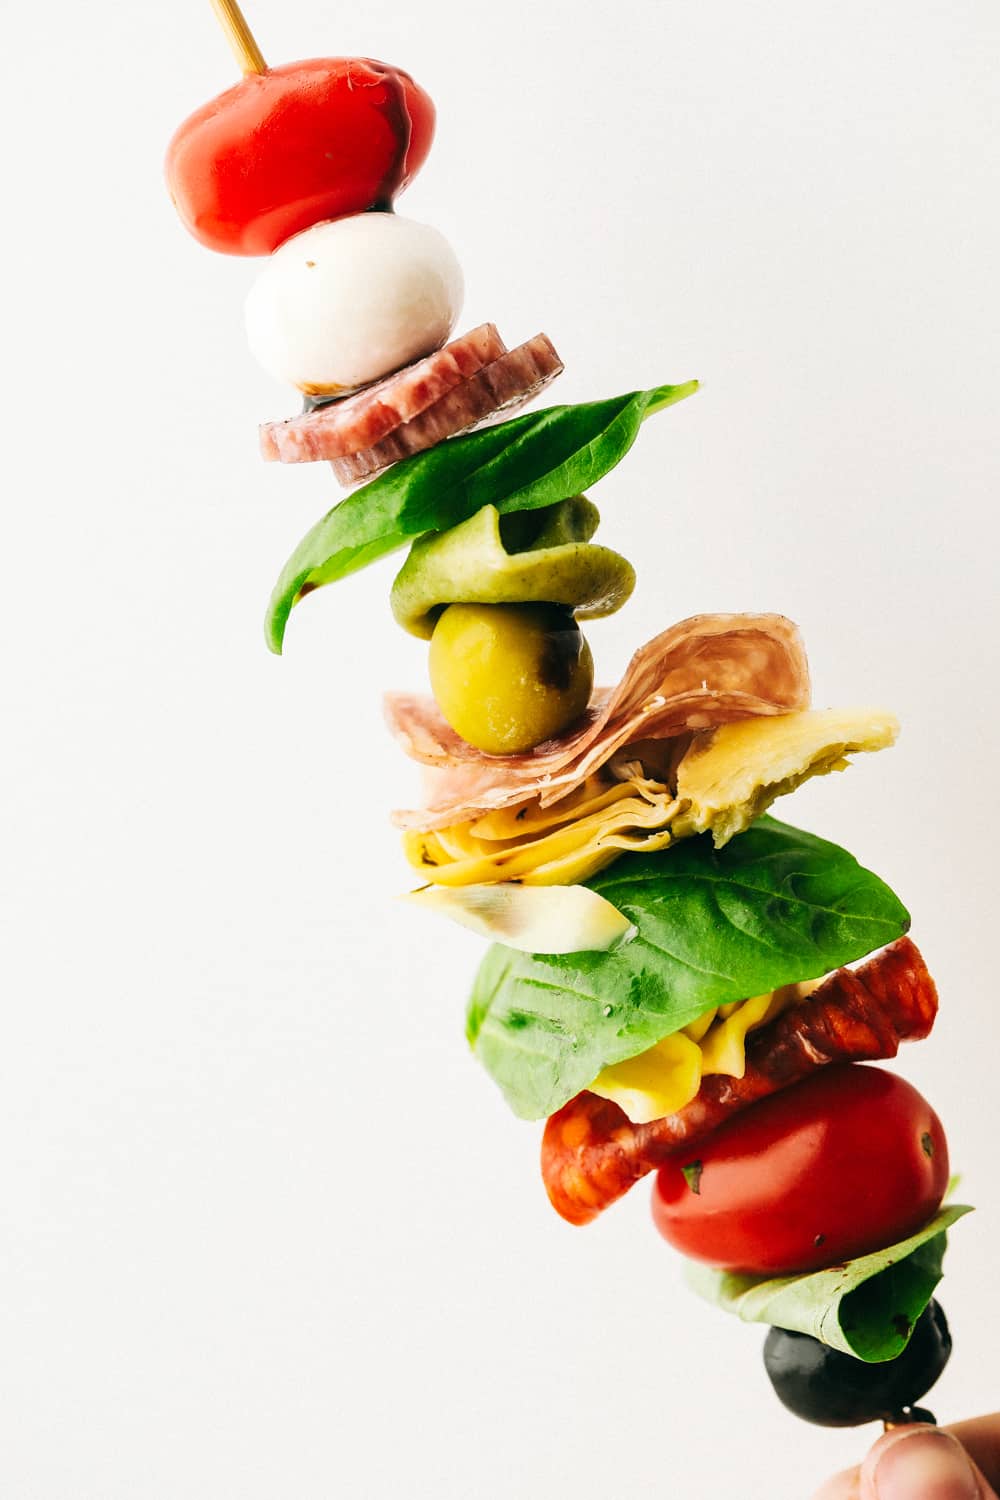
  2. Assemble: Thread each skewer with each ingredient.
  3. Glaze: Drizzle with balsamic glaze if desired.

Ingredients for antipasto skewers on a cutting board ready to be assembled.

What is Antipasto?

When an antipasto salad, or platter or these skewers hits the table everyone gets excited. With it’s luscious combination of olives, tomatoes, cheese and cured meats it is huge favorite. So what exactly is Antipasto?

  • Antipasto: Antipasto is derived from latin which means “before” and “meal.” So antipasto literally refers to the dish that comes before others. Its origins come from Italy where it was tradition to have antipasto before a formal Italian meal. Typical ingredients of a traditional antipasto include cured meats, olives, pepperoncini, mushrooms, anchovies, artichoke hearts, various cheeses, pickled meats, and vegetables in oil or vinegar. Breads similar to a baguette or thin breadsticks are often served with antipasto platters. They can vary according to regions and are often meant to whet the appetite and be visually stunning as well as delicious.
  • Salad: One of the best ways to serve antipasto nowadays is in the form of a salad. It puts all the goodness of the antipasto board into the ease of a salad you can eat with a fork. It’s a staple at picnics and potlucks because of its cured meats and pickled vegetables it can stay at room temperature a lot longer than some of other potluck favorites such as potato salad. Making them as these appetizer skewers is an easy way to serve this winning combination of foods!

Layering ingredients on skewers for antipasto skewers.

Tips and Variations for Easy Antipasto Skewers

Visually stunning and super appetizing, these antipasto skewers are must make. They will be the hit of the party!

  • Skewers: Wooden skewers are cheap and you don’t have to worry about getting them back. If you are worried about splinters you can soak them before threading the antipasto.
  • Meats:  Any of your favorite cured meats will be perfect in these skewers. I like to use the bite sized salami instead of the large ones. Pepperoni, prosciutto, and bigger cuts can be folded over to be made smaller.
  • Basil: Not everyone is a fan of basil, especially a whole leaf. Substitute some or all of the basil with spinach. It’s mild but still has that vibrant green color.
  • Vegetables: Grape tomatoes add a nice fresh balance to the richness of the cheese and meats. You can use cucumber slices to also help break up the richness if you wish. For extra kick use whole pepperoncini as well.
  • Tortellini:  Try using a tri-colored tortellini to add even more color and pizazz.
  • Olives:  Kalamata olives are a favorite, but feel free to use any combination of olives. Using more than one olive adds more depth to your skewers.
  • Balsamic Glaze: This adds zing and richness to the antipasto skewers, which you will love. I recommend buying your balsamic glaze, it’s easy, tastes amazing and you won’t regret not having to make your own!

Can You Make Antipasto Skewers in Advance?

  • Make Ahead: Antipasto skewers can be made up to a day ahead. Don’t drizzle with the glaze till ready to serve.
  • Store:  Keep skewers in an airtight container in the fridge for up to 3-4 days. You can combine leftovers for a quick salad if you wish.

Up close look at an antipasto skewer layered with ingredients.

More Appealing Appetizers To Try

Appetizers are some of the best foods out there. It’s probably why restaurants offer entire platters of just appetizers for dinner. They’re small mini bites of luscious combinations of foods. It’s a great way to try new foods or indulgent foods in small increments. Having appetizers is a great way to try something new, and be adventurous. So when you need an appetizer for a party or if you just want to create an entire meal from appetizers, reach for these favorite recipes.

Print

Antipasto Skewers

Antipasto Skewers are a super easy and delicious appetizer, perfect for any occasion. Colorful and full of flavor, these are true crowd pleaser!
Course Appetizer, Snack
Cuisine American, Italian, Italian American
Keyword antipasto skewers
Prep Time 10 minutes
Cook Time 10 minutes
Total Time 20 minutes
Servings 8 Skewers
Calories 439kcal
Author Alyssa Rivers

Ingredients

  • 10 ounces cheese tortellini
  • 2 cups kalamata olives
  • 2 cups black olives
  • 2 cups grape tomatoes
  • 24 slices of salami
  • 24 slices pepperoni
  • 1 (15 ounce can) marinated artichokes
  • 1 container small fresh mozzarella balls
  • fresh basil leaves
  • balsamic glaze for drizzling
  • wooden skewers

Instructions

  • Start by cooking the tortellini according to package directions. Rinse in cold water.
  • Thread each skewer with each ingredient. Drizzle with balsamic glaze if desired.

Nutrition

Calories: 439kcal | Carbohydrates: 20g | Protein: 20g | Fat: 31g | Saturated Fat: 10g | Trans Fat: 1g | Cholesterol: 63mg | Sodium: 2099mg | Potassium: 257mg | Fiber: 4g | Sugar: 3g | Vitamin A: 768IU | Vitamin C: 5mg | Calcium: 236mg | Iron: 2mg


from The Recipe Critic https://ift.tt/3d4ca87
https://ift.tt/3acCtah