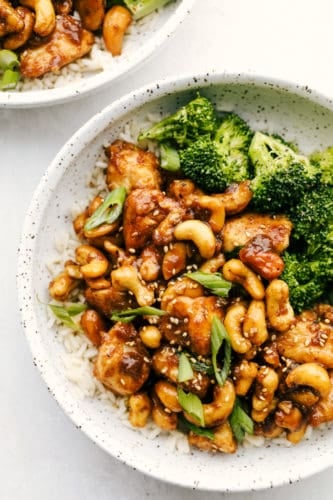
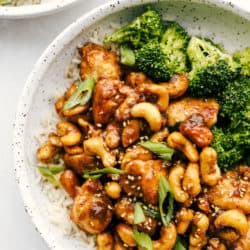
This homemade Cashew Chicken is way better than takeout! Tender chicken is stir-fried and tossed with a luscious garlic sauce and cashews.
Better than take out in the comfort of your own home is the best! Combine this dish with Egg Rolls, Fried Rice and some Wontons for a complete dinner.

Homemade Cashew Chicken
Chinese take out is one of America’s favorites with good reason. It is a comfort food that is jam packed with flavor and diversity. The chicken is tender, the cashews are crunchy and the sauce is the perfect combination of sweet and zing. You have to try this tried and true recipe!
Coating the chicken in the cornstarch creates a nice crisp crust and will also thicken the sauce. The sauce has the perfect balance of sweetness with saltiness and bit of zing from the garlic. If you want more kick you can add red pepper flakes to the sauce. The different combinations of textures will more than satisfy. The chicken is tender with a light crust. The cashews add a bit of crunch and the sauce is creamy smooth. We like to serve it with rice and vegetables.
Ingredients in Easy Chicken Cashew
Simple ingredients come together to make this tangy, with a hint of spicy cashew chicken. Everything is easy to find in your local grocery store. No need to go to a specialty store.
- Chicken: Skinless boneless chicken breasts.
- Salt and Pepper: To taste
- Cornstarch: This acts as a coating and thickener for the sauce.
- Olive Oil: To stir fry the chicken in.
- Soy Sauce: You can either use low sodium or regular.
- Chicken Broth: For the sauce.
- Garlic Cloves: Adds a bit of a kick and a ton of flavor.
- Brown Sugar: Provides a bit of sweetness to the sauce.
- Hoisin Sauce: Classic sauce used in many asian dishes.
- Sesame Oil: Helps with the flavor and cooking.
- Whole Cashews: Unsalted are best, you can use pieces if those are easier to find.
Making Better than Takeout Cashew Chicken
This better than take out is actually quite easy to make. All it takes is a bit of time and you’ve got cashew chicken that will taste amazing.
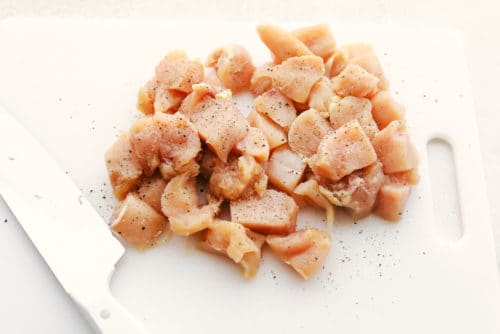
- Cut: Dice your chicken breast into one inch pieces. Salt and pepper to taste.
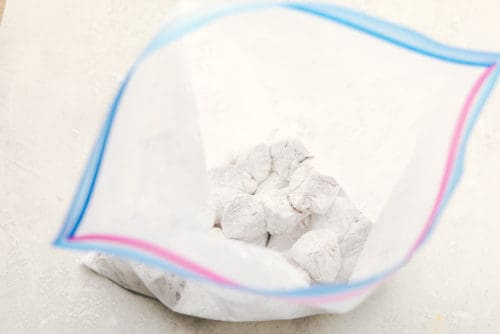
- Mix: Toss the chicken with the cornstarch mixture in a ziplock bag.
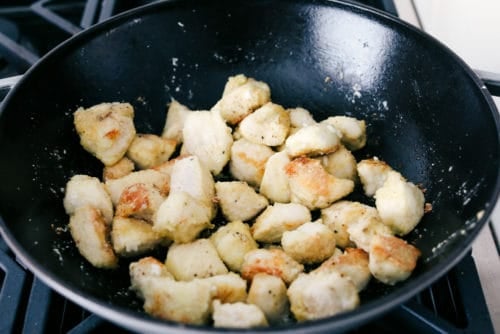
- Stir Fry: Add olive oil to wok or large skillet over medium high heat. Once the oil gets to the smoking point then add the chicken in a single layer in batches. Cook each side until golden brown.
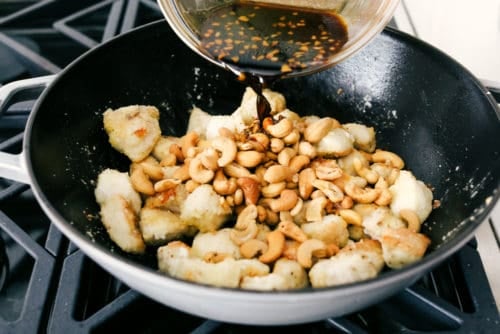
- Sauce: In a small bowl whisk the soy sauce, chicken broth, garlic, brown sugar, hoisin and sesame oil.
- Combine: Add to the pan with the cashews.Toss until the sauce has thickened.
- Serve: Serve over rice with vegetables if desired.

Tips for The Best Cashew Chicken
This will come together fast so make sure you have everything ready to go. The extra time to prep everything before you start cooking will make all the difference.
- Wok: If you don’t have a wok, no worries. You can use a large fry pan with the same success.
- Chicken: Cut the chicken into the same sized pieces so they cook evenly. It is important that you do not overcook the chicken. It will turn rubbery instead of juicy and tender. Just brown each side and then begin adding the other ingredients. It will finish cooking in the sauce. You can also use chicken thighs cut up, use boneless skinless for easy preparation.
- Roast the Cashews: If you bought your cashews raw, you will want to roast them to bring out their flavor. Place them on a sheet pan and put in the oven at 350 degrees for about 5 minutes or until fragrant. They will crisp up as they cool.
- Garnish: I like to cut up some green onions and add at the very end for a bit of flavor and color.
- Serve: We love this over rice and some stir fried vegetables for a complete meal that is so scrumptious. You can also try cauliflower rice, quinoa or noodles to serve this cashew chicken over.
- Vegetables: You can also stir fry bell peppers, mushrooms, zucchini and broccoli right in the wok after the chicken is done. Remove the chicken, stir fry the vegetables. When tender add the chicken back in and the sauce.

Storing Chinese Cashew Chicken
While cashew chicken is amazing the leftovers can be a little soggy. Especially the cashews! The flavor, however, intensifies as it melds together overnight.
- Store: Keep leftovers in the fridge for up to 4 days in a well sealed container.
- Reheat: To reheat you can use the microwave or add back to a pan and flash fry in the pan on medium high till heated through. This will help crisp up the chicken and nuts a bit.

More Better Than Takeout Favorites to Try
It is always a culinary success when I can make my favorite takeout meals at home. More often than not, they also taste better than the restaurants too. Save money and know exactly what is going into your favorite dishes by making them at home. When you are looking for a favorite, you have to try these first. They are all so good! You may never go out again!
- Slow Cooker General Tso Chicken
- Sticky Asian Glazed Chicken
- 20 Minute Garlic Beef and Broccoli Lo Mein
- Slow Cooker Mongolian Beef
- Crispy Sweet and Sour Baked Chicken
Cashew Chicken
Ingredients
- 1 1/2 pounds chicken breasts
- salt and pepper
- 1/4 cup cornstarch
- 2 Tablespoons olive oil
- ¼ cup Soy Sauce low sodium if preferred
- 1/2 cup chicken broth
- 3 Garlic Cloves minced
- 1 Tablespoons Brown Sugar
- 1 Tablespoon Hoisen Sauce
- 1 teaspoon Sesame Oil
- 1 cup whole unsalted cashews
Instructions
-
Cut your chicken breast into one inch pieces. Salt and pepper.
-
Toss the chicken with the cornstarch mixture in a ziplock bag.
-
Add olive oil to a wok or large skillet over medium high heat. Once the oil gets to the smoking point then add the chicken in a single layer in batches. Cook each side until golden brown.
-
In a small bowl whisk the soy sauce, chicken broth, garlic, brown sugar, hoisin and sesame oil. Add to the pan with the cashews. Toss until the sauce has thickened. Serve over rice and with veggies if desired.
Nutrition
from The Recipe Critic https://ift.tt/2NXEoan
https://ift.tt/2NXsxZJ