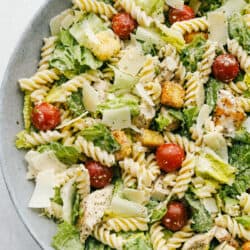
Chicken Caesar Pasta salad is fun twist on the classic! Fresh romaine tossed with chicken, cherry tomatoes, shredded parmesan cheese, croutons and a vegetable pasta adds a fun new texture!
Light and tasty, this Salad makes a great spring or summer meal. Pair it with Breadsticks, Salad and top it off with Tiramisu!

Chicken Caesar Pasta Salad
Caesar salad is one of my all time favorite salads. It is such a simple combination of salad, croutons, parmesan cheese and a spectacular dressing. Being able to turn my favorite salad into a meal my whole family loves is just golden. The noodles give it a bit more depth and helps to fill you up. Adding tender, juicy, seasoned chicken adds flavor and nutrient dense protein. I love the addition the fresh tomatoes make. It gives the chicken caesar salad a bit of brightness. Your whole family is going to love this salad turned main dish!
You may not think that adding pasta and lettuce together works, but it totally does. They work together to create a fabulous texture you are going to love. You can try it out in my Kale Pasta Salad or BLT Avocado Salad too. This is a perfect dish for a summer picnic or potluck. Or serve at a brunch or special lunch. How ever you serve it, you are going to love it.
Ingredients for Caesar Pasta Salad
Save time and use rotisserie chicken from the store, it can be a total busy night life saver.
- Lettuce: Use romaine lettuce for good nutrition and crunch.
- Rotini Pasta: The swirly pasta is perfect to hold onto the dressing.
- Chicken: Cooked and diced chicken in bite sized pieces.
- Cherry Tomatoes: You can use grape tomatoes too.
- Parmesan: I love using large shaved parmesan.
- Caesar Dressing: Use homemade Caesar dressing for the best flavor. You can also use store bought if you need to.
- Croutons: You can make your own, try it, it is easy and absolutely yummy!
Making Caesar Pasta Salad with Chicken
This comes together in a snap. You can have a wonderful light delicious meal on the table in no time.
- Pasta: Cook the pasta according to package directions. Drain and rinse in cold water. Set aside.
- Combine: In a large bowl, add Romaine lettuce, pasta, chicken, cherry tomatoes, shredded parmesan, Caesar dressing and croutons. Toss until all ingredients are coated well in the dressing.
- Serve: Best if served immediately.

Tips For The Best Chicken Caesar Pasta Salad
Such a simple recipe that makes a wonderful dish.
- Chicken: For an easy way to make this use rotisserie chicken. You can also pan cook your chicken, but make sure you season it really well. Use Italian seasoning, and salt and pepper. Air fried chicken is an absolutely divine way to cook your chicken. It’s super juicy inside and a bit crispy on the outside.
- Cheese: I love the big shavings of parmesan, use a potato peeler to get nice shavings. It will give loads of flavor.
- Keep it Chilled: Keep everything chilled so that the lettuce does not wilt. If you are making it ahead of time, wait till you are about to serve it to add in the lettuce.
- Lettuce: Romaine is a great stout flavorful lettuce. Do not use super leafy lettuce. It will wilt quickly and not be able to hold up to the chicken and noodles.

Variations Of Caesar Pasta Salad
The basic thing you want to keep consistent is the dressing and lettuce. Everything else you can customize the way you want to.
- Noodles: I love the rotini noodles in this Caesar salad but you can use others. Shell pasta, bowtie, cavatappi, and fusilli.
- Chicken: You can leave out the chicken all together or swap it out for salmon, steak or shrimp.
- Cheese: Parmesan is the star but you can sub out for Asiago, Pecorino, or Parmigiano-Reggiano.
- Add Ins: You can add in a few extras like bacon crumbles, use half lettuce and half spinach, and you can add a splash of lemon.

Storing Your Caesar Salad
This salad is best served immediately after combining it all together to avoid the lettuce from wilting. This will keep in the fridge for up to 5 days, however, the lettuce will wilt. It will still taste amazing but it will not look nice. It will look the best for the first 24 hours.

More Pasta Salads To Love
Salads
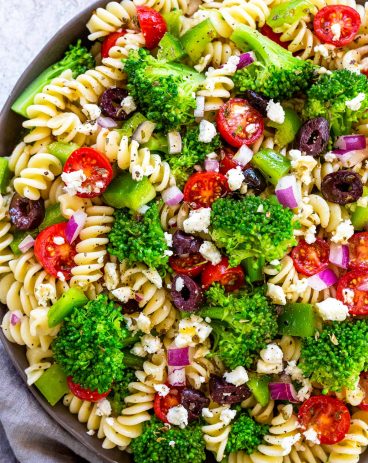
Greek Broccoli Pasta Salad
Pasta
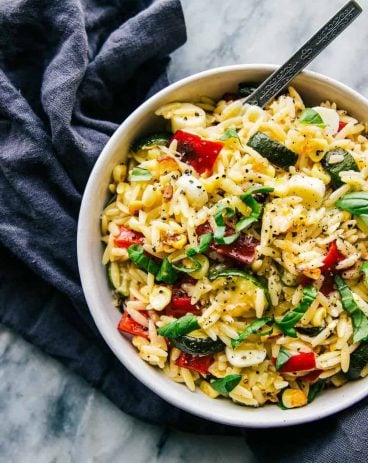
Orzo Pasta Salad
Side Dishes
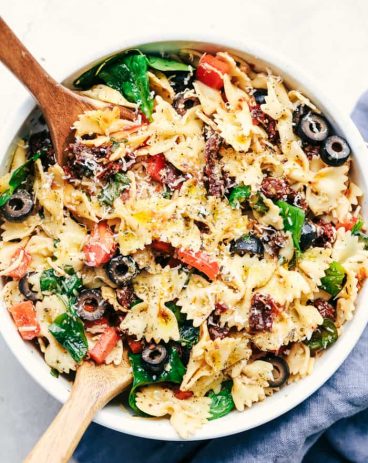
Tuscan Pasta Salad
Side Dishes
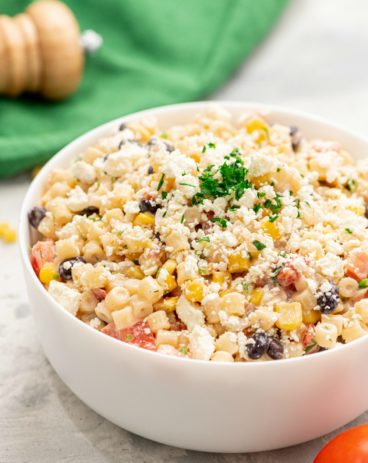
Mexican Pasta Salad
Chicken Caesar Pasta Salad
Ingredients
- 3 cups Romaine Lettuce Chopped
- 1 package Rotini Pasta 12 oz
- 2 cups chicken cooked and chopped
- 1 pint cherry tomatoes
- 1 cup Shredded Parmesan
- 1 cup homemade caesar dressing LINK
- 1 cup croutons
Instructions
-
Cook pasta according to package directions. Drain and rinse in cold water. Set aside.
-
In a large bowl, add Romaine lettuce, pasta, chicken, cherry tomatoes, shredded parmesan, caesar dressing and croutons. Toss until all ingredients are coated well in the dressing. Cover and chill until ready to serve.
Notes
Nutrition
from The Recipe Critic https://ift.tt/3gc95od
https://ift.tt/3mQVuE2