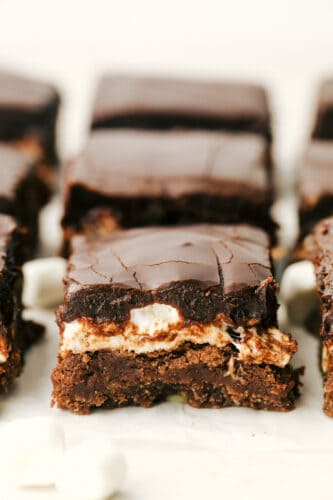
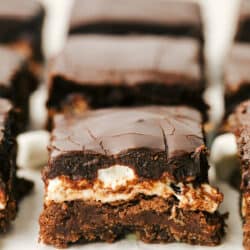
Mississippi Mudslide Bars are a chewy brownie base, topped with a fluffy marshmallow layer, and finished off with a rich and silky chocolate frosting. They are so addictive!
Brownies are a decadent dessert that everyone loves! I have tried and true brownies that come in all flavors, like Lemon, Red Velvet, and Cream Cheese Brownies!

The Best Mississippi Mudslide Brownies
These Mississippi Mudslide Bars are absolutely, positively addictive. These are aptly named because they mimic the famous Mississippi Pie. It was named this because it was the same color as the banks of the Mississippi River, deep chocolate brown. However it got its name, these brownies are exquisite. These are super simple and really easy to make and the whole family is going to love the chewy marshmallow top covered in rich frosting. Mississippi Mudslide bars are perfect for picnics, parties, and whenever you need a good chocolate fix.
You can serve these at room temperature but there’s something about that frosting that gets a million times better when it’s chilled. If you’re wondering what exactly these bars are, they are a chewy brownie base, topped with a fluffy marshmallow layer, and finished off with a rich and silky chocolate frosting. Like I said, ADDICTIVE!! Don’t wait another day before making these, you will LOVE them!
Ingredients For Mississippi Bars
Fudgy, gooey, and oh so good, these simple ingredients are destined to make greatness.
- Butter: Melt your butter first so it isn’t piping hot.
- Sugar: White granulated sugar balances out the cocoa and also adds moisture.
- Cocoa Powder: This is unsweetened cocoa, not sweetened.
- Eggs: Get your eggs out early and allow them to come to room temperature.
- Vanilla: Vanilla helps the chocolate taste like chocolate, it’s true.
- Salt: Needed to balance out the sweetness.
- Flour: All-purpose flour or unbleached flour.
- Miniature Marshmallows: Make sure your marshmallows are soft and fresh, not hard.
Mississippi Mud Frosting Ingredients
- Chocolate Chips: Use semi-sweet chocolate chips, they are the perfect flavor.
- Heavy Whipping Cream: This creates a creamy consistency that won’t harden when refrigerated.
- Butter: Butter should be at room temperature, not cold.
- Vanilla: Sweet vanilla helps the chocolate taste divine.

Let’s Make Easy Mud Brownies!
The extra step in making your own frosting is absolutely divine in these brownies. You won’t regret the extra time!
- Prep: Preheat oven to 350 degrees and grease a 9×13 inch baking pan.
- Mix: In a large bowl combine melted butter, sugar, cocoa powder, eggs and vanilla and mix until smooth.
- Add: Stir in flour and salt and mix until incorporated.
- Bake: Spread evenly in a prepared pan. Bake for 25-30 minutes until a toothpick in the center comes out clean. a few loose crumbs are okay but no wet batter.
- Marshmallows: Spread the marshmallows in an even layer on top of the brownie layer. Return them to the oven and bake for another 3-7 minutes until marshmallows are fluffy and beginning to lightly brown.
- Cool: Allow to cool while you prepare the frosting
- Frosting: In a microwave-safe glass bowl combine chocolate chips and heavy cream and microwave on half power for 2 minutes at a time, stirring after each until smooth.
- Add: Stir in butter and vanilla and mix till smooth.
- Cover: Pour mixture over the marshmallows and chill for at least 2-3 hours or until completely cooled before cutting into bars and serving.

Tips and Variations for the Best Mississippi Mud Brownies
These mud brownies are rich and fudgy! You will be tempted to eat them all by yourself. It is ok, I understand.
- Eggs: Eggs beat best into recipes when they are at room temperature, so if you have time and remember to remove them from the fridge about 20-30 minutes before using them.
- Flour: I like to sift my flour so that it mixes in smoothly and I do not have any lumps.
- Cocoa Powder: There are two types of cocoa powder out there, regular and dutch cocoa. Regular cocoa has a lighter color and more intense chocolate flavor. Dutch cocoa has been treated to reduce some of the acidity, it creates a smooth more mellow flavor and darker color. Either one will work in this recipe, but regular will have a more intense chocolate flavor. Use dutch if you want a lighter flavor.
- Add: If you like a bit of a crunch, toast chopped pecans and add with the marshmallows. It is so delicious. You could use peanuts too if you wanted.
- Double It: If you are having a party and need to feed a crowd, double the recipe and bake in a sheet pan.
- Cutting Mudslide Bars: For best results let the bars cool completely. Using a good serrated knife or plastic knife use a sawing motion to cut the brownies.

Storing and Keeping Marshmallow Brownies
This is if you have leftovers of Mississippi Mudslide Bars, you may not, and do not be surprised by that!
- Storing: These will keep either in the fridge tightly covered for up to a week. Or you can keep them tightly covered for up to 4 days at room temperature. Either way, they are delicious!
- Freezing: You can also keep these in the freezer. Wrap tightly with plastic and then with foil. Keep for up to 3 months.
More Chocolate Desserts To LOVE
Salads
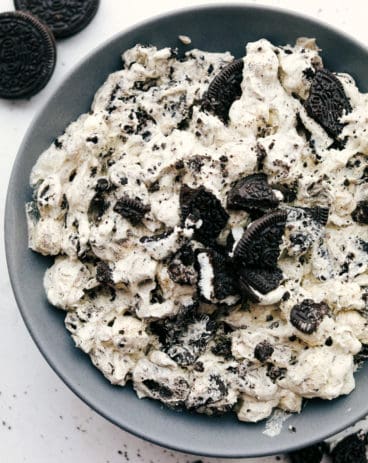
Oreo Fluff Dessert Salad
Dressings, Sauces, and Dips
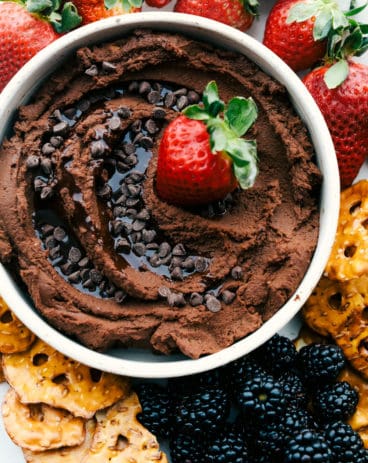
Chocolate Hummus (5 Minutes!)
Desserts
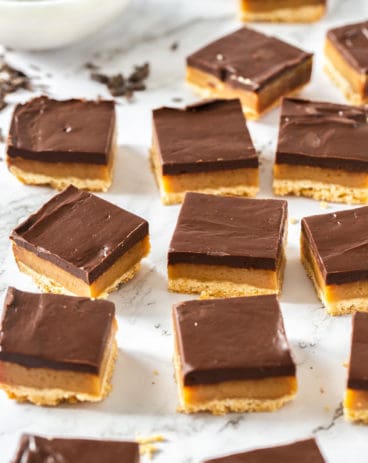
Millionaire Shortbread

Desserts
Brown Butter Chocolate Chip Cookies
Mississippi Mudslide Bars
Ingredients
Bars:
- 1 cup butter melted
- 2 cups sugar
- 1/3 cup unsweetened cocoa powder
- 3 large eggs
- 1 teaspoon vanilla
- 1/4 teaspoon salt
- 2 cups flour
- 4 cups miniature marshmallows
Frosting:
- 2 cups semisweet chocolate chips
- ¾ cup heavy whipping cream
- 2 tablespoons butter
- 1/4 teaspoon vanilla
Instructions
-
Preheat oven to 350 degrees and grease a 9×13 inch baking pan.
-
In a large bowl combine melted butter, sugar, cocoa powder, eggs, and vanilla and mix until smooth. Add flour and salt and mix until incorporated. Spread batter evenly in prepared pan. Bake for 25-30 minutes until an inserted toothpick in the center comes out clean (a few loose crumbs are okay but no wet batter).
-
Spread marshmallows in an even layer on top of the brownie layer. Return to oven and bake another 5-7 minutes until marshmallows are fluffy and beginning to lightly brown. Allow to cool while you prepare the frosting.
-
In a microwave-safe glass bowl combine chocolate chips and heavy cream and microwave on half power for 2 minutes at a time, stirring after each, until smooth. Stir in butter and vanilla til smooth. Pour mixture over marshmallows. Chill at least 2-3 hours or until completely cooled before cutting into bars and serving.
Notes
Nutrition
from The Recipe Critic https://ift.tt/3stTiUi
https://ift.tt/3uW3aI3