
Sloppy Joes are messy, saucy and the perfect family dinner. A timeless classic, these are bound to be the best you have ever had!
These sandwiches are just yummy and easy to customize. If you are looking for a twist on the classic try Hawaiian, Greek, and a personal favorite Philly Cheesesteak Sloppy Joes.

Delicious Sloppy Joe Recipe
I once had a conversation with my family about why Sloppy Joes were called Sloppy Joes and not something like messy bobs? Well it turns out that when your name is Joe and you invented this family favorite, you get to name it after yourself if you want. That is what Joe from Sioux City, Iowa did when he mixed tomato sauce and seasonings with his hamburger and served it on a bun.
These sloppy joes became popular, so popular that a company canned the stuff and called it Manwich. Also known as Maid-Rites, Yip Yips, and Loose Meat Sandwiches these sloppy joes have variations and traditions that vary all over the country. This homemade sloppy Joe recipe is the best classic recipe you will find and it tastes way better than anything in a can! These easy sloppy joes come together quickly with ingredients you probably already have in your pantry. So get out some extra napkins and have a fun, tasty meal tonight with these delicious sloppy joes!
Ingredients You Need For Sloppy Joe Sauce
Homemade sloppy joes comes together in about 20 minutes with ingredients right in your pantry. It is quick and easy to make and a family favorite!
- Olive oil: For sauteing the onions and cooking the beef.
- Onion: finely chopped.
- Ground beef: Use lean ground beef for less fat.
- Garlic: Mince the garlic finely.
- Ketchup: Adds the tangy sauce.
- Brown sugar: Adds a bit of sweetness and caramelization.
- Chili powder: Brings the heat to balance the sweet.
- Paprika: Adds a kick of flavor that can be a bit hot. Limit this if needed.
- Worcestershire sauce: The perfect savory umami flavor
- Salt and pepper: Add to your tastes.
- Buns: Good sturdy buns work best or you can make your own!
How To Make Easy Sloppy Joes
Quick and Easy this is a great dish for busy week day or a lazy weekend! Sloppy joes are irresistible and all ages love them!
- Sauté: In a medium-sized skillet add the olive oil and onion over medium-high heat. Sauté until almost tender and add the ground beef and cook and crumble until no longer pink.
- Seasonings: Add the garlic, ketchup, brown sugar, chili powder, paprika, Worcestershire sauce salt, and pepper. Let simmer for 2-3 minutes.
- Enjoy: Serve on buns.

The Best Sloppy Joe Tips and Variations
One of the best things about a meal that is messy, is you do not have to worry about how this looks, just how it tastes. And I have you covered on that one.
- Hamburger: Essentially you can use any fat ratio you would like but the leaner the meat the less grease you will have. If you use a “greaser” beef, drain it before adding the onions to saute. This will eliminate most of the greasy mess.
- Onions: If you do not want large chunks in your sandwiches, be sure to finely chop the onions or even grate them into your meat mixture. This will still impart flavor without leaving chunks.
- Green Peppers: If you like a bit of texture to your sloppy joes, dice half a green pepper and saute with the onion.
- Mustard: If you like a bit of depth to your mixture try squirting a long squeeze of mustard into the mixture. The acidity also balances out the sweetness and gives a nice rich flavor.
- Make-Ahead: This is one of those dishes that gets better as it simmers. Once the flavors are added and have mixed and simmered for a bit you can turn it down and cover it and leave it to simmer for an hour or two. You will need to check it to make sure it isn’t losing moisture. I like to transfer the mixture to a crockpot and let it simmer and keep warm till ready to serve.
- Double it: Make extra and freeze the other half for another meal. It will keep in the freezer for up to 3 months. Let it thaw in the fridge overnight.

The perfect Sides for The Perfect Sloppy Joes
Side dishes can be just as important as the main dish, rounding out flavors and nutrition. Similar to hamburgers these sloppy joes are ideal for picnics, potlucks, and large gatherings. You will be able to keep it warm on the stove or in a slow cooker for long periods of time making it superb for gatherings where people can come and go and eat when they want. It is an excellent party pleaser. Serve these sloppy joes up with these sides for a meal that will be sure to satisfy.

Side Dishes
Air Fryer Potato Chips
Side Dishes
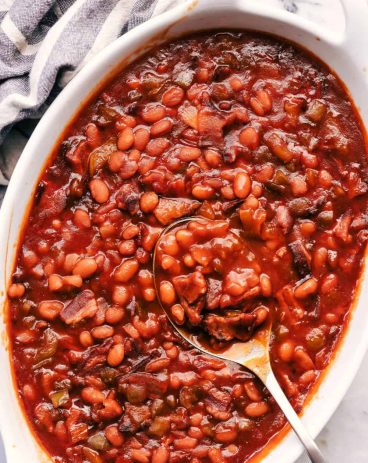
World’s Best Baked Beans
Side Dishes
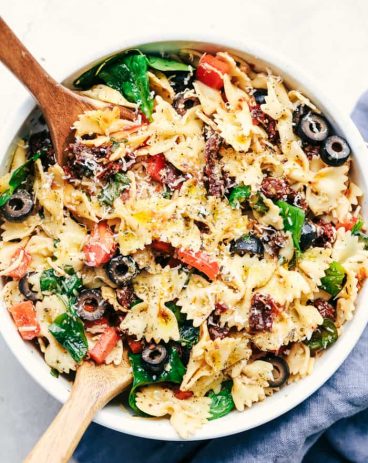
Tuscan Pasta Salad
Salads
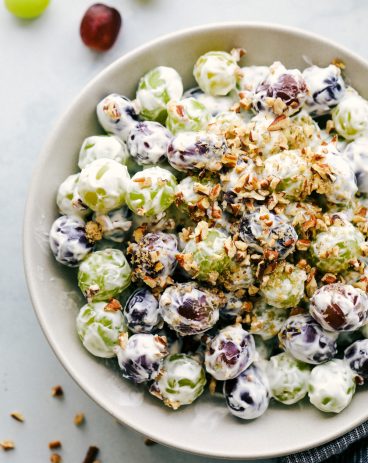
Creamy Grape Salad Recipe

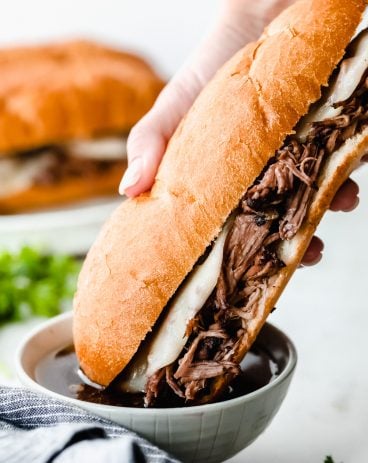
More Sandwich Meals to Try


Homemade Sloppy Joe
Ingredients
- 1 Tablespoon olive oil
- 1 small onion chopped
- 1 pound ground beef
- 3 cloves garlic minced
- 1 cup ketchup
- 2 Tablespoons brown sugar
- 1 teaspoon chili powder
- ½ teaspoon paprika
- 1 Tablespoon worchestershire sauce
- salt and pepper
- 4 buns
Instructions
-
In a medium sized skillet add the olive oil and onion over medium high heat. Sauté until almost tender and add the ground beef and cook and crumble until no longer pink.
-
Add the garlic, ketchup, brown sugar, chili powder, paprika, Worcestershire sauce salt and pepper. Let simmer for 2-3 minutes.
-
Serve on buns.
Nutrition
from The Recipe Critic https://ift.tt/3eVUWuj
https://ift.tt/2S3KLe7


")


")