Italian Chopped Salad is stuffed with flavor and texture that is highly satisfying. Full of classic Italian flavors, this salad is going to be a huge hit at your next gathering!
I love chopped salads, you get a bit of everything in every bite, and it’s all bite-sized. You have to try some of my other favorite chopped salads, Avocado, Chicken and Bacon, Thai Cashew, and an Autumn Salad.

Italian Chopped Salad
If you can chop stuff up, you can make this incredible salad. Italian chopped salad is zesty, fresh, and full of Italian flavors you are going to love. This salad comes together quickly and easily, making it a go-to when I’m short on time but need a big flavor. The cheese and salami give it a boost of protein that allows this salad to be either a main dish or a side salad. Either way your family is going to love the uniqueness of it.
The lettuce and tomatoes lighten the salad, so it isn’t super heavy. Red onion and pepperoncini give it that classic Italian zesty kick. And the black olives add flavor and a bit texture. Chopping everything in this Italian salad makes it super easy to eat and ensures every bit gets a good dose of that insanely delicious dressing. You have to make this salad, it’s so good!
What You Need For Chopped Italian Salad
- Romaine Lettuce: thinly chopped
- Pepperoncini: deseeded and sliced
- Cherry tomatoes: chopped
- Olives: I buy mine already sliced in a can, or you can slice them yourself.
- Red Onion: Slice and chop the red onion nice and thin.
- Italian salami: thinly sliced, can also use bite-sized salami
- Mozzarella cheese: cubed
- Homemade Italian Dressing: Yes, make sure it’s Homemade, it is so much better, it’s fast and delicious.
Let’s Get Chopping!
- Chop and Combine: In a large bowl combine the romaine, pepperoncini, cherry tomatoes, olives, red onions, salami, cheese, and dressing.
- Dress and Toss: Make the recipe for homemade Italian dressing and use as much as desired. Toss the salad until combined.

Tips and Variations for Italian Chopped Salad
The beauty of this salad is you can customize it to your liking.
- Chop: This is called a chopped salad for a reason, everything in it should be chopped, not just sliced or diced. This helps the salad mix thoroughly, makes it easier to eat, and better-tasting.
- Lettuce: I like to use romaine lettuce because it has both crunchy and leafy parts that give all the texture I could want. You can use iceberg or a mixture of both. Also, try mixing in some spinach for an extra boost of iron.
- Meat: Salami is the meat most often found in a chopped salad, you can also substitute in pepperoni, just note it will give you a slightly different flavor. To save time buy the bite-sized salami all ready to go.
- Cheese: For a shortcut, you can use cheese sticks and cut them up. They are a perfect size already! Try substituting parmesan or provolone or using a mixture of all of the above too.
- Add-Ins: For other ingredient ideas try chickpeas, sun-dried tomatoes, kalamata olives, and fresh diced peppers.
- Storage: Unfortunately once the salad and dressing have combined, it is hard to store. The salad will get soggy. Only dress what you plan on eating and store the salad and dressing separately for longer storage. Both will keep in the fridge for 2-3 days.

What to Serve with this
This is a robust, satisfying salad that can be used either as a main course or a side dish. The meat and cheese give it protein and the vegetables, well are your vegetables. Serve it along with a nice fruit salad and a hunk of toasted crusty bread and you have a light dinner or hearty lunch ready to go. Here are more ideas to serve insanely delicious salad with.


More Italian Recipes to Love

Desserts
Italian Christmas Cookies

Soup Recipes
Classic Italian Wedding Soup
Dinner
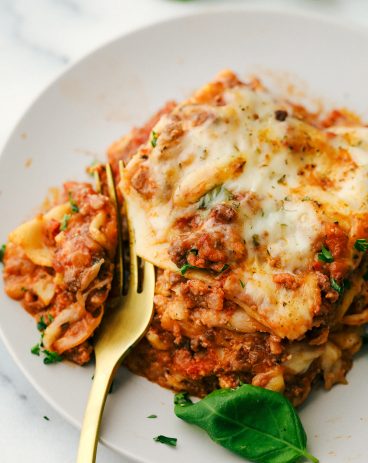
The BEST Lasagna Ever!

Dinner
Creamy Tuscan Garlic Chicken

Italian Chopped Salad
Ingredients
- 4 cups romaine thinly chopped
- 1 cup pepperoncinis deseeded and sliced
- 1 cup cherry tomatoes chopped
- 1 cup olives sliced
- 1/2 medium red onion sliced
- 1/2 cup italian salami thinly sliced
- 1 cup mozzarella cheese cubed
- Recipe for Homemade Italian Dressing
Instructions
-
In a large bowl combine the romaine, pepperoncinis, cherry tomatoes, olives, red onions, salami, cheese, and dressing.
-
Make recipe for homemade italian dressing and use as much as desired. Toss the salad until combined.
Nutrition
from The Recipe Critic https://ift.tt/3yKziRC
https://ift.tt/3hYqjpQ