These copycat Olive Garden Breadsticks are insanely delicious! Fresh, buttery, and garlicky you can still have unlimited breadsticks, only these taste better!
Make it an Olive Garden night at home and add these incredible copycat recipes for a complete meal. Try Salad, Gnocchi, or Alfredo Pasta for a luscious restaurant-style meal in the comfort of your own home.

Olive Garden Breadsticks
Olive Garden has to be on the top of the list of a family-friendly, and family favorite restaurant. The food is divine, it fills you up and everyone can get what they want. We may not always agree on what we all want as a main dish, but we can all agree on the endless basket of breadsticks. Because these Olive Garden breadsticks are so tasty, I set out to make them myself. And I think these copycat breadsticks taste even better than the ones from the restaurant. Now I just need an extra chef in the kitchen to keep an endless supply coming when we eat!
These Olive Garden Breadsticks are really quite easy. And just like the copycat Olive Garden Dressing, these will taste even better made from scratch. Do not let working with yeast scare you, I’ve got all the ins and outs so that you can end up with perfectly fluffy on the inside, and crusty on the outside breadsticks. Then if the chewy tender texture wasn’t enough, I’m going to dazzle your tastebuds with a butter seasoning that is out of this world amazing! These copycat Olive Garden breadsticks are going to become your families go to recipe from now on!
Ingredients for Olive Garden Breadsticks
Similar to most breadsticks this is a very easy dough to assemble and make. Most the ingredients are right in your pantry!
- Warm Water: Keep the temperature between 95 and 115 degrees for optimal fermentation.
- Active Dry Yeast: This is different from instant yeast.
- Granulated sugar: Feeds the yeast.
- Extra Virgin Olive oil: Classic flavor for breadsticks.
- Salt: Needed for flavor and balance.
- Flour: All-purpose or unbleached flour will work.
Brush on Garlic Butter
Take your copycat Olive Garden breadsticks to the next level with this garlic butter. It is a simple combination that is quick to melt together!
- Unsalted Butter Melted: Using unsalted will ensure it isn’t too salty.
- Salt: The classic bit of saltiness that you find on the original.
- Garlic Powder: That nice garlic flavor that isn’t too overpowering.
- Fresh Parsley: Chopped, optional
How to Make Homemade Breadsticks
So delicious, so easy and done in no time! These Olive Garden breadsticks are a family favorite every time.
- Activate the Yeast: Mix water, yeast, and sugar in the bowl of a mixer. Let stand for 5 minutes until frothy.
- Add the Rest: Add olive oil, salt, and flour. Mix with the dough hook for 6-8 minutes on medium-low speed until smooth. Transfer to an oiled bowl and cover with plastic wrap sprayed with cooking spray. Let rise until doubled in size, about an hour.
- Prep: Preheat oven to 425.
- Shape: Punch down and turn the dough out onto a lightly floured surface. Cut into 12 even portions, about 2 oz each. Roll out into 8-9 inch logs and set on baking sheet. Let rest for 10-15 minutes.
- Make Butter Seasoning: While the dough is resting, mix together the garlic butter: melted butter, garlic powder, salt, and parsley.
- Bake and Brush: Bake for 12-15 minutes, until golden brown. Brush immediately with garlic butter.

Breadstick Tips and Variations
This recipe is very similar to my quick and easy dough recipe, so I know you can make this, and everyone is going to be impressed.
- Yeast: There is a difference between Instant and Active dry yeast, but whichever one you have, proof both of them. Technically you do not have to prove the instant yeast, it does not require “activation” as active yeast does. But I like to “activate” my instant anyway. This way I know whether or not the yeast is good. If your yeast does not bubble and rise after 10 minutes, throw it out. It isn’t good anymore.
- Sugar: The sugar is to feed the yeast, do not worry it will not make your breadsticks taste sweet at all.
- Garlic: If you want a stronger Garlic flavor finely mince fresh garlic and stir into the melted butter. You can brush the garlic butter on the breadstick both before and after baking.
- Seasonings: Garlic and salt are the Olive Garden classic flavorings, but you can mix it up. Instead, use a teaspoon or two of Italian seasoning or Ranch seasoning.
- Sweeter: Turn these savory breadsticks into dessert by mixing cinnamon and sugar into the melted butter and spreading on top for a cinnamon breadstick treat.
- Double and Store: If I were you, I’d probably double this batch of breadsticks. They are so addictive you are going to want the extras, trust me. And if you do have leftovers they store in a plastic bag at room temperature for 3 days, or in the freezer for up to 3 months. Warm the leftovers in foil in the oven till warm and tender on the inside.

What to Serve Copycat Olive Garden Breadsticks With
Besides serving these with Olive Garden-like favorites such as Slow Cooker Pasta e Fagioli and Creamy Zuppa Toscana, these breadsticks are great for dipping. Find a favorite sauce and dip away, everyone loves a great dip.
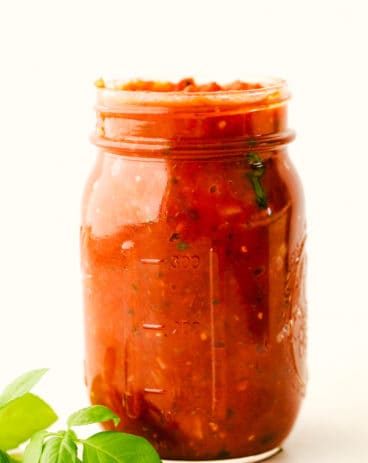
Dressings, Sauces, and Dips
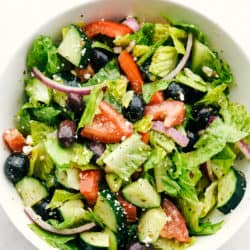
Easiest Homemade Marinara
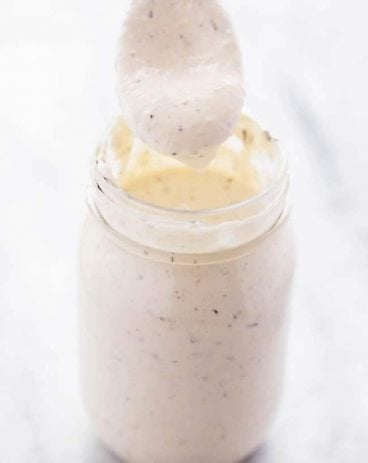
Dressings, Sauces, and Dips
The Best Homemade Alfredo Sauce Recipe Ever!
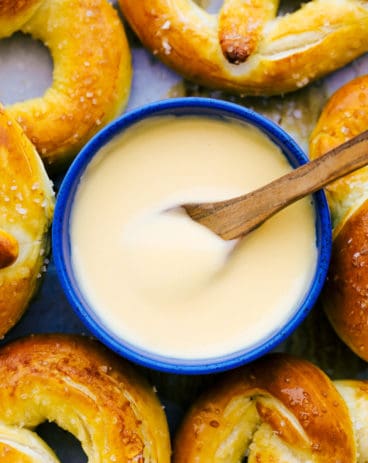
Dressings, Sauces, and Dips
Homemade Cheese Sauce

Dressings, Sauces, and Dips
Pepperoni Pizza Dip

More Copycat Favorites

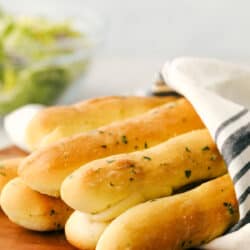
Copycat Olive Garden Breadsticks
Ingredients
- 1 Cup warm water
- 1 packet active dry yeast
- 2 Tablespoons granulated sugar
- 3 Tablespoons Extra Virgin Olive oil
- 1 teaspoon salt
- 3 ½ Cups Flour
Garlic Butter
- 6 Tablespoons unsalted butter melted
- 1 teaspoons salt
- 1 teaspoons garlic powder
- 1 Tablespoon fresh parsley chopped, optional
Instructions
-
Mix water, yeast, and sugar in bowl or mixer. Let stand for 5 minutes until frothy.
-
Add olive oil, salt and flour. Mix with the dough hook for 6-8 minutes on medium low speed until smooth. Transfer to an oiled bowl and cover with plastic wrap sprayed with cooking spray. Let rise until doubled in size, about an hour.
-
Preheat oven to 425.
-
Punch down and turn dough out onto a lightly floured surface. Cut into 12 even portions, about 2 oz each. Roll out into 8-9 inch logs and set on baking sheet. Let rest for 10-15 minutes.
-
While dough is resting, mix together the garlic butter: melted butter, garlic powder, salt, and parsley.
-
Bake for 12-15 minutes, until golden brown. Brush immediately with garlic butter.
Notes
Nutrition
from The Recipe Critic https://ift.tt/3vqiOvK
https://ift.tt/3bWqiz8