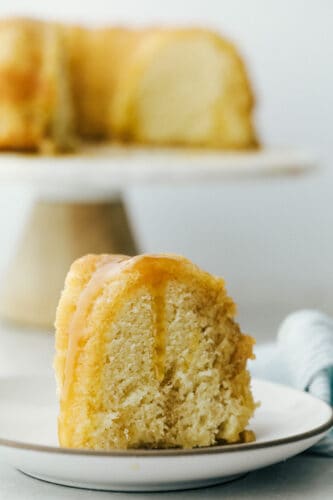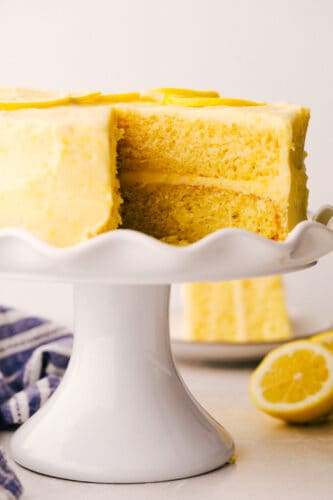
Lemon Cake is everything you want in a sweet, yet zingy cake! Tender moist layers of refreshing lemon cake are smothered with a tart but sweet frosting.
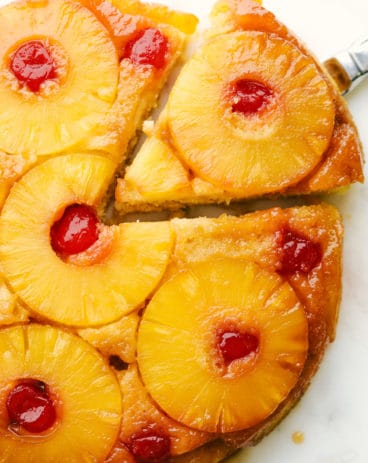
Cake is a classic dessert that is perfect for every occasion, from parties to celebrating making it through the week! Try these tried and true Tiramisu, Pound Cake and Butter Cake recipes next time.

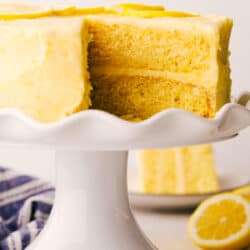
Lemon Layer Cake
This Layered Lemon Cake is literally a slice of sunshine in your mouth! If sunshine was a cake, this would be it! It is bright, zingy and full of fresh lemony flavor. The cake bakes up light and moist with the most perfect tender crumb. You will have to be careful not to just eat the cake all by itself. Trust me you want to wait till you frost it with the richest, lemon buttercream frosting out there. The combination is absolutely divine.
This Lemon Layer cake is the perfect cake to make any occasion special. It does take some prepping as you want the cake to be able to sit in the fridge for at least 4 hours, this will help them be easier to frost. Your whole family is going to love how light and refreshing a cake can be. It is ideal in this hotter weather when you don’t want a heavy dessert, but you still want something sweet that will hit the spot. It’s decadent in all the right ways!
Ingredients For Lemon Cake
Don’t let the ingredients scare you. These are all pantry staples and will combine to become a moist and sweet lemon cake. You will find the ingredient measurements located in the recipe card.
- Cake flour: Creates light and delicious cake. All-purpose will work too.
- Baking Powder: One of the leavening agents that helps it be light and fluffy.
- Salt: Provides flavor and balance.
- Baking Soda: Helps give the cake its lift.
- Sugar: Sweet sugar balances out the tartness.
- Butter: Because every cake is better with butter.
- Vegetable Oil: Adds moisture to the cake.
- Buttermilk: If you do not have any make your own.
- Lemon Juice: Fresh lemon juice will give you the freshest flavor.
- Lemon Zest: Use a zester or the smallest holes of a cheese grater.
- Vanilla: Compliments the lemon and helps to tame its tartness.
- Eggs Yolks: Don’t worry you’ll use the whites for the buttercream frosting.
Sweet Lemon Frosting
This frosting is sweet and creamy with a hint of lemon in it. It is the perfect balance to this beautiful lemon cake recipe.
- Egg Whites: The other half of the egg yolks.
- Sugar: Provides sweetness.
- Butter: Creates a creamy spreadable texture.
- Lemon Zest: This provides the pop of lemon in the frosting.
- Salt: Always need a bit to balance everything out.
How to Make Lemon Cake from Scratch
- Prep: Preheat the oven to 325. Prep two 8-inch round cake pans by spraying them with cooking spray, using a parchment round on the bottom of the pan, and spray that again with cooking spray. Dust the whole inside of the pan with flour and tap out the excess.
- Dry: In the bowl of a stand mixer sift together flour, baking powder, salt, baking soda, and 1 ¼ cups of sugar.
- Wet Ingredients: In a different small bowl, mix the melted butter, buttermilk, vegetable oil, vanilla, lemon juice, lemon zest, and egg yolks until combined.
- Egg Whites: In a separate, clean bowl of your stand mixer use the whisk attachment to beat the egg whites until foam, about a minute. Lower the speed to medium-low and add in the remaining ¼ cup of sugar while the mixer is still running. Allow the egg whites to beat until stiff peaks form, just about a minute. Set aside.
- Combine and Fold: With the bowl containing the flour mixer, use the whisk attachment on low and slowly add the butter mixture to your flour while mixing for about 15-20 seconds. Scrape down the sides of the bowl and the whisk and mix again at medium-low until the mixture is combined, about 15 more seconds. Fold in about ½ of the whipped egg whites until combined and then gently fold in the rest, taking care to make sure it’s fully incorporated, and no streaks remain.
Baking and Assembling a Two Layer Cake
- Bake: Pour your batter into the prepared cake pans. Bake for 30-45 minutes, or until the tops of the cakes bounce back when touched and a toothpick comes out clean.
- Cool: Cool the Lemon cakes in the pans for about 10 minutes before flipping them upside down on a cooling rack and remove the pans. Allow the cakes to cool upside down on the cooling rack. This will make the tops of your cakes nice and level.
- Chill: Once the cakes are cooled, wrap them individually in plastic wrap and store them in the fridge overnight, or at least 4 hours. Chilling the cake layers makes it easier to frost without getting crumbs in your frosting.
- Frost: When the cakes are done chilling, use an offset spatula to ice your cake with the frosting, using it for the filling as well. This will make that beautiful lemon layer cake.
Making Lemon Frosting
- Double Boiler: Set a small pan on the stove. Put about an inch of water in the pan and bring it to a simmer over medium-low heat. In a mixing bowl whisk together the egg whites and sugar. Place the bowl over the water, making sure the water doesn’t touch the bowl.
- Mix: Whisk constantly until a thermometer reaches 165. Remove the bowl and use the whisk attachment of your mixer to whip the egg whites on high until you have medium-stiff peaks and the bowl has cooled to room temperature.
- Make it Thick and Rich: Switch to the paddle attachment and, with the speed at medium, add in the butter 1 tablespoon at a time until it is all incorporated. Add in the lemon zest and salt and turn the speed up to medium-high. Mix until the frosting becomes thick. It may take a bit and it may look like it has curdled but trust the process and keep mixing! It will come together for a nice smooth, rich frosting. Keep the frosting in an airtight container at room temp until the cake layers are ready to be frosted.

The Best Lemon Cake Tips
The layers make this cake look elegant and fancy. It is super easy and worth the extra effort.
- Room Temperature: It is super important that all your ingredients be at room temperature. Especially the eggs as you will be separating them and heating them. Remove them from the fridge at least an hour ahead of time. It allows your ingredients to mix in more easily and thoroughly.
- Lemons: Use fresh real lemon for your juice and zesting. Look for lemons that are blemish-free and bright yellow. Using real lemons will give you the best flavor and zing that you want in this cake. Zest your lemons just till you reach the pith, or the white part of the lemon, rotating to get all the skin.
- Separate the Eggs: Make sure you do not get any egg yolk in your egg whites. They will not whip up properly and ruin your frosting.
- Chill your Cakes: If you want your frosting to go on smoothly without getting cake crumbs in it, be sure to chill your cakes. You can also freeze the cakes if you are short on time. Try about 2 hours.
- Extra Lemony: For even more lemon flavor, make my lemon curd to go in between the layers instead of the frosting.
- Variations: Make it a Lemon Poppyseed cake by adding 3Tablespoons of poppy seeds with the flour.
- Cake types: You can also make this into a 9x 13 pan and cupcakes. Bake the 9×13 for about 30 minutes and the cupcakes for about 18 minutes. Check both with a toothpick to see if it comes out clean. Frost as desired.

Storing your Homemade Lemon Cake
This lemon cake can be made ahead of time if needed. It is great for parties, celebrations and everything in-between!
- Store: Once the cake has been frosted you can keep this at room temperature for up to 2 days. Tightly cover the cake to keep it from drying out.
- Fridge: Keeping the cake in an air-tight container or wrapped in the fridge will help it last longer. You can keep it for up to 5 days in the fridge. If you desire you can let it sit out and bring it to room temperature before serving.
- Freeze: If you want to freeze your lemon layer cake, wrap the cooled individual cakes tightly with plastic wrap and then in foil. Keep in the freezer for up to 2 months. Thaw them at room temperature or overnight in the fridge.

More Lemon Recipes To Love

Desserts
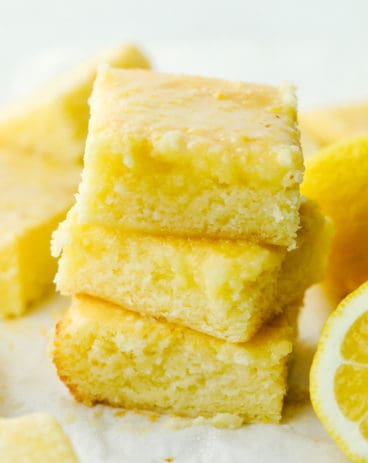
Glazed Lemon Brownies

Beverages
Chick fil A Copycat Frosted Lemonade

Dinner
Creamy Lemon Chicken Piccata
Lemon Layer Cake
Ingredients
Cake
- 2 cups Cake flour
- 1 Tablespoon Baking Powder
- ¾ teaspoon Salt
- 1/2 teaspoon baking soda
- 1 ½ cups sugar divided
- ½ cup unsalted butter melted
- 1/4 cup veggie oil
- ½ cup buttermilk
- ½ cup fresh lemon juice
- 1 Tablespoon lemon zest
- 1 teaspoon vanilla
- 4 eggs separated
Frosting
- 4 egg whites
- 1 ½ cup granulated sugar
- 1 pound unsalted butter softened
- 3 Tablespoon lemon zest
- Pinch of salt
Instructions
Cake
-
Preheat the oven to 325 degree Fahrenheit. Prep 2, 8 inch round cake pans by spraying them with cooking spray, using a parchment round on the bottom of the pan and spray that again with cooking spray. Dust the whole inside of the pan with flour and tap out the excess.
-
In the bowl of a stand mixer sift together flour, baking powder, salt, baking soda, and 1 ¼ cups of sugar.
-
In a small bowl, mix the melted butter, buttermilk, vegetable oil, vanilla, lemon juice, lemon zest and egg yolks until combined.
-
In a separate, clean bowl of your stand mixer use the whisk attachment to beat the egg whites until foam, about a minute. Lower the speed to medium low and add in the remaining ¼ cup of sugar while the mixer is still running. Allow the egg whites to beat until stiff peaks form, just about a minute. Set aside.
-
With the bowl containing the flour mixer, use the whisk attachment on low and slowly add the butter mixture to your flour while mixing, about 15-20 seconds. Scrape down the sides of the bowl and the whisk and mix again at medium low until the mixture is combined, about 15 more seconds. Fold in about ½ of the whipped egg whites until combined and then gently fold in the rest, taking care to make sure it’s fully incorporated, and no streaks remain.
-
Pour your batter into the prepared cake pans. Bake for 30-45 minutes, or until the tops of the cakes bounce back when touched and a toothpick comes out clean.
-
Cool the cakes in the pans for about 10 minutes before flipping them upside down on a cooling rack and remove the pans. Allow the cakes to cool upside down on the cooling rack. This will make the tops of your cakes nice and level.
-
Once the cakes are cooled, wrap them individually in plastic wrap and store in the fridge overnight, or at least 4 hours. Chilling the cake layers makes it easier to frost without getting crumbs in your frosting.
-
When the cakes are done chilling, use an offset spatula to ice your cake with the frosting, using it for the filling as well.
Frosting
-
Set a small pan on the stove. Put about an inch of water in the pan and bring it to a simmer over medium-low heat. In a mixing bowl whisk together the egg whites and sugar. Place the bowl over the water, making sure the water doesn’t touch the bowl.
-
Whisk constantly until a thermometer reaches 165. Remove the bowl and use the whisk attachment of your mixer to whip the egg whites on high until you have medium stiff peaks and the bowl has cooled to room temperature.
-
Switch to the paddle attachment and, with the speed at medium, add in the butter 1 tablespoon at a time until it is all incorporated. Add in the lemon zest and salt and turn the speed up to medium-high. Mix until the frosting becomes thick. It may take a bit and it may look like it has curdled but trust the process and keep mixing! It will come together for a nice smooth, rich frosting. Keep the frosting in an airtight container at room temp until the cake layers are ready to be frosted.
Nutrition
from The Recipe Critic https://ift.tt/3pnveST
https://ift.tt/3vVkduL