बुधवार, 9 जून 2021

Fall off the Bone Slow Cooker Ribs

These Slow Cooker ribs are going to melt in your mouth and fall off the bone! They are cooked low and slow so they are perfectly tender and then covered in a sauce that’s absolutely to die for!

Ribs, whether short or baby back are fall off the bone tender and absolutly delecatable. You have to try these recipes that prove it, Instant Pot Short Ribs, Slow Cooker Short Ribs, and Sticky Asian Ribs.
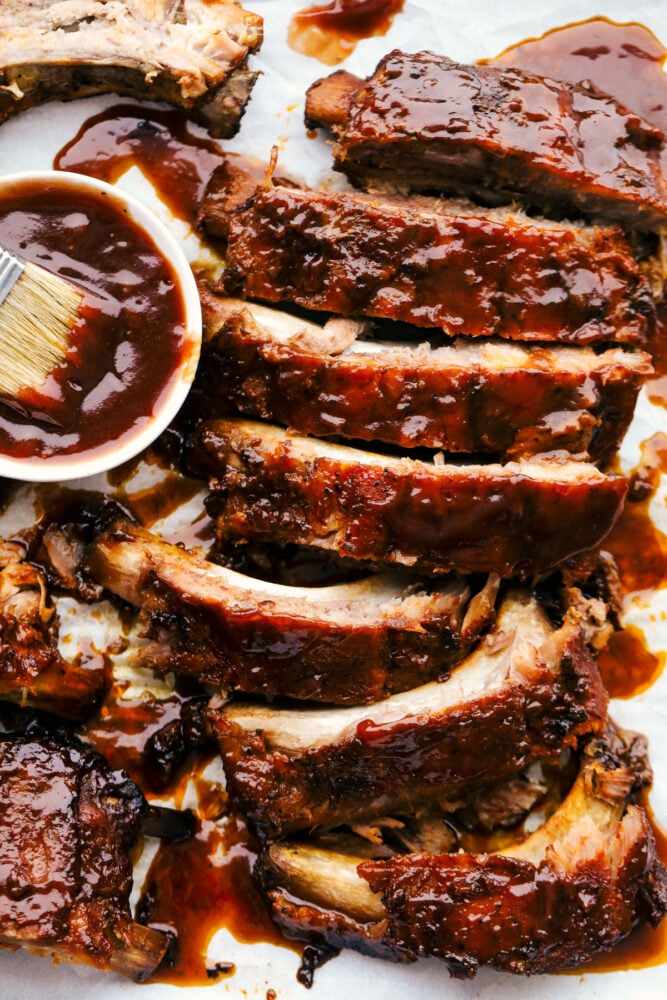
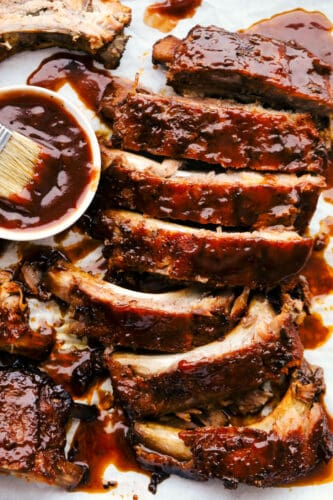
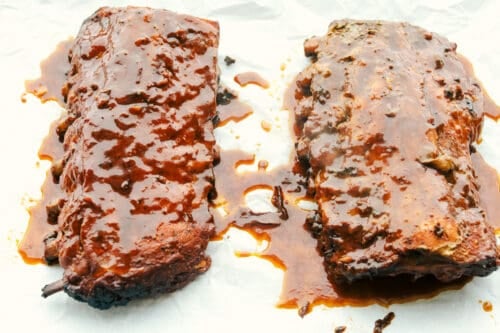
Slow cooker ribs separated with sauce.

Slow Cooker Ribs

These slow cooker ribs are seriously the BEST ribs you will ever have! Done in the slow cooker you get that super tender, fall off the bone texture that is divine. Then it’s finished off in the oven with your favorite BBQ sauce for a taste that’s right out of the restaurant, only better! These take a little bit of time but they are so worth it and once you place them in the slow cooker, it’s hands off. The crockpot does all the work. Your whole family is going to devour these.

The dry rub creates flavor that will penetrate below the surface of the meat as it cooks. Helping to tenderize and flavor it. Then you will layer it with even more BBQ flavor that you are going to lick your fingers clean, it’s so good. These slow cooker ribs are so good you are going to put them on your list to make again and again. And the best part, they are super easy to make!

What You Need For Slow Cooker Ribs

  • Pork baby back ribs: I bought one that was 4lbs.
  • Brown sugar: Helps to caramelize the ribs.
  • Paprika: Adds color and taste with a little bit of heat.
  • Garlic Powder: Much needed garlic flavor that is yummy.
  • Onion Powder: Gives a great onion flavor to the ribs.
  • Salt and Pepper: Add to taste.
  • Homemade Bbq Sauce: use your favorite store-bought sauce.

How to Make Fall Off The Bone Ribs

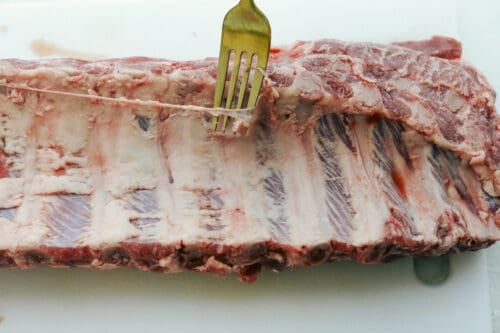
  1. Prep Ribs: Prepare your ribs by removing the membrane and patting dry with a paper towel.
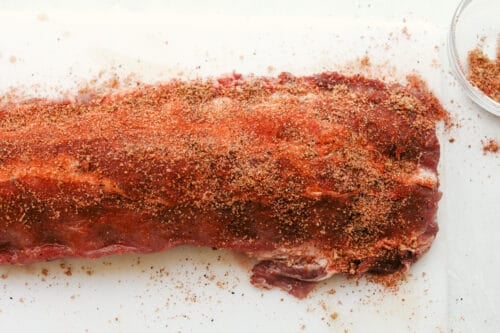
  2. Dry Rub: Prepare the rub by combining brown sugar, paprika, garlic powder, onion powder, salt, and pepper. Rub evenly on top of the ribs.
  3. Cut in Half: Cut the ribs in half. Add half of the rack of the ribs into the bottom of the slow cooker. Pour half of the sauce on top and layer with the other rack with the remaining sauce. You can also wrap the ribs around the slow cooker if the top will fit on.
  4. Slow Cook: Cook the ribs on low for 6-7 hours or high for 3-4.
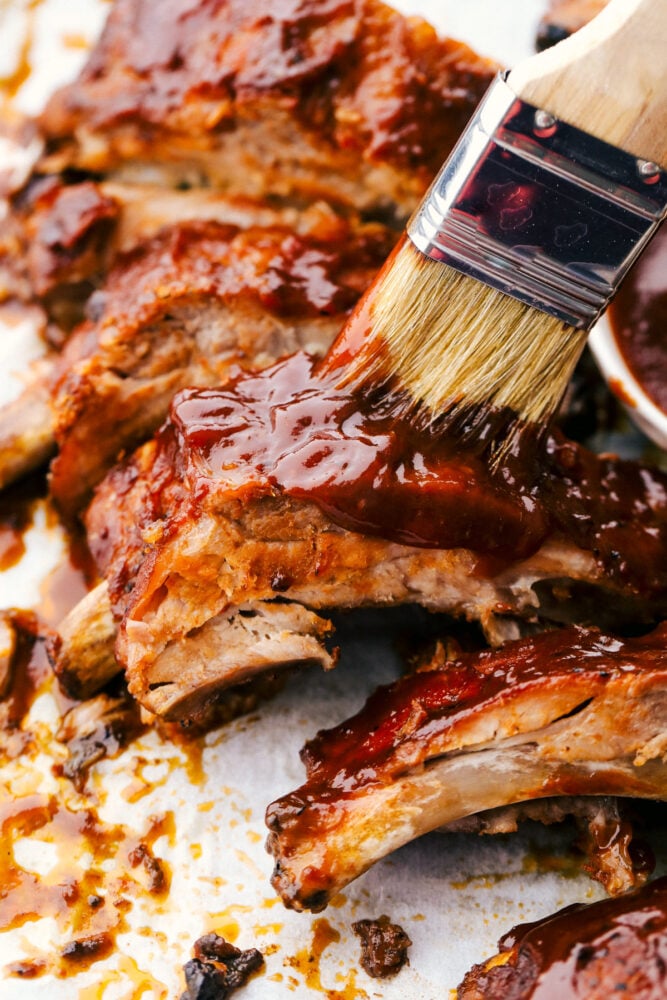
  5. Crisp: Preheat oven to 425 degrees. Remove the ribs and set them on a baking sheet. Pour the sauce on the top. Cook for 10 minutes until the tops get crispy. Brush with additional sauce if needed.
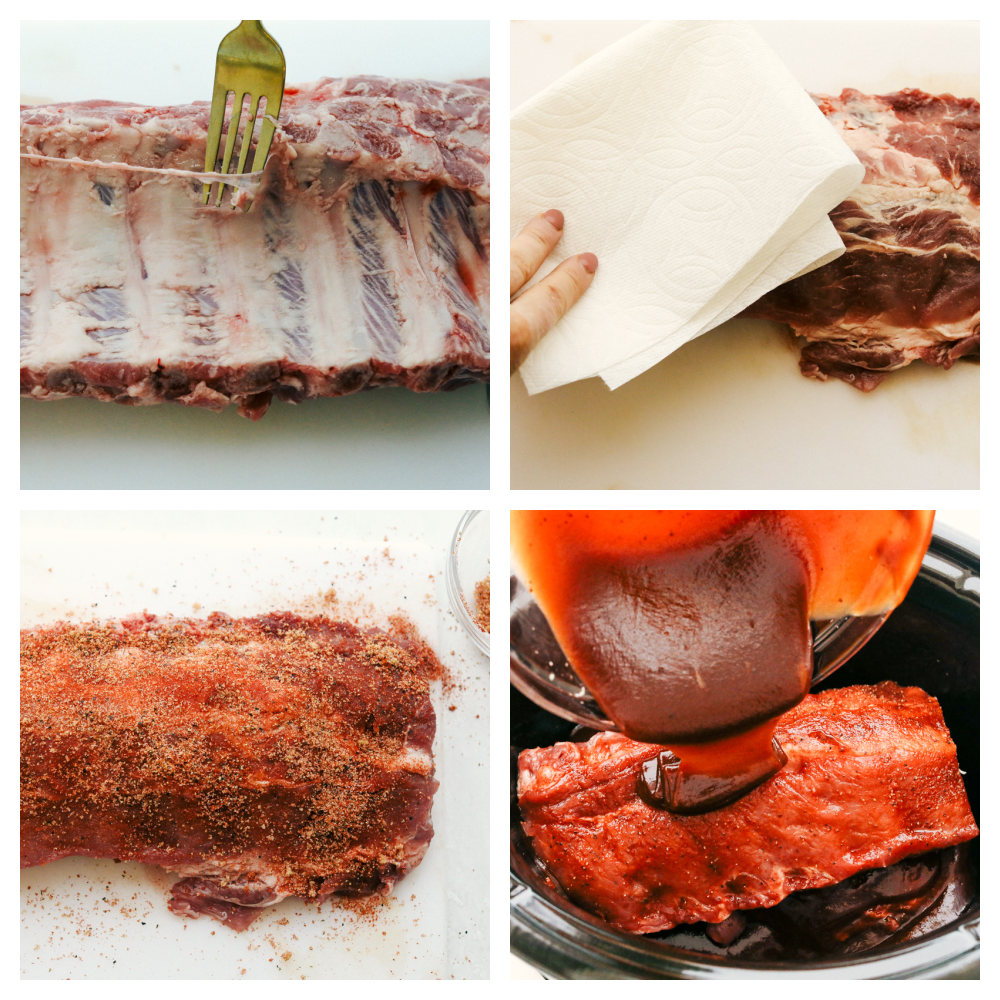
Prepping the ribs by removing the skin, adding the ruba nd then the sauce.

All About Ribs!

Ribs are the main event for this slow cooker dinner! Tender, juicy fall of the bones ribs are just what you will get when picking and preparing the right set up ribs.

  • What Kind of Ribs: This recipe is for baby back ribs, but if you want to use St. Louis style ribs, you can. They are meatier and longer so make sure they fit your slow cooker. They also need a longer time to cook, so do not cook them on high. Low and slow is the only way to go for them.
  • Remove the Membrane: Use a fork, knife to get under the membrane. If it seems a bit slippery use a paper towel to grab a hold of it and pull it off. Once in a while, the butcher will have taken it off, so if you can’t find it, it’s ok.
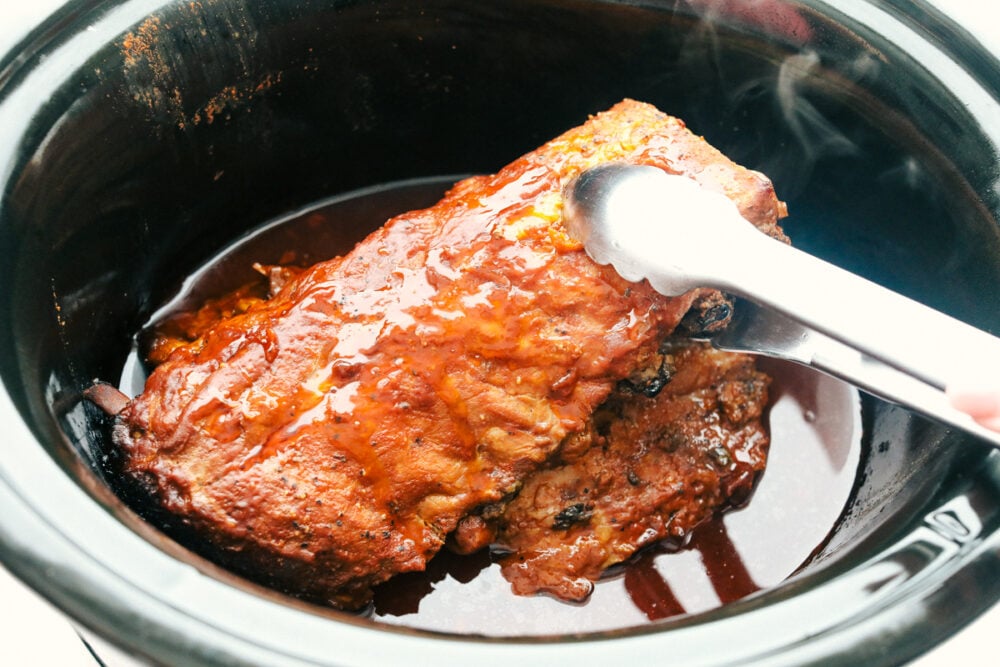
Removing the cooked ribs from the slow cooker.

Slow Cooker Rib Tips

These are going to be some of the best ribs you will ever have! Slow cooker ribs are tender and juicy every time!

  • Dry Rub: Be generous with the dry rub, if you need to double the recipe and make sure the ribs are well coated on both sides. You really want the rub everywhere so that you have great flavor.
  • Cooking: The ribs will be best cooked slow and low, so if you have time do that. If you don’t they will still be tender and delicious on high.
  • Broil: Putting them in the oven after you have slow-cooked them will caramelize the BBQ Sauce giving them an absolutely delectable crispy skin but still tender and juicy inside.
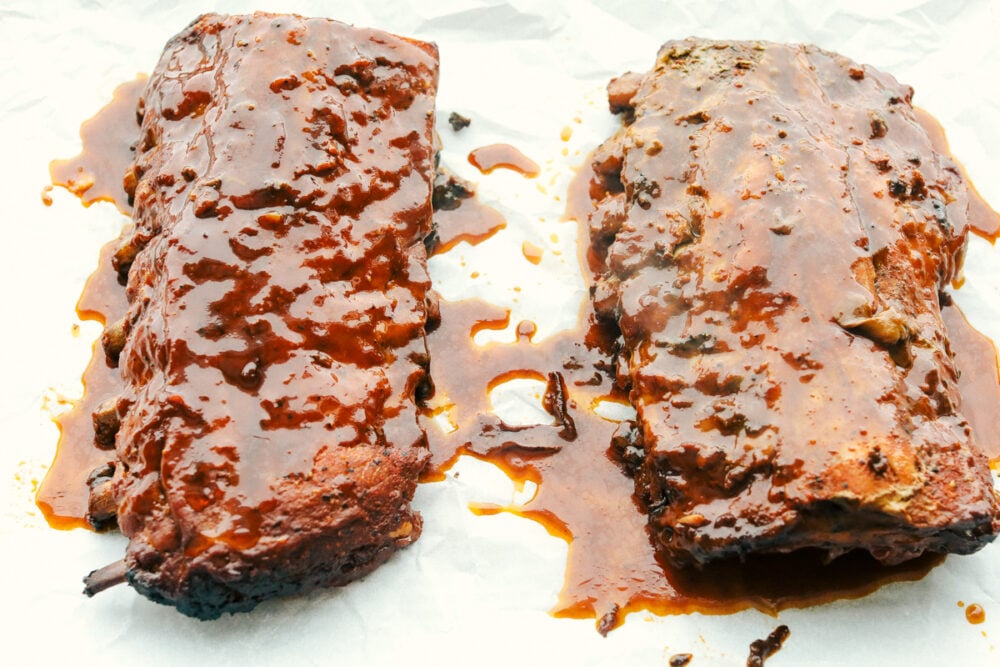
Adding extra sauce to the ribs before broiling.

How Long to Cook Ribs in the Slow Cooker

Ribs are tender and juicy all on their own when using a slow cooker. I recommend cooking them low and slow for 6 to 7 hours or until their eternal temperature reaches 145 degrees Fahrenheit. This will ensure that fall off the bone deliciousness!

  • Slow Cook Ribs on High: If you are short on time or just remembering to make dinner cook for 3 to 4 hours long.
  • Slow Cook Ribs on Low: Make time to cook for 6 to 7 hours if possible. It is super simple to make but so worth the wait!
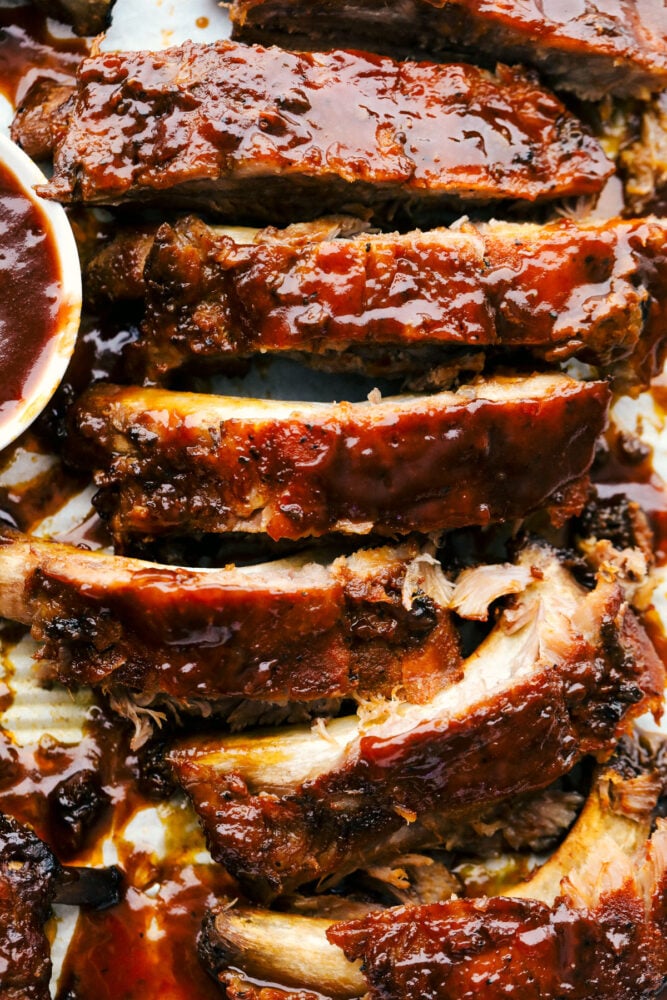
Segmented ribs with sauce showing texture.

What to Serve with Fall off the Bone Ribs

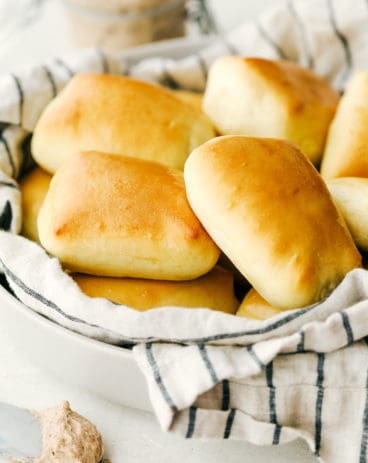
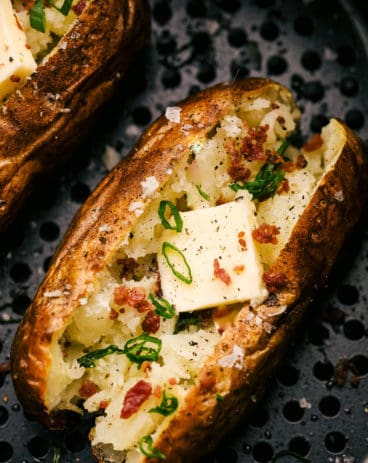
I would love to just sit and eat my weight in ribs, really, these are that good! But it is important to have a well-balanced meal. A great side dish can make this meal taste like you are at a restaurant but, trust me, it will be way better! This is going to be a meal your loved ones are going to rave over. Perfect for special occasions such as Father’s Day, Graduation party, or a special birthday. this is the ideal meal!

Brushing on extra sauce on the slow cooker ribs.

Storing Your Rib Leftovers

These are a great leftover meal, warm them up for lunch at the office and everyone will be jealous!

  • Fridge: These will keep in an air-tight container or tightly wrapped in the fridge for 5 days. Warm them up in the microwave for 30-second intervals, or on a lower power level. You do not want to re-cook the ribs, just warm them, otherwise, they’ll become tough.
  • Freezer: Tightly wrap leftover ribs in plastic wrap, then foil and freeze for up to 2 months. Let them thaw overnight in the fridge and heat them as you desire.
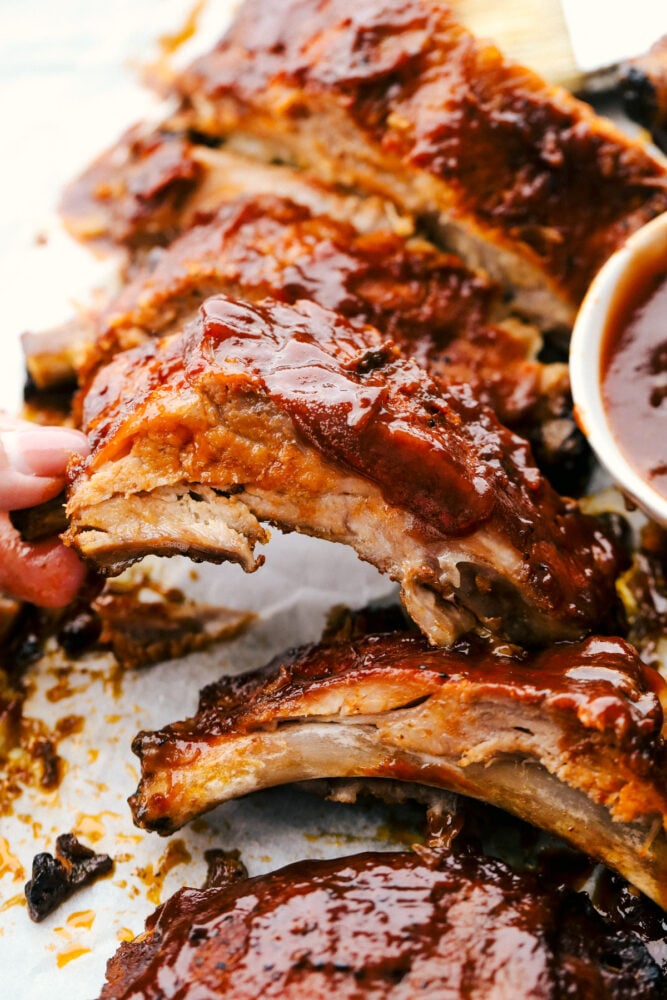
Pulling a rib from others to eat.
Print

Slow Cooker Ribs

These Slow Cooker ribs are going to melt in your mouth and fall off the bone! They are cooked low and slow so they are perfectly tender and then covered in a sauce that's absolutely to die for!
Course Dinner, Main Course
Cuisine American
Keyword baby back ribs, ribs, slow cooker ribs
Prep Time 10 minutes
Cook Time 6 hours 10 minutes
Total Time 6 hours 20 minutes
Servings 6 people
Calories 603kcal
Author Alyssa Rivers

Ingredients

  • 4 pounds pork baby back ribs
  • 1 Tablespoon brown sugar
  • 2 teaspoons paprika
  • 1 teaspoon garlic powder
  • 1 teaspoon onion powder
  • 1 teaspoon salt
  • 1/2 teaspoon pepper
  • 2 cups Homemade BBQ Sauce or Store Bought

Instructions

  • Prepare your ribs by removing the membrane and patting dry with a paper towel.
  • Prepare the rub by combining brown sugar, paprika, garlic powder, onion powder, salt and pepper. Rub evenly on top of the ribs.
  • Cut the ribs in half. Add half of the rack of the ribs into the bottom of the slow cooker. Pour half of the sauce on top and layer with the other rack with remaining sauce. You can also wrap the ribs around the slow cooker if the top will fit on.
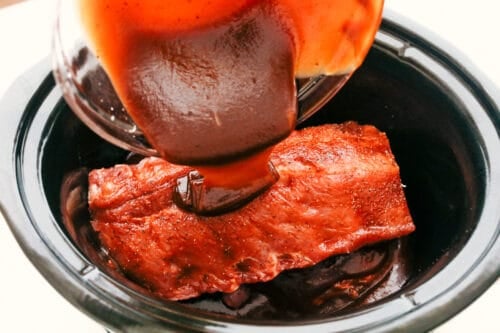
  • Cook the ribs on low for 6-7 hours or high for 3-4 hours.
  • Preheat oven to 425 degrees Fahrenheit. Remove the ribs and set on a baking sheet. Pour the sauce on the top. Cook for 10 minutes until the tops get crispy. Brush with additional sauce if needed.
Nutrition

Calories: 603kcal | Carbohydrates: 42g | Protein: 37g | Fat: 32g | Saturated Fat: 11g | Polyunsaturated Fat: 5g | Monounsaturated Fat: 13g | Trans Fat: 1g | Cholesterol: 131mg | Sodium: 1534mg | Potassium: 721mg | Fiber: 1g | Sugar: 34g | Vitamin A: 585IU | Vitamin C: 1mg | Calcium: 96mg | Iron: 2mg


from The Recipe Critic https://ift.tt/3xdPtp3
https://ift.tt/3v9mJMF
Air Fryer Eggplant Pizza

This Air Fryer Eggplant Pizza is healthy and delicious and absorbs the flavor of whatever you put on it! It is quick and easy to make and the toppings are endless!

Pizza is a favorite at our house and we love this healthy twist. Try these other whole wheat, zucchini, or even keto pizzas!

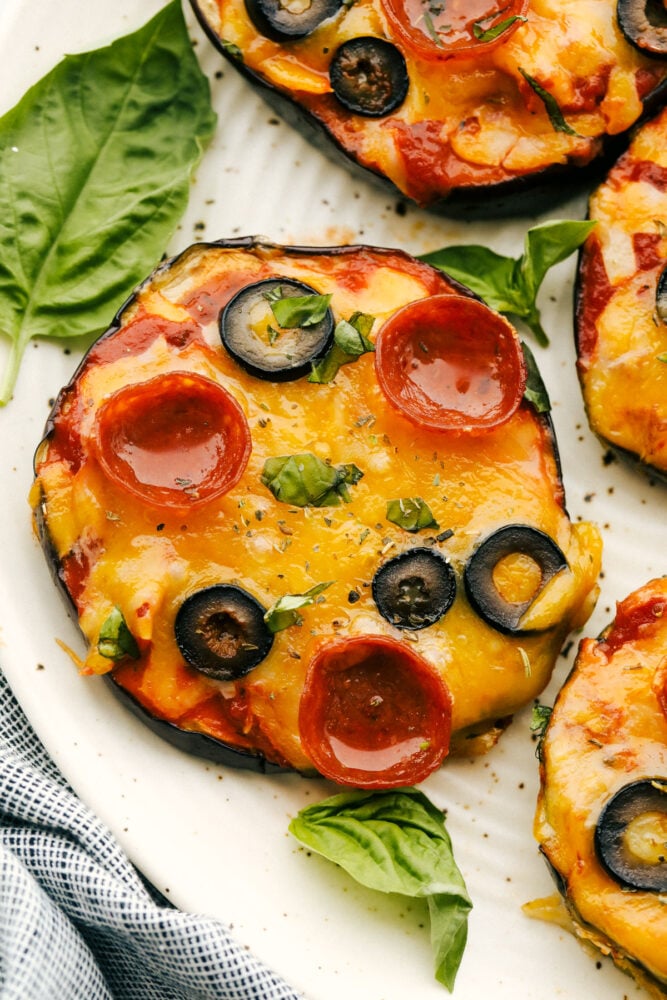
Eggplant pizzas with garnish on plate.

Eggplant Pizza Recipe

If you haven’t tried eggplant before, this is a great way to start! Eggplant is a hidden gem and is perfectly tender when cooked. Since it takes the flavor of whatever you put on it, you do not have to worry about the veggie flavor being too overpowering. It is a healthy alternative to regular crusts that’s low carb but has more body-loving antioxidants, vitamins, and minerals! This is also a great choice to make if you want something gluten-free. Our Zucchini Lasagna is another favorite to try utilizing this versatile veggie!

Using an air fryer to cook these Eggplant Pizzas takes the hassle out of dinnertime. You can cook them in half the time with perfectly crisp edges and bubbly cheese! You can also use the air fryer to reheat them which makes it a perfect tool for leftovers. This became such a fun and easy thing to have for pizza night. We made this with our homemade marinara sauce and the whole family loved it!

Easy Eggplant Pizza Ingredients

Making these pizzas is quick and easy and you only need a few simple ingredients! You can even switch out the sauce for one of your choosing. All of the measurements for each of these ingredients can be found in the recipe card below.

  • Eggplant: Half inch slices work best for this Eggplant Pizza.
  • Homemade Marinara Sauce: This homemade sauce is super easy to whip up and only requires a few simple ingredients, but the fresh, delicious flavor makes ALL the difference!
  • Colby Jack: Colby Jack cheese is the perfect melty cheese for these pizzas. You can also try using mozzarella if you want something less sharp.
  • Pepperoni: Since these are individual sized pizzas, using mini pepperoni slices works great!
  • Italian Seasoning: If you do not have Italian seasoning on hand, you can use this recipe to make your own! You can customize your own blend to taste.

How to Cook Eggplant Pizza in an Air Fryer

Using an air fryer makes dinnertime so quick and easy! You can cook up to four pizzas at a time and the whole family can help!

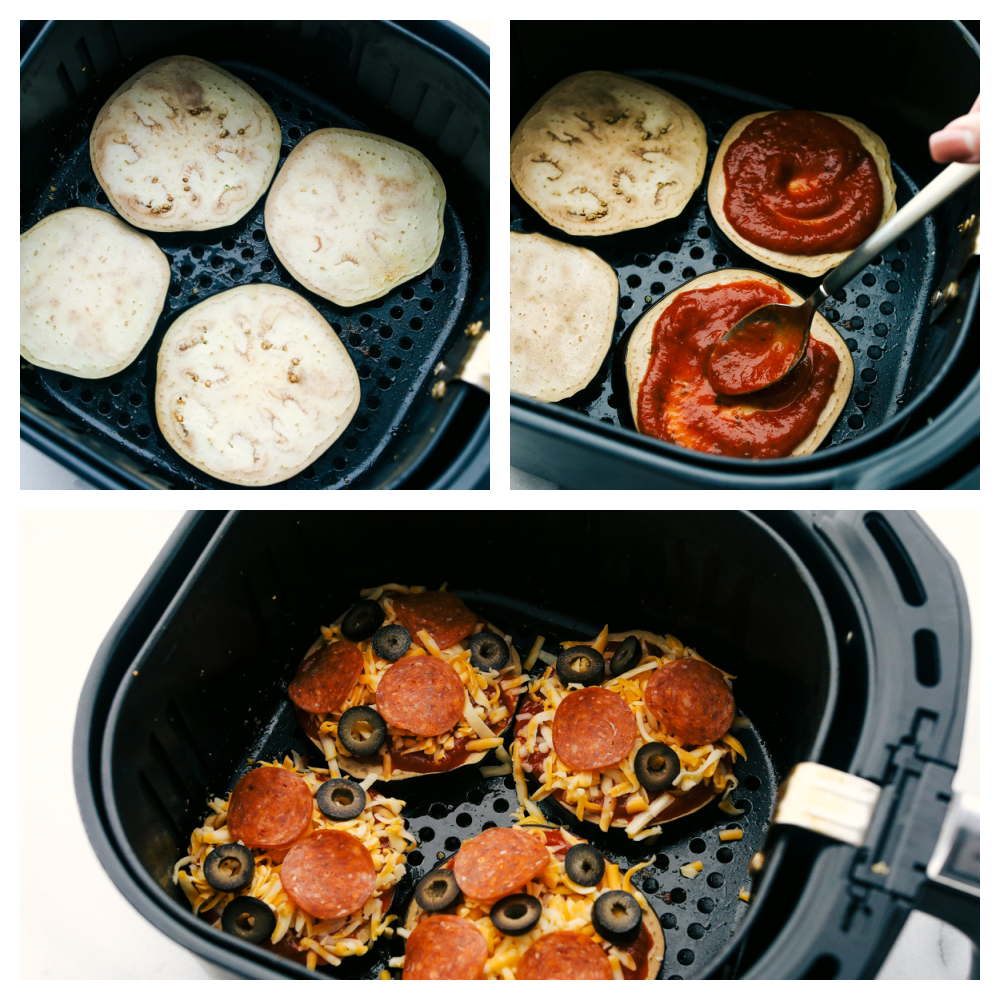
  1. Preparing the eggplant: Pat the eggplant with a paper towel to remove excess moisture. Place the eggplant in a single layer in the air fryer and cook at 400 degrees for 2 minutes. Then flip the eggplant and cook for an additional 2 minutes.
  2. Add Toppings: Spread the sauce evenly over the eggplant. Top with cheese and pepperoni and sprinkle with Italian seasoning.
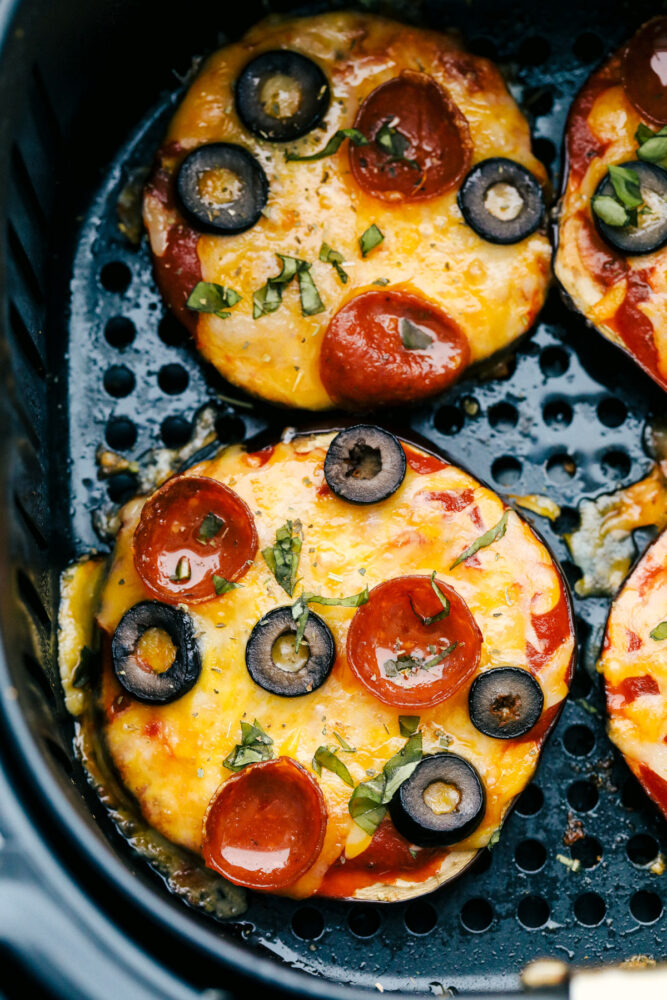
  3. Air Fryer: Cook for 5 more minutes or until the cheese is bubbly and lightly brown on the top.
Eggplant slices being prepared in air fryer.

The Best Eggplant Air Fryer Tips

These tips are going to help you make the perfect air fryer eggplant pizza. It is best to watch carefully not to overcook

  • Eggplant: The perfect eggplant will be heavy, medium in size and have a glossy, dark purple skin.
  • Use Nonstick Cooking Oil: This will keep the eggplant from sticking to the bottom of the air fryer. You don’t have to use a metal insert, just place them in the bottom of the basket.
  • Seasoning: Season the eggplant with salt and pepper or even our homemade Italian seasoning before cooking for extra flavor.
  • Cooking time: Make sure not to overcook your eggplant. You will know that it is ready when it is golden brown in color and tender. An overcooked eggplant will be too soft.
  • Bread Crumbs: You can dip the eggplant in an egg wash and bread crumbs before cooking for extra flavor and texture.
  • Cooking in Oven: These pizzas can also be made by putting them in the oven at 425 degrees Fahrenheit for 10 minutes, checking it until the cheese bubbles.
Cooked eggplant pizzas in air fryer basket.

What to Serve with Eggplant Pizza

You can serve these pizzas with a salad, pasta salad, or breadsticks for an Italian twist! These are easy sides to put together and will complete your meal in a matter of minutes. You can even have the sides prepared in advance to cut down on prep time for dinner since making the Eggplant Pizza is so quick!

Storing Your Homemade Eggplant Pizza

It is best to enjoy these pizzas fresh, but you can also store them in an airtight container in the refrigerator for up to 3 days. These are great to reheat in the oven, skillet, or microwave for a quick lunchtime meal. Kids can also easily heat them up in the air fryer!

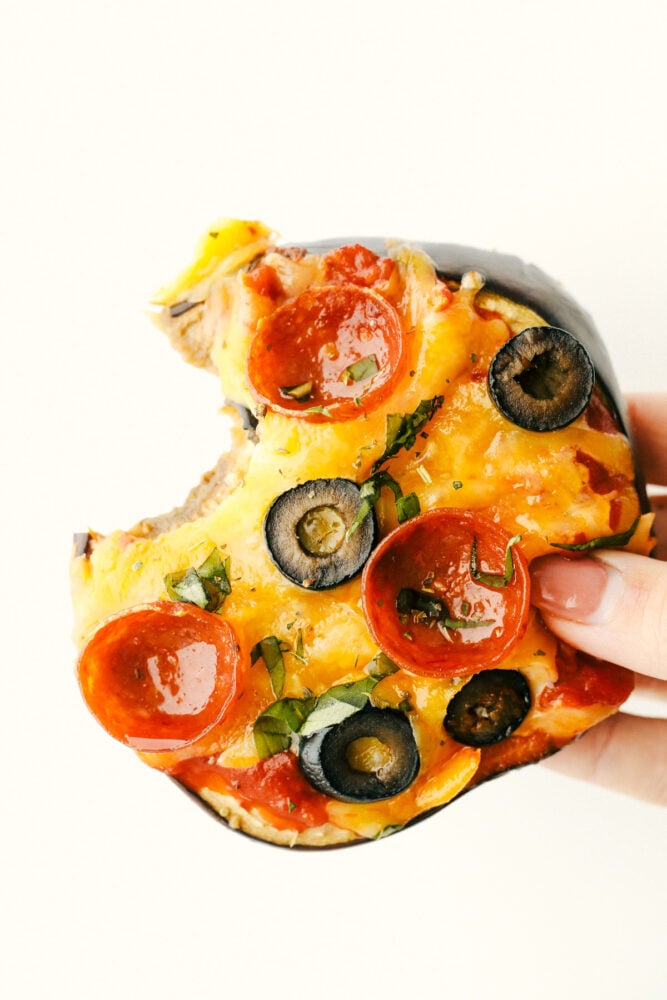
Eggplant air fryer pizza with a bite taken out of it.
Print

Air Fryer Eggplant Pizza

Course Dinner, Main Course
Cuisine American
Keyword air fryer eggplant pizza, eggplant pizza
Prep Time 5 minutes
Cook Time 10 minutes
Total Time 15 minutes
Servings 4 pizzas
Calories 239kcal
Author Alyssa Rivers

Ingredients

  • 1 medium sized eggplant sliced into ½ slices
  • 1/2 cup marinara sauce.
  • 1 cup Colby jack or mozerella cheese
  • 1/2 cup Pepperoni or favorite toppings
  • 1 tablespoon italian seasoning

Instructions

  • Pat the eggplant with a paper towel to remove excess moisture. Place the eggplant in a single layer in the air fryer and cook at 400 degrees for 2 minutes. Then flip the eggplant for 2 minutes and cook.
  • Spread the sauce evenly over the eggplant. Top with cheese and pepperoni and sprinkle with italian seasoning.
  • Cook for 5 more minutes or until the cheese is bubbly and lightly brown on the top.

Nutrition

Calories: 239kcal | Carbohydrates: 10g | Protein: 13g | Fat: 17g | Saturated Fat: 9g | Polyunsaturated Fat: 1g | Monounsaturated Fat: 6g | Trans Fat: 1g | Cholesterol: 46mg | Sodium: 611mg | Potassium: 461mg | Fiber: 4g | Sugar: 6g | Vitamin A: 508IU | Vitamin C: 5mg | Calcium: 263mg | Iron: 2mg


from The Recipe Critic https://ift.tt/3v25oFj
https://ift.tt/2TRJnMF

मंगलवार, 8 जून 2021

Incredible Homemade Peach Pie

This Homemade Peach Pie is a bit of summer paradise on your plate! Flakey buttery crust is filled with a luscious sweet peach filling that is perfect with a scoop of vanilla ice cream.

Peach is the queen of summer fruits in my opinion. You have to try them in these recipes, Cookie Bars, Grilled, and Cobblers this summer!

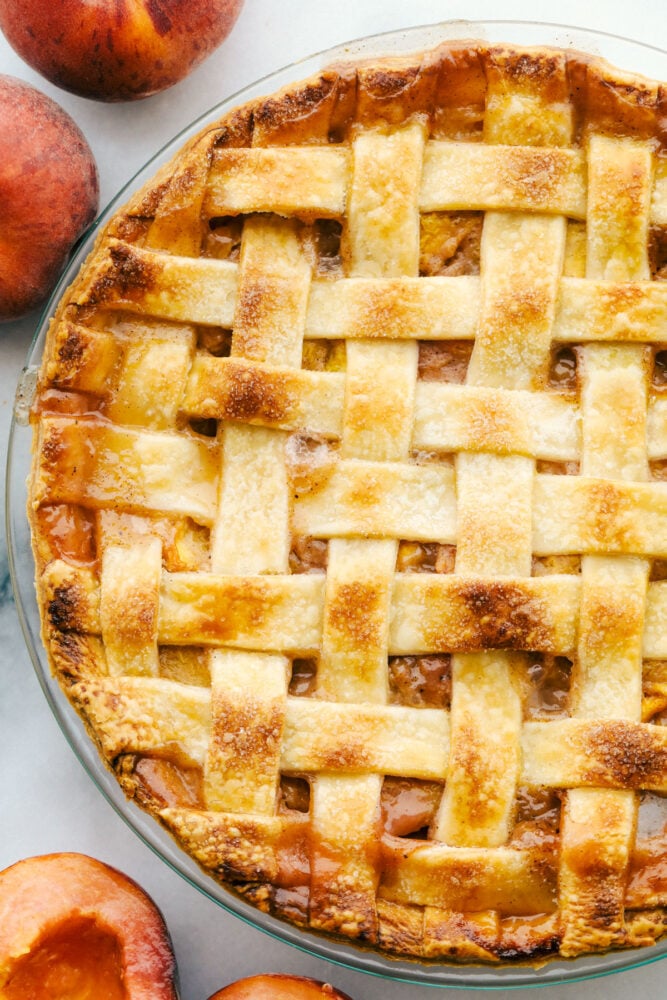
Baked peach pie.

Homemade Peach Pie

I know that summer is in full swing when peaches start to show up at the farmer’s market. These round, fuzzy, scrumptious fruits taste like a bit of summer heaven. They are sweet and juicy and make some of the best homemade pies I have ever had. Use this pie filling to fill these incredible Air Fryer hand pies, which you can bake in the oven as well. The combination of sugar, spices, and peaches is absolutely splendid in this homemade peach pie.

This peach pie is the perfect dessert after everything from a backyard BBQ to a fancy Sunday dinner. The flakey crust is tender and full of flavor. You can make your own crust, which I highly recommend. Or if you are in a hurry use store-bought crust and get wonderful results too. The key is to use fresh, ripe peaches which I will explain how to find below. Even if you are not a big pie baker, you have to make this homemade peach pie! It is easy, and so worth any effort.

Peach Pie Ingredients

Peaches are at their best in the summer! Make sure you buy them in season for the best flavor in this homemade peach pie recipe!

  • Pie Crusts: Make your own or use store-bought.
  • Peaches: Use fresh in-season peaches for the best tasting results.
  • Sugar: Sweet white sugar.
  • Brown Sugar: Adds a bit of a caramel flavor to the pie filling.
  • Flour: All-purpose flour is all you need here.
  • Cinnamon: This is a staple flavor that goes perfectly with peaches.
  • Nutmeg: Adds a nice flavor you are going to love.
  • Salt: Balances out all the flavors.
  • Lemon Juice: This helps to keep the peaches from turning brown. It won’t flavor it at all.
  • Vanilla Extract: Actually helps the peaches taste even more peachy.
  • Egg: You only need the egg yolk for the egg wash.
  • Water: Mix this with the egg yolk.

How to Make Peach Pie From Scratch

This peach pie takes effort, but it is so worth it! Trust me you will be carving out time in your schedule to make sure you can make this amazing homemade pie!

  1. Peaches: Peel and slice your peaches and all them to a colander to drain the excess juices for about 30 minutes.
  2. Drain and crust: While your peaches drain, prep your bottom pie crust in your pie pan. Place in the fridge until you’re ready to add your filling.
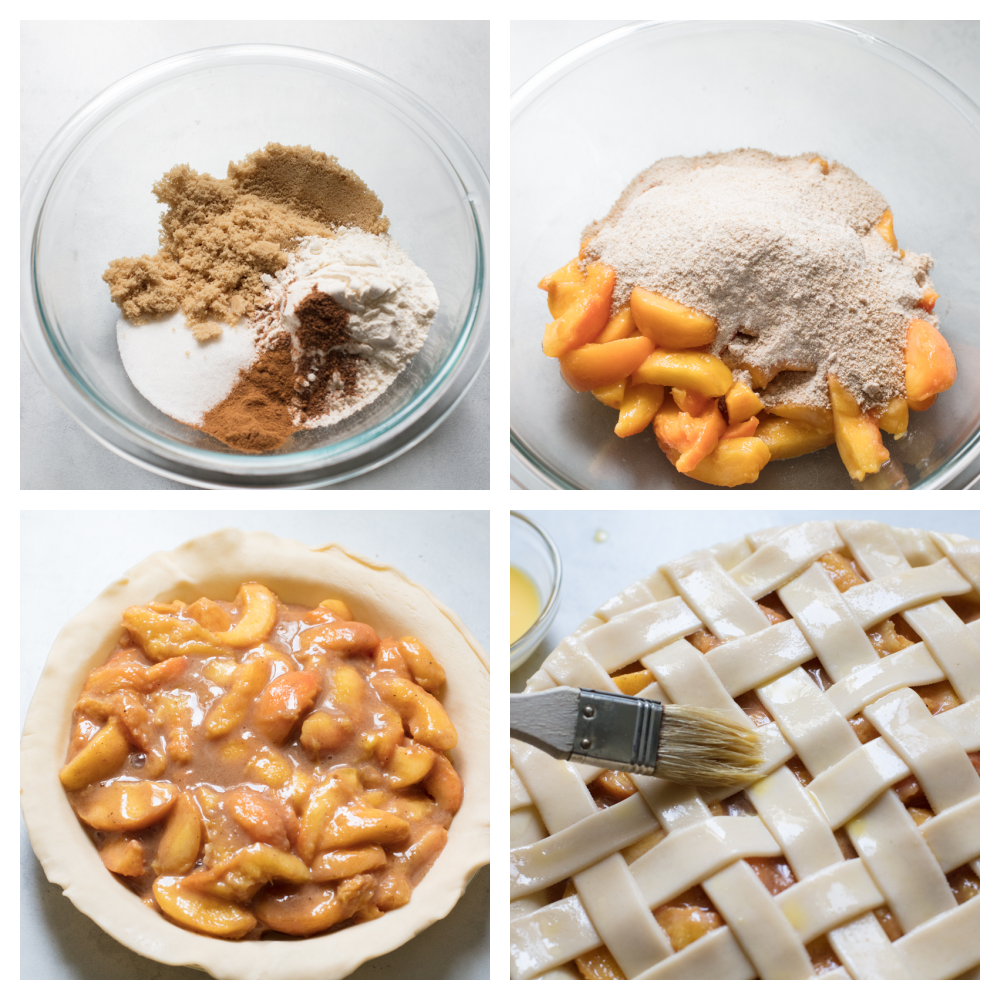
  3. Pie Filling: In a bowl, whisk together granulated sugar, brown sugar, flour, cinnamon, nutmeg, and salt. Pour your peaches into a large bowl and add the dry ingredients on top and toss together. Add the lemon juice and vanilla extract and mix again. Pour filling into prepared pie pan.
  4. Top it: Layer the top crust over the pie and crimp the edges to seal.
  5. Egg Wash: In a small bowl, use a fork to mix the egg yolk with the water to make your egg wash. Use a pastry brush to brush it across the top of the pie crust. If you’d like, you can sprinkle granulated sugar over the top of the egg wash.
  6. Bake: Place the prepped pie on a sheet pan (to catch any run-over juices) and bake for about 40-50 minutes, until the filling is bubbly and the bottom crust is golden brown. If the top crust is getting too dark, you can use aluminum foil on top to prevent it from browning further.
  7. Enjoy: Cool at least 20 minute
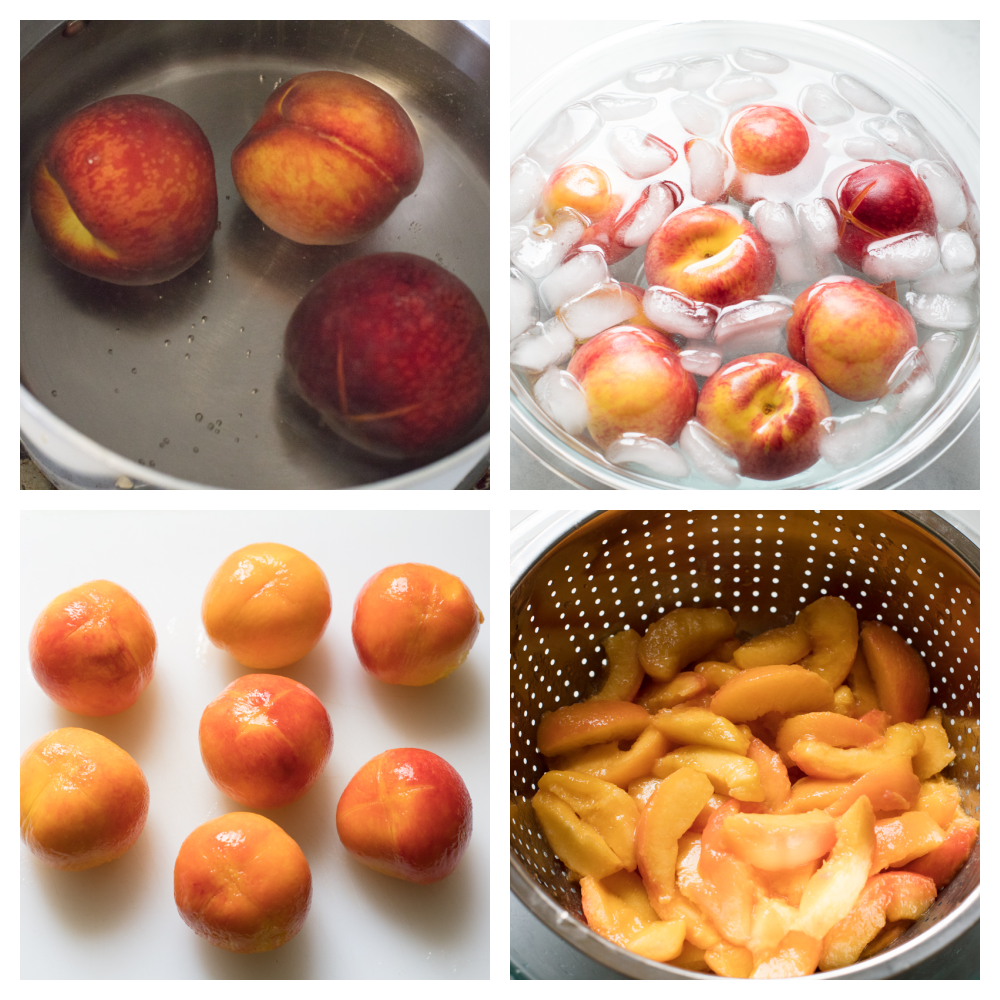
Peaches in a cold bath and peeled.

How to Pick and Prepare Peaches

The perfect ripe peach is like delectable gold. Sweet, tender and juicy! This peach pie will make all the difference with what peaches you have in the filling.

  • Variety: Peaches come in all different varieties and flavors. Their colors range from white to dark reddish-orange and all taste amazing. Many will be labeled as freestone or clingstone peaches. This refers to how the flesh sticks to the pit. Look for freestone peaches, they will come away cleanly and easily from the pit.
  • What to Look For: When buying or picking peaches there are a few things to look for. Look for firm peaches that give slightly under light pressure. They should be free from bruises, soft spots, and wrinkles. A ripe peach will also be fragrant.
  • How to Ripen Peaches: Often stores and markets will sell peaches that are slightly underripe so that they transport better and will ripen at the store or in your home. If all you can find are under-ripe peaches, pick the best ones you can find. They should still be blemish-free and peach-colored, not green. Place the peaches in a paper bag and place them on your counter till ripe.
  • Store: Keep all ripe peaches in the fridge till ready to use.
Process shots of making peach pie in a glass bowl.

Peach Pie Tips

Blanching the peaches will help them be easier to peel, it takes a bit of time, but you will be so thankful you did! Homemade peach pie is a classic and always a favorite in the summertime.

  • Blanching Peaches: For skins that literally slip off, blanch the peaches. Cut an x, just through the skin on the bottom of the peach opposite of the stem. Dunk the peaches in boiling water for no longer than 30 minutes. You do not want to cook the peaches, just loosen the skins. Immediately place in ice water to stop the cooking process. Remove from the water and the peels should slip off with your hands.
  • Dice and Drain: After you have peeled the peaches dice them and let them drain for 30 min or so that your filling isn’t so watery.
  • Pie Crust: If you feel like your crust is getting too brown during the cooking process you can tent it with foil while it cooks.
  • Lattice: You do not have to do a lattice if you do not want to. Simply cover the peach pie with another layer of crust. Pinch all around the ends and then make 6 1-inch slits for venting.
  • Can I Use Frozen or Canned Peaches?: Yes you can. Thaw frozen peaches and drain them thoroughly. For canned peaches, you will also need to drain them. If your filling looks too watery add 1-2 teaspoons of cornstarch to the mix.

Can You Store Homemade Peach Pie?

Keep the peach pie in the fridge loosely covered for up to 3 days. Note the longer the peach pie is kept the filling will turn brown and the bottom crust will get soggy. It is best eaten within the first 2 days. Serve with vanilla ice cream or whipped cream.

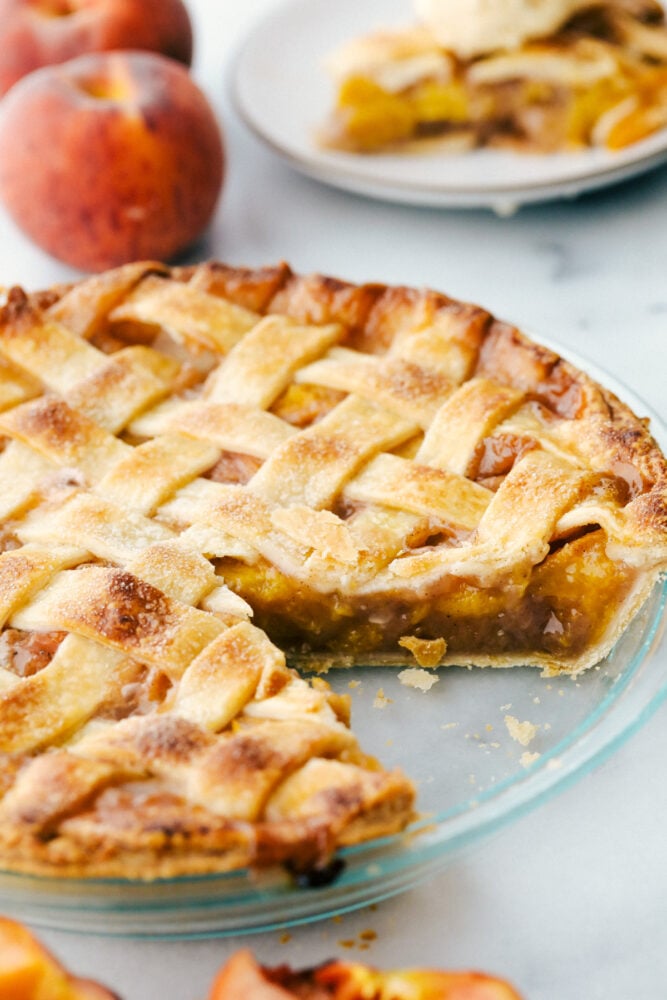
Peach pie with a slice taken out of it.
Print

Homemade Peach Pie

This Homemade Peach Pie is a bit of summer paradise on your plate! Flakey buttery crust is filled with a luscious sweet peach filling that is perfect with a scoop of vanilla ice cream.
Course Dessert
Cuisine American
Keyword homemade peach pie, Peach Pie
Prep Time 30 minutes
Place dough in the refrigerator for 1 hour or overnight to chill. 1 hour
Total Time 1 hour 30 minutes
Servings 8 Slices
Calories 305kcal
Author Alyssa Rivers

Ingredients

Homemade Crust or Use 2 (9 inch) Store Bought Pie Crusts

  • 2 1/2 cups all purpose flour
  • 1 Tablespoon granulated sugar
  • 1 teaspoon salt
  • 1 cup unsalted butter, cold and cubed
  • 6-8 Tablespoons ice water

Peach Pie Filling

  • 5 cups 6-8 ripe but firm peaches  peaches, sliced (can be peeled or unpeeled)
  • 1/3 cup granulated sugar
  • 1/3 cup brown sugar
  • 1/3 cup flour
  • 1/2 teaspoon ground cinnamon
  • 1/4 teaspoon nutmeg
  • 1/4 teaspoon salt
  • 2 Tablespoons lemon juice
  • 1 teaspoon vanilla extract
  • 1 large egg yolk
  • 2 Tablespoons water

Instructions

Homemade Crust

  • Add flour, sugar, salt and cubed butter to a stand mixer with the paddle attachment. Mix until the butter resembles pea shaped crumbs.
  • Add water to the dough 1 tablespoon at a time until the dough forms a ball.
  • Divide the ball into two balls and shape each into a round flat disk. Place in the refrigerator for 1 hour or overnight to chill.

Making the Peach Pie

  • Preheat oven to 425 degrees Fahrenheit.
  • Peel and slice your peaches and all them to a colander to drain the excess juices for about 30 minutes.
  • While your peaches drain, prep your bottom pie crust in your pie pan. Place in the fridge until you’re ready to add your filling.
  • In a bowl, whisk together granulated sugar, brown sugar, flour, cinnamon, nutmeg and salt. Pour your peaches into a large bowl and add the dry ingredients on top and toss together. Add the lemon juice and vanilla extract and mix again. Pour filling into prepared pie pan.
  • Layer the top crust over the pie and crimp the edges to seal.
  • In a small bowl, use a fork to mix the egg yolk with the water to make your egg wash. Use a pastry brush to brush it across the top of the pie crust. If you’d like, you can sprinkle granulated sugar over the top of the egg wash.
  • Place the prepped pie on a sheet pan (to catch any run-over juices) and bake for about 40-50 minutes, until the filling is bubbly and the bottom crust is golden brown. If the top crust is getting too dark, you can use aluminum foil on top to prevent it from browning further.
  • Cool at least 20 minutes before cutting so the filling has time to set up. Serve with whipped cream or vanilla ice cream.

Notes

Updated on June 8, 2021
Originally Posted on June 15, 2020

Nutrition

Calories: 305kcal | Carbohydrates: 69g | Protein: 6g | Fat: 1g | Saturated Fat: 1g | Cholesterol: 23mg | Sodium: 374mg | Potassium: 197mg | Fiber: 2g | Sugar: 33g | Vitamin A: 285IU | Vitamin C: 5mg | Calcium: 16mg | Iron: 2mg


from The Recipe Critic https://ift.tt/2UOCNUS
https://ift.tt/3g0odo4