गुरुवार, 17 जून 2021

Watermelon Agua Fresca

Watermelon Agua Fresca is the perfect drink to keep you cool this summer with the smooth, crisp flavor of fresh watermelon! You are going to LOVE how crazy delicious and easy to make this is!

Making an amazing summertime drink doesn’t have to be complicated. For other super easy drinks to help you beat the heat, try out my tasty water, lemonade and peach cooler recipes!
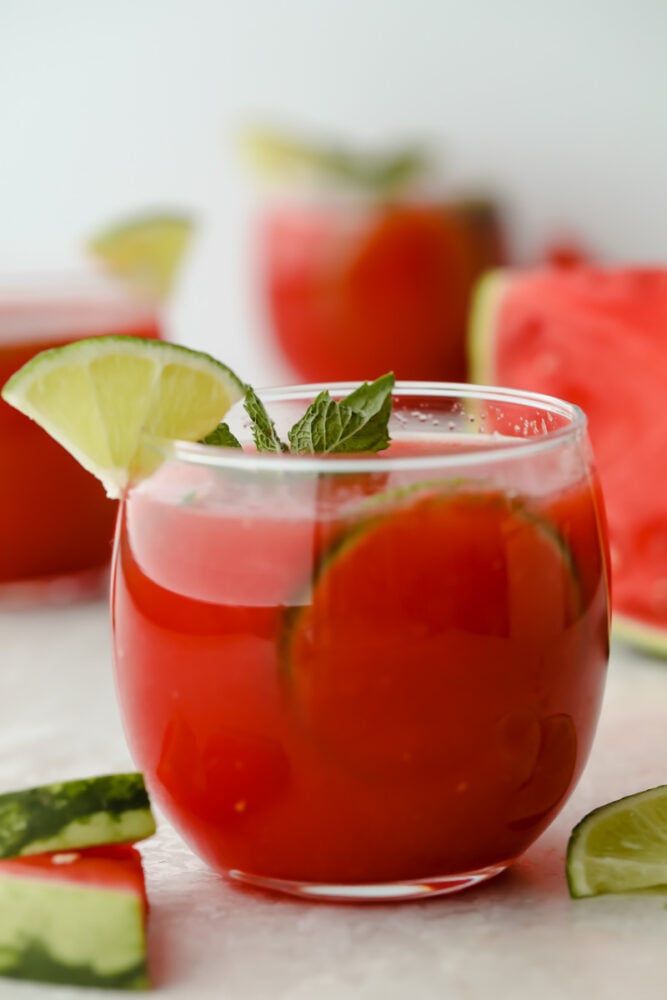
Watermelon agua fresca in cup with mint and lime garnish

What is Agua Fresca?

Agua Fresca originates from Mexico and Central America and translates to “cool water.” Unlike a juice or smoothie, agua fresca is fresh fruit added to water to give it crisp, delicious flavor without being overpowering! With watermelon being one of my favorite summer fruits, I thought it would be a perfect choice for this drink! I love that it doesn’t have any artificial flavors and it is SO refreshing for the dog days of summer we are experiencing here in Utah!

I have been using watermelon in a lot of my cooking lately. Gotta take advantage of them being in season! It has the best texture and flavor, and helps keep you hydrated which is perfect for hot weather! I have loved having my watermelon salad and watermelon and feta salad for cool summer meals. So much fruity goodness in this watermelon Agua Fresca!

Watermelon Agua Fresca Ingredients

You will probably only need fresh watermelon to put this watermelon Agua Fresca drink together. It is that easy! For all the measurements to the ingredients scroll to the recipe card.

  • Watermelon: 4 cups cubed with seeds removed. See tips for picking the best watermelon below!
  • Water: This drink works best with cold water.
  • Sugar: For sweetness to taste.
  • Lime Juice: You can use bottled lime juice, but I recommend using the juice of one lime for extra fresh flavor.
  • Lime and Mint Garnish: Looks great and tastes great too!

Making Your Agua Fresca

Watermelon Agua Fresca comes together in minutes. Just blend and go! Mixed berry and raspberry peach smoothies are other quick and delicious drinks to try!

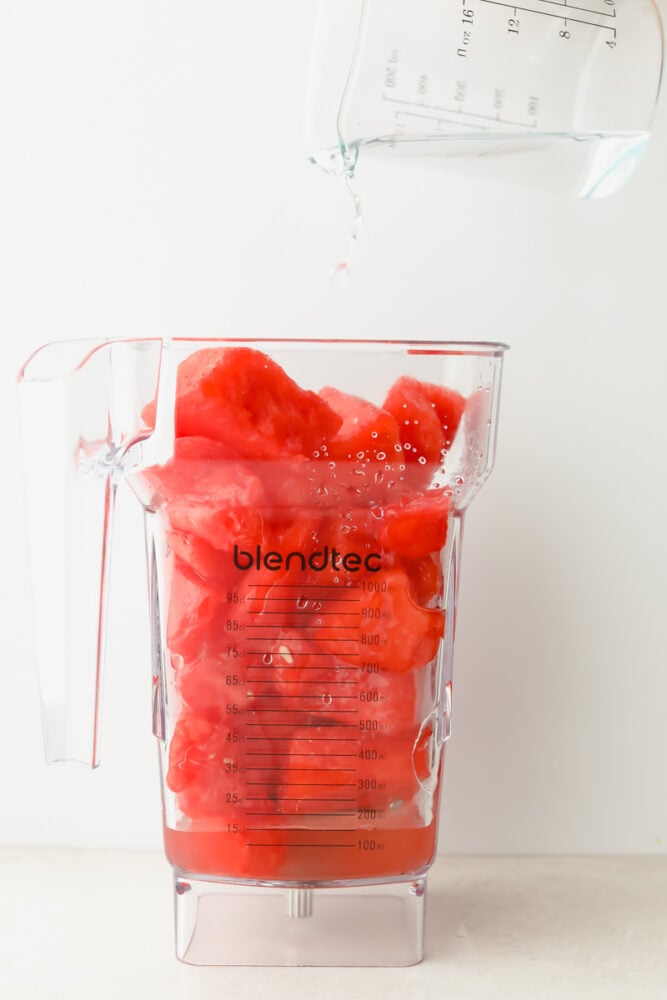
  1. Blend: In a blender add the watermelon and water and blend.
  2. Add Sugar: Add in sugar and lime juice and mix.
  3. Garnish: Garnish with lime wedges and mint.
  4. Serve: Best served chilled.
Chunks of watermelon in blender

Should you Strain Agua Fresca?

It is up to you and a great option! Watermelon Agua Fresca is light and refreshing summertime drink. Agua Fresca means “fruit water”. To make this Agua Fresca even better, using a strainer will help remove the fleshy part of the watermelon that is not blending all the way in the blender. This will leave the watermelon juice a watery texture and thin like substance without having any solids in the drink. This is optional, and can be helpful with the taste and texture from the watermelon.
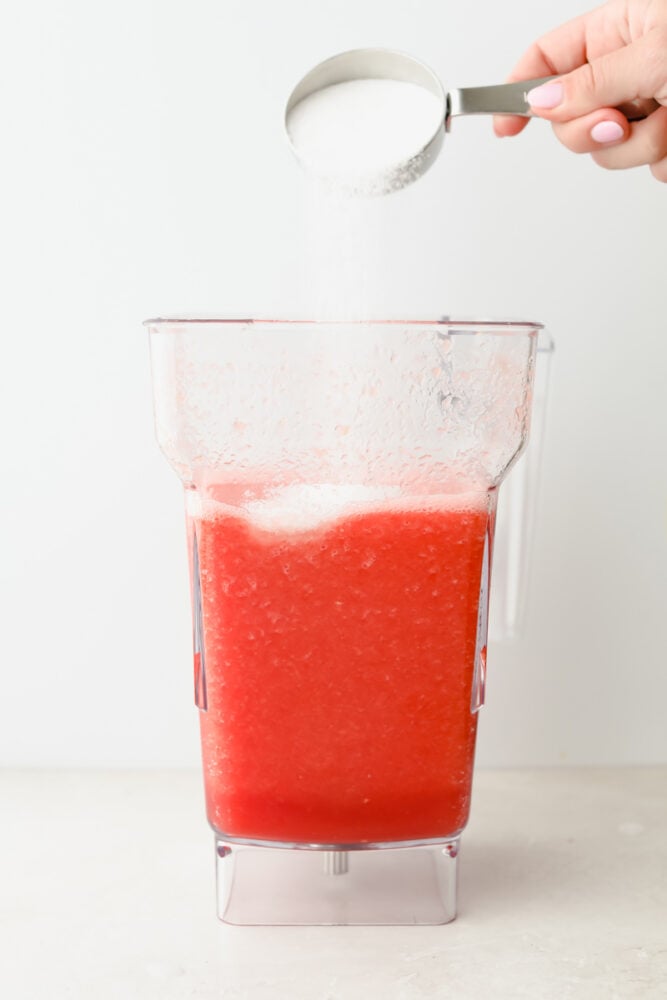
Adding sugar to watermelon agua fresca

Picking Your Watermelon and Making the Best Agua Fresca

A ripe watermelon makes all the difference in the quality of your drink. Follow these tips to make your Agua Fresca taste incredible!

  • Watermelon: The best watermelons will be deep green with clearly defined stripes. Also, opt for more dull-looking watermelons. If they are too shiny, it likely means they are not ripe yet. Go for the heaviest watermelons, too. This means they have more water content in them.
  • Cutting: Follow the shape of the watermelon when cutting them open. This way, you will only cut the rind off and not excess fruit. Once the rind is completely cut off, you should be left with a nice, round ball of watermelon. Cut this in half and lay the flat side on the cutting board. Now you can easily cut it into cubes!
  • Agua Fresca Flavors: Try substituting the fruit in your agua fresca for guava, mango, papaya, and pineapple to make other amazing, tropical flavors. You can also use other flavors like horchata to make a more traditional version of the recipe.
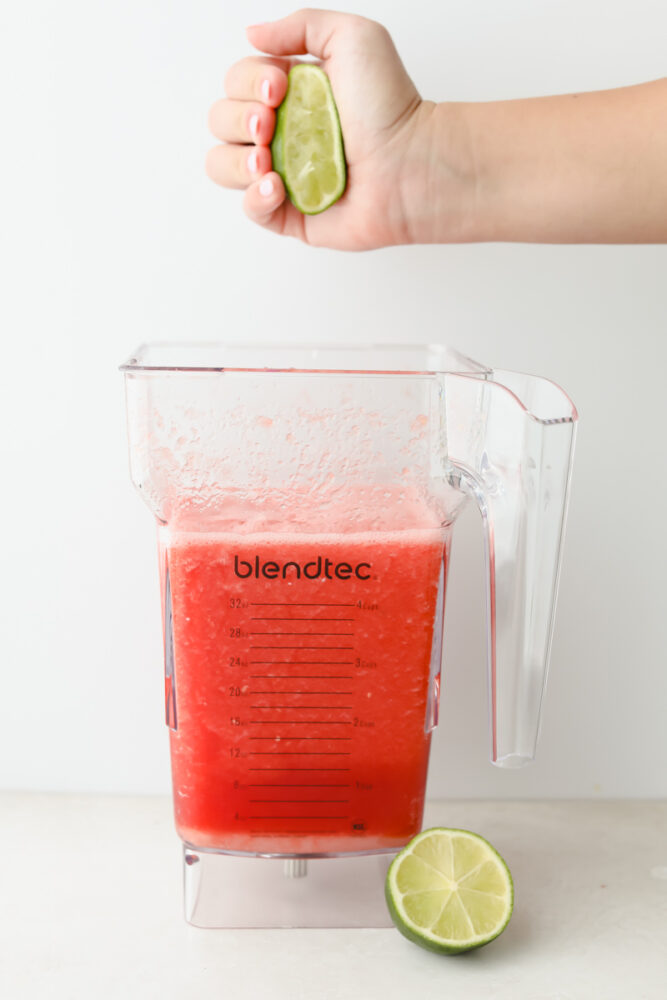
Adding lime to watermelon agua fresca

What to Serve with Your Drink

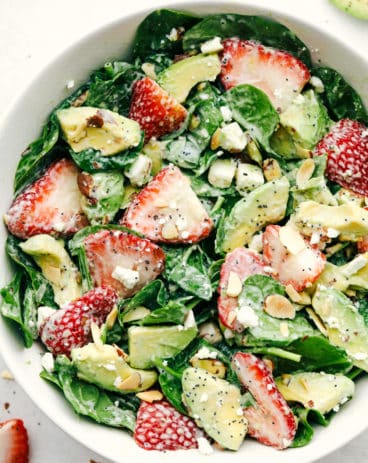
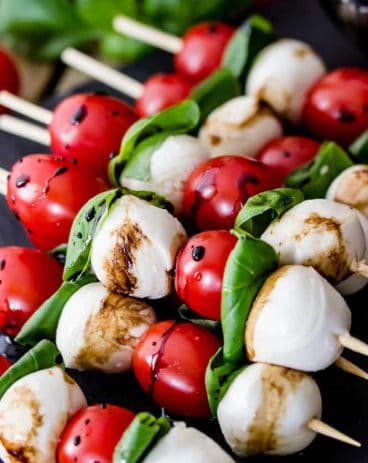
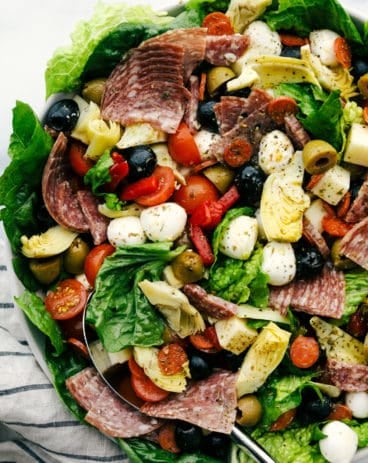
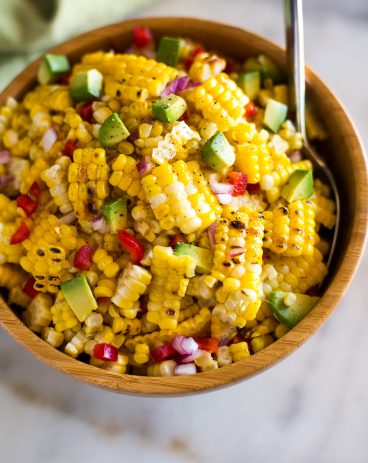
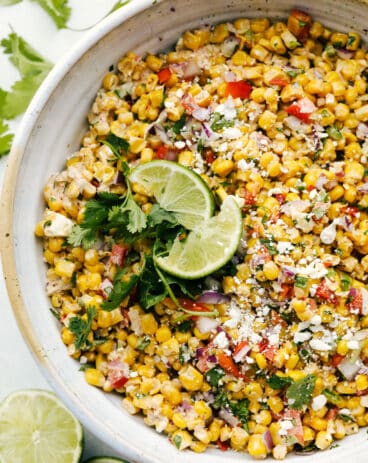
I always like to pair drinks like these with a salad in the summer. It helps cool me down and is such a tasty combination! For a Mexican-inspired meal, serve your Agua Fresca with my family favorite corn salad! This drink also pairs well with fruit-based salads like my strawberry avocado salad. Summer party-ready, try serving this up with skewers and antipasto salad. No one will be leaving hungry!
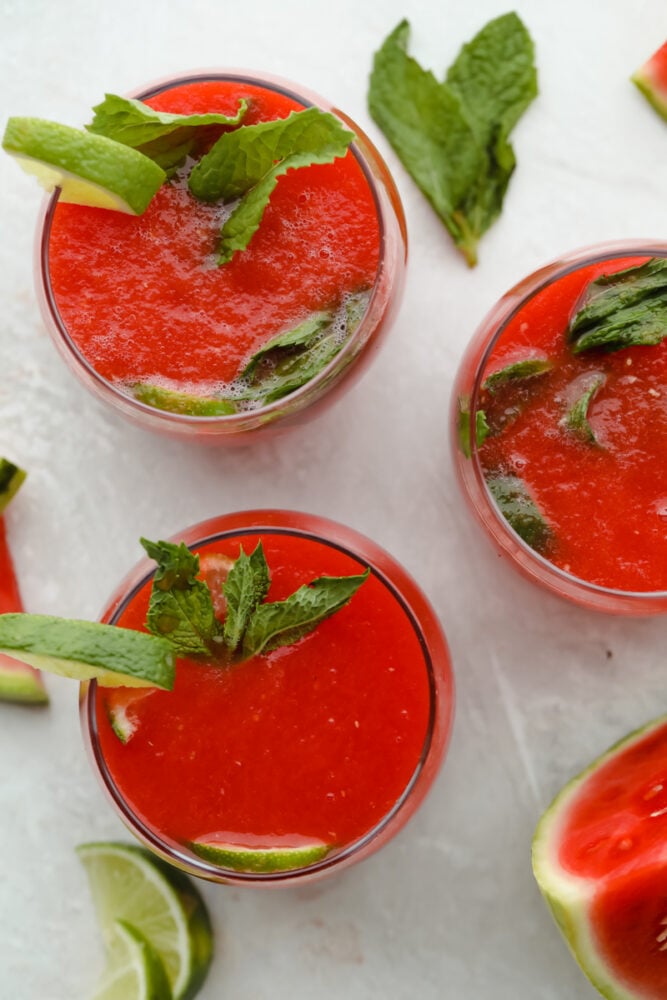
Watermelon agua fresca served in glasses with garnish

Storing Watermelon Agua Fresca

In a closed pitcher, you can keep your Watermelon Agua Fresca for up to 3 days in the fridge. Separation may occur, so make sure to stir before serving.
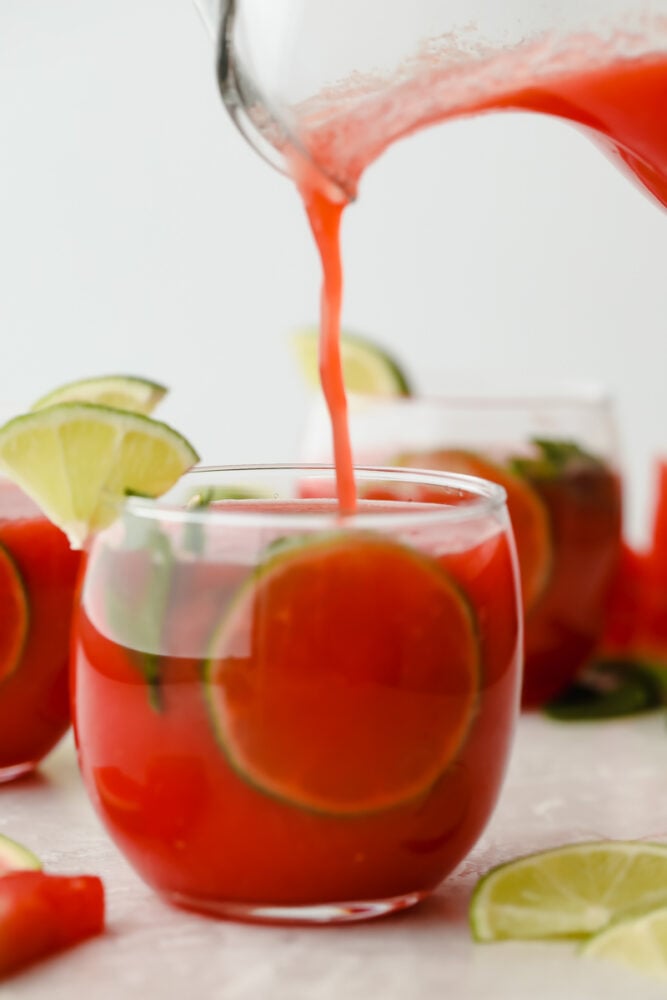
Pouring watermelon agua fresca into glass
Print

Watermelon Agua Fresca

Watermelon Agua Fresca is the perfect drink to keep you cool this summer with the smooth, crisp flavor of fresh watermelon! You are going to LOVE how crazy delicious and easy to make this is!
Course Beverage
Cuisine Mexican
Keyword agua fresca, watermelon agua fresca
Prep Time 10 minutes
Total Time 10 minutes
Servings 4 glasses
Calories 191kcal
Author Alyssa Rivers

Ingredients

  • 4 cups watermelon cubed and seeds removed
  • 1/3 cup water
  • 1/4- 1/2 cup sugar
  • Juice of one lime
  • lime slices and mint for garnish

Instructions

  • In a blender add the watermelon and water and blend. Add in sugar and lime juice and mix.
  • Garnish with lime wedges and mint. Serve chilled.

Nutrition

Calories: 191kcal | Carbohydrates: 49g | Protein: 1g | Fat: 1g | Saturated Fat: 1g | Polyunsaturated Fat: 1g | Monounsaturated Fat: 1g | Sodium: 3mg | Potassium: 171mg | Fiber: 1g | Sugar: 47g | Vitamin A: 865IU | Vitamin C: 12mg | Calcium: 12mg | Iron: 1mg


from The Recipe Critic https://ift.tt/3gCO7gR
https://ift.tt/2SxW0wb
बुधवार, 16 जून 2021

Mini Corn Dogs

A crispy cornbread outer layer and snack-able size make these Mini Corn Dogs the perfect family treat! Recreate delicious county fair flavors in just a few simple steps!

Something about the summer makes me want to make all the fair and carnival-inspired treats. Try pickles, onion rings, and donut holes for other irresistible treats perfect for bringing street food to you.

Mini corn dogs on a plate with mustard and ketchup on the side.

Easy Mini Corn Dogs Recipe

Mini Corn dogs have been a favorite in my house! It is so much fun to put them together with my kids. It really is a recipe that the whole family can join in on. These mini corn dogs are so good, though, I won’t judge you if you keep the batch all for yourself! They have the most amazing cornbread and buttermilk breading which creates the perfect light and fluffy texture. Pair that with a savory, juicy hot dog in the middle, and these mini corn dogs become too good to resist!

My family has loved having these on summer afternoons paired with homemade cheese sauce for dipping. The smaller size of these corn dogs makes them perfect for taking on the go. But do not let their small size deceive you, they are bursting with flavor in every bite! If you are feeling extra hungry, you can also give my classic homemade corndogs a try. Whether they are bite or standard-sized, I am sure they will become a favorite at your house!

Mini Corn Dogs Ingredients

Ingredients and batter make all the difference in creating the perfect corn dog. These are mini corn dogs are so easy and fun to make! Find individual measurements for each ingredient in the recipe card below!

  • Canola Oil: You will need enough for 2 inches of oil for frying.
  • Hot Dogs: 6, regular size and thickness. These will be cut into 2-inch pieces.
  • Skewers: You will need at least 12 wooden skewers. You can also use candy or popsicle sticks.
  • All-Purpose Flour: Used to thicken the batter.
  • Cornmeal: Fine cornmeal works best. It adds a light, crumbly texture to your batter and will make your corndogs perfectly crispy!
  • Salt: To enhance flavors.
  • Granulated Sugar: Adds a sweet flavor to your mixture.
  • Baking Powder: This will give your corndogs a fluffy texture.
  • Egg: You will need one egg in your mixture as a binding agent.
  • Honey: Adds sweetness to your mixture and keeps it smooth.
  • Buttermilk: Makes your batter rich and delicious. You can whip up some of my homemade buttermilk if you do not have it on hand!
  • Milk: Keeps your mixture from becoming too thick.

Making the BEST Mini Corn Dogs

Making Mini Corn dogs is fun and easy! My kids love helping putting the sticks in and dipping them in batter. It is a great family activity!

  1. Prepare Your Oil: Heat about 2 inches of oil in a large pot or dutch oven to 350 degrees.
  2. Prep Hot Dogs: Pat them dry with paper towels. Set aside.
  3. Buttermilk Batter: In a large bowl, whisk the flour, cornmeal, salt, sugar, and baking powder together. In another bowl or large liquid measuring cup, whisk the egg, honey, buttermilk, and milk together. Add the wet ingredients to the dry and combine thoroughly. The batter will be thick, but smooth enough to evenly coat the hot dog once it has been dipped.
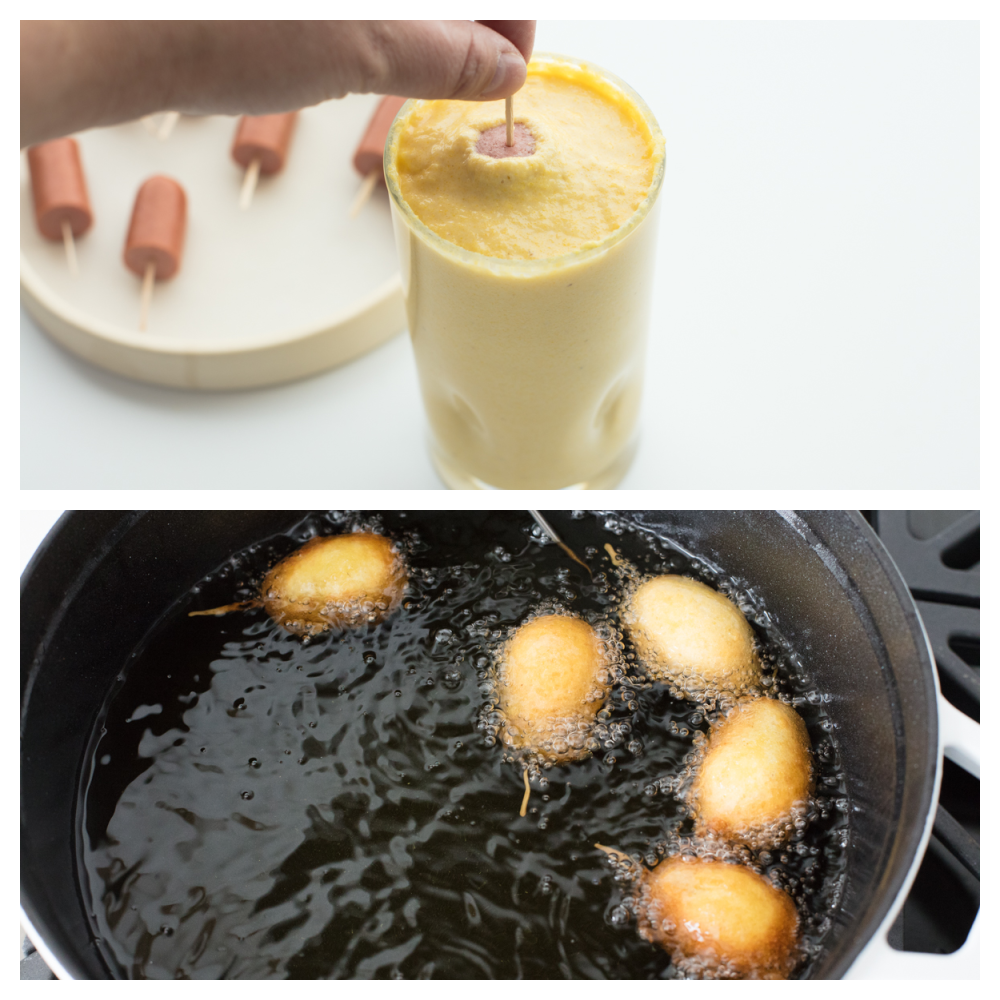
  4. Batter Hot Dogs: Cut the hot dogs into two-inch pieces. Stick a skewer into the hot dog. Dip into the batter until you no longer see bubbles.
  5. Fry: Gently drop the battered hot dog into the hot oil. Cook for about 2-3 minutes, until nice and golden brown on all sides. Remove from the oil and allow to drain on paper towels. Serve immediately.
  6. Leftovers: If you have leftover batter, it can be saved for 2-3 days in the fridge and used to fry up more dogs. With leftover dogs, they can be stored in the fridge in an airtight container for 2-3 days, or frozen.
Dipping mini corn dogs in the batter and frying them in oil.

Corn Dog Tips and Tricks

It is really hard to go wrong with mini corn dogs, but here are some tips to make yours as delicious as possible!

  • Hot Dogs: The best part about this recipe is that you can interchange hot dogs for things like breakfast sausage links! I also like using cheese-filled hot dogs or sausages with jalapenos or peppers in them for a spicy twist on this classic.
  • Batter Won’t Stick: If your batter will not stick to your hot dogs, give them a light dusting of flour before dipping.
  • Skewer Length: Your popsicle sticks or skewers should be long enough that they can go into the hot dog halfway but still allow a few inches at the bottom to hold onto easily.
  • Leftover Oil: It takes quite a bit of oil to fry these corn dogs up, and one can be left wondering what to do with it once cooking is done. If you are going to throw it away, never dump it down the drain. Instead, pour it into a disposable cup, seal it up, and toss it. You can also reuse your oil by running it through a strainer and then putting it in a clean container. Make sure your oil has cooled completely before transferring it anywhere to avoid burns.

What to Serve With Your Mini Corn Dogs

These Mini Corn dogs are delish as is, but using condiments can really enhance them! Go for classic ketchup or mustard for dipping, or for some cheesy goodness, try out my to die for homemade cheese sauce! Honey is also amazing for dipping. I first tried it at a food truck and instantly fell in love with the sweetness it gave my corn dog! I also like serving these alongside veggies and salads as a light contrast. You can even serve them up with Mexican street corn for a true food truck experience!

Storing Your Mini Corn Dogs

Mini Corn dogs are the perfect thing to keep as leftovers. Heat them up for a quick and easy meal that tastes just as good as the day you made them! They are great to have on hand for hungry kids and easy enough for them to reheat on their own.

  • Refrigerator: Keep corn dogs in an airtight container for up to 3 days. You can also store excess batter in the fridge for 2-3 days.
  • Freezer: You can keep your corn dogs in an airtight bag or container for up to 3 months in the freezer.
  • Reheating: Mini Corn dogs can be easily reheated in the microwave or on the skillet, but my personal favorite is to throw them in the air fryer at 360 degrees Fahrenheit, checking on them every few minutes. It keeps the outside perfectly crispy! Check out my air fryer corn dog recipe for more tips and tricks.
Mini corn dogs being dipped in ketchup.
Print

Mini Corn Dogs

A crispy cornbread outer layer and snackable size make these Mini Corndogs the perfect family treat! Recreate delicious county fair flavors in just a few simple steps!
Course Dinner, Main Course, main dish
Cuisine American
Keyword mini corn dogs, mini corndogs
Prep Time 10 minutes
Cook Time 15 minutes
Total Time 25 minutes
Servings 12 hotdogs
Calories 130kcal
Author Alyssa Rivers

Ingredients

  • canola oil for frying
  • 6 hot dogs regular size and thickness cut into 2 inch pieces
  • 12 hot dog sticks or popsicle sticks candy sticks, wooden skewers, etc
  • 1 cup all purpose flour
  • 1 cup cornmeal fine
  • ¼ teaspoon salt
  • 2 Tablespoon granulated sugar
  • 1 Tablespoon baking powder
  • 1 large egg
  • 2 Tablespoon honey
  • 1 cup buttermilk
  • ¼ cup milk

Instructions

  • Heat about 2 inches of oil in a large pot or dutch oven to 350 degrees.
  • Prep your hot dogs by patting them dry with paper towels and inserting the sticks. Set aside.
  • In a large bowl, whisk the flour, cornmeal, salt, sugar, and baking powder together. In another bowl, or large liquid measuring cup, whisk the egg, honey, buttermilk and milk together. Add the wet ingredients to the dry and combine thoroughly. The batter will be thick, but smooth enough to evenly coat the hot dog once it has been dipped.
  • Cut the hot dogs into two inch pieces. Stick a toothpick into the hot dog. Dip into the batter until you no longer see bubbles.
  • Gently drop the battered hot dog into the hot oil. Cook for about 2-3 minutes, until nice and golden brown on all sides. Remove from the oil and allow to drain on paper towels. Serve immediately.
  • If you have leftover batter, it can be saved for 2-3 days in the fridge and used to fry up more dogs. With leftover dogs, they can be stored in the fridge in an airtight container for 2-3 days, or frozen.

Nutrition

Calories: 130kcal | Carbohydrates: 24g | Protein: 4g | Fat: 2g | Saturated Fat: 1g | Polyunsaturated Fat: 1g | Monounsaturated Fat: 1g | Trans Fat: 1g | Cholesterol: 18mg | Sodium: 79mg | Potassium: 196mg | Fiber: 2g | Sugar: 6g | Vitamin A: 64IU | Vitamin C: 1mg | Calcium: 77mg | Iron: 1mg


from The Recipe Critic https://ift.tt/3vnpB8Q
https://ift.tt/3wGLjG4

मंगलवार, 15 जून 2021

Chocolate Lasagna

Chocolate Lasagna is a no-bake slice of chocolate heaven! Layered with a cream cheese and pudding layer, sandwiched between whipped topping and luscious Oreo crust, it’s too die for!

No-bake desserts are a MUST in the summer, they are easy, full of flavor, and don’t heat up the house making them. Try these tried and true No-Bake desserts now, Cheesecake, Key Lime, and Strawberry Pie.

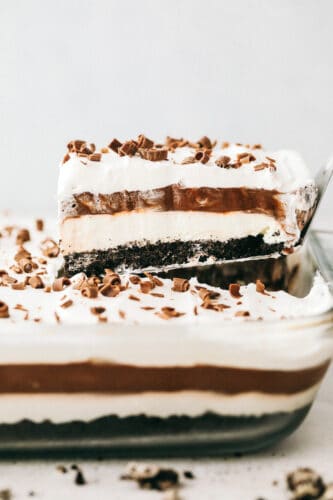
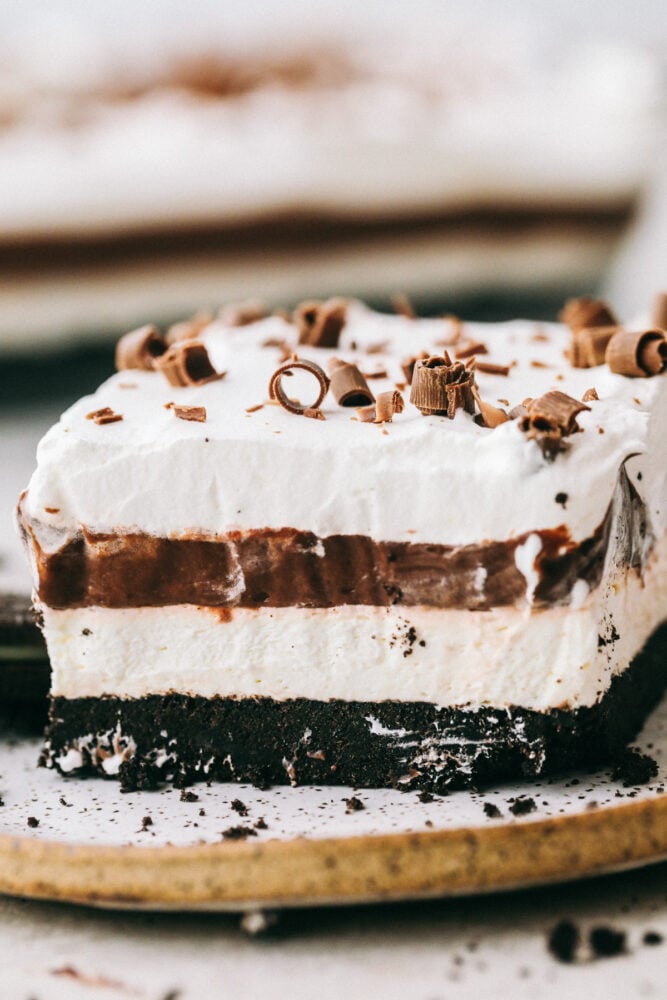
A piece of Oreo Lasagna showing off the layers on a plate.

Oreo Lasagna

I love food with layers. They not only look amazing but taste amazing too. Just like My amazing Lasagna and 7 layered salad, this Oreo lasagna is as pretty as it is scrumptious. The rich chocolaty crust is made from Oreos and unsalted butter that I could eat by its self it’s so good. The creamy tangy cream cheese layer is sweetened with vanilla and lightened up with cool whip. Then you’ll make the chocolate pudding layer with evaporated milk which is a total game-changer. Top it all with whip cream and chocolate curls for a decadent dessert that is actually light and insanely delicious!

Oreo Lasagna is a perfect dessert for summer potlucks or BBQs! It’s easy to transport and serve straight from the pan. With all the layers and chocolate flavors this dessert always disappears fast! It is a surprisingly light dessert for all its layers making it an ideal treat when you do not want something heavy. The fact that it’s no-bake makes it even better. No reason to heat up the kitchen! Your family and friends are going to love this!

Ingredients For Chocolate Oreo Lasagna

These ingredients are split into separate parts when layering the chocolate lasagna. This is layers of deliciousness and fun for any get together! For all the measurements follow the recipe card below.

  • Packaged of regular Oreos: It is best to use regular Oreos not double stuffed to get a more chocolaty crust.
  • Unsalted butter: Melt the butter in the microwave in 10 to 15 seconds intervals.
  • Cream cheese: You can use either low-fat or full-fat cream cheese in this recipe. Soften the cream cheese by leaving it out or microwaving it for a few seconds.
  • Powdered sugar: Powdered sugar mixes in easier from the granulated sugar.
  • Vanilla or vanilla bean paste: Either will give you a rich vanilla flavor perfect for this dessert.
  • Cool whip: Find this in the freezer section next to the ice cream.
  • Evaporated milk: Evaporated is richer and a bit thicker than regular milk with a slightly sweet aftertaste. It creates a velvety smooth pudding.
  • Instant chocolate pudding: Be sure to get instant and not cook and serve pudding.
  • Cool whip: Thaw cool whip in the fridge before using. Keep it cold though.
  • Desired toppings: Make it how you like it choosing from,  chocolate chips, crushed Oreos, mini chocolate chips, chocolate curls, chocolate sauce, candies, etc

How To Make Chocolate Lasagna Cake

In five easy steps you will have the most delicious layered cake! It is simple to create the first layer with Oreos then add to the lasagna with each step. It is going to be a huge hit when it is being served!

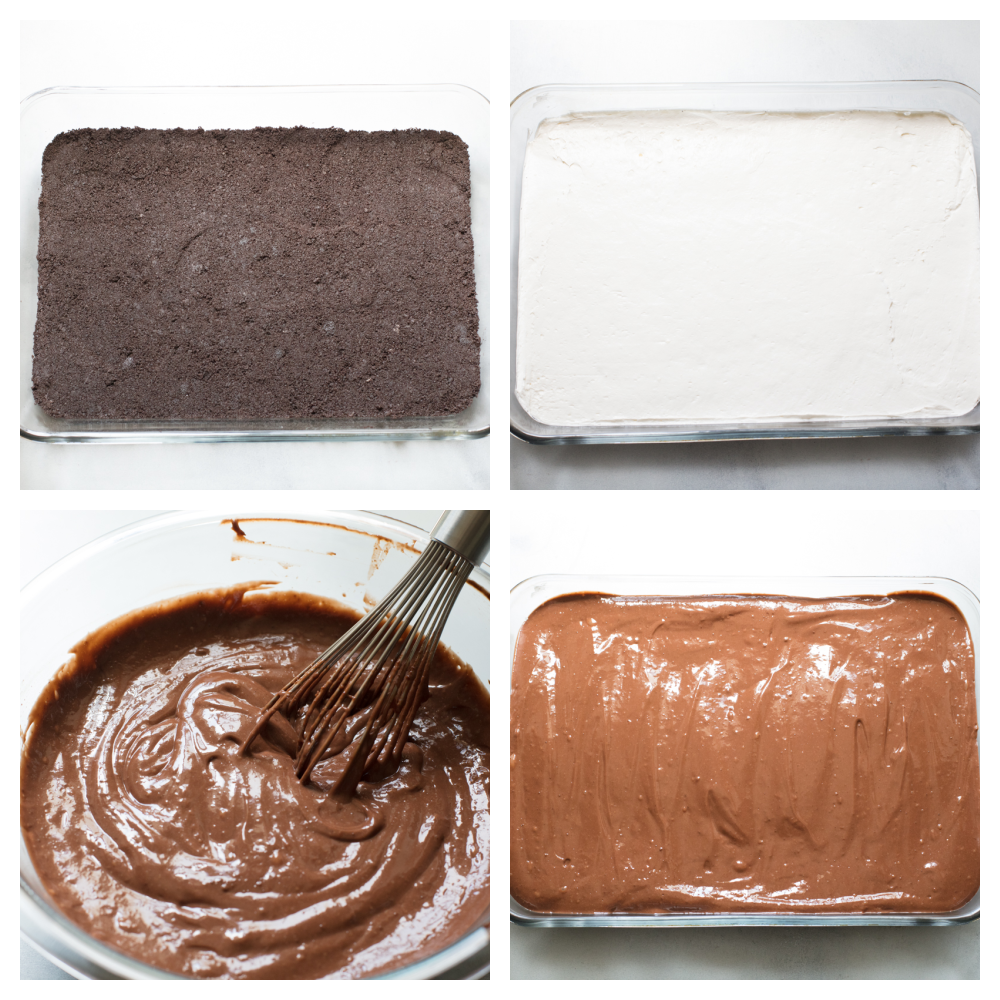
  1. Crush: Using a food processor, add all the Oreo cookies and crush them until they resemble wet sand. Add the melted butter and mix until combined.
  2. Crust: Press the oreo mixture in the bottom of a 9×13 casserole dish and put in the fridge for about 10 minutes to set up. You can use the freezer instead to cut down the wait to about 5 minutes.
  3. Mix Layer 2: Using the paddle attachment, mix your cream cheese until it’s smooth and fluffy. Add in the powdered sugar and vanilla. Once combined, mix in 8 ounces of cool whip by hand until completely combined. Spread evenly over the oreo crust and return to the fridge or freezer for 10-15 minutes.
  4. Whisk Layer 3: In a medium bowl whisk the evaporated milk and pudding mix together until nice and thick. Spread it evenly across the cream cheese layer and place in the fridge for 10-15 minutes, until the pudding has set up.
  5. Layer 4 and Chill: Once the pudding is set up, spread the remaining cool whip across the top and add the toppings of your choice. Chill in the fridge for at least 3 hours before serving. Serve chilled.
Oreo layer, cream cheese layer, chocolate pudding layer and putting it all together.

The Best Oreo Lasagna Tips

This chocolate lasagna is super easy! You will need to plan time for the layers to chill and is a great make ahead dessert! Get ready to WOW your family!

  • Freeze as you go: After each layer is put in the pan, place it in the freezer. This will help to solidify the layers so that they stay nice and clean, and don’t run together.
  • Freeze before cutting: To keep those layers pretty freeze the dessert for 30 minutes before cutting it. This will keep the knife from running the layers together and give you nice clean edges. It will also help to chill it just enough before serving.
  • Oreos: To get the best chocolaty flavor and texture, use regular Oreos, not double stuff. Save the double stuff for dunking in milk.
  • Use a Food Processor: To get the finest crumb from your Oreos use a food processor to crush them. It will create a consistency like chocolate sand which we love. You can also crush them using a zip-top bag and a rolling pin if you do not have a food processor. Get them as fine as you can so it doesn’t fall apart when scooping.
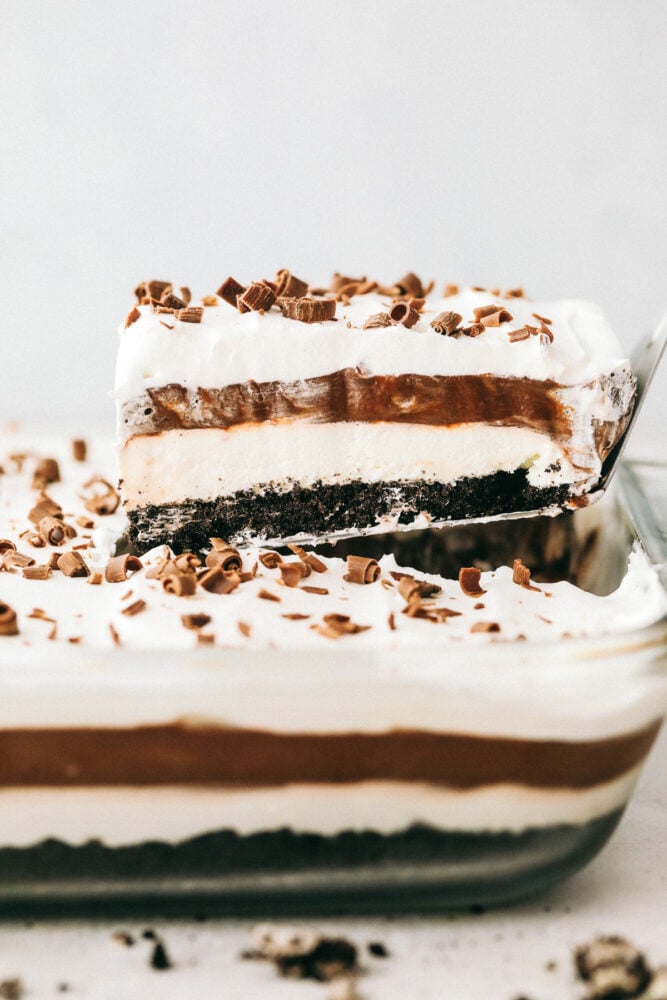
Scooping out the chocolate lasagna from a 9x13.

Chocolate Lasagna Variations

This chocolate Lasagna is easy to substitute and customize to make it your own. Make it different flavors, substitute the milk or even add fun toppings for different parties and events. This chocolate lasagna is going to be a family favorite!

  • Evaporated Milk: Using evaporated milk gives richness to the pudding that is exquisite. If you do not have evaporated milk on hand, you can use the equivalent of regular milk to mix your pudding. It may not thicken up quite as much, but will still taste amazing and work perfectly.
  • Cool Whip: If you want to use hand-whipped cream instead of cool whip you can. It will not keep as well as or long but should still be amazing. Be sure to whip the cream till it’s stiff and add sugar to sweeten it a bit.
  • Pudding: You can use a different kind of pudding if you prefer. Sometimes I have mixed one vanilla and one chocolate together to lighten the chocolate. There are many variations of the pudding out there, try one that speaks to you.
  • Toppings: You can top this lasagna with a wide variety of goodies. Think chopped nuts, mini chocolate chips, chocolate curls, cut p peanut butter cups, Snickers, or M&M’s. Any candy bar that you desire would work here too. Also, try Andes mints, toffee bits, or keep it simple with a simple dusting of cocoa powder or more crushed Oreos.

How to Store Chocolate Lasagna

This no bake chocolate lasagna cake is perfect to make ahead or even freeze! It is simple to make and ready to eat once it is cooled.

  • Make A-head: This oreo lasagna can easily be made up to 3 days ahead of time. Store in the fridge covered. It can also be frozen and thawed overnight in the fridge before serving.
  • Frozen: This will freeze beautifully and if you want can even be served partially frozen for an almost ice cream-like texture.
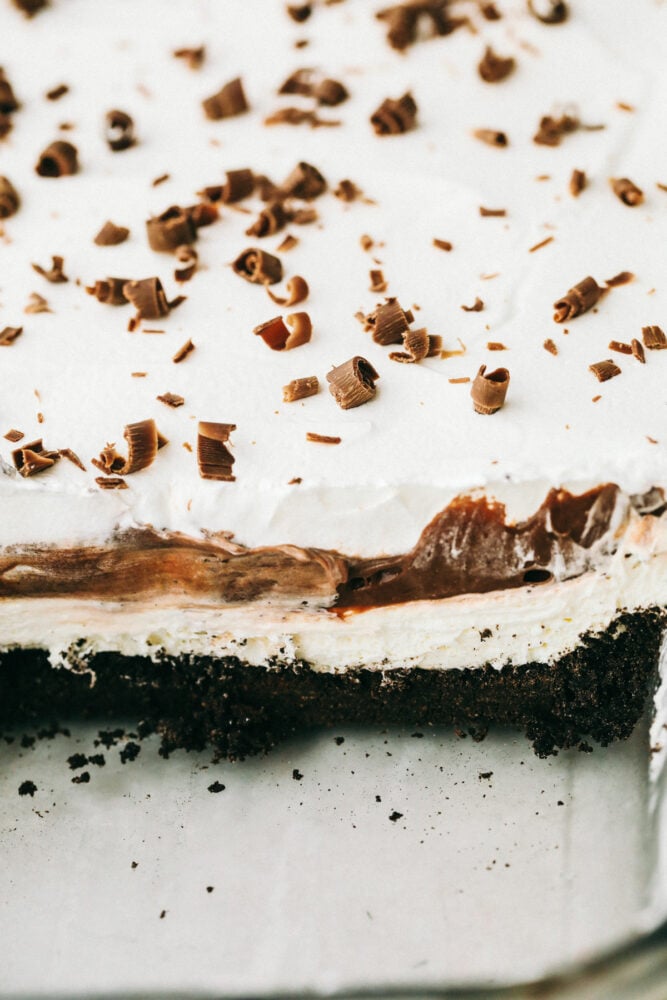
Cross cut of the Oreo lasagna showing off the different layers.
Print

Chocolate Lasagna

Chocoalte Lasagna is a no-bake slice of chocolate heaven! Layered with a cream cheese and pudding layer, sandwiched between whipped topping and luscious Oreo crust, it's too die for!
Course Dessert
Cuisine American
Keyword chocolate lasagna, chocolate oreo lasagna, oreo lasagna
Prep Time 35 minutes
Chill Time 3 hours
Total Time 3 hours 35 minutes
Servings 16 People
Calories 390kcal
Author Alyssa Rivers

Ingredients

Layer 1

  • 1 package Oreos
  • 6 ounce unsalted butter melted

Layer 2

  • 8 ounces cream cheese softened
  • 1 cup powdered sugar
  • 1 teaspoon vanilla or vanilla bean paste
  • 8 ounces cool whip

Layer 3

  • 2 cans evaporated milk
  • 2 (3.2 ounces box) instant chocolate pudding

Layer 4

  • 8 ounces cool whip
  • Desire toppings chocolate chips, crushed oreos, mini chocolate chips, chocolate curls, chocolate sauce, candies, etc

Instructions

Layer 1

  • Using a food processor, add all the Oreo cookies and crush them until they resemble wet sand. Add the melted butter and mix until combined.
  • Press the Oreo mixture in the bottom of a 9×13 casserole dish and put in the fridge for about 10 minutes to set up. You can use the freezer instead to cut down the wait to about 5 minutes.

Layer 2

  • Using the paddle attachment, mix your cream cheese until it’s smooth and fluffy. Add in the powdered sugar and vanilla. Once combined, mix in 8 ounces of cool whip by hand until completely combined. Spread evenly over the oreo crust and return to the fridge or freezer for 10-15 minutes.

Layer 3

  • In a medium bowl whisk the evaporated milk and pudding mix together until nice and thick. Spread it evenly across the cream cheese layer and place in the fridge for 10-15 minutes, until the pudding has set up.

Layer 4

  • Once the pudding is set up, spread the remaining cool whip across the top and add the toppings of your choice. Chill in the fridge for at least 3 hours before serving. Serve chilled.

Nutrition

Calories: 390kcal | Carbohydrates: 40g | Protein: 6g | Fat: 24g | Saturated Fat: 13g | Polyunsaturated Fat: 2g | Monounsaturated Fat: 7g | Trans Fat: 1g | Cholesterol: 56mg | Sodium: 246mg | Potassium: 248mg | Fiber: 1g | Sugar: 29g | Vitamin A: 612IU | Vitamin C: 1mg | Calcium: 169mg | Iron: 3mg


from The Recipe Critic https://ift.tt/3pYMZZk
https://ift.tt/3zt2QUc