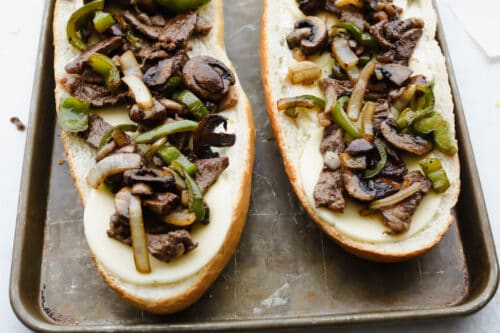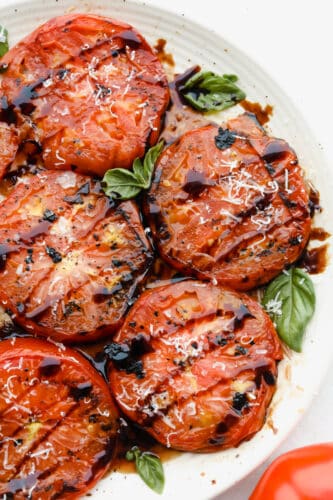
शनिवार, 26 जून 2021

Grilled Tomatoes

Super easy and super delicious, you are going to love these juicy Grilled Tomatoes! Each slice is cooked to perfection and bursting with luscious, savory flavors in every bite.

Serve both standalone and as a side dish for a healthy and delicious treat ready to impress. I love the way fresh tomatoes enhance my summer cooking- the flavor pairs perfectly in sandwiches, skewers, and skillets.
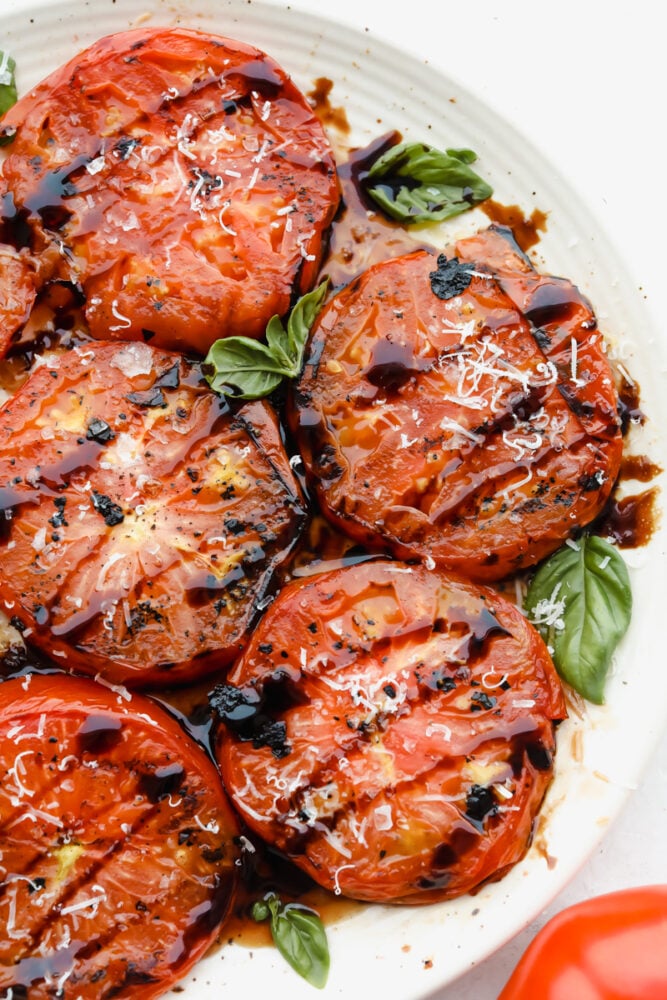
Grilled tomatoes on plate with balsamic vinegar glaze.

Easy Grilled Tomatoes Recipe

To me, grilling brings out the best in tomatoes. You start with fresh slices of tomatoes and in just a couple quick and easy steps, you have created a soft, smoky masterpiece while still retaining all of the health benefits of this versatile fruit. When tomatoes are cooked, it boosts the power of their natural antioxidants so you are left with something that tastes scrumptious but is great for your body, too! They have the best flavor and texture, so I love eating them as-is, but I also love putting them on bread for a super simple bruschetta that tastes just as delicious as what you can get from top-tier Italian restaurants.

Now, I know that tomatoes aren’t everyone’s favorite. But if you use any recipe as a gateway drug, let it be this one. The simple addition of fresh herbs, sea salt and balsamic glaze really transform plain old tomatoes into a sophisticated treat. I love the sweet, tangy balance these tomatoes give when paired with grilled meats at a barbecue. These grilled tomatoes really add the most amazing summery flavor!

Grilled Tomatoes Ingredients

Since these grilled tomatoes recipe only requires a few ingredients, it is best to make sure they are all extra fresh to have the best outcome!

  • Tomatoes: You will need 3-4 that are large and firm.
  • Salt and Pepper: To taste.
  • Olive Oil: Adds moisture and flavor to your tomatoes.
  • Freshly Shredded Parmesan: Adds a pinch of sharp, salty flavor to your tomatoes. You can also substitute Parmesan for fresh Romano cheese.
  • Flaky Sea Salt: I like using sea salt to sprinkle on top for added flavor and texture.
  • Balsamic Glaze: Use balsamic vinegar to cook down into a smooth glaze.
  • Basil: To add a light, slightly sweet flavor to tomatoes.

How to Make The Best Grilled Tomatoes

Making grilled tomatoes is as easy as it sounds. Simply pop them on the grill and add fresh toppings for a decadent treat!

  1. Preheat Grill and Prep Tomatoes: Preheat grill to high heat. Slice the tomatoes into ½ inch slices. You can seed the tomatoes but it is optional, I left mine with the seeds. Drizzle with olive oil.
  2. Grill: Add the sliced tomatoes to the grill. Grill on each side for 2-3 minutes.
  3. Add Toppings: Remove from the grill and serve with optional toppings if desired.
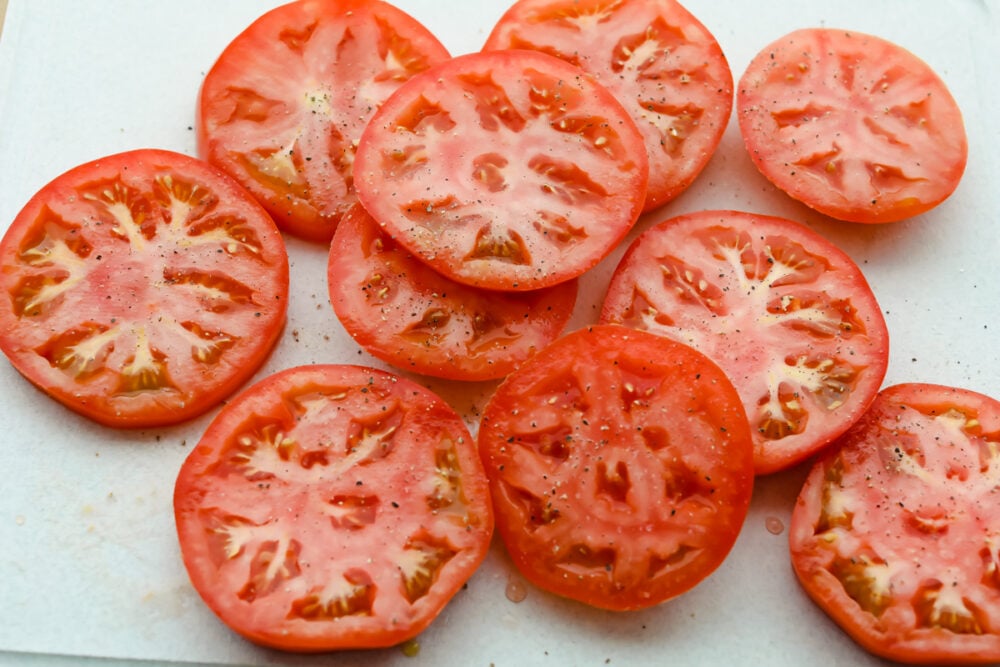
Raw tomatoes salted and peppered

Tips and Tricks for Grilled Tomatoes

Up-level your tomatoes with just a few simple tips! These grilled tomatoes will be a favorite side dish or appetizer.

  • Tomatoes: Look for tomatoes with a consistent, deep red coloring. You will also want to make sure your tomatoes are large and heavy. Since this recipe works best with fresh ingredients, try to purchase no earlier than a day before grilling.
  • Toppings: In addition to basil, you can add rosemary, oregano or cilantro to your tomatoes for a pinch of cool, crisp flavor. You can also use fresh dill for a summery kick!
  • Cheese: Instead of Parmesan or Romano, try sprinkling fresh feta over your tomatoes for a Greek twist on the dish.
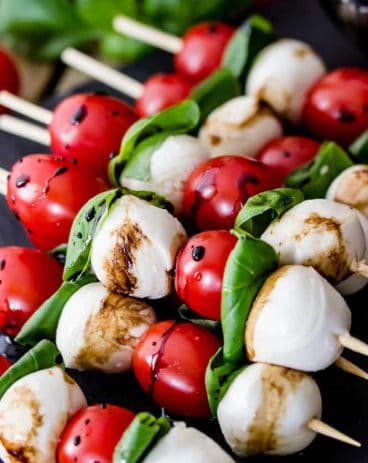
  • Caprese-Style: Serve your tomatoes up alongside fresh mozzarella for a classic Caprese Salad.
  • Cooking on High Heat: Be sure to grill your tomatoes on high heat. This will give them the perfect smoky flavor and char.

Perfect Grilled Tomato Pairings

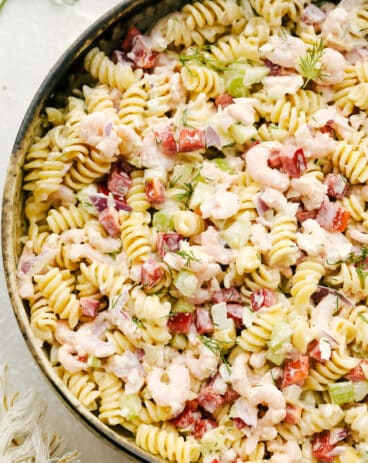
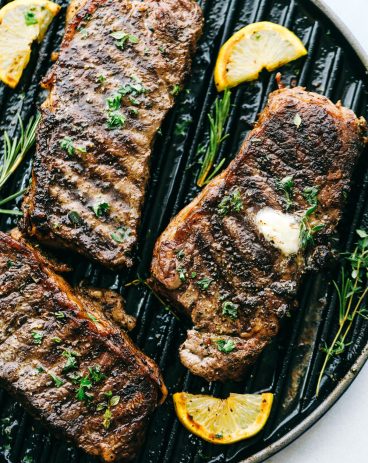
For a barbecue-ready meal, I like to serve my tomatoes alongside steak, grilled chicken, and pasta salad. For quick weeknight dinners, you can also use leftover tomatoes to create sandwiches and skewers for delicious meals that come together in minutes. I cannot get over how tasty and versatile grilled tomatoes are!
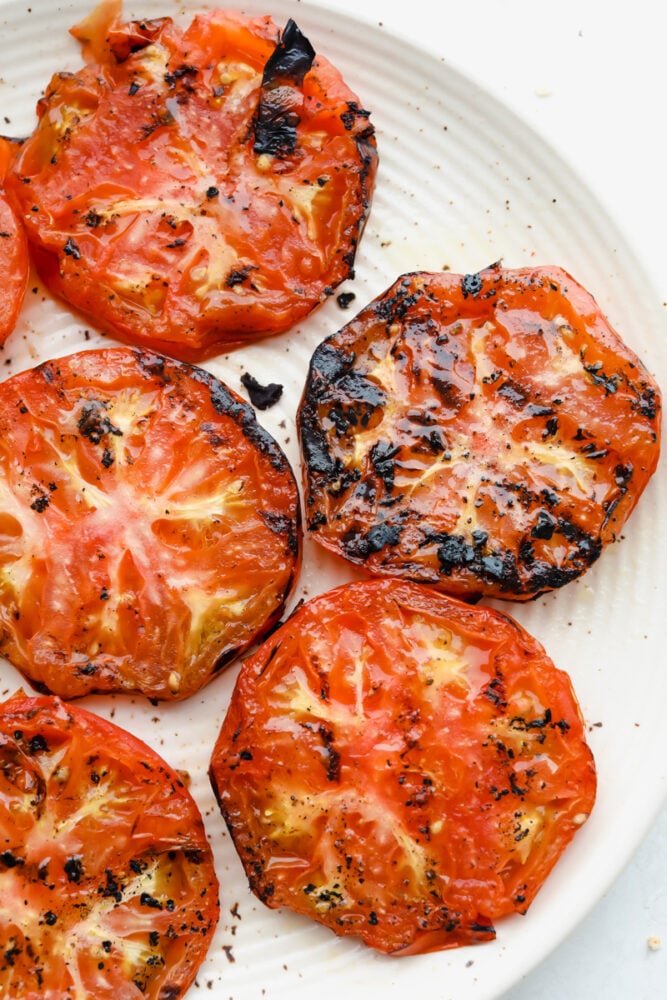
Grilled tomatoes on plate

Storing Grilled Tomatoes

  • In the Refrigerator: Grilled Tomatoes are best served fresh, but can also be kept in an airtight container in the fridge for up to 3 days.
  • To Reheat: Grilled tomatoes taste best reheated in either an oven or toaster oven to keep from becoming soggy. Place your tomatoes on a baking sheet and bake at 450 degrees Fahrenheit for 5 minutes for best result.
Print

Grilled Tomatoes

Super easy and super delicious, you are going to love these juicy Grilled Tomatoes! Each slice is cooked to perfection and bursting with luscious, savory flavors in every bite.
Course Side Dish
Cuisine American
Keyword grilled tomatoes, how to grill tomatoes
Prep Time 5 minutes
Cook Time 5 minutes
Total Time 10 minutes
Servings 12 tomatoes
Calories 8kcal
Author Alyssa Rivers

Ingredients

  • 3-4 large firm tomatoes
  • salt and pepper
  • olive oil

Optional toppings:

  • freshly shredded parmesan
  • flaky sea salt
  • balsamic glaze
  • basil

Instructions

  • Preheat a grill to high heat. Slice the tomatoes into ½ inch slices. You can seed the tomatoes but it is optional, I left mine with the seeds. Drizzle with olive oil.
  • Add the sliced tomatoes to the grill. Grill on each side for 2-3 minutes.
  • Remove from the grill and serve with optional toppings if desired.

Nutrition

Calories: 8kcal | Carbohydrates: 2g | Protein: 1g | Fat: 1g | Saturated Fat: 1g | Polyunsaturated Fat: 1g | Monounsaturated Fat: 1g | Sodium: 2mg | Potassium: 108mg | Fiber: 1g | Sugar: 1g | Vitamin A: 379IU | Vitamin C: 6mg | Calcium: 5mg | Iron: 1mg


from The Recipe Critic https://ift.tt/3qpOQ9A
https://ift.tt/2T7bkjw
शुक्रवार, 25 जून 2021

Cherry Clafoutis

Cherry Clafoutis is a surprisingly easy yet elegant french dessert that everyone is going to love! This custard-like base is studded with sweet pitted cherries and flavored with vanilla and almond, so scrumptious!

Cherries are a delightfully sweet fruit, whether they are canned or fresh. Cherries are such a fun fruit for desserts, try some of these tried and true, whether canned or fresh, Bars, Brownies, and Crumb Bars.

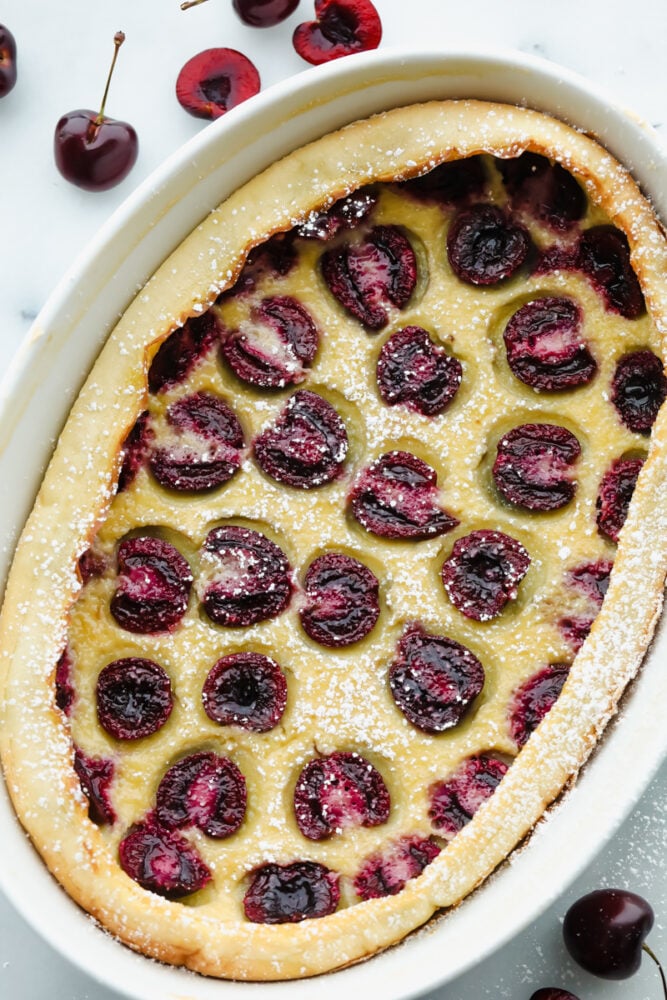
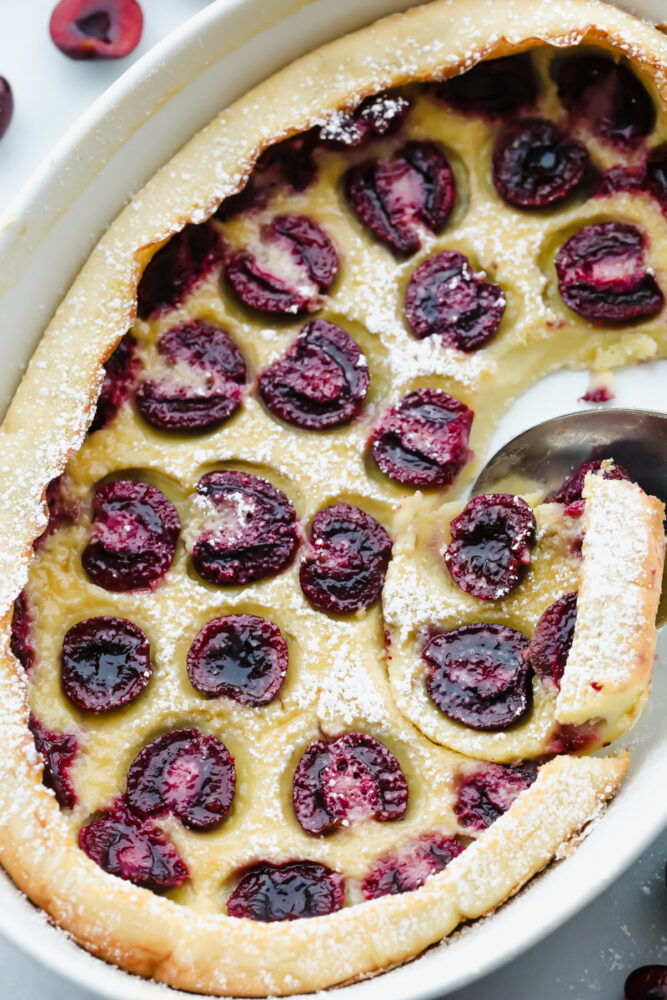
Cherry Clafoutis in a white dish baked and ready to eat.

What is Cherry Clafoutis?

Cherry Clafoutis (pronounced klah-foo-TEE) is a french dessert that is still one of it’s most famous and favorites. The name is fancy, it looks like you slaved all day, but it could not be any easier! I love desserts that are deceptive like that, make any inconvenience worth it. If you have never had a cherry clafoutis, now is the time to try it, especially during cherry season! This is one of the best ways you can use up any extra cherries you may have on hand.

Clafoutis can be served as a dessert or for a brunch, and I have even seen it served for breakfast. No judgment here, it is not much different from my Cherry Almond Cream Cheese Breakfast Braid or this Incredible Blueberry Buttermilk Breakfast Cake. The batter is similar to a crepe batter where it has an egg-dominated consistency. It will bake up into a luscious custard-like texture that is perfect for cradling those sweet cherries.

Ingredients for Cherry Clafoutis

With just a bit of flour the batter will be similar to a crepe batter, it won’t be overly thick or thin. For exact measurements for cherry clafoutis, scroll to the recipe card at the bottom.

  • Eggs: Use Large eggs not medium and have them at room temperature for easier mixing.
  • Sugar: White sugar adds the sweetness, moisture, and tenderness of the custard-like base.
  • Salt: This will balance the sweetness.
  • Milk: Helps the batter cook up to be custard-like instead of cake-like.
  • Vanilla extract: Sweet flavor that pairs beautifully with cherries.
  • Almond extract: Orginal clafoutis kept the pits in the cherries that give off an almond flavor, we’ll use this instead.
  • Unsalted butter melted: Everything is better with butter and the french cook a lot with it. It’s a must.
  • All-purpose flour: This will provide the structure for the custard that will cradle the cherries.
  • Sweet cherries pitted and halved: You will definitely want to pit the cherries so you do not break a tooth!
  • Powdered sugar for dusting: This helps give the clafoutis a pretty look.

How to Make This French Cherry Clafoutis

Using a blender makes this clafoutis extremely easy to put together.

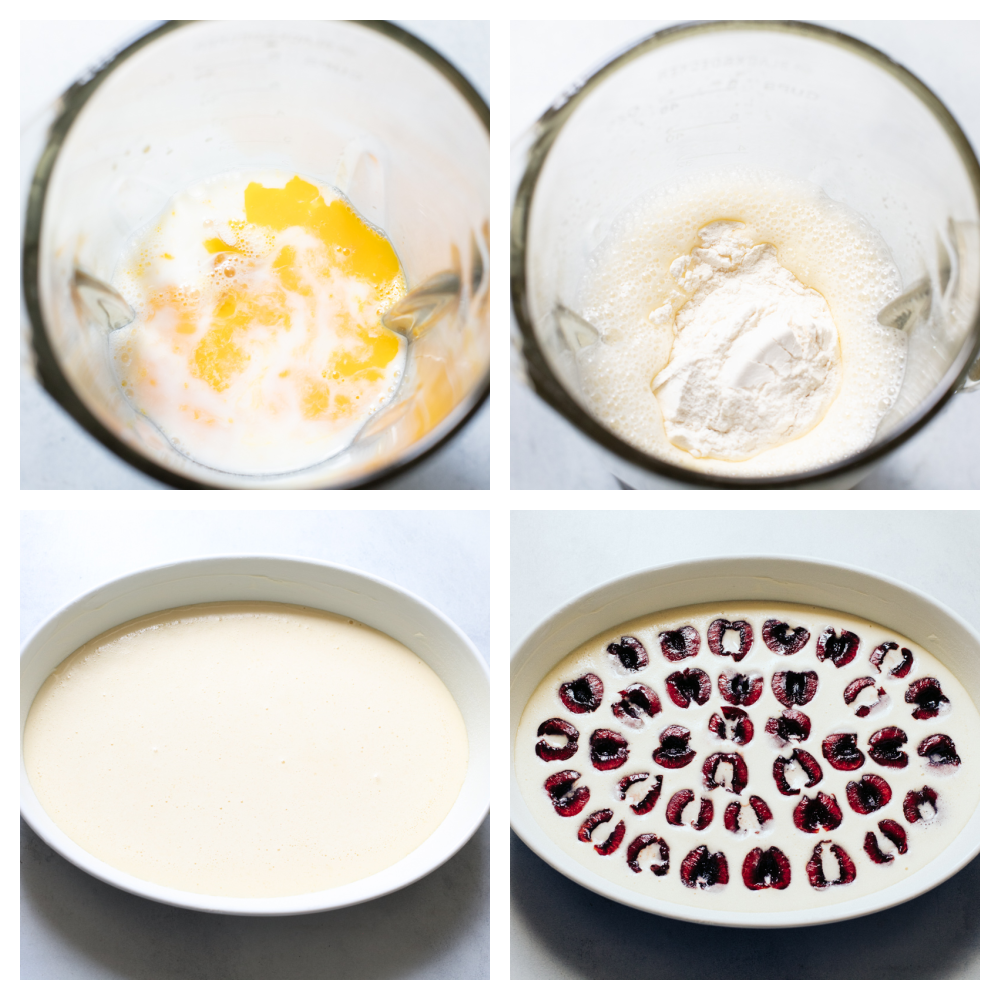
  1. Blend it all Up: In a blender, combine eggs, sugar, salt, milk, and both extracts. Blend until combined. Add in the flour and blend again for about 30 seconds until combined. Add in the melted butter and pulse the blender a couple of times to mix it in.
  2. Place and Pour: Pour the batter into the prepared baking dish. Place the cherries on top of the batter. You can arrange them however you prefer.
  3. Cook and Cool: Bake for 45-55 minutes, or until fully set and a knife comes out mostly clean. Remove from the oven and allow to cool at least 15 minutes.
  4. Enjoy: You may serve this warm or cold. Dust with powdered sugar and, if desired, serve with fresh whipped cream or vanilla ice cream.
Mixing the ingredients, pouring them into a pan and adding the cherries.

Tips for the Best Cherry Clafoutis

Family and friends are going to be blown away by this light summertime dessert!

  • Cherries: Originally the cherries used were unpitted. You will want to pit them to avoid unnecessary dentist bills. Halving them helps distribute them in a more decorative pattern, but it is optional. You can leave them whole if you desire.
  • No cherry pitter, no problem: If you don’t have a cherry pitter, using a metal straw works great! Poke the bottom of the cherry with the straw and the pit will pop out the top. 
  • Blend it: I like to blend this up because it makes it so much easier on me, but this will work with a whisk just as well too.
  • Different Fruits: This recipe will work magically just as well with other fruits. Try it with plums, apricots, raspberries, and blackberries. You will want to stay away from fruit that gives off a lot of juice when cooked.
  • Bake it small: You can make individualized clafoutis by dividing the batter and cherries among ramekins. Bake for 30-35 minutes and then check.
  • How you know it’s done: Because this is like a custard, more than a cake, the consistency should have a bit of a wobble to it. And a knife or toothpick will come out mostly clean.

Serving and Storing Your Cherry Clafoutis

  • Serve: The hardest part about the Cherry clafoutis is waiting for it to cool slightly and set up. This will take about 15 minutes or so. Once cooled cover with powdered sugar for a decorative look. You can serve this warm or cold, but I prefer warm with a dollop of whipped cream or ice cream. Others like it better at room temperature or cold. It is a matter of preference.
  • Store: Because this has egg in it, you will need to tightly cover it and keep it in the fridge. It will stay for up to 4 days. This can be made ahead of time up to a day in advance.
  • Reheat: If you desire to serve it warm, you can microwave it or place it in the oven at 350 degrees for 10 minutes or so.
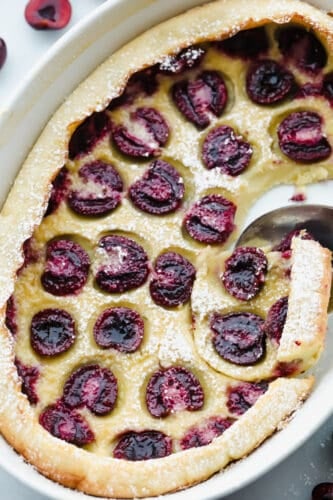
Scooping out the cherry clafoutis from the serving dish.
Print

Cherry Clafoutis

Cherry Clafoutis is a surprisingly easy yet elegant french dessert that everyone is going to love! This custard-like base is studded with sweet pitted cherries and flavored with vanilla and almond, so scrumptious!
Course Dessert
Cuisine American
Keyword cherry clafoutis
Prep Time 15 minutes
Cook Time 45 minutes
Total Time 1 hour
Servings 8 People
Calories 198kcal
Author Alyssa Rivers

Ingredients

  • 4 large Eggs
  • ½ cup sugar
  • ½ tsp salt
  • 1 cup milk
  • 1 Tablespoon vanilla extract
  • 1 teaspoon almond extract
  • 2 Tablespoons unsalted butter melted
  • ¾ cup all purpose flour
  • 2 cups sweet cherries pitted and halved
  • Powdered sugar for dusting

Instructions

  • Preheat oven to 350 degrees. In a blender, combine eggs, sugar, salt, milk, and both extracts. Blend until combined. Add in the flour and blend again for about 30 seconds until combined. Add in the melted butter and pulse the blender a couple times to mix it in.
  • Pour the batter into the prepared baking dish. Place the cherries on top of the batter. You can arrange them however you prefer.
  • Bake for 45-55 minutes, or until fully set and a knife comes out mostly clean. Remove from the oven and allow to cool at least 15 minutes.
  • You may serve this warm or cold. Dust with powdered sugar and, if desired, serve with fresh whipped cream or vanilla ice cream.

Notes

If you don’t have a cherry pitter, using a metal straw works great! Poke the bottom of the cherry with the straw and the pit will pop out the top. 

Nutrition

Calories: 198kcal | Carbohydrates: 29g | Protein: 6g | Fat: 6g | Saturated Fat: 3g | Polyunsaturated Fat: 1g | Monounsaturated Fat: 2g | Trans Fat: 1g | Cholesterol: 104mg | Sodium: 195mg | Potassium: 168mg | Fiber: 1g | Sugar: 19g | Vitamin A: 294IU | Vitamin C: 2mg | Calcium: 56mg | Iron: 1mg


from The Recipe Critic https://ift.tt/3h6RKvE
https://ift.tt/3xTPCOM

गुरुवार, 24 जून 2021

Philly Cheese Steak Cheesy Bread

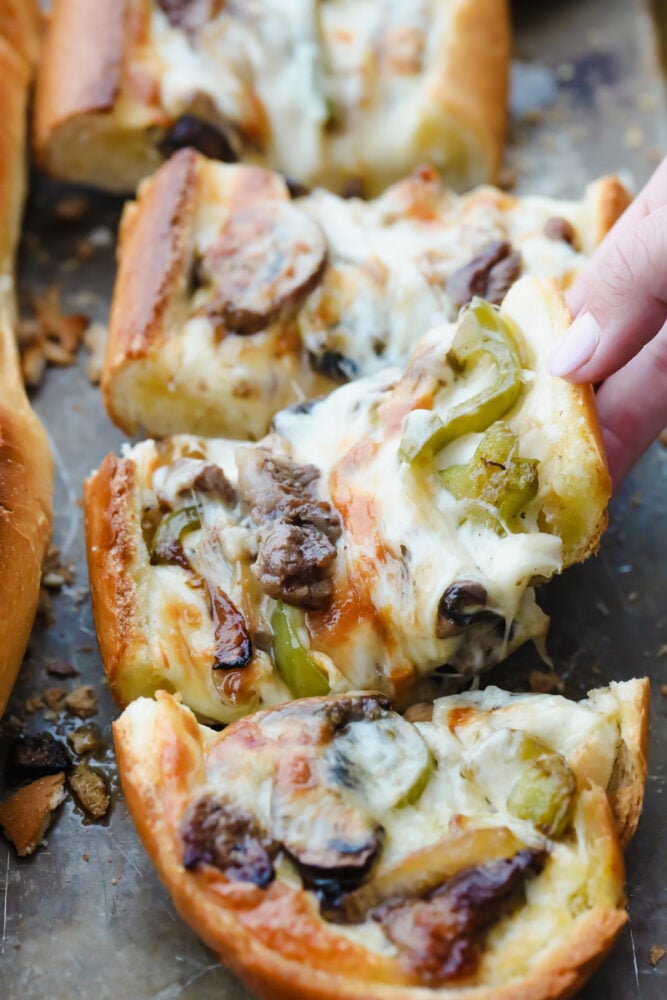
Philly Cheese Steak Cheesy Bread with just a few simple ingredients is the taste of Philly for a crowd! It comes together in just minutes with major flavor in each bite!

With tender cuts of meat, melty cheese, tangy Worcestershire sauce, and fresh veggies, the flavors of Philly cheesesteaks are irresistible! I like to use these tasty ingredients in things like sloppy joes, stuffed peppers, and even egg rolls for a cheesy twist!

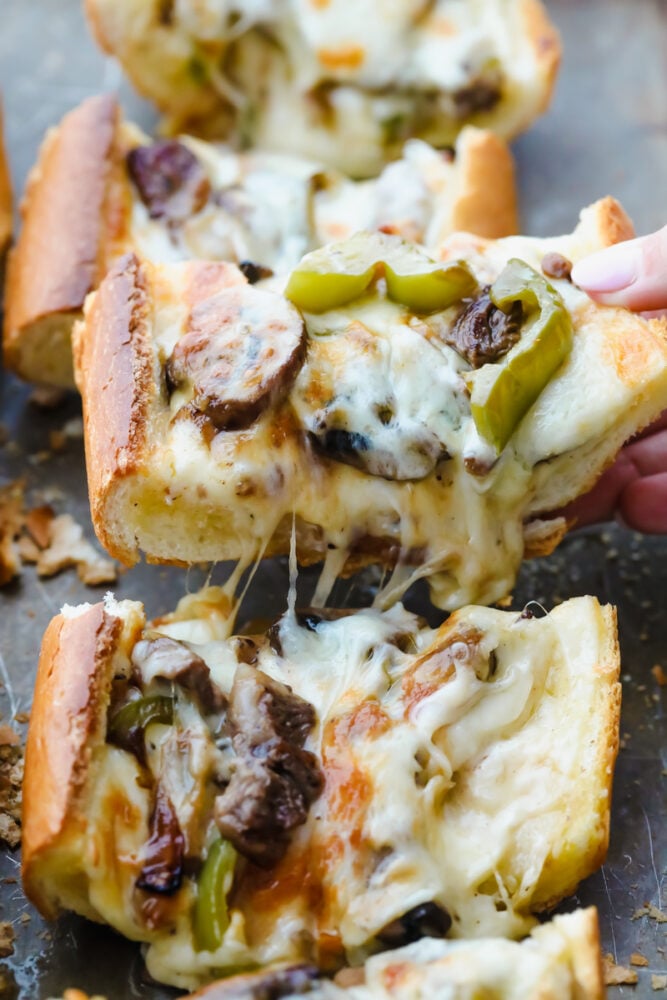
Piece of Philly cheesesteak cheesy bread being pulled from pan

Philly Cheesesteak Cheesy Bread Recipe

Philly cheese steak cheesy bread sounds like a hard recipe but it’s actually ready to go in the oven in less than 20 minutes and is a perfect recipe for a crowd. This is going to be your new go-to for summer parties! It has all the amazing flavor of cheesesteaks but easy preparation and convenient pull apart pieces your friends and family will love! Plus, this Philly cheese steak cheesy bread recipe doesn’t require a lot of ingredients and is actually pretty inexpensive to make.

Perfect for quick and easy dinners, parties, game days, and potlucks, the delicious flavors of this Philly cheese steak cheesy bread are sure to impress. One of the most popular recipes on my blog is for a Philly cheese steak cheesy bread, and there are at least four different recipes on the blog for cheesesteaks, but this one is my favorite version for a crowd. A recipe that tastes this good and is so effortless makes it is hard to make cheesesteaks any other way! With soft, flaky French bread, tender ribeye slices, peppers, onions, and mushrooms sauteed to perfection, and melty provolone bubbling on top, be ready to indulge in the ultimate comfort food!

What You Will Need For Cheesesteak Cheesy Bread

Fresh ingredients work best to enhance the flavor of this Philly cheese steak cheesy bread. Scroll down to the recipe card to find the exact measurements for Philly cheese steak cheesy bread ingredients.

  • Ribeye Steak:16 ounces thinly sliced.
  • Salt and Pepper: To taste.
  • Canola Oil: For pan-frying the pieces of steak. You can substitute canola oil for sunflower, vegetable, or grapeseed oils.
  • Worcestershire sauce: Adds delicious, tangy flavor to the meat.
  • Butter: For pan-frying vegetables. I like using salted butter to enhance the flavor of the veggies.
  • Green Bell Pepper: Adds a delicious crunch and zing to your cheesesteaks.
  • Yellow Onion: Sliced, adds sweet and savory flavor.
  • Mushrooms: Sliced, for delicious flavor and texture.
  • French Bread: Cut in half lengthwise.
  • Mayonnaise: For creaminess and tang.
  • Provolone cheese: I like using provolone because it is rich and savory and melts to perfection. You can also substitute provolone for mozzarella, muenster, or parmesan.

How To Make Philly Cheesesteak Cheesy Bread

This cheesy delight comes together in just a few quick and easy steps! Philly cheese steak cheesy bread is a delicious appetizer, side, or a simple main dish!

  1. Preheat Oven and Prep Steak: Preheat the oven to 400 degrees. Add the salt and pepper to the ribeye steak.
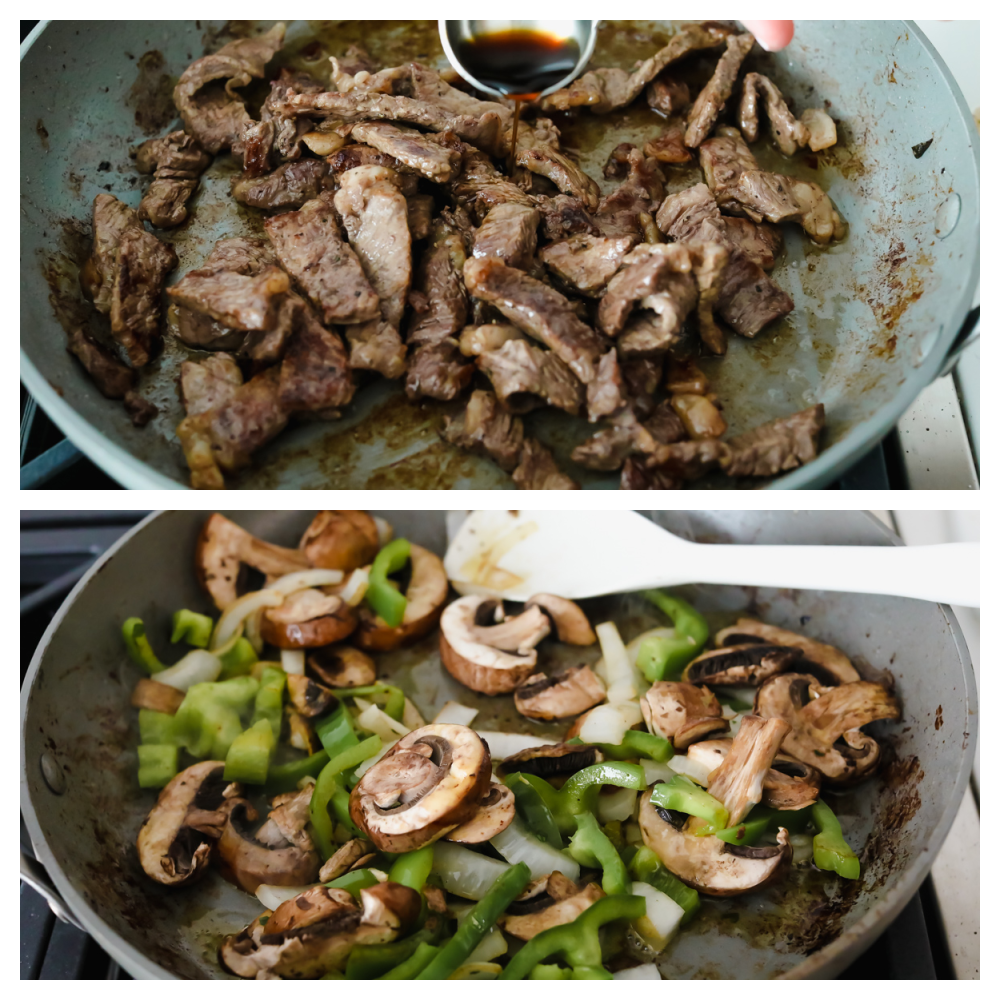
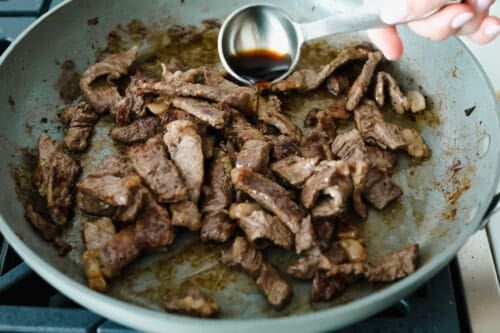
  2. Pan-fry Steak: In a large cast-iron skillet add the oil and heat to medium-high. Add the steak and sear each side for about 2 minutes.
  3. Add Worcestershire Sauce: Add the Worcestershire sauce and toss with the meat. Remove from the pan.
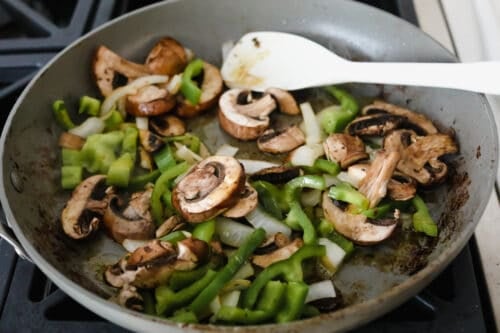
  4. Sauté Vegetables: Add the butter, bell peppers, onion, and mushroom to the pan and salt and pepper to taste. Cook for two minutes until the veggies are tender.
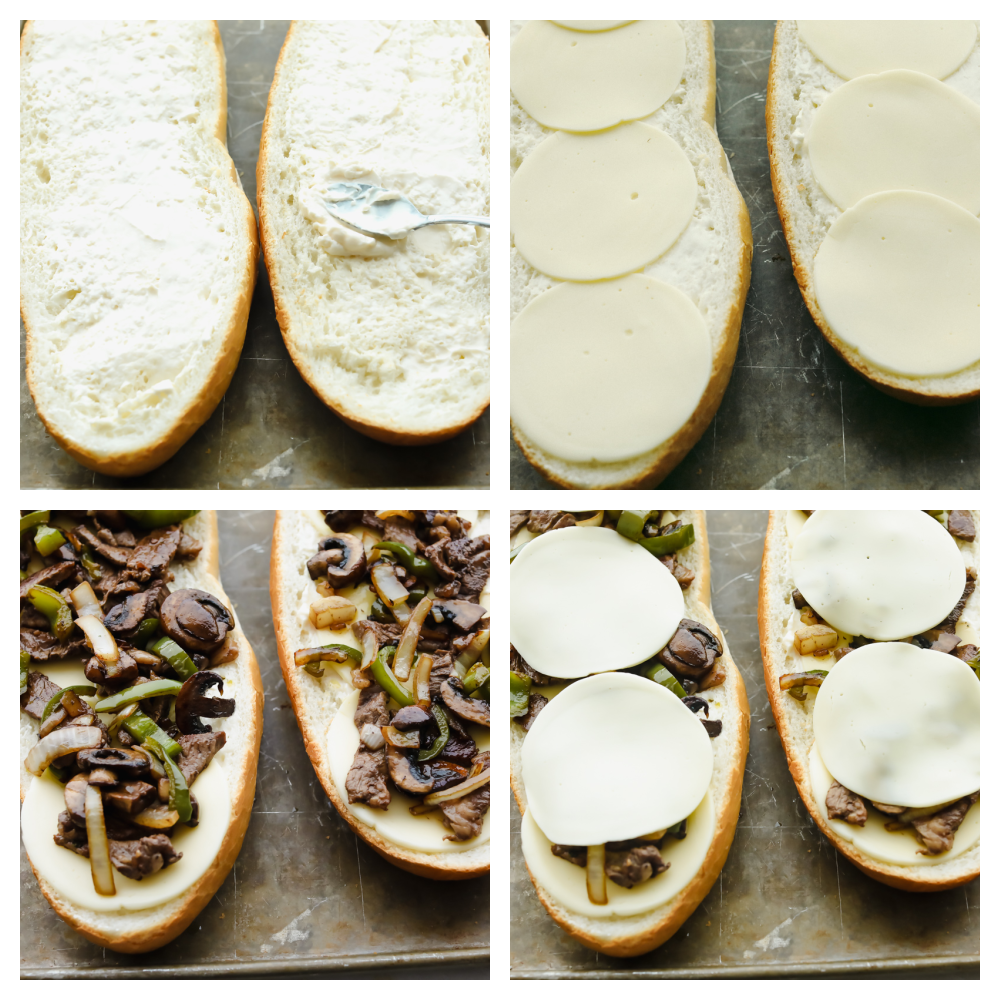
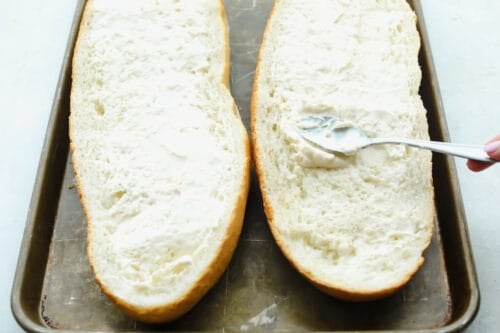
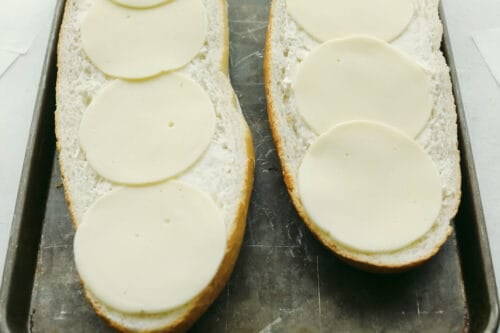
  5. Prepare Cheesesteaks: Spread mayonnaise over both halves of the bread. Layer with slices of Provolone cheese. Add the steak and vegetables. Layer with remaining cheese.
  6. Bake: Cook for 10-15 minutes on the middle rack until browned.
  7. Serve: Slice into two-inch thick slices and serve immediately.
Meat and vegetables being stir-fried
Philly cheesesteak cheesy bread being prepared

Great Cheesesteak Pairings

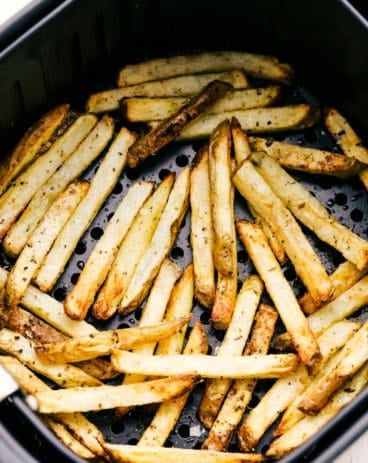
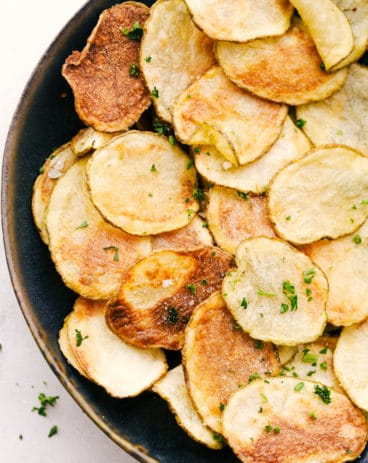
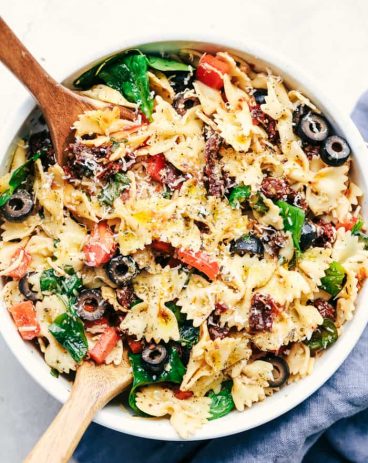
For a classic side, serve up your Philly cheese steak cheesy bread alongside my air fryer potato chips and fries. They are so quick and easy to make, perfect for throwing together right before a party! I like to also serve these alongside my Tuscan and shrimp pasta salads for a complete, delicious summer meal.

Making The Best Philly Cheesesteak Cheesy Bread

You can make this Philly cheese steak cheesy bread to suit your tastes, here are a few more options:

  • Cheese: The recipe calls for Provolone, but you can use any cheese you prefer. Just don’t use Cheez Whiz in this recipe, it won’t cook as well on high heat.
  • Steak: The more tender the cut of meat, the better your end product will be. I use Ribeye, but skirt steak would also work really well. Just avoid really tough cuts of meat or you will end up with very chewy pieces of meat.
  • Marinating Meat: Marinating your meat in sauces like Worcestershire, balsamic vinegar, and soy sauce help to break down connective tissue in meat and make it extra tender- perfect for sandwiches.
  • Adding Mayonnaise: The mayonnaise on the bread adds a lot of flavor and helps the end product stay moist and creamy, I would not skip it.
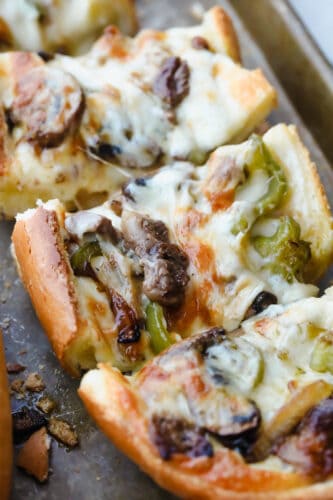
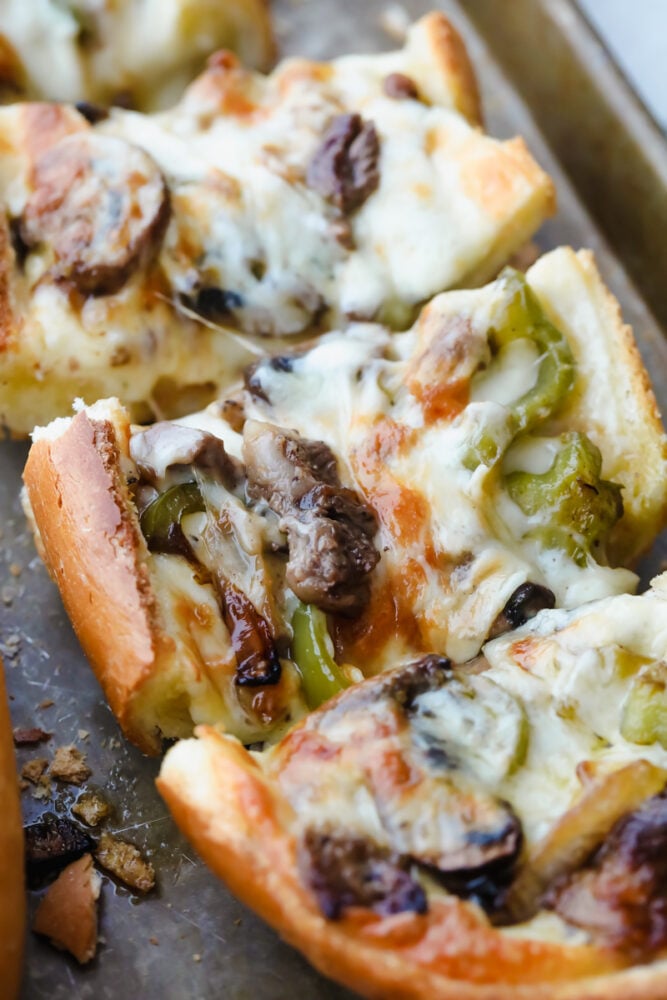
Philly Cheesesteak Cheesy Bread cut into pieces

Storing Your Cheesesteak Cheesy Bread

  • In the Refrigerator: Store your Philly cheese steak cheesy bread in either an airtight container or wrapped tightly in plastic wrap. It will last for up to 4 days.
  • In the Freezer: Your cheesy bread can be kept in the freezer for up to 3 months in an airtight container.
  • Reheating: To keep your bread from getting soggy, I recommend reheating your Philly cheese steak cheesy bread in the oven for 15-20 minutes at 375 degrees Fahrenheit. Wrap your bread in tin foil before cooking.
Picking up a piece of Philly cheesesteak cheesy bread
Print

Philly Cheese Steak Cheesy Bread

Philly Cheese Steak Cheesy Bread with just a few simple ingredients is the taste of Philly for a crowd! It comes together in just minutes with major flavor in each bite!
Course Dinner, Main Course
Cuisine American
Keyword philly cheese steak cheesy bread
Prep Time 10 minutes
Cook Time 15 minutes
Total Time 25 minutes
Servings 12 slices
Calories 270kcal
Author Alyssa Rivers

Ingredients

  • 16 ounces Ribeye Steak thinly sliced
  • salt and pepper to taste
  • 1 tablespoon canola oil
  • 1 tablespoon Worcestershire sauce
  • 2 tablespoons butter
  • 1 medium green bell pepper sliced
  • 1 medium yellow onion sliced
  • 4 ounces mushrooms sliced
  • 1 loaf French bread cut in half lengthwise
  • 1/4 cup mayonnaise
  • 10-12 slices Provolone cheese

Instructions

  • Preheat the oven to 400 degrees. Add the salt and pepper to the ribeye steak.
  • In a large cast iron skillet add the oil and heat to medium high. Add the steak and sear each side for about 2 minutes.
  • Add the Worcestershire sauce and toss with the meat. Remove from the pan.
  • Add the butter, bell peppers, onion and mushroom to the pan and salt and pepper to taste.
  • Cook for two minutes until the veggies are tender.
  • Spread mayonnaise over both halves of the bread.
  • Layer with slices of Provolone cheese.
  • Add the steak and vegetables.
  • Layer with remaining cheese.
  • Cook for 10-15 minutes on the middle rack until browned.
  • Slice into two inch thick slices and serve immediately.

Notes

Updated on June 24, 2021
Originally Posted on May 12, 2017

Nutrition

Calories: 270kcal | Carbohydrates: 21g | Protein: 13g | Fat: 15g | Saturated Fat: 6g | Cholesterol: 32mg | Sodium: 408mg | Potassium: 192mg | Fiber: 1g | Sugar: 2g | Vitamin A: 261IU | Vitamin C: 9mg | Calcium: 163mg | Iron: 2mg


from The Recipe Critic https://ift.tt/2LlhWFz
https://ift.tt/3w2yqFz