बुधवार, 30 जून 2021

Red White and Blue Cake

This Red, White and Blue Cake is going to steal the show for your 4th of July celebrations! Tender moist cake is swirled in the sweetest tie-dye pattern!

Classic American desserts or red, white, and blue are a must for the 4th. Here are some other celebratory desserts, Caramel Apple Slab Pie, Cherry Pie Bars, and Very Berry Cheesecake Salad.
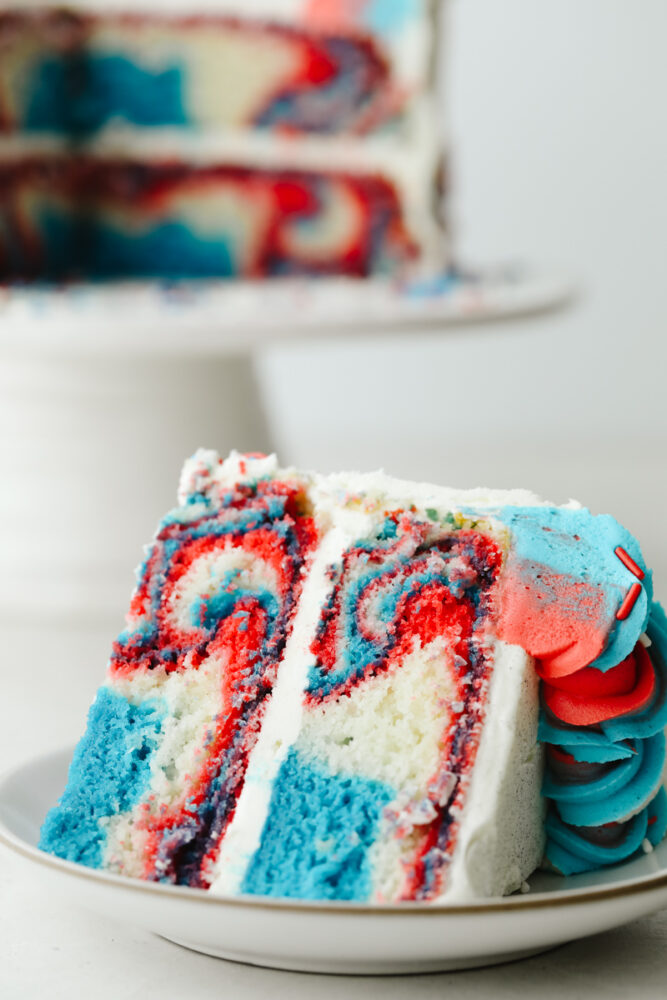
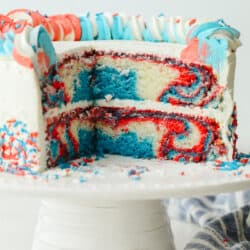
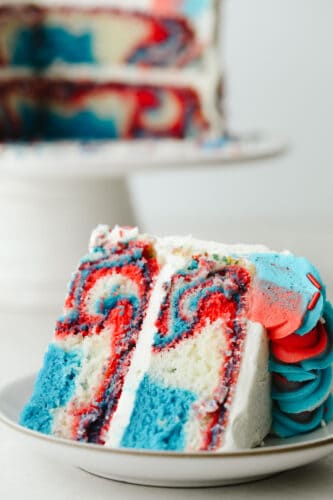
A slice of the red white and blue cake showing the swirls.

Fourth of July Red, White, and Blue Cake

One of my favorite holidays is the 4th of July. I love the reason why we celebrate and all the festivities that come with it. The parades, the patriotism and of course the fireworks.Then there is the food! BBQs and family gatherings call for amazing dishes and even better desserts. This red, white and blue cake with it’s tie-dye effect is going to be the hit of the party.

Not only does this look dazzling, but it also tastes spectacular. The inside is tender, moist, and has that perfect density that you want in a cake. The almond and vanilla flavors combine to create a unique smooth flavor that is balanced with the buttercream frosting. Adding the swirls looks hard but it is super easy, your family and friends are going to be impressed for sure! Make this red, white and blue cake this holiday and it will definitely be a crowd-pleaser!

Ingredients For the Tie-dye Cake

Red, white and blue cake is the perfect holiday dessert this Fourth of July! All ingredients are listed below with the measurements in the recipe card.

  • All-Purpose flour: All-purpose flour will provide the cake with the structure you need.
  • Baking powder: This helps give the cake rise and fluff.
  • Baking soda: Make sure your baking soda is fresh so that your cake will cook up light and fluffy.
  • Salt: Salt will balance all the flavors.
  • Butter softened: Have the butter at room temperature or soften it in the microwave, but do not melt it.
  • Granulated sugar: Sweet white sugar provides sweetness and moisture.
  • Egg whites: Have your egg whites at room temperature by removing them from the fridge an hour or more ahead of time.
  • Vanilla extract: Vanilla gives the cake a classic scrumptious flavor.
  • Almond extract optional: This is optional but it provides an incredible flavor you are going to love.
  • Milk whole: Using whole milk will provide a lovely rich, moist, and tender cake.
  • Sour cream: Don’t question this secret ingredient, it provides a moist cake with a bit of tang you are going to love!
  • White vinegar: Vinegar makes cake fluffy yet still moist. The acidity helps set the proteins in the flour.
  • Red Food Coloring and Blue Food Coloring: To avoid adding more liquid to your batter try using a food coloring gel.
  • Red White and Blue sprinkles: Look for these where they sell the sprinkles at your store. These are optional too.

Buttercream Frosting Ingredients

  • Butter: Set your butter out a few hours before needed so it’s good and soft, but not melted.
  • Powdered sugar: Sift your powdered sugar so it mixes in smoothly.
  • Vanilla extract clear, if bright white icing is desired: If you can’t find this in your local grocery store you can find clear vanilla where they sell cake decorating supplies.
  • Pinch of salt: This will balance out the sweetness.
  • Heavy cream more if needed: This is only if you need to thin the frosting out a bit to make it spreadable.
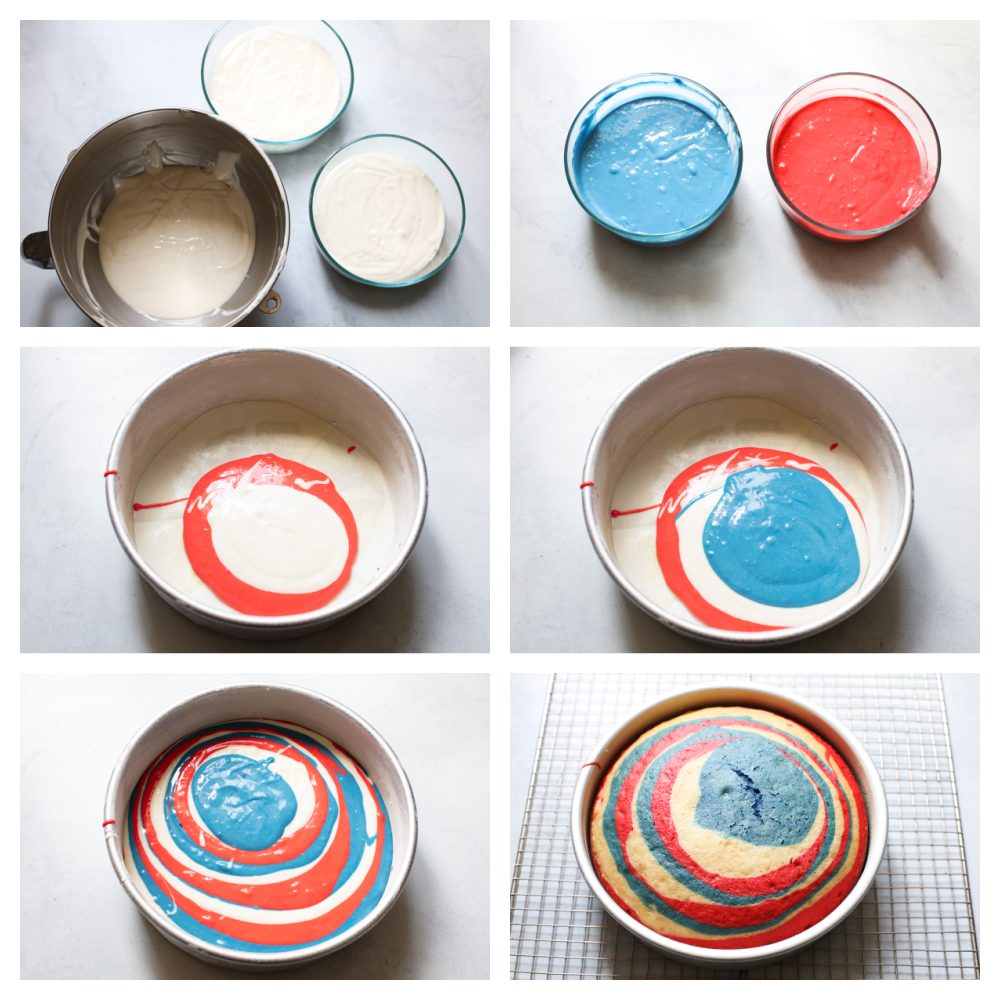
Making the batter, separating and coloring the mixes and then placing it in the cake tin to bake.

How to Make the Red, White, and Blue Swirly Cake

This is so much easier than you think and the effect is stunning!

  1. Prep: Preheat the oven to 350°. Spray two 8 inch round cake pans with cooking spray and dust with flour. Set aside.
  2. Dry ingredients: In a medium bowl, sift together the flour, baking powder, baking soda, and salt. Set aside.
  3. Cream: In the bowl of your mixer, beat the butter until creamy. Add the sugar and beat again for about 3-5 minutes on medium-high speed until it turns white and fluffy. Mix in the egg whites one at a time and mix on medium until each one is fully mixed in.
  4. Combine: Add the extracts, milk, sour cream, and vinegar to the butter mixture and mix on medium speed until combined. Add the dry ingredients and mix until just combined.
  5. Color: Split the batter evenly into three bowls. Tint one bowl red and one bowl blue. To get the tie-dyed effect you will layer scoops of colored batter into the cake pans. One scoop red followed by one scoop white and one scoop blue, repeated until each pan has about ⅓ of each color of batter.
  6. Cook: Bake for about 35-40 minutes, until the top of the cake springs back when lightly touched and a toothpick comes out clean from the center.
  7. Cool: Allow to cool in the pan on a cooling rack for about 10 minutes before turning upside down on the cooling rack to cool the rest of the way. Cooling the cakes upside down levels out the top so you have nice flay layers that make getting a level cake very easy.
  8. Freeze or Frost: Once the cake has cooled, you can either wrap the layers in plastic wrap and store them in the fridge overnight (chilled layers are typically easier to frost) or you can frost them the same day.

How to Frost the Firecracker Cake

  1. Frost and Layer: On a cake stand or plate, place one layer top-down. Add a generous dollop of frosting on top and smooth it evenly. Place the second layer and another dollop of frosting smoothed over the top. Add the top layer upside down and another dollop of frosting on top. Smooth a thin layer of frosting around the outside of the entire cake as a crumb coat. Chill in the fridge for 15-20 minutes.
  2. Frost the outside: Frost the outside of the cake. If you have a bench scraper or cake spatula, you can use this to get nice smooth sides and sharp corners at the top of the cake.
  3. Make it pretty: Use a large star tip, such as the Wilton 1M, to pipe a border around the top. Press sprinkles around the bottom of the cake and, if desired, sprinkle around the top border.

Mixing the Frosting Together

  1. Mix: In the bowl of a stand mixer, beat the butter until light and fluffy. Scrape down the sides of the bowl and add the powdered sugar 1 cup at a time, mixing at low speed until incorporated. Once all the sugar has been added, add the salt and the vanilla. Increase the speed to medium and beat for 2-3 minutes.
  2. Make a tint: If desired, tint a small amount of frosting red and a small amount blue for the border at the top of the cake.
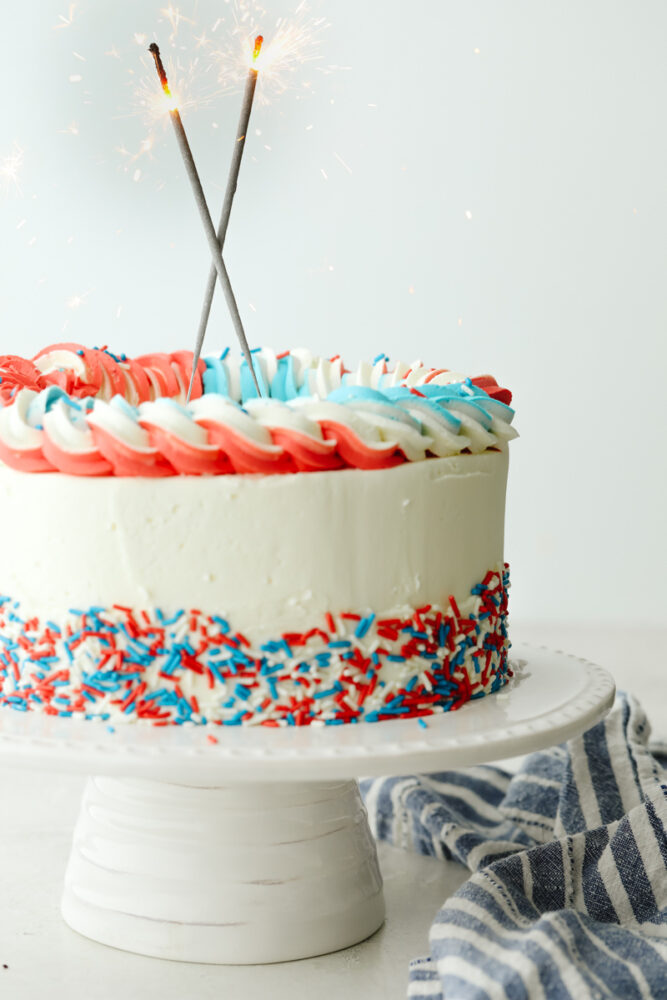
Decorated cake with sparklers on top.

Red, White, and Blue Cake Tips

The cake is going is going to impress as well as taste absolutely indulgent!

  • Sour Cream: Adding sour cream to the cake adds moisture and a rich texture to the batter without thinning it out. It will also activate the baking soda because of the acidity which gives helps the cake rise. Trust me you are going to love having sour cream on your cake.
  • Vinegar: This might seem like a weird ingredient, but it will make a huge difference in the texture of your cake, and do not worry it won’t taste like vinegar at all. The vinegar helps the protein in the flour to stabilize leaving a super moist yet fluffy cake.
  • Do not stir: As tempting as it might be, to get the tie-dye swirl effect do not stir the colors together once placed in the tins. They will mix and become purple instead of individual colors. To create more intricate designs, drop your colored batter in a different pattern, small dollops, big dollops, etc, but do not stir.
  • Chill: To make frosting your cakes easier be sure to chill them. This helps the cake firm up and the outside won’t leave crumbs in your frosting.
  • Food coloring: I have found that using gel food coloring produces the brightest and most vibrant colors. You definitely do not want to under color your frosting.
  • Sparklers: Using sparklers is obviously optional but it sure does look amazing. Just be sure to light them and serve outside if you use the sparklers.
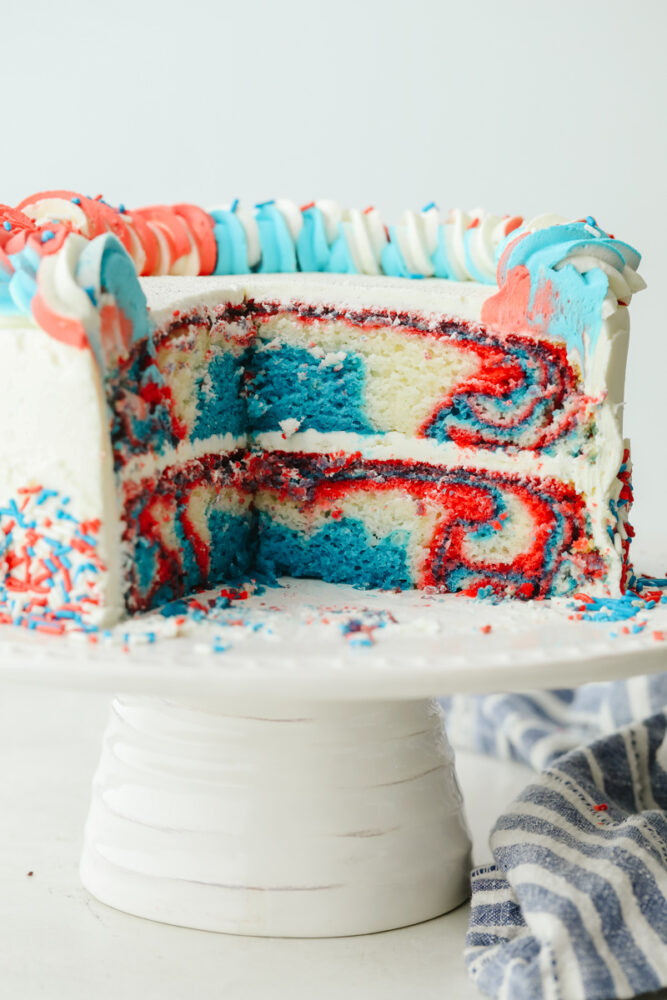
The red, white, and blue cake sliced so you can see the inside.

Variations and Storage of Tie-dye Cake

This is going to look absolutely fabulous once cut.

  • Tin: You do not have to make this in cake tins. You can make them in a 9×13, a bundt tin, or even cupcakes. Be sure to follow the same process for the cupcakes to get the swirl.
  • Coloring: You can use the same cake recipe but use different colors to fit your celebration or holiday. Use red and green for Christmas. Blue and pink for a baby shower or a child’s favorite color for a birthday cake to impress.
  • Decorations: There are so many different ways you can decorate this, you can color the frosting, add sprinkles, cookies, and whatever else you can think of. Frosting a cake is like painting on a blank slate. It is all about your imagination.
  • Storage: To keep this cake fresh, cover lightly and keep it at room temperature for up to 3 days. It can keep even longer in the fridge, but take it out about an hour before serving so it can come to room temperature.
  • Freeze: The cake can be frozen unfrosted for up to 2 months. It can be frosted frozen or let thaw partially before frosting.
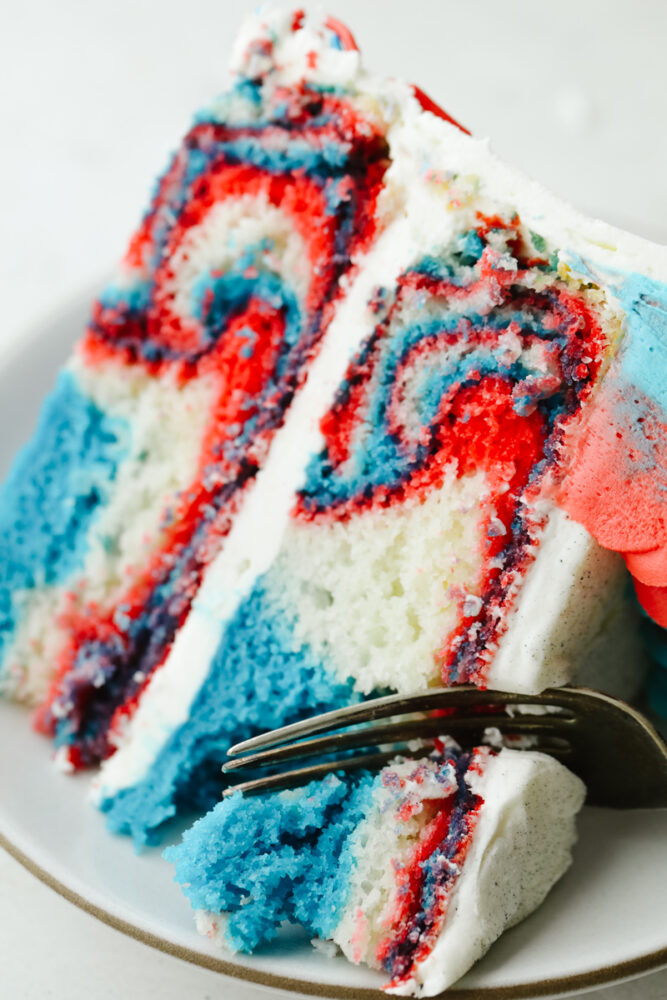
Cutting into the cake with a fork.
Print

Red White and Blue Cake

This Red, White and Blue Cake is going to steal the show for your 4th of July celebrations! Tender moist cake is swirled in the sweetest tie-dye pattern!
Course Dessert
Cuisine American
Keyword red white and blue cake
Prep Time 45 minutes
Cook Time 45 minutes
Total Time 1 hour 30 minutes
Servings 12 slices
Calories 1043kcal
Author Alyssa Rivers

Ingredients

Cake

  • 2 and 1/3 cup all purpose flour
  • 2 teaspoons baking powder
  • ½ teaspoon baking soda
  • 2 teaspoons salt
  • 1 ½ cup butter softened
  • 1 ¾ cup granulated sugar
  • 6 Egg whites room temperature
  • 2 teaspoons vanilla extract
  • 1 teaspoon almond extract optional
  • 1 ½ cup milk whole
  • ½ cup sour cream
  • 2 Tablespoons white vinegar
  • Red Food Coloring
  • Blue Food Coloring
  • Red White and Blue sprinkles

Frosting

  • 1 pound unsalted butter softened
  • 8 cups powdered sugar
  • 1 Tablespoon vanilla extract clear, if bright white icing is desired
  • pinch of salt
  • 1-3 Tablespoon heavy cream more if needed

Instructions

How to Make the Cake

  • Preheat the oven to 350°. Spray two 8 inch round cake pans with cooking spray and dust with flour. Set aside.
  • In a medium bowl, sift together the flour, baking powder, baking soda and salt. Set aside.
  • In the bowl of your mixer, beat the butter until creamy. Add the sugar and beat again for about 3-5 minutes on medium high speed until it turns white and fluffy. Add in the egg whites one at a time and mix on medium until each one is fully mixed in.
  • Add the extracts, milk, sour cream and vinegar to the butter mixture and mix on medium speed until combined. Add the dry ingredients and mix until jut combined.
  • Split the batter evenly into three bowls. Tint one bowl red and one bowl blue. To get the tie-dyed effect you will layer scoops of colored batter into the cake pans. One scoop red followed by one scoop white and one scoop blue, repeated until each pan has about ⅓ of each color of batter.
  • Bake for about 35-40 minutes, until the top of the cake springs back when lightly touched and a toothpick comes out clean from the center.
  • Allow to cool in the pan on a cooling rack for about 10 minutes before turning upside down on the cooling rack to cool the rest of the way. Cooling the cakes upside down levels out the top so you have nice flay layers that make getting a level cake very easy.
  • Once the cake has cooled, you can either wrap the layers in plastic wrap and store in the fridge overnight (chilled layers are typically easier to frost) or you can frost them the same day.
  • On a cake stand or plate, place one layer top down. Add generous dollop of frosting on top and smooth evenly. Add the second layer and another dollop of frosting smoothed over the top. Add the top layer upside down and another dollop of frosting on top. Smooth a thin layer of frosting around the outside of the entire cake as a crumb coat. Chill in the fridge for 15-20 minutes.
  • Frost the outside of the cake. If you have a bench scraper or cake spatula, you can use this to get nice smooth sides and sharp corners at the top of the cake.
  • Use a large star tip, such as the Wilton 1M, to pipe a border around the top. Press sprinkles around the bottom of the cake and, if desired, sprinkle around the top border.

How to Make Frosting

  • In the bowl of a stand mixer, beat the butter until light and fluffy. Scrape down the sides of the bowl and add the powdered sugar 1 cup at a time, mixing on low speed until incorporated. Once all the sugar has been added, add the salt and the vanilla. Increase the speed to medium and beat for 2-3 minutes.
  • If desired, tint a small amount of frosting red and a small amount blue for the border at the top of the cake.

Nutrition

Calories: 1043kcal | Carbohydrates: 130g | Protein: 6g | Fat: 57g | Saturated Fat: 36g | Polyunsaturated Fat: 2g | Monounsaturated Fat: 15g | Trans Fat: 2g | Cholesterol: 152mg | Sodium: 689mg | Potassium: 194mg | Fiber: 1g | Sugar: 110g | Vitamin A: 1781IU | Vitamin C: 1mg | Calcium: 97mg | Iron: 1mg


from The Recipe Critic https://ift.tt/3ds6sMZ
https://ift.tt/2TbcpqF
मंगलवार, 29 जून 2021

Strawberry Icebox Cake

Strawberry Icebox Cake is the cool, creamy, and moist no-bake dessert of your dreams. Add a pop of juicy strawberry and you will never want to make cake another way!

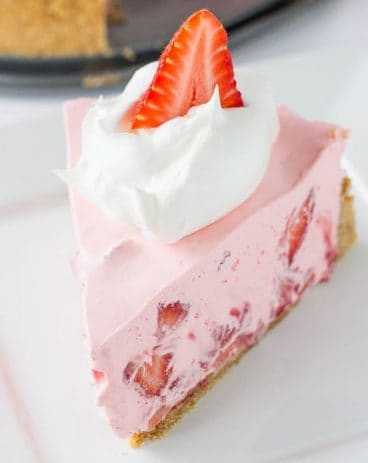
Strawberries are the perfect summer fruit. Take advantage of them being in season and try out my cake, cinnamon rolls, and peanut butter pie all infused with delicious strawberry!

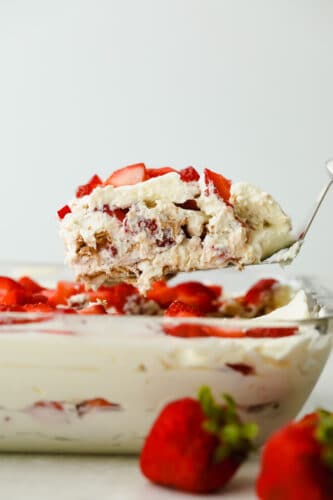
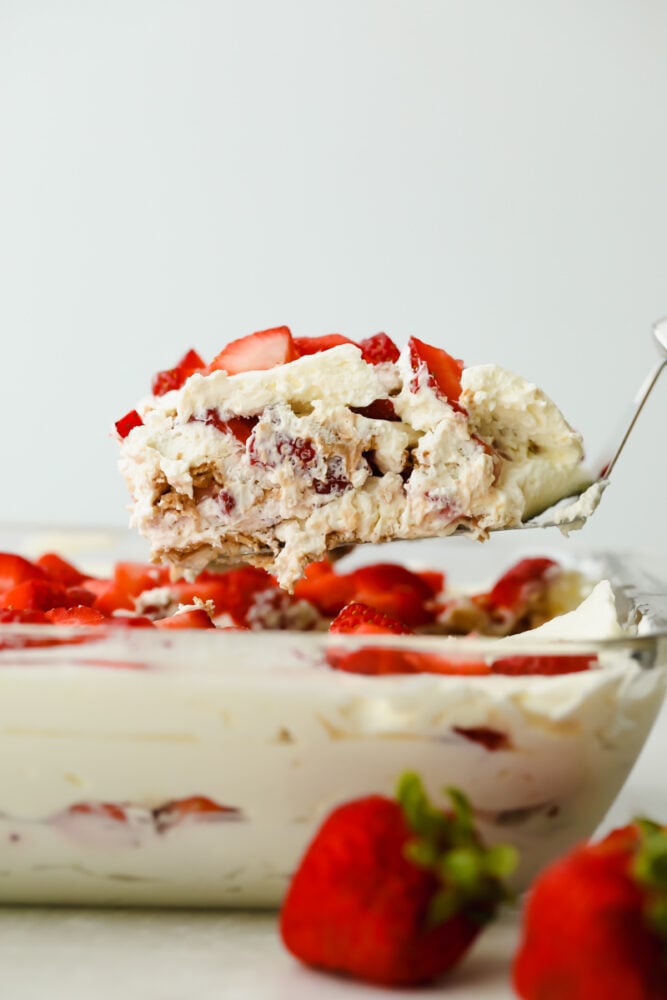
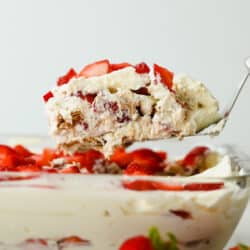
Serving a piece of Strawberry Icebox Cake.

Easy Strawberry Icebox Cake Recipe

I’m a sucker for cold cakes in the summer. Tres leches, ice cream cakes, you name it! This strawberry icebox cake, though, takes the cake. Literally. It is so rich and decadent but also cool and refreshing for hot summer days. Add a touch of ripe, juicy strawberry and you have the ultimate summer dessert on your hands.

Icebox Cake first originated in the 1930s to advertise the production of iceboxes. The recipe has now become an irresistible treat consisting of layer upon layer of graham crackers and light, fluffy cream. This strawberry icebox cake is great for a crowd because it whips up in minutes and you can make it in bulk! I know you will love this quick and delicious recipe as much as I do!

No-Bake Strawberry Icebox Cake Ingredients

Gone are the days that you have to worry if your cake will turn out moist or not. These super simple ingredients ensure a perfectly soft, indulgent treat every time. All ingredients and measurements for this strawberry icebox cake are listed below in the recipe card.

  • Heavy Cream: You will need this for your whipped cream base.
  • Powdered Sugar: For sweetness and a smooth texture.
  • Instant Vanilla Pudding Powder: Adds flavor and gives your cream a light, mousse-like texture.
  • Vanilla Extract: For flavor. Pure vanilla extract works best.
  • Strawberries: Fresh, diced.
  • Graham Crackers: Adds texture and flavor.

Making Traditional Icebox Cake with Strawberries

Putting strawberry icebox cake together is super simple, and an activity the whole family can join in on! My kids love to help add layers and see the cake come to life.

  1. Create Cream Filling: Using a mixer with the whisk attachment, whip the heavy cream, powdered sugar, pudding powder, and vanilla extract together on high until you have stiff peaks.
  2. Layer Cream, Graham Crackers, and Strawberries: In the bottom of a 9×13 pan, spread a thin layer of whipped cream over the bottom. Add a layer of graham crackers followed by about ½ cup of strawberries, enough that there is an even layer. Top with ⅓ of the remaining whipped cream.
  3. Repeat: Add layers two more times—graham crackers, whipped cream, and strawberries. You may add additional strawberries sliced as desired on top to make it look just to your liking.
  4. Chill: Cover with plastic wrap and chill for 4 hours, or overnight. Serve cold.
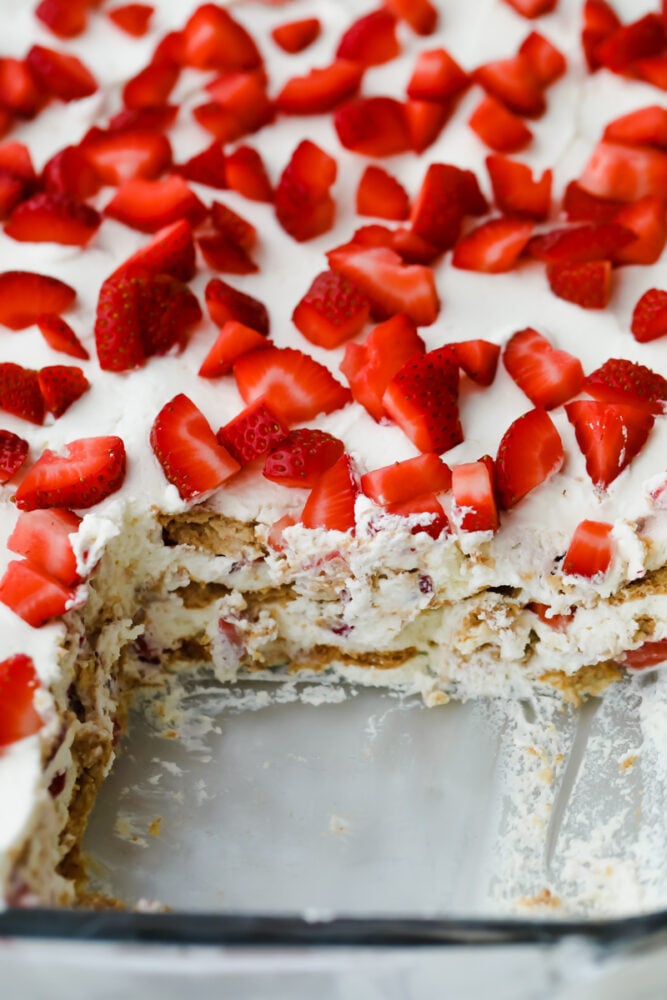
Strawberry icebox cake with piece cut out.

The Best Icebox Cake Tips

Upgrade and customize your Icebox Cake with these easy tips! Add strawberries for the ultimate flavor and summertime dessert! This strawberry icebox cake will impress and feed a crowd.

  • Let Your Cake Rest: Allow at least 3 hours for your cake to rest in the fridge to allow cookie layers to absorb moisture and become softer.
  • Creating Your Cream Base: Whipped cream and any whisks or mixer attachments should be cold before using. This helps your whipped cream to thicken properly.
  • Strawberries: Ripe strawberries will be bright red all the way around with no hints of white or green- this can mean that the fruit is not ripe yet. Strawberries do not continue to ripen after being picked, so what you see is what you get.
  • Adding Other Fruits: You can add other layers of fruit to your icebox cake such as bananas, blueberries, raspberries, or even lemon curd for amazing variety!
  • Adding Chocolate: Add cocoa powder into your whipped cream mixture for a delicious chocolate variation.
  • Cookies: You can swap out graham crackers for layers of Oreos or wafers.

Storing Your Old Fashioned Icebox Cake

  • In the Refrigerator: Covered with plastic wrap, your icebox cake will keep in the fridge for up to 4 days.
  • In the Freezer: Your icebox cake will keep for up to a month in the freezer when covered with aluminum foil. Thaw for a few hours in the fridge before serving.
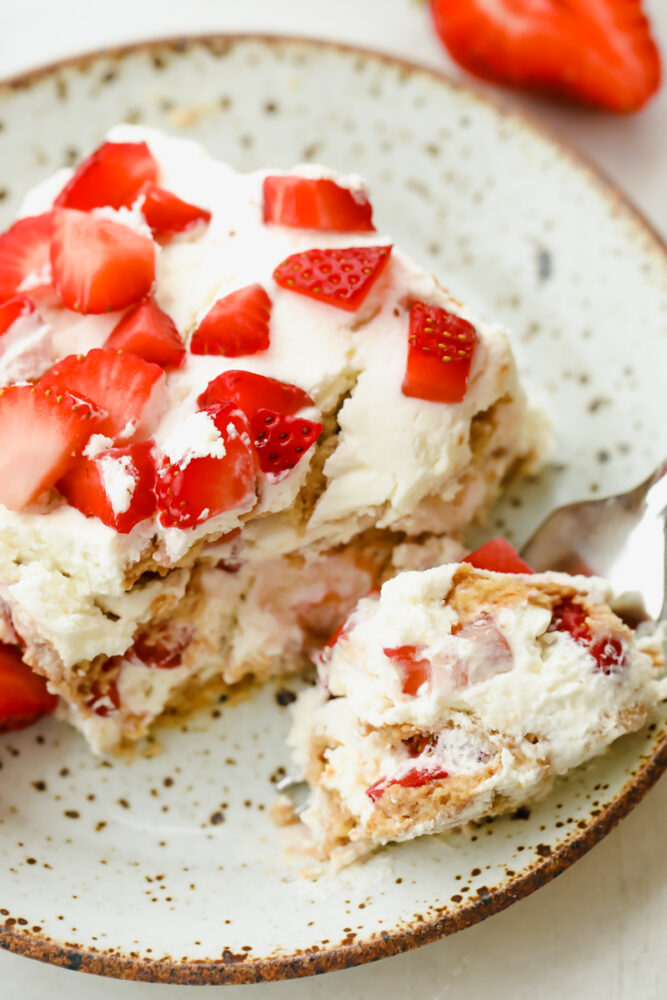
Having a spoon of icebox cake.
Print

Strawberry Icebox Cake

Strawberry Icebox Cake is the cool, creamy, and moist no-bake dessert of your dreams. Add a pop of juicy strawberry and you will never want to make cake another way!
Course Dessert
Cuisine American
Keyword icebox cake, icebox cake recipe, strawberry icebox cake
Prep Time 15 minutes
Chill 4 hours
Total Time 4 hours 15 minutes
Servings 15 People
Calories 200kcal
Author Alyssa Rivers

Ingredients

  • 3 Cups heavy cream
  • 1/3 cup powdered sugar
  • 3 Tablespoons instant vanilla pudding powder
  • 1 teaspoon vanilla extract
  • 1.5-2 pounds fresh strawberries diced
  • 1.5 sleeves graham crackers more as needed

Instructions

  • Using a mixer with the whisk attachment, whip the heavy cream, powdered sugar, pudding powder and vanilla extract together on high until you have stiff peaks.
  • In the bottom of a 9×13 pan, spread a thin layer of whipped cream over the bottom. Add a layer of graham crackers followed by about ½ cup of strawberries, enough that there is an even layer. Top with ⅓ of the remaining whipped cream.
  • Repeat the layers two more times—graham crackers, whipped cream, and strawberries. You may add additional strawberries sliced as desired on top to make it look just to your liking.
  • Cover with plastic wrap and chill for 4 hours, or overnight. Serve cold.

Nutrition

Calories: 200kcal | Carbohydrates: 10g | Protein: 1g | Fat: 18g | Saturated Fat: 11g | Polyunsaturated Fat: 1g | Monounsaturated Fat: 5g | Cholesterol: 65mg | Sodium: 145mg | Potassium: 106mg | Fiber: 1g | Sugar: 5g | Vitamin A: 705IU | Vitamin C: 27mg | Calcium: 38mg | Iron: 1mg


from The Recipe Critic https://ift.tt/3y689r2
https://ift.tt/2UElp7R

The Best Shrimp Marinade

Layer this amazing marinade onto your shrimp for a perfectly rich, savory flavor with a pop of lemon your taste buds will LOVE! The drool-worthy flavor combinations and ease of preparation make this Shrimp Marinade a recipe to come back to over and over again.

A marinade can really make or break grilled meat and seafood. For your barbecues this summer, I recommend also trying my steak, chicken, and Asian-inspired marinades to count on for flavorful, mouth-watering meat every time!

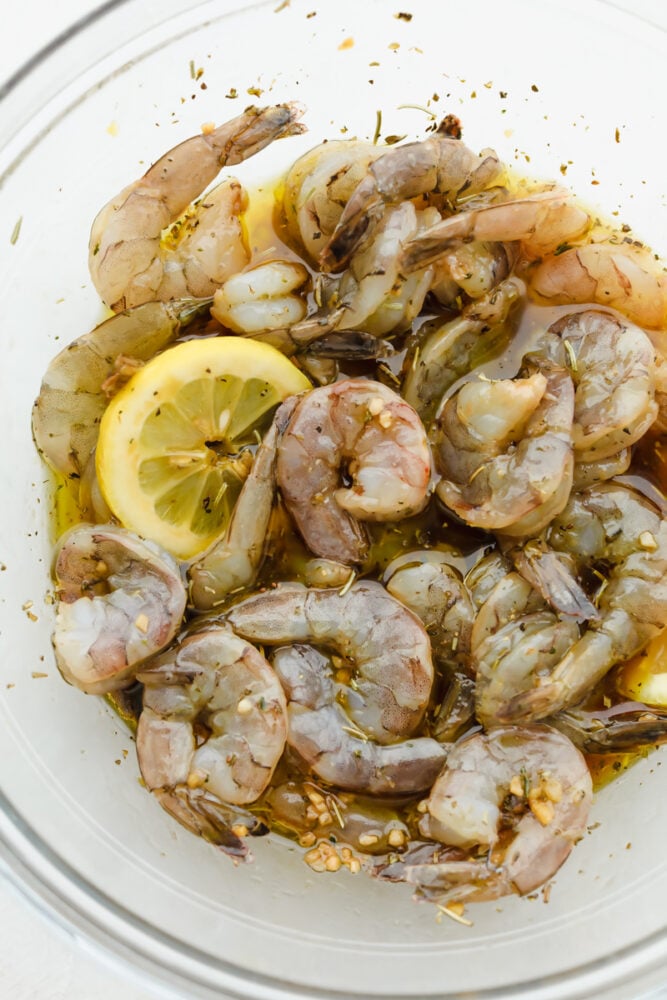
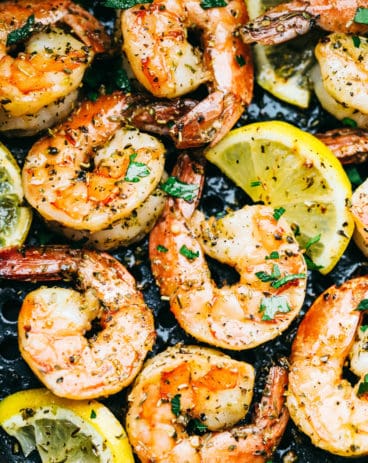
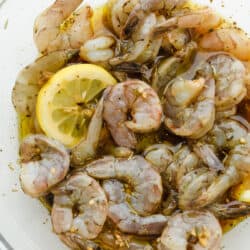
Fresh shrimp in marinade with lemon slices.

Easy Shrimp Marinade Recipe

Grilling season is in full force and it’s time to enhance your meats! Sauces are great, but for truly impactful flavor that your family will go crazy over, you have got to start with a delicious marinade as a foundation. Flavor your shrimp from the inside-out with this marinade made with soy and Worcestershire sauce, Dijon Mustard, garlic, red wine vinegar, and Italian Seasoning. These pantry-ready ingredients create the most perfect savory, tangy marinade with just a pinch of zip and sweetness.

You are going to love the way this marinade makes your shrimp taste. Each bite bursts with amazing flavor and texture. Whether you are cooking on the grill, in a skillet, or in the oven, this marinade delivers! Simply whisk together a few ingredients, cook your shrimp to perfection, and you have a winning dinner on your hands!

Shrimp Marinade Ingredients

The best part about this recipe is that it only requires a blend of a few sauces that you probably already have on hand! All individual measurements are found in the recipe card below.

  • Olive Oil: Pulls fat-soluble ingredients together and really helps to infuse your shrimp with flavor. You can also substitute olive oil for melted butter.
  • Red Wine Vinegar: Adds a tangy flavor with a hint of sweetness.
  • Garlic: 3 cloves, minced.
  • Italian Seasoning: Adds a zesty flavor and texture. You can use packaged Italian seasoning, but I recommend using my homemade seasoning for extra fresh flavor.
  • Lemon Juice: You can use bottled or fresh lemon juice.
  • Soy Sauce: Makes your marinade more savory. Also adds a beautiful, caramelized color to your shrimp when cooked.
  • Dijon Mustard: Adds a sharp, tangy flavor to the marinade.
  • Worcestershire Sauce: Adds a blend of sour, sweet, and slightly spicy flavors to your marinade.

Making Your Marinade

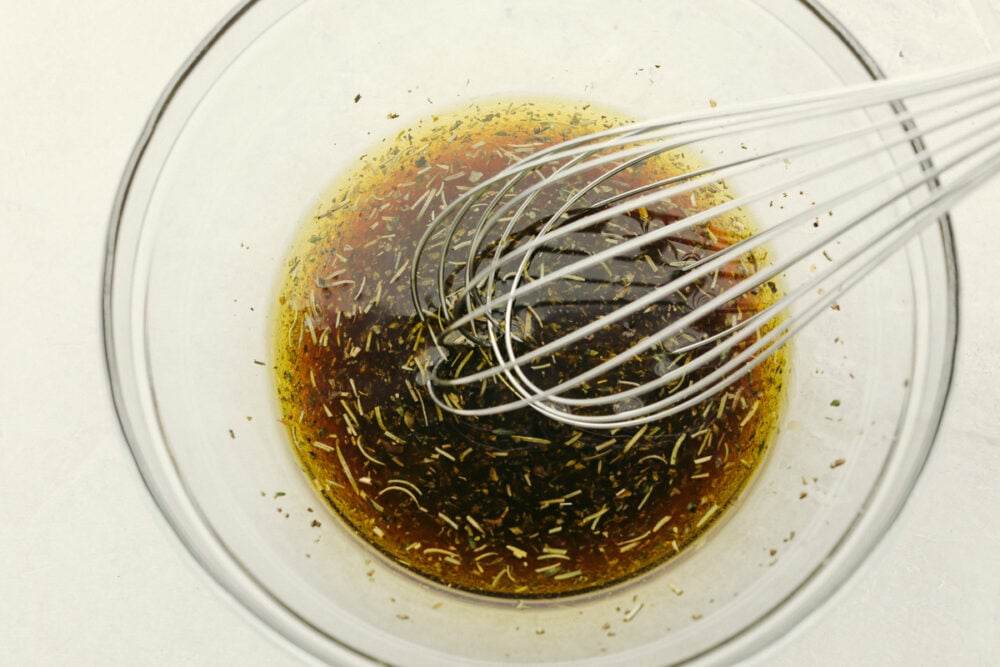
With only one step, this is the easiest way to add insanely delicious flavor to shrimp. Using a medium-sized bowl, combine olive oil, red wine vinegar, garlic, Italian seasoning, lemon juice, soy sauce, Dijon Mustard, and Worcestershire sauce. Add the shrimp and let marinate for at least one hour or overnight.

Whisking marinade ingredients together.

Shrimp Marinade Pro Tips

As the building block of grilling, marinating is important! Use these tips and tricks to make sure your meat and seafood turns out perfectly!

  • Not Marinating Too Long: If using a lot of citrus in your marinade, make sure not to let your shrimp sit in it too long. The acid in the marinade can actually start to eat through your shrimp and make it mushy. 30 minutes to an hour is plenty of time for a citrus-based marinade to work.
  • Pat Shrimp Dry: Before marinating shrimp, make sure to pat it dry. This helps the marinade stick better.
  • Fresh or Frozen: You can use either fresh or frozen shrimp when marinating, but fresh shrimp absorbs flavor better. Let frozen shrimp thaw in the marinade for 30 minutes before cooking.
  • Always Marinate in Fridge: Marinating at room temperature can cause harmful bacteria to grow.
  • Using Marinade as Glaze: You can save some of your marinade to top your shrimp with as a glaze after cooking. Make sure you set aside extra marinade before adding raw shrimp to avoid foodborne illnesses.
  • Using Other Meats: This marinade also tastes great when cooked with chicken, steak, and fish. It is so versatile and delicious.
  • Serve With: This shrimp tastes great paired up with so many different things. You can put it on a bed of pasta, serve it alongside delicious garlic mashed potatoes, or even stick it on a skewer with vegetables for a gorgeous summer treat!
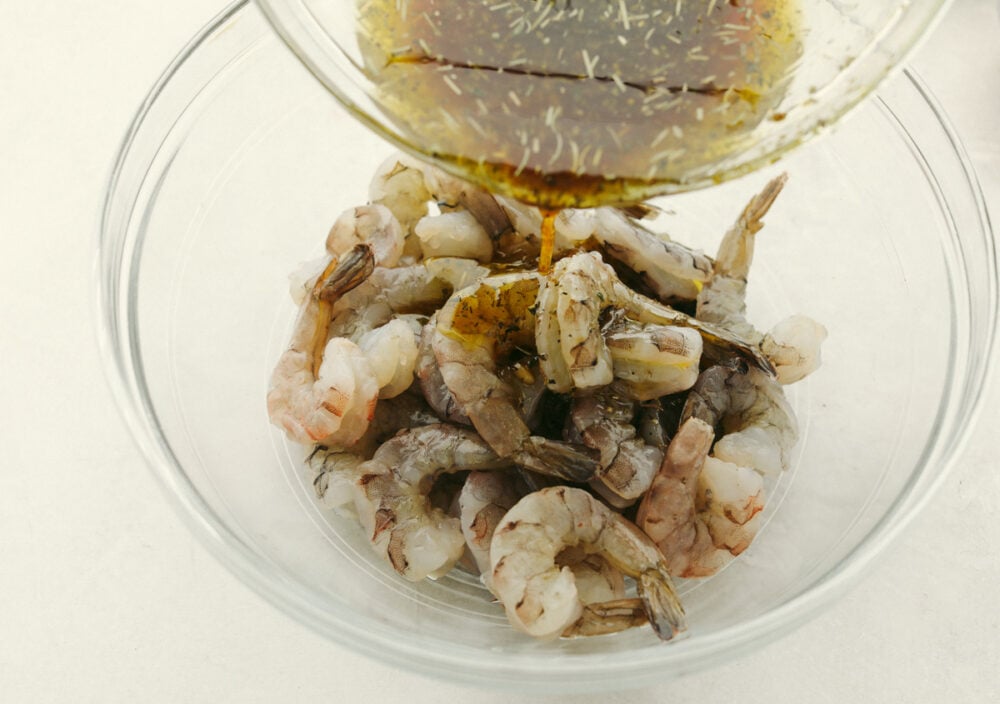
Pouring marinade over raw shrimp.

Storing Leftover Shrimp Marinade

  • In the Refrigerator: Homemade marinade will last up to 2 weeks in the fridge in an airtight container. Make sure you store leftover marinade that hasn’t had any raw meat in it yet.
  • In the Freezer: Marinade can be stored in ziplock bags and kept for 3-6 months.
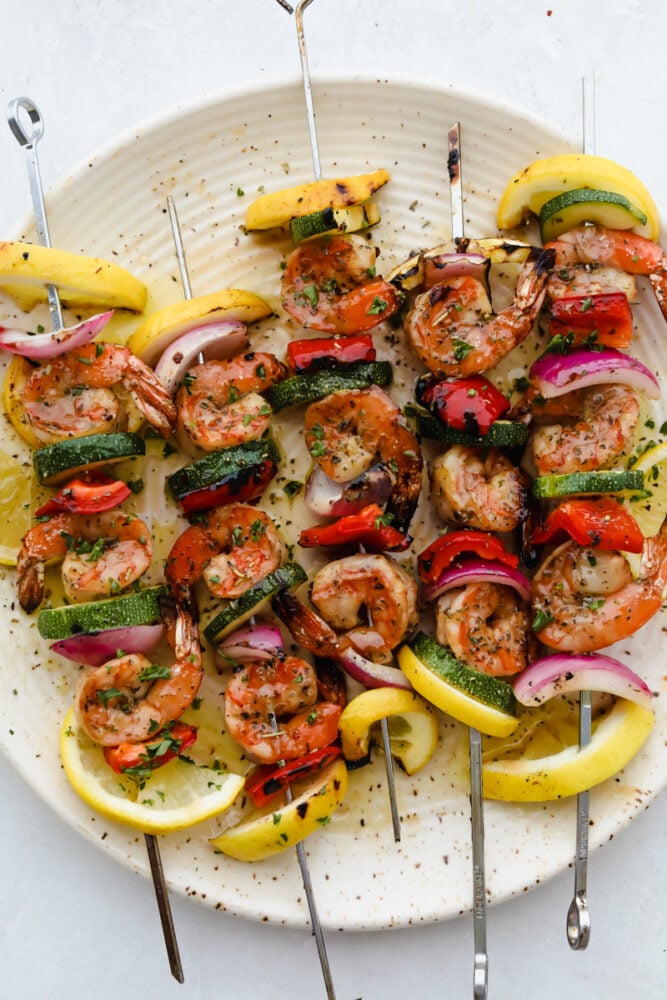
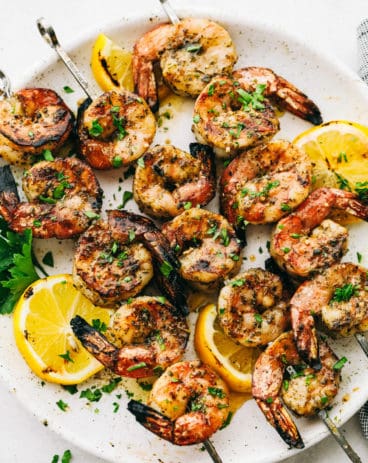
Grilled marinated shrimp on skewer with veggies.
Print

Shrimp Marinade

Layer this amazing marinade onto your shrimp for a perfectly rich, savory flavor with a pop of lemon your taste buds will LOVE! The drool-worthy flavor combinations and ease of preparation make this Shrimp Marinade a recipe to come back to over and over again.
Course marinade
Cuisine American
Keyword grilled shrimp marinade, shrimp marinade
Prep Time 5 minutes
Total Time 1 hour 5 minutes
Servings 16 shrimp
Calories 65kcal
Author Alyssa Rivers

Ingredients

  • 1/2 cup olive oil
  • 1/4 cup red wine vinegar
  • 3 garlic cloves, minced
  • 1 Tablespoon Italian seasoning
  • 1 Tablespoon lemon juice
  • 2 Tablespoons soy sauce
  • 1 teaspoon dijon mustard
  • 1 Tablespoon Worcestershire sauce

Instructions

  • In a medium sized bowl combine olive oil, red wine vinegar, garlic, Italian seasoning, lemon juice, soy sauce, Dijon Mustard and Worcestershire sauce. Add the shrimp and let marinate for at least one hour or overnight.

Nutrition

Calories: 65kcal | Carbohydrates: 1g | Protein: 1g | Fat: 7g | Saturated Fat: 1g | Polyunsaturated Fat: 1g | Monounsaturated Fat: 5g | Sodium: 140mg | Potassium: 22mg | Fiber: 1g | Sugar: 1g | Vitamin A: 6IU | Vitamin C: 1mg | Calcium: 8mg | Iron: 1mg


from The Recipe Critic https://ift.tt/3doE5iz
https://ift.tt/3hgjqOP