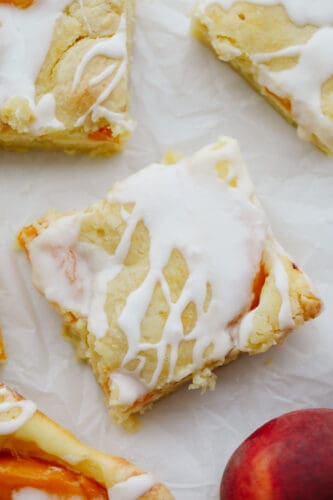
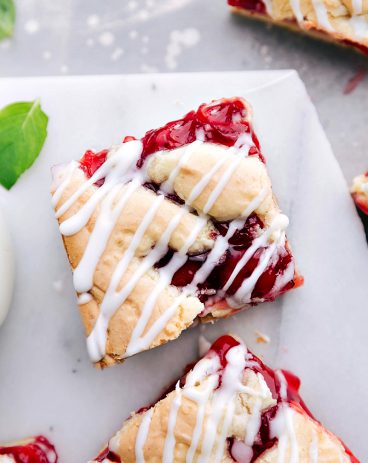
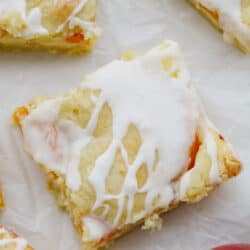
Peach Pie Bars are delicious bars that have a creamy cheesecake and peach pie filling in the center. They are drizzled in a glaze and taste just like you are biting into a peach pie!
Pie in any form is decadent and an ideal dessert for every occasion. Try these pies the next time you need a fix, Hand Pies, French Silk, and Key Lime Pie.

Peaches and Cream Dessert Bars
It is so nice and warm these days and we are loving it. With the warmer weather comes some of my favorite desserts. Peach pie is one of them! There is nothing better than a warm peach pie or cobbler with a scoop of ice cream on top. Whenever I made a delicious peach pie I only use the best pie filling from Lucky Leaf. I love the quality of the lucky leaf and you can trust that it will bake up something delicious. These peach pie bars have the perfect combination of sweet and savory with every bite!
This recipe is a combination of peach pie filling and a creamy cheesecake center. The bars are easy to cut and take anywhere you go. Perfect for a BBQ or Potluck when feeding a crowd. These peach pie bars are made with minimal ingredients and are so simple to make. They come together within 20 minutes and are ready to put into the oven in no time at all. I couldn’t believe how insanely good my first bite was. Every layer was perfect!
Ingredients For Peaches and Cream Bars
Super simple ingredients make a scrumptious summertime treat that you can have year-round. You will love how simple these peach pie bars are. Find all the ingredients and measurements below in the recipe card.
- Butter: Have your butter at room temperature for optimal mixing.
- Sugar: Granulated white sugar adds sweetness and helps the batter to brown.
- Eggs: Bring your eggs to room temperature by taking them out of the fridge an hour before baking.
- Vanilla extract: The flavor adds a bit of richness and sweetness to the dough.
- All-purpose flour: This is a good flour that provides structure for the bars.
- Salt: Salt makes everything balanced.
- LUCKY LEAF® peach pie filling: A cut above the rest when it comes to filling find it in the baking aisle.
Creamy Cheesecake Center
These peach pie bars are so simple to make and come together quick and easy. This layer of creamy cheesecake center is perfect in the center. Every bite is better than the first!
- Cream cheese: Have your cream cheese at room temperature so it will mix easier and completely.
- Sugar: Helps to fluff the cream cheese adding sweetness and structure.
- Vanilla: Adds a nice delicate flavor to the filling.
- Egg: Room temperature egg will give the cheesecake center stability.
Glaze Topping
Drizzle the glaze topping right over top to add a little more sweetness!
- Vanilla extract: Vanilla is a classic flavor that makes everything taste better.
- Almond extract: Almond flavor and peaches were meant to be together.
- Powdered sugar: Sift your powdered sugar for easy mixing and also it will be clump free.
- Milk: To thin the glaze. Add more or less as you desire.
How to Make Peach Pie Bars
Once I bite into the center with the delicious peach filling and creamy cheesecake center I was hooked. This makes one phenomenal dessert and is sure to be a crowd-pleaser. You are going to love these peach pie bars just as much as we do!
- Cream: Cream together butter and sugar. Add eggs and beat well. Beat in vanilla.
- Mix in Dry Ingredients: In a separate bowl combine flour and salt. Add to the creamed mixture. Mix until combined.
- Cheesecake filling: In a medium sized bowl beat together cream cheese, sugar, and vanilla until smooth. Add the egg and beat until combined.
- Prep and fill pan: Grease a 15x10x1 pan or 9×13, whichever one you decide to use. (I used a 9×13 but cooking time will be longer) Spread 3 cups batter in the bottom. Spread the cream cheese layer on top and lastly Spread with pie filling. Drop remaining batter on top of pie filling.
- Bake, Cool, and Glaze: Bake at 350 for 25-30 (If using a 9×13 increase time to 35) minutes or until toothpick comes clean. Cool on wire rack. Combine powdered sugar and milk for the glaze and drizzle over the bars.
- Refrigerate: I like to let the bars cool completely and refrigerate them for 3 hours for easier cutting.

The Best Peaches Pie Bar Tips
Sweet and rich, these peaches and cream pie bars are going to impress. You will love making these peach pie bars all summer long!
- Room Temperature Ingredients: Be sure to have your butter, eggs and cream cheese at room temperature or soften in the microwave. This will make sure your ingredients mix throughly, evenly and without lumps. Especially for the cream cheese filling.
- Sift Your Powdered Sugar and Flour: Yes it does take a few extra minutes, but its so worth it. Your crust will be evenly mixed and your glaze will be clump free.
- Refrigerate: The warmer these are the harder they will be to cut. Make sure they cool completely and refidgerating them also helps the filling set so they stay together when eating.

Peach Pie Substitutions
Peaches and cream is a classic combination but you can mix it up too.
- Pie Filling: Any fruit pie filling would work with this recipe. Some good ones to try would be raspberry, blackberry and apple. Using a pie filling that is already thickened will help keep this from being too runny.
- Fresh Fruit: Fresh fruit will give off extra water when baked and could make the dish too watery and soggy. I have not tried it but it’s worth a try. Let me know in the comments how it turns out.
- Add ins: You can add in fruit or nuts to the pie filling to amp up the flavor. Mix in a cup of blackberries with the peach filling to add a bit of tartness. Add chopped pecans to the top crust for a bit of crunch.

Storing Peaches and Cream Pie Bars
Storing these peach pie bars are easy and can be warmed up or eaten cold. Perfect for making ahead or storing after the party!
- Refrigerate: These are best stored in the fridge. Cover tightly and keep in the fridge for up to 4 days.
- Freeze: These can be frozen, cover tightly and place in a freezer safe bag for up to 3 months.

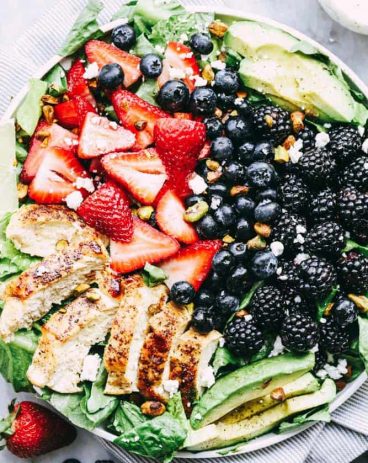
More Dessert Bar Recipes
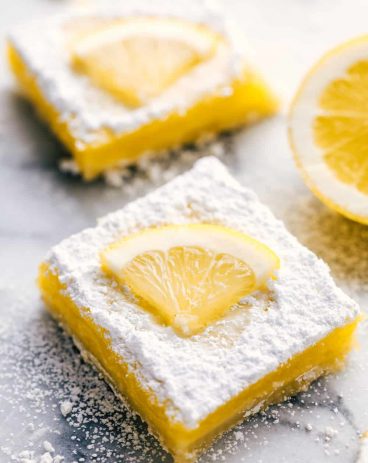
Desserts
Perfect Lemon Bars
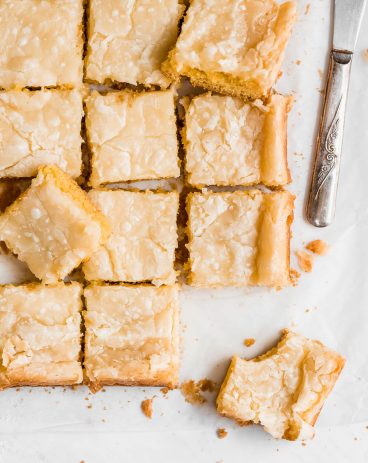
Desserts
Neiman Marcus Bars
Desserts
Cherry Pie Bars

Desserts
Reese’s No Bake Peanut Butter Bars
This post was sponsored by Lucky Leaf®. All opinions expressed are my own!
Peaches and Cream Pie Bars
Ingredients
- 1 cup butter softened
- 2 cups sugar
- 4 large eggs
- 1 teaspoon vanilla extract
- 3 cups all-purpose flour
- 1 teaspoon salt
- 1 (21 ounces) LUCKY LEAF® peach pie filling
Cheesecake Center:
- 1 (8 ounces) package cream cheese softened
- 1/2 cup sugar
- 1 teaspoon vanilla
- 1 large egg
Glaze:
- ½ teaspoon vanilla extract
- ½ teaspoon almond extract
- 1 cup powdered sugar
- 2 Tablespoons milk
Instructions
-
Cream together butter and sugar. Add eggs and beat well. Beat in vanilla.
-
In a separate bowl combine flour and salt. Add to the creamed mixture. Mix until combined.
-
In a medium sized bowl beat together cream cheese, sugar, and vanilla until smooth. Add the egg and beat until combined.
-
Grease a 15x10x1 pan or 9×13, whichever one you decide to use. (I used a 9×13 but cooking time will be longer) Spread 3 cups batter in the bottom. Spread the cream cheese layer on top and lastly Spread with pie filling. Drop remaining batter on top of pie filling.
-
Bake at 350 for 25-30 (If using a 9×13 increase time to 35) minutes or until toothpick comes clean. Cool on wire rack. Combine powdered sugar and milk for the glaze and drizzle over the bars.
-
I like to let the bars cool completely and refrigerate them for 3 hours for easier cutting.
Notes
Nutrition
from The Recipe Critic https://ift.tt/3wIH8cp
https://ift.tt/3wwU9FF